
THE LITTLE PRINZ PART 6
The ’59 NSU Gets a Nose Job That Included the Removal of Several Layers of Patches Formed Inside the Body Shell. One Layer Had the Consistency of Old Grease…
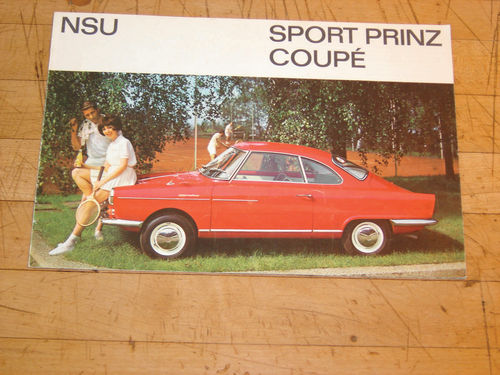
When I last reported on the progress in reviving my 1959 NSU Sport Prinz, I had stripped everything but the doors off the car and mounted the remaining shell on a wheeled cart (August). Now it was time to address the damage done to the front of the car.
Peeling Back Layers of Time and Abuse
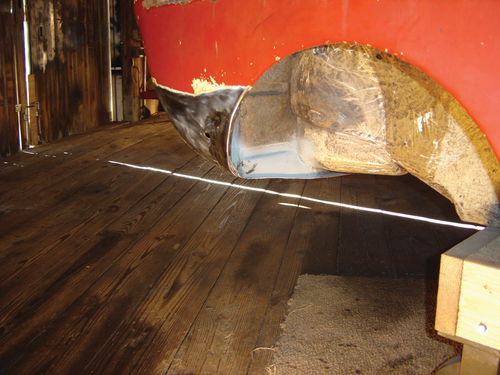
The nose of the car had been put in primer which was obviously covering a lot of filler. As with other areas, the first order of business was to clean it off, inside and out, so I could assess what needed to be done.
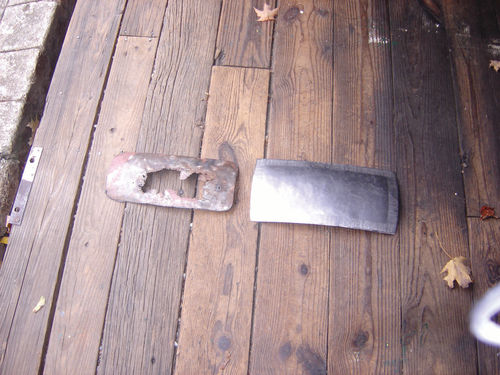
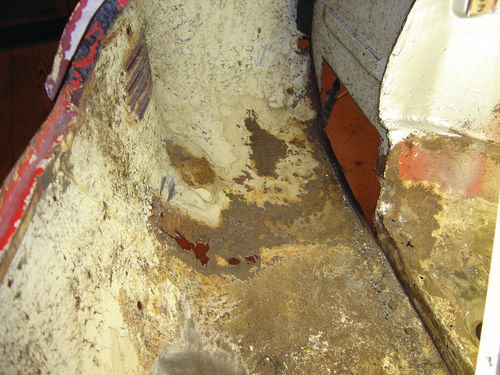
Inside the front trunk, someone had put a thick layer of silver paint and undercoating all over everything. Under it, there appeared to be an inner sheet metal liner of some sort. I assumed it was original, put in place to prevent damage to the outer skin of the nose if someone dropped the spare or the jack in there too hard.
As I stripped away the coatings, however, it became apparent that the metal liner was crudely cut and had been riveted into place. Some of the rivets went right through the front skin, so some of the filler on the outside was there to cover them. I drilled out the rivets and removed the sheet metal liner, only to find a thick layer of what at first looked like fiberglass resin poured in underneath. However, when I poked at it, the layer of material was still soft and was actually an inch or more deep in places!
It had the consistency of old grease and looked and smelled the same. I had no idea what this stuff was or why it had been laid down under that inner skin, but I knew it had to come out. All-in-all, I probably scraped several pounds of this sludge out of the nose.
But Wait: There’s Still Several Layers to Go!

As I removed the sludge, I realized I still wasn’t looking at the back of the outer skin, but yet another metal liner of sorts. This one was held in with a bunch of sheet metal screws and small bolts that, again, appeared to be coming right through the outer skin. As with the rivets, they too were smoothed over on the outside with a layer of filler that was even thicker, especially since the tightening of the bolts had caused deep depressions on the outside. In fact, loosening and tapping from the inside caused big circles of filler to pop off the front of the car.

This liner took a lot of prying to break free. It seemed like someone might have put a coating of glue behind it. I was wondering how I was going to get all that dried glue off the inside of the nose when I realized, to my amazement, that there was still another patch below it. This was getting ridiculous. It was like one of those sets of Russian nesting dolls. This time, however, the liner turned out to be made of fiberglass matting and it pulled free pretty cleanly. Below it, finally, was the actual nose skin of the car.
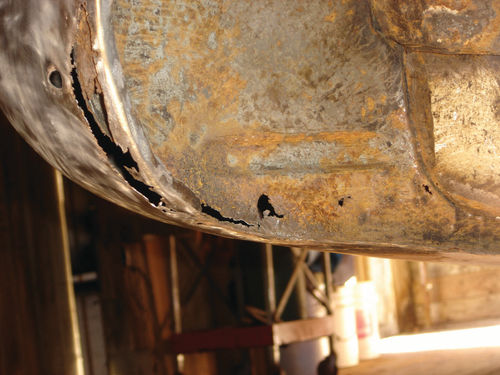
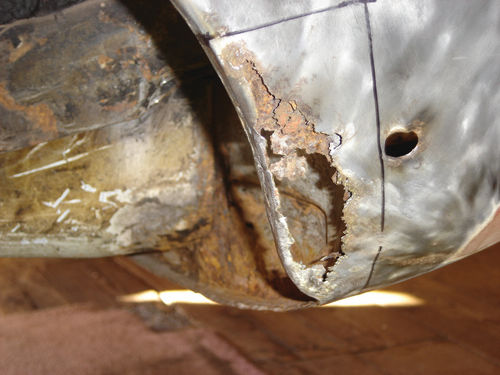
After a lot of cleaning and stripping, it was evident that there was corrosion and pitting on the inside surface, along with a few spots where it had rotted through, but it certainly seemed fixable. So it was a mystery as to why someone had put all those layers over it in the first place. If nothing else, I probably removed 10 to 15 pounds of stuff from the nose. Like the tar-and-plastic layers covering holes in the rockers, someone had used some pretty unorthodox methods in patching up this car. In fact, I had discovered something equally weird when I was examining the fender liners inside the front wheel wells.
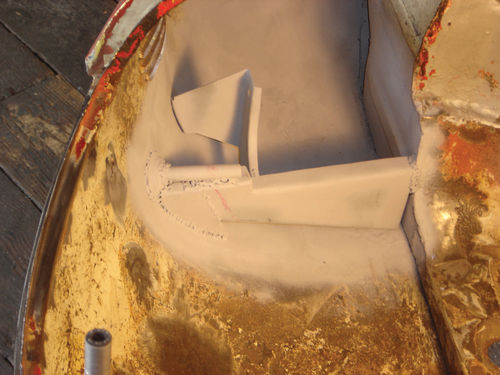
Toward the rear of each well was a cavity formed where it met the front bulkhead. There, too, I found what at first looked like a crude patch of sealer or tar packed in by hand. When I probed it further, it turned out to be a big blob of material that had been put there to apparently prevent dirt and moisture from settling and rotting the steel. It was really jammed in there and took a lot of prying to break free, but when it did it revealed clean metal behind it.
This stuff had the consistency and odor of dried-out modeling clay. There must have been two or three pounds of it on each side. I can’t believe the factory would have done something so clumsy. I assume something else must have been in there and fallen out, so a previous owner replaced it with this stuff. I’m going to have to investigate this further with some of my NSU contacts to see what, if anything, originally covered this cavity.

Reconstructive Surgery
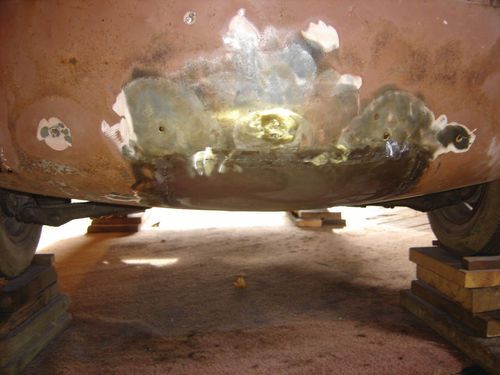
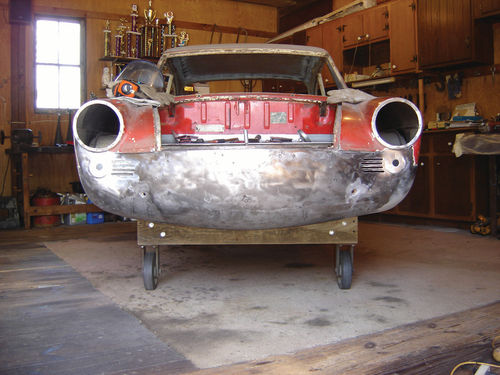
With much of the outside paint and filler removed, the poor car’s nose looked like that of a prize fighter who’d gone one too many rounds. There were dents, holes and rust patches all over. The worst rot was in the center near the bottom, where moisture must have collected under all those inner layers. To fix that spot, I faced the same issue I had when considering how to plug up the sunroof hole: I needed to make a patch with a matching crown and weld it in without distortion. In this case, though, the patch was smaller, the crown not as shallow and the surrounding structure a bit more rigid, so I thought I could do it.
The first issue was going to be forming that crowned sheet metal to match the curve of the nose. As before, I knew I had to get that panel shape right before cutting things. To start dishing out a metal shape like this, I’ve seen examples of pros who start by hammering the sheet into a shallow mold. In fact, I’ve seen at least a couple who use a carved-out depression in the end of a tree trunk! I didn’t have a handy carved-out tree trunk, so I started looking around for something similar, just to get the shape started.
As primitive as the tree trunk approach seems, I found my solution in a rock.
Making Use of What’s At Hand
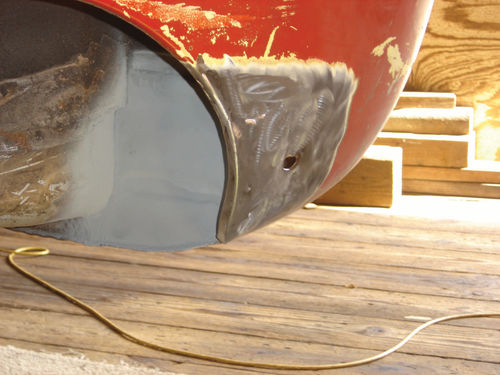
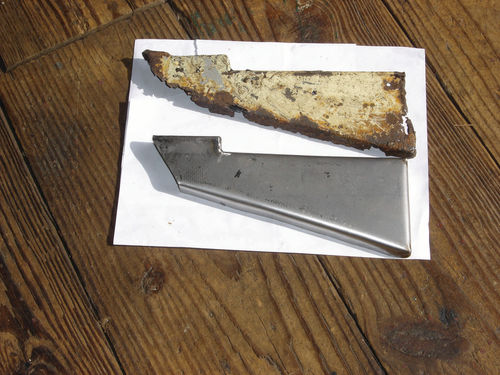
There was a large, smooth rock on my property that had a nice, shallow depression in it. Our property goes way back and was once inhabited by Native Americans. Folklore had it that this rock was actually used by them to grind corn into flour. Whether true or not, I hoped I wasn’t desecrating their memory by putting the stone to a more modern use. Anyway, the stone provided a nice solid surface to start dishing out the piece. I had made the patch larger than I needed so that I could then use my shrinker and stretcher tools around the edges to fine-tune the curvature. The piece was pretty dimpled from all the hammering and I don’t have any fancy planishing tool. To get it smoother, I mounted one of my dollies upside down in a vise and used a hammer to drive out most of the dimples. Again, this took time and repetitive checks against the existing skin, but eventually I had a good match. I then cut out the rot, trimmed the patch to fit and welded it in slowly. After some hammering and grinding, it looked pretty good.
The forward ends of the front wheel arches, where the nose skin essentially begins, were also rotted, as were the inner wheel wells behind them. I followed my same approach to patch them using patterns, measuring and tweaking multiple times and using my shrinker/stretcher to help make compound curves. As with the rockers, the passenger’s side was worse, with more rot on the inner wheel well. What’s more, that rot extended into the sheet metal of the nose, under an internal support brace for the bumper. In fact, that brace itself was compromised, so I had to create a new one.
Once all the rot was repaired and all the rivet- and screw-holes filled, I went back to a hammer and dolly to get the dents out as much as possible to minimize the use of filler. The front bumper on these cars is quite small and the nose protrudes so much that it is prone to damage. In fact, NSU later incorporated additional bars to the bumper to provide more protection for this vulnerable area.
Uncovering Some OldWorld Craftsmanship
One of the things I enjoy about restoring an old car is uncovering the technology that went into it. It’s like an archeological dig. Doing the bodywork on the NSU, I really began to appreciate the workmanship that went into the car at Bertone.
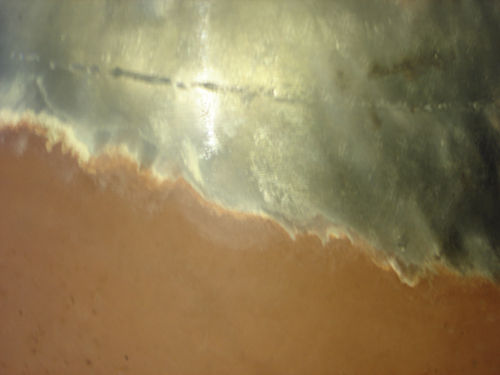
When I got portions of the nose skin down to bare metal, I realized that it had actually been made by welding several sections together. The welds I uncovered were very finely done— much cleaner than my efforts. And these were done back in the 1950s and 60s when I doubt they had modern wire-feed MIG and TIG technology, much less the super-precision of today’s robotic systems. I’m sure these were done by hand by master craftsmen. Impressive, especially considering this wasn’t some high-end Ferrari, but lowcost basic transportation.
Maintaining the Big Picture
With the major repairs to the nose completed, the final finishing will wait until after the car is media blasted and put in epoxy primer. In the meantime, I’ll need to go back over the rest of the body to weld up some random tears and holes, hammer out a few more dents and scrape off the rest of the undercoating. I have some repairs to make on the front and rear hoods, too. Plus, I still need to find a way to get the doors off. But I can now foresee the day when the car will actually go in for blasting and priming.
That will be a major milestone for me. Knowing that the basic shell has been physically revived will give me new impetus to step up the parts hunt. It will also get me past that slump that always threatens to derail any restoration project. It happens when you start to feel overwhelmed by all that’s left to do. When it hits me, I usually look for inspiration from stories in publications like Auto Restorer or just talking to other car owners.
Actually, my NSU saga in Auto Restorer led to just such an exchange. Frank Baker, an original owner of a Sport Prinz and a former member of the now-defunct US NSU Club, was kind enough to contact me. He’s a great guy and shared lots of helpful info, including an old club roster. While my outreach to those club members hasn’t yielded much yet, I did get a note from one former member that was particularly interesting.
Alex Wehrle once restored a 1966 NSU Spider, a convertible version of the Sport Prinz and the first massproduction car with a Wankel rotary engine. Alex had read an article or seen a video of celebrity and renowned car-guy Jay Leno citing Mazda’s rotary engine history. Alex wrote to Jay to fill him in on NSU’s early leadership with the technology. That led to a couple of phone conversations and visits, after which Jay ended up actually buying Alex’s car for his collection!
While I’m not aiming for a sale to Jay Leno, I do hope the facelift I’m giving my little Sport Prinz will restore its youthful good looks. After all, even if mine wasn’t the actual car used in the Rock Hudson movie “Man’s Favorite Sport,” one of its brethren was. To paraphrase a line from another Hollywood film, “Sunset Boulevard,” I’m looking forward to the day when I can say “It’s ready for its close-up, Mr. DeMille.”


