
Blending Color & Clear Coats
You Think You’ve Finished a Paint Job…and Find a Flaw. Here’s How to Fix Spots That Aren’t Quite Right.
I HAVE YET to complete a paint job without having to go back and repaint some part of that vehicle. Hopefully this is not an indictment of my prowess with a paint gun but rather a look at how life actually is lived inside a restoration shop. Sometimes Things just go wrong. When they do, you have to take a step back and make them right.
The good news when it comes to taking care of a paint redo before the vehicle leaves the shop is that the finish is fresh, very fresh, and that can make color matching a breeze, and make blending the clear coat something you can actually accomplish without pulling your hair out.
That is two really good things to know as long as you understand that my definition of fresh is a base coat/clear coat paint job that is less than a week old and preferably only a day or two old. That is a short window of time, but if your need for repair falls within that window, fixing paint problems isn’t that difficult.
So what happens if you delay longer than a week? The clear coat will have cured to the point where blending becomes more difficult.
A tip: If you check the P Sheets for most clear coat products you will find a recoat section that states that after so many days, anywhere from three to five depending upon the product brand, the clear must be sanded before being recoated. In short, what that is saying is that it takes the clear three to five days to fully cure. That is why I defined fresh clear coats as less than a week old. The clear has yet to fully cure and that is what makes the repair I am about to demonstrate possible. Here’s how:
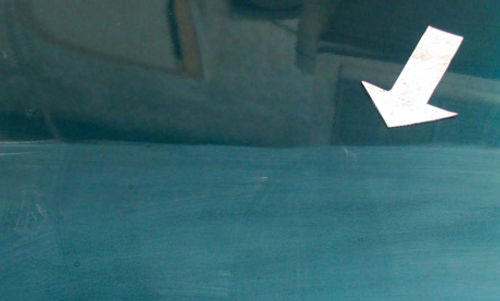
How’d That Speck Get There?
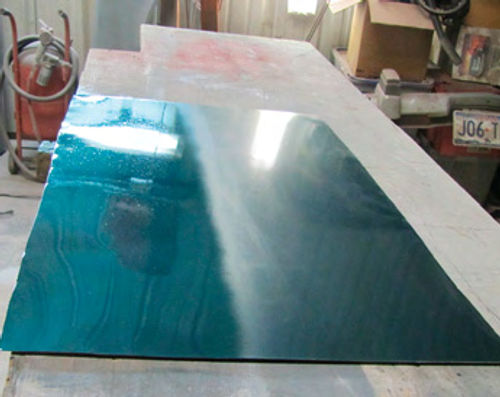
Let’s assume the test panel in Photo 1 has a small speck of trash near the bottom of the panel.
To repair this problem the first step was to sand that speck smooth. To do that I wet sanded the area using 800-grit sandpaper on a very small block.
How small of a block? How about 1x1–inch square?
The goal here wasn’t to sand until the trash is completely gone. All I needed to do was to level the area. Anything that remained of the trash after sanding is encased in the clear coat and will not cause problems in the future.
What if the flaw is larger or deeper, such as a scratch? This happens occasionally and when it does the biggest concern is to not create a low spot in the panel when sanding out the flaw. If, for example, the flaw is deep into the clear coat you need to go to a larger block, stick with the 800-grit wet, and sand a larger area until the flaw is sanded smooth.
I do need to caution you about standing too much in one area. Even with a larger block, such as one that measures 2.5x6 inches, you still can create a low area in the finish that will become very obvious once the repair is complete. To prevent creating a low area it is sometimes necessary to stop sanding before a flaw such as a scratch is completely removed and apply a coat of primer/surfacer over the repair to fill and hide that flaw.
Once the primer/surfacer has cured overnight it can then be block sanded smooth using 800-grit and sanding the area wet.Why stick with the 800-grit and not go down to 320-grit? Using 320-grit will leave behind deeper sand scratches than will the 800-grit. Those deeper sand scratches can be very difficult to fill with paint.
Note: A repair that has been primed will need a single coat of sealer before applying more color and even though that single coat will be enough to fill 320- grit sand scratches, you still run the risk of not covering all of the 320-grit sand scratches. If that happens, the small amount of color needed to repair the flaw will not be enough to fill those sand scratches. If you stick with wet sanding the repair using 800-grit sandpaper you never have to worry about creating those deeper sand scratches.
In Photo 2 notice that I have now sanded the entire bottom half of the test panel. To sand the rest of the panel I switched to 1000-grit. Why make the switch to 1000-grit? I’m only going to put color over the small area being repaired. Once that is done I’m going to apply clear to the entire bottom half of the test panel. To do that I need a surface the clear can stick to, but not a surface covered with sand scratches. The 1000-grit sandpaper gives me that surface.
Blending the Color Coat
The technique used when blending a base color coat has very little in common with the technique used to apply a base color coat to an entire panel. When applying a base color coat over a complete panel the objective is to maintain an even speed as you move across the panel while keeping the spray gun a consistent distance from that panel from end to end. Blending requires that the gun position remain almost stationary on the panel while at the same time being quickly rolled back-and-forth in a 180- degree arc (Photo 3).
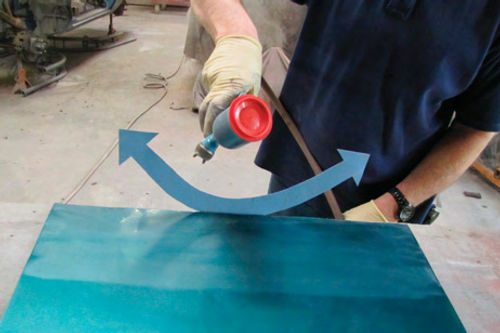
The purpose behind the 180-degree arcing motion is to deliver paint directly over the repair while allowing the edges around the repair to receive only a feathering of paint. That really is what blending is all about, to let one coat of color fade into another coat of color in order to form a seamless union between the two. When done correctly it is impossible to determine where the first layer ends and the second layer begins. The thing is you can’t hope to accomplish a good blend without a little practice, which is why I brought out the test panel instead of working on a car.
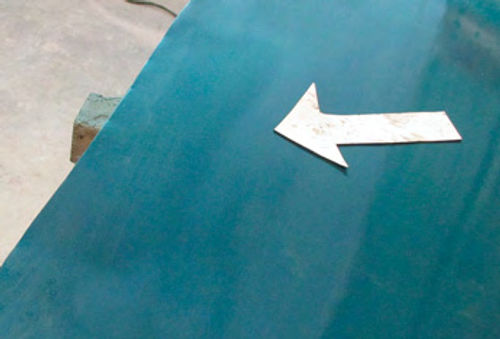
The actual process of blending color can take up to three passes. Allow each passto dry for at least 10 minutes before applying the next pass of color. Once an invisible blend has been achieved, the coloris allowed to dry for at least 30 minutes before being cleaned with a tack cloth (Photo 4).
The tack cloth will remove all of the dust left from the blending process and will let you know the blend is smooth with no heavy ridges of dried paint. How do you tell that? The tack cloth should move over the blended area smoothly without being snagged. What if the tack cloth snags or pulls? The blend isn’t smooth enough.
If a problem like that occurs, you need to load a clean, lint-free cloth with PPG DX330 Degreaser, or some other quality brand of degreaser, and wipe away the blending color and start over. A rough color coat will telegraph through a clear coat that’s applied over it and could leave the area with the appearance of having been repaired.
To eliminate the chances of getting those rough edges, try adding another 10% of reducer to the color mix and that should help the blend to lay smoother. Added reducer can delay the drying process so be sure to give each pass plenty of time to dry before applying the next coat.
Laying Down the Clear Coat
Theoretically, the hard part of this repair is already done. The flaw has been removed and the base color has been applied and blended into the existing color. All that’s left now is to spray the clear coat over the repair.
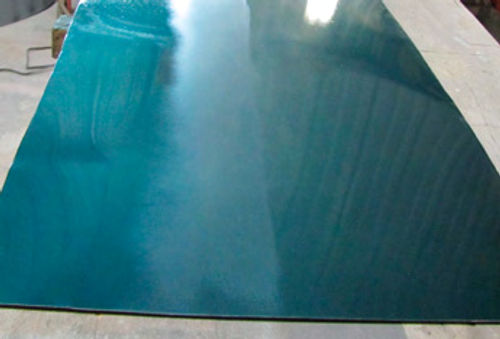
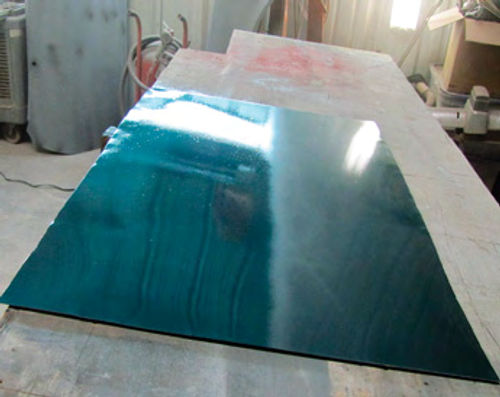
That starts by applying a coat of clear over the repair area only and allowing that to cure for at least 15 minutes at 70 degrees. The second coat covers the repair area and about half of the sanded area on the panel (Photo 5). The third coat covers the area that was sanded right up to the sand line (Photo 6).
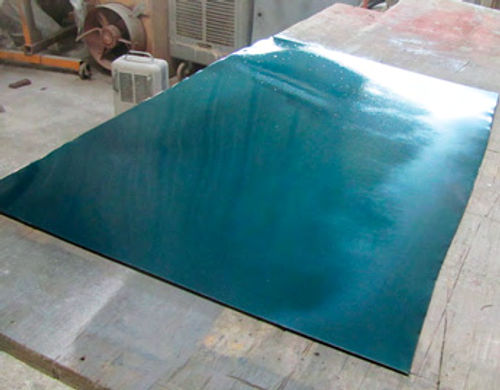
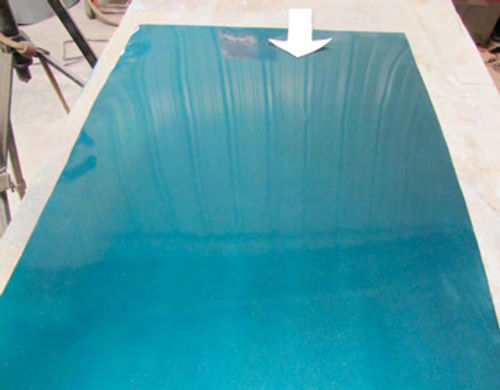
That sounds simple enough but there is always a catch. That’s because I need to apply a fourth coat of clear to complete this blend. The fourth coat also covers the entire repair area but this time I want to be sure this coat covers the edge of the sanded line I created when I initially sanded the test panel (Photo 7). This ensures that I have plenty of clear covering the sanded edge. It’s OK to let this coat mist out onto the area of the test panel that was not sanded because the next step is to empty the spray gun of clear and pour in at least an ounce of PPG DX840 Universal Blender.
Note: All automotive paint manufacturers carry a clear coat blending solvent. Check with your local supplier for the correct blending solvent for your particular clear coat product.
What the blender is going to do for me is soften the edge where new clear meets the old clear. The trick is to apply only a very thin mist coat over the blended edge. I’ll repeat that. Never apply a blending solvent anywhere but over a blend line and never apply more than a very thin mist coat. Once the mist coat is applied go away and clean the spray equipment. You are done for now (Photo 8).
Compounding the Problem
The next part of the project starts by lightly color sanding the repair area using 1500-grit sandpaper on a soft block. If you did everything right, a light sanding will be all it takes to deal with any nibs or rough spots. After that, a little compounding is necessary using a quality compound such as 3M 6085 or Norton Liquid Ice (Eastwood #12019).
But once again, there is always a catch. To compound a clear coat blend line I prefer not to use a nine-inch buffing pad (3M 5703 or Eastwood #12018). Instead I prefer to use a smaller, three-inch diameter buffing pad (3M 8507 or Eastwood pad #51422 either of which will work with backing pad 3M 5770).
The reason for making the switch to a smaller three-inch buffing pad is to achieve better control over the polishing process along the blend line. I don’t want to run the risk of burning the blend line with a higher speed, nine-inch diameter buffer. So what tool works best for this type of buffing? I prefer to chuck the 3M 5770 backing pad into a right-angle die grinder and use that as my buffer. So what does the end product look like? Take a look at Photo 9.
Some Things to Consider
I used a test panel for one reason, sometimes good blends can be difficult to achieve.
A test panel lets you get in some practice before attempting this on the actual project vehicle. You may blend 10 test panels before you feel confident enough to attempt one on your favorite ride.
Then there is the issue of how much of the vehicle do you need to paint and where is the best place to attempt a blend. If you have checked out our “Curing Paint Problems” DVD (available through LPL Body Works listed at the end of this article) you watched me do a blend on a quarter panel in an area where I could use body lines to break the edges of the blend. In the absence of these body lines you have to use the method I’ve discussed here.
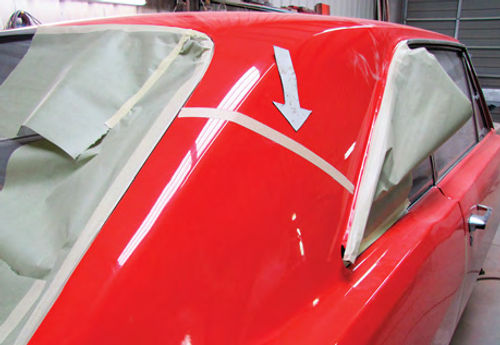
So, let’s look at a car and see where I would make a blend. On the car in Photo 10, I would blend about halfway up the sail panel. This is an ideal place to do a blend because you are working in a defined space and not having to attempt a blend out across a large panel, which is never a good idea.
In order to blend on the sail panel I also need a good place to blend where the quarter panel meets the package tray. On this car that point is the seam line where the quarter meets the package tray. This Is an ideal place to lay a feather edge tape line so that you don’t have to do a blend out on the package tray.
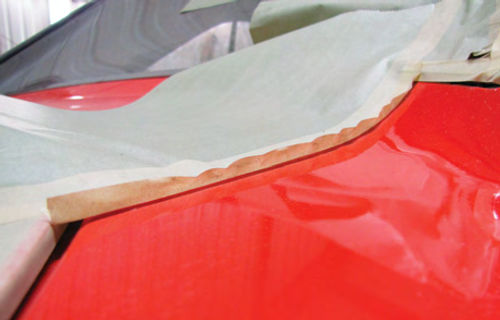
What is a feather edge tape line? Notice in Photo 11 that the edge of the tape is lifted off of the panel. What this does is allow the clear to lightly mist in under the raised tape to form a soft edge along the line where the two panels meet.
Spray a mist of blending solvent along this line once you have completed the blend line on the sail panel and this blend will also disappear.
Anything else? Yes, glad you asked.
Another place you can use this blending method is when you’re repairing minor fisheye issues. My preference is to mark any fisheye dots then lightly sand each one using a red Scotch-Brite pad. The trick here is to use the corner of the Scotch-Brite pad and sand in a circular motion using your fingertip and only sand the dot itself. Once sanded and wiped clean with a degreaser and a tack cloth, dab a tiny dot of clear onto a toothpick and fill the fisheye dot.
After the clear has cured overnight, the dot can be block sanded smooth using 1000-grit then 1500-grit before compounding. The fisheye dot will disappear completely. Got a question? Send it along.
Products and supplies provided by:
LPL Body Works,LLC
5815Contented Lane
Amarillo, TX 79109
Paint and body repair DVDs
Eastwood Company
263 Shoemaker Road
Pottstown, PA 19464
Automotive restoration products and supplies


