Restoring a Steering Wheel
Even though I am a very organized guy, when it comes to the restoration of my 1939 Packard 12 with a limo body, I tend to jump from one job to another.
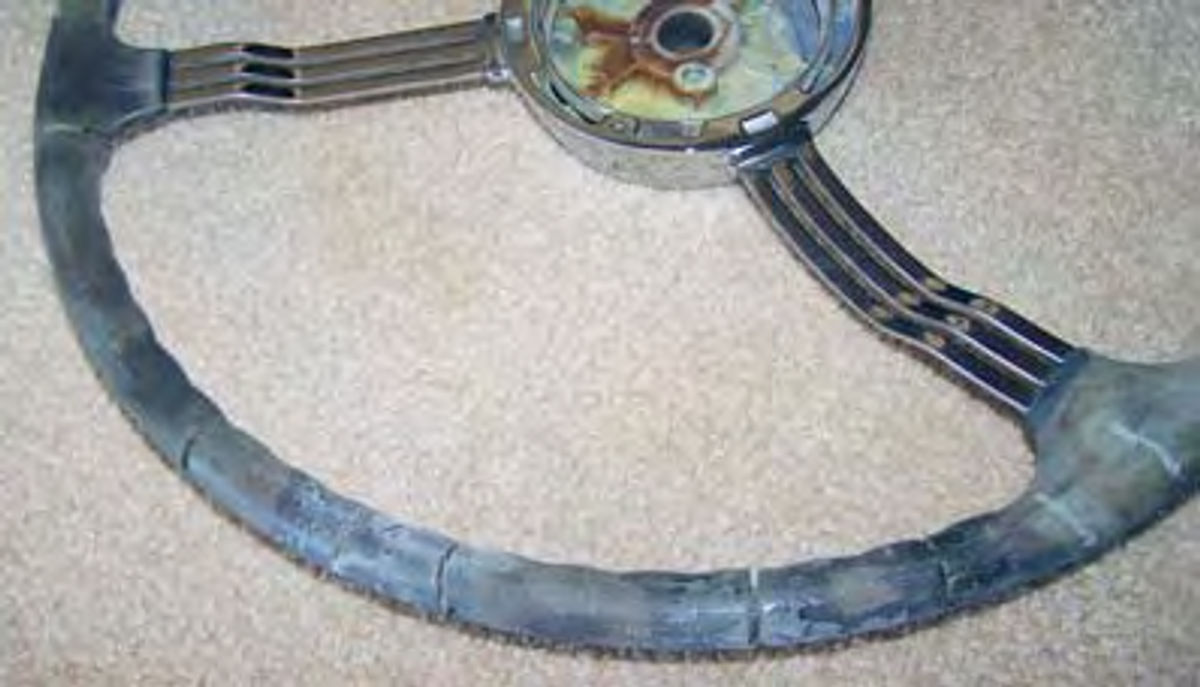
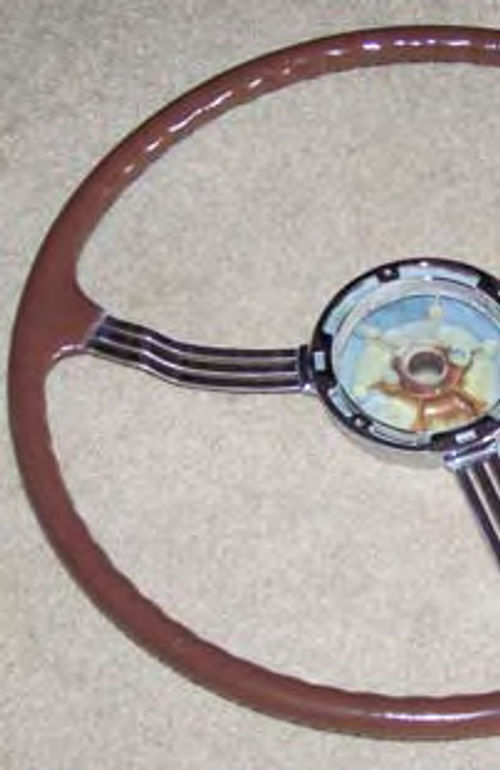
For example, I had all the chrome parts redone, including those on the steering wheel, which is the “banjo” type. When I got it back from the shop it looked so good that I decided to drop what I was doing and restore it. Figure 1 illustrates the condition of the wheel after the chrome plating.
I do not know what “plastic” material was used in the ’30s, but the plastic on this wheel was not something that weathered well. I remembered the other “plastic” of that era, the ebonite, which was used in making the black telephones. Ebonite was not a plastic; rather it was vulcanized rubber, which included excessive amounts of sulphur.
Shrinking Led to Cracks and Gaps
The material used to make steering wheels tended to shrink and many gaps were left. There also were small, superficial cracks over the whole surface. The material was poured over a circular heavy steel wire, which provided the necessary strength.
My restoration approach called for filling the large gaps first and repairing the superficial cracks afterwards. I experimented with a number of compounds purchased at the hobby shops, but all proved to be still soft after curing.
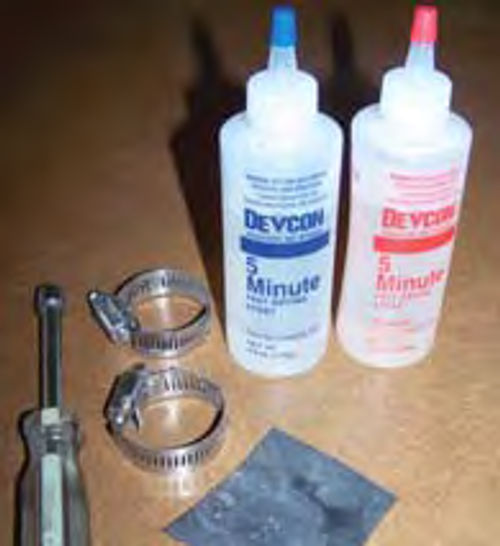
I had better luck with a two-part epoxy, even though this epoxy is meant to “glue” parts to each other. The fast-cure epoxy (Figure 2) proved to be the best.
You Have to Work Fast
This epoxy consists of the epoxy itself and a hardener, which should be mixed one-to-one. You only have five minutes to work with it before it starts hardening, so mix only a small quantity at a time.
I made small cups out of aluminum foil, and bought Popsicle sticks from a hobby store, which I used for mixing. Both the cups and the sticks were discarded once the epoxy started hardening on them.
Pouring the epoxy in the gaps proved to be impossible at first, as what I poured on the top was running out at the bottom!
So, I made a cover over the gap to keep the epoxy from running out. The first cover was made from heavy aluminum foil which did the job but proved to be a disaster as the epoxy “glued” the foil to the steering wheel!
I had a hard time removing the foil.
When All Else Fails...
Then, after carefully reading the instructions that came in the package, I learned that this epoxy will not work on rubber. So I had my answer—I made the cover from pieces of an old inner tube.
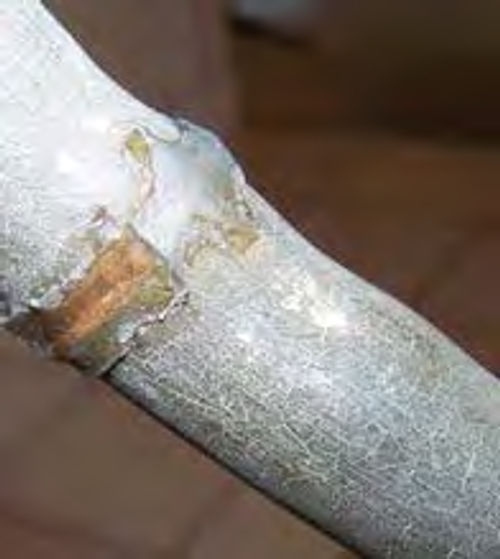
Figure 3 is a sketch showing a crosscut of the steering wheel. The steel wire is in the center, the “plastic” covers it, and my rubber, held in place by two hose clamps, is covering the wheel. Notice that the rubber was cut so that an opening is left on the top, through which I poured the epoxy. After the epoxy cured I was able to remove the rubber cover with no problem. The result is seen in Figure 4.
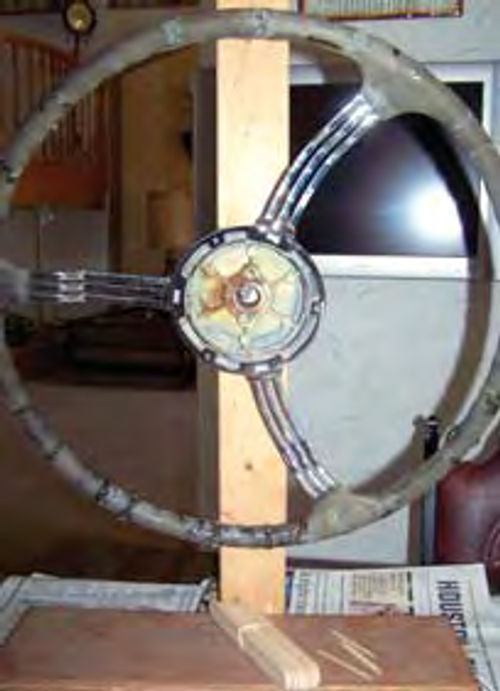
As cracks were all around the steering wheel, I made a jig out of two pieces of wood (Figure 5), and a heavy bolt served as an “axle” over which I rotated the wheel, so new gaps would move to the top. Once all the gaps were filled, I had to go over each one again and pour a little bit of epoxy in the area where indentations still existed. The epoxy does not shrink, which is a good feature for the long run.
Excess Is Good
I intentionally applied an excessive amount of epoxy, so that the corrected areas would be larger in diameter than the original wheel. Then I had to remove
the excess, so that the epoxy would be the same size as the wheel.
I tried a number of files and found out that the most efficient is a fine rasp. Care must be taken not to file the original surface. Actually, some excess epoxy was left, which was removed with emery paper.
Using an 80-grit backed by a small piece of wood makes for a fast method.

After the excess was removed, I continued with the same emery paper, held by hand, over the entire surface of the wheel. Even though only a small amount of the original material was removed in this step, it was sufficient to make most of the superficial cracks disappear.
Then I switched to finer and finer grit until the steering wheel looked perfect. However, as the epoxy is clear, the areas that were filled could be seen (Figure 6).
So, I painted the wheel with a quality enamel. Do not use a spray can! The thinner used in spray cans can damage the wheel. I used paint from a small can, and applied it with a small, high-quality brush.
After the paint dried, I sanded it with 200-grit paper, wiped it carefully, painted again, sanded again, and did this process until I was satisfied with the looks of the steering wheel.
The level of the result depends only on how much patience one has.
Figure 7 shows the result I obtained.
Contributor Mike Calistrat is restoring a 1939 V-12 Packard limo and has been sharing his progress with us in a series of how-to articles.


