How -to The Basics of Frame Restoration, Pt. 1
Key to a Successful Project Is the Restoration of the Frame. We’ll Start With Disassembly and Some Clean-Up.
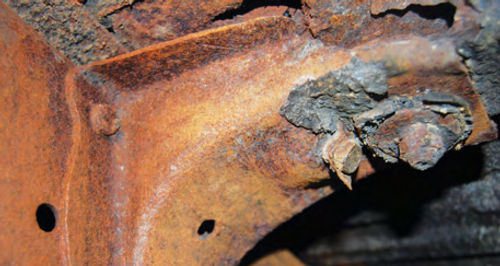
AFTER YOU’VE RESTORED a few old cars or trucks, you’ll appreciate what we mean when we say that a “frame-up” restoration starts with restoration of the frame. While some newcomers may tend to think that a vehicle’s frame is a hardy piece of steel that rarely needs little more than new paint, those with more experience know that over many years of use, frames can develop countless problems like scaly rust, dents from hitting objects, nicks from flying road debris, broken off or rusty parts, brittle or mushroomed rubber bushings,stress cracks, damaged fasteners, eaten away body mounts and even completely corroded sections.
Frames Through the Years
Mounting a totally separate body to a rigid frame designed to support a vehicle’s drivetrain was the original method of building automobiles. Most prewar and early postwar cars feature body-on frame construction. There are American marques such as Nash and numerous imports that used unitized (monocoque) body construction in those eras, but most had ladder frames. In the late 1950s, the X-girder frame was used. By the early 1960s, Chrysler products became unitized cars and by the late 1960s many cars were sharing that technology.
Material-wise, the frames found on very early cars were made of ash wood. The Brush runabout even had wooden axles. Steel “ladder” frames were introduced later and, by the 1930s, became the most common foundation for car building until the unitized body with its stamped sheet metal frame took hold.
One reason the ladder frame lasted so long in America was the emphasis placed on annual model year changes. With a ladder frame, the body or interior could be restyled without re-engineering the entire frame and chassis, which would have been necessary with monocoque construction. Ladder frame construction also made it easier to use a common chassis and driveline under many different cars.
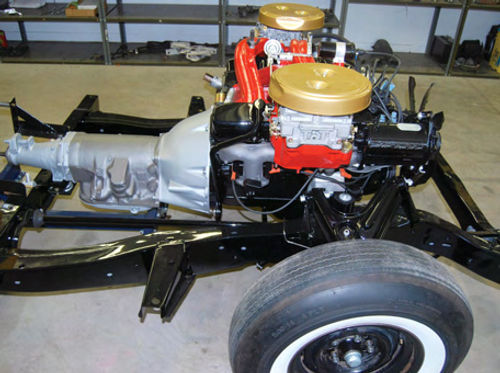
Today, body-on-frame remains the most common system used for building trucks. And as car manufacturing moved away from the use of frames, one reason the Ford Crown Victoria remained a popular police car was that law enforcement vehicle buyers preferred its full-framed, front engine, rear-wheel-drive setup. (As we reported last May, Ford has announced that it will end production of the Crown Vic in late 2011 and sell a police car based on the front-drive Taurus.) Likewise, the related Lincoln Town Car dominated the American limousine market because it was the last American luxury car made with body-on-frame construction, which made it easy to stretch for livery work.
Working With Full Frames and Subs
For the most part restorers—particularly home restorers—will be dealing with full-frame cars or with semi monocoque cars that have a unit body combined with a front sub frame (or engine cradle) that resembles the front section of a ladder frame.
From a restorer’s view, while a sub frame is a little easier to store and move around, both types of frames can suffer the same types of deterioration over the years and both require similar types of restoration work and refinishing.
Like most restoration work, the job of redoing a frame to make it look new once again startswith disassembly. First the bumpers, grille, fenders, front and rear splash aprons, hood and rocker panels or running boards are taken off the body. To do a complete job on a full frame chassis, the body also must be detached from the frame and hoisted or jacked high enough to remove it completely. On cars with semi monocoque construction, we would guess that many restorers leave the sub frame attached to the body. However, if you separate the two parts you’ll do a better job and make certain there is no hidden deterioration.
All of this is hard work, of course, and scary in a way. In fact, a lot of vintage vehicles get taken apart in good order, but they then become “basket cases” that never get put back together.
To do the complete job, you need to have a plan and a high degree of commitment to finishing your project. If you are not good at taking a project to conclusion, do a partial or “rolling restoration” and learn to be happy with less than perfect quality. Don’t tear apart every last piece of your car unless you know that you have the energy, talent and money to put it back together.
With that in mind, are you ready to go on? Ifso, the next thing you’ll find is that once the frame is separated from the body, you can go in one of two directions.
Some restorers like to leave the front and rear suspensions, steering, road wheels and tires in place while an initial cleaning or blasting of the frame is done. This makes it easier to move the heavy frame around the shop and is what we did for years. The downside of leaving those components intact is that nothing is going to get totally clean while it’s still assembled. All the shackles, leafs, tie rods, steering links, wheels and so on will have to be cleaned again to do things right.
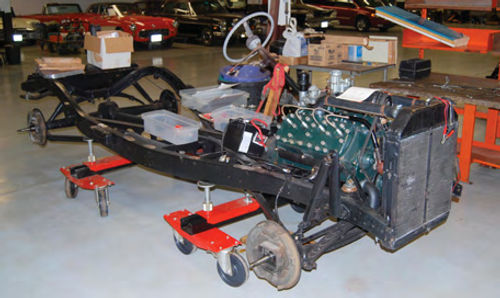
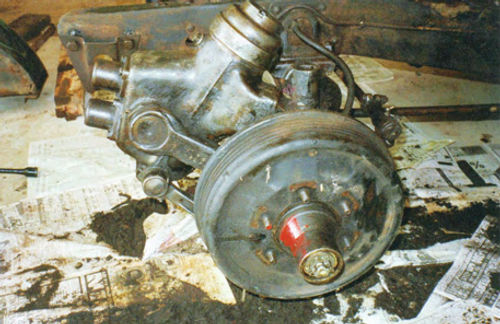
The second option is to find some type of dolly, fixture or “skate” type device that can support a completely stripped down frame. This can be a homemade creation or a “store bought” item. Car Moving skates will support a frame, but most will position it uncomfortably low for doing any work on the metal and it will also be difficult to get at the area resting on the skate.
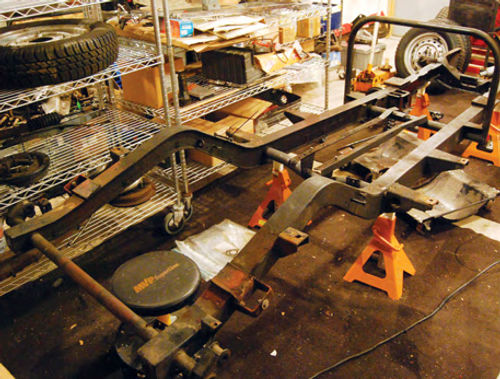
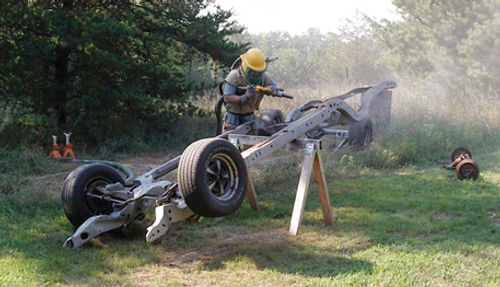
A friend has a system he bought in France that seems like the ultimate “frame holder.” It is super sturdy and has big dolly wheels. (See photo on page 23.)But it was expensive, costly to bring here and even he doesn’t know how to find another one. Backyard Buddy released the Easy Access System a few years ago, which is what we use. In fact, we just purchased our second such system so both our shops have one.
Crud Can Be Your Friend
Some frames get very cruddy and this can be a good thing as caked-on oil and grease can protect the steel from rusting. We’ve scraped down frames that looked brand-new under an inch of road grime. Wire brushes,scrapers, chisels and screwdrivers all come in handy for cleaning. Once you have the heavy build-up off, a wire wheel on a power tool will work wonders. We prefer using a Milwaukee Tool with a knitted wire wheel as it makes the crud go away pretty fast.
No doubt about it, this is dirty work. Wear heavy gloves, goggles or a face shield, a head covering and protective clothing. Put cardboard or newspaper down all over the shop floor. Think about what you’re doing and where the debris is going. And keep in mind that if you wire brush a frame and let it sit, flash surface rust will develop very quickly.
As you clean, you may encounter the scaly rust, curb dents, nicks, egg-shaped holes, breaks and tears, broken off or rusty parts, brittle or mushroomed rubber bushings,stress cracks,damaged fasteners, eaten away body mounts and large corroded sections such as we mentioned earlier. They can be fixed. You can usually lift off scaly rust in layers, using your scraper. Bad dents can be cut out and new metal welded in. Damaged body mounts for most older cars need to be custom fabricated, but some reproductions are available for the most popular cars. A good welder can easily fix cracks and tears.
An egg-shaped hole can be a sign of collision damage, but this is not always the case. When we found one on an MG TD frame, we first assumed that the car had been in an accident.
However, it turned out that hole in the frame that the steering rack passes through must be egg-shaped for clearance if the rack is removed from that model without taking the entire front end apart (which we knew had been done on that car). So, if you see an egg-shaped hole, do a little research before you think the worst.
Measure the frame up from side to side and check the squareness of corners and the straightness of frame rails. Most factory shop manuals include illustrations showing frame dimensions.
Removing a Few More Parts
The best time to do a final disassembly of any frame parts is when the unit has been completely repaired and cleaned with hand tools and wire brushes, but not yet blasted. If you blast it first and then remove a body mounting bracket or shock absorber support, the surface under the removed part, obviously, will not have been blasted.
But before you strip parts like these off the frame, take a digital camera and photograph the entire frame, section by section, for a guide to help you put the parts back in their proper place. If your shop manual has drawings of the frame, take some close-ups and overall shots anyway to supplement the drawings.
Some brackets and supports may be held on the frame by large “suspension bridge” rivets.Most restorers leave these permanently attached as it is virtually impossible to replace these kinds of rivets outside a factory environment. However, there are restorers who prefer torching them off, blasting under them and replacing the rivets with large, neverrust stainless steel bolts.
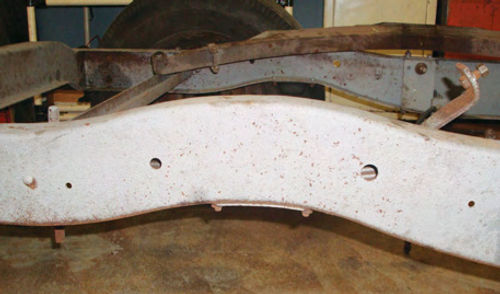
To avoid flash rusting, once you get the frame crud-free, rush it to the media blasting stage. In many locales there are shops that will do this job for a reasonable cost. Some require you to bring the frame to them and some will come to your location with a portable blasting unit. The mobile blasters are often the best option for the hobbyist restorer and sometimes the cheapest, as their overhead is less. (Just be sure you have ample room to do the job and won’t be annoying any neighbors or violating any municipal codes.) Make sure your blaster does all surfaces of the frame and then blows the loose abrasive off the frame and out of all the openings and channels.
Blasting will usually leave frame rails and crossmembers with a light gray color. Don’t assume this will last forever. We know of one restorer who took a frame to a blaster in May and, shortly thereafter, the blaster went out of business. However, the car owner didn’t keep close tabs on his frame and didn’t realize that the blaster had shut his doors until October. He had to pay more for storage than blasting and he wound up with a frame that was starting to get rusty again.It had to be re-blasted.Clearly it’s not a good idea to have a frame blasted and let it sit around. Once the blasting is done, put some primer on the frame to keep it from flash rusting.
Editor’s note: In the second and final part of this article, we’ll cover refinishing an original frame and building a new frame.
