How -to Mixing Paint
At a Time Like This, a Plastic Cup Can Become Your Best Friend. Especially When You Consider the Costs Involved.
IN THE MAY issue I showed you some very nice spray guns to help put the shine on your ride and I followed that in June by outlining which paint products should be used where and when. Now I want to show you a way to help keep the cost of all those painting products under control by determining how much product is enough to do a particular painting job.
I’ll start with a look at how professional paint shops determine the final costs of their paint jobs.
The High Cost of Spray Painting
Out in the world of commercial paint shops we never focus on the cost of the individual components used to make up a particular painting product. Instead we look at the RTS, or Ready To Spray, cost of the product. The reason for that is very simple. If you purchase a gallon of polyurethane clear that mixes at a 4:1:1 ratio you also need a quart of hardener and a quart of reducer before that gallon of clear can be used on a given project.
If you consider that a gallon of clear (PPG Concept DCU 2002) costs around $200 and a quart of hardener (DCX61) costs around $100 and a quart of reducer (DT870) around $12 it quickly becomes apparent that the cost of loading a spray gun and stepping up next to your project with gun in hand is much higher than the initial price of that gallon of clear as it sat on the shelf.
Suddenly, the need to know how much money you are spending each time you mix a given amount of any painting product becomes critical.
And while knowing how much you are spending every time you mix a little paint may make you want to cry, it is important knowledge because it makes you very aware of the need to know exactly how much paint material you need to mix in the first place.
At$312 for an RTS gallon-and-a-half of clear—the total of having mixed a gallon of clear with a quart of hardener and a quart of reducer—the last thing you want to do is mix more than you need and have that unused clear sit on the bench and turn into a paperweight.
Working With a Mixing Cup
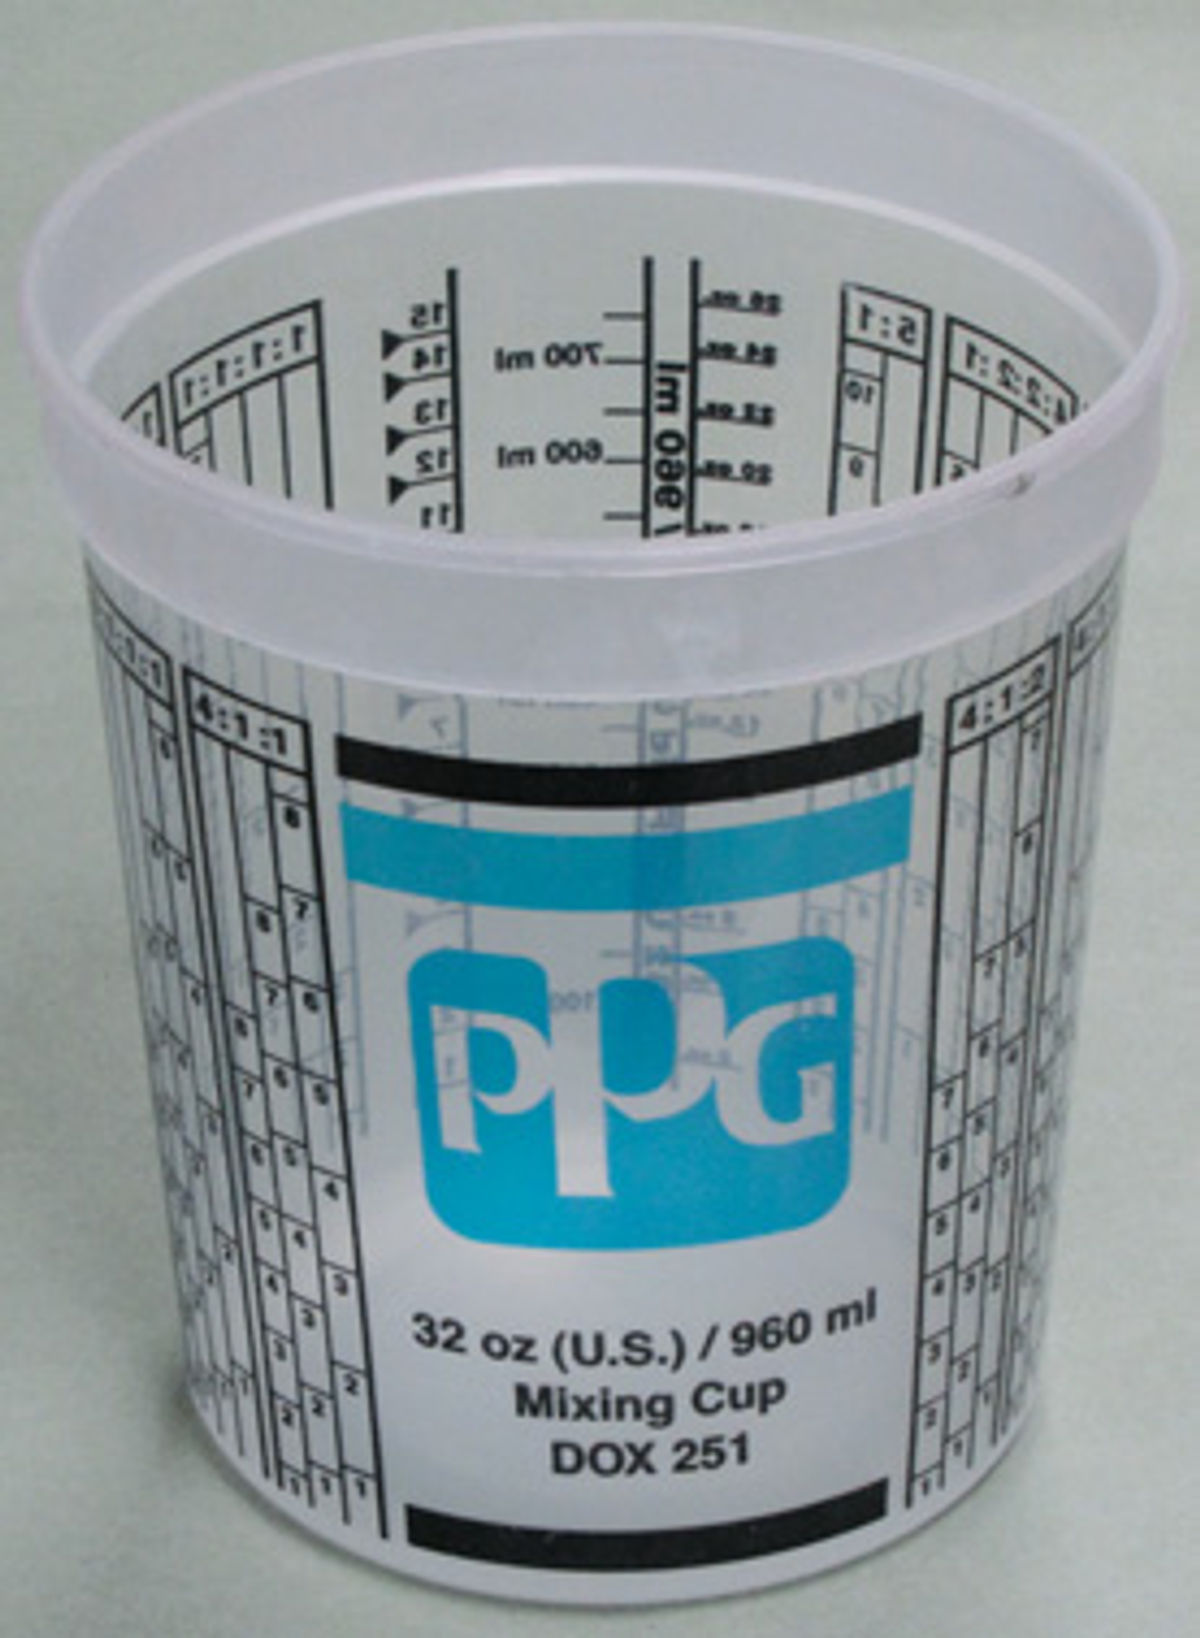
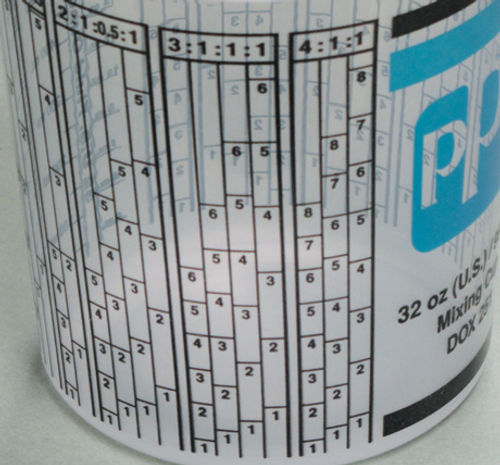
Knowing how much paint to mix starts with the cardinal rule of mixing any automotive painting product and that is to always use a mixing cup like the one in Photo 1. This is a disposable plastic mixing cup and it is marked with several different mixing ratios like the 3:1:1:1 and 4:1:1 ratios shown in Photo 2. These are probably the two most commonly used mixing ratios printed on this cup but if you need an oddball ratio like 5:1 you will find it on the cup, also.
You are probably wondering what that fourth ingredient would be when mixing with the 3:1:1:1 ratio. In most cases the fourth ingredient is a tinting color and it is primarily used when tinting sealers.
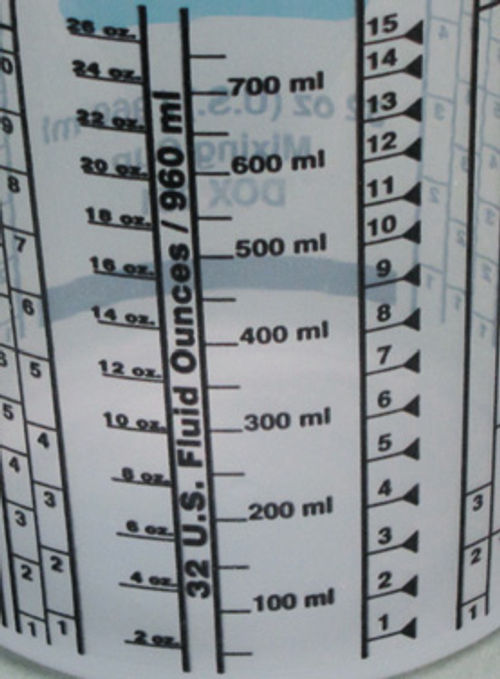
Another designation this cup uses is what I call the “per parts” measurement (Photo 3). A good example of how to use the “per parts” designation is that it allows you to pour in four parts of clear, one part of hardener, then one more part of reducer for a total of six parts to make up a 4:1:1 ratio. That might not be as handy as using the actual 4:1:1 ratio designation printed on the side of the cup, but it can be very useful should you encounter an off-the-wall ratio.
Finally, the cup is marked to allow you to mix in ounces and milliliters. You can see the ounce/milliliter markings just to the left of the “per parts” designation, which I’ll explain later, shown in Photo 3.
Your paint supplier will always mix paint in either ounces or milliliters, but once in the shop I can’t think of a single time you will need to prepare an RTS painting product by the ounce or by the milliliter. You will need to know how many ounces are in a pint, quart and gallon to help determine how much product you will need to purchase for a particular job, but that’s for later.
So how do you get this cup to work for you?
Because the 4:1:1 ratio will probably be the most-used mixing ratio printed on the cup, I’m going to stick with it to explain. Photo 4 is a closeup of the 4:1:1 mixing ratio. Notice that the ratio is separated into three columns, one for each part of the mix. For comparison look at the 3:1:1:1 ratio just to the left of the 4:1:1 ratio. It has four columns, one for each part of the mix.
Now look closer at the cup and notice that the 4:1:1 ratio columns are numbered one through eight with the amount in each column stair stepping up from left to right.
Here is how that works: If you pour clear into the cup and fill it up to the “8” mark in the “4” column, that’s just over half full, you would next pour hardener into the cup until the mix reachesthe “8” mark in the second column, which is the first “1” column. Finally, you would add reducer to the mix and fill the cup to the “8” mark in the third column, the second “1” column.
You have just precisely mixed enough clear to apply eight coats to the outside of an average-size deck lid. How do I know that? I’ll get into that when we talk about how much RTS product you need, but first I want to talk about the “per parts” designation on the opposite side of the cup.
Referring back to Photo 3, notice that the “per parts” designation is marked up of 15 parts. This is the easiest way to measure out base colors that mix at a 1:1 ratio. Fill the cup up to the “7” mark with base color then finish filling the cup up to the “14” mark with reducer. You have just precisely mixed enough base color to apply seven coats to that average-size deck lid. Stir well and spray.
So, how do I know filling the cup to the “8” mark on the 4:1:1 ratio will give me eight coats and filling the cup to the “7” mark on the “per parts” designation will give me seven coats? Eight equals eight and seven equals seven? Sounds like a reoccurring theme, which is best explained by explaining paint coverage.
Looking again at the 4:1:1 ratio printed on the mixing cup, if I mix up a one part batch of clear (PPG Concept DCU 2002 mixed at 4:1:1) and pour that RTS amount into a spray gun I have just mixed enough clear to cover roughly seven square feet, which just happens to be the size of an average deck lid, which, for example, is the size of a 1967 Mustang deck lid.
Now let’s take this coverage thing one step further. Referring to the “Technical Data” near the back of the P Sheets for most painting products you will find the square foot coverage listed for that particular product. A good average is 550 square feet per gallon of RTS product.
Note: Some base coat colors will provide about half of that coverage because half of the RTS mix is reducer, which offers no coverage benefit at all.
That breaks down to 137 square feet per quart (550 ÷ 4 = 137), which breaks down to 68 square feet per pint (137 ÷ 2 = 68), which breaks down to roughly 9 parts on the “per parts” designation (one pint equals 16 ounces which is roughly 9 parts as marked on the cup), which breaks down to roughly nine RTS coats on that average-size deck lid (one part equals one coat), which finally breaks down to roughly 7 square feet of coverage per coat (68 ÷ 9 = 7.55), which just happens to be the square footage of a 1967 Mustang deck lid.
That’s a lot of calculating to reach the simple conclusion that one RTS part when mixed using the “per parts” designation or any of the other given ratios printed on the mixing cup equals one coat of paint on an average-size panel.
Keep in mind that this method works whether you are mixing sealer, base colors, clear coats or single-stage urethanes… as long as you took note of the caution I provided about some base colors providing less coverage.
What does this mean in the overall scheme of things where painting is concerned?Let’s back up to the application of the color coat and start there. Most color coats mix at a 1:1 ratio and my preference is to apply three coats. That means I can refer to the “per parts” designation on the mixing cup and pour my base color up to the “3”mark. Since the mixing ratio is 1:1, reducer is then added to the cup up to the “6” mark.I now have enough RTS base color to apply at least three medium wet coats to a deck lid, or an outer door skin, or a fender, or even a small hood.
Once the base color has dried I want to apply three coats of clear. To do that I go back to the 4:1:1 ratio printed on the side of the cup and add clear up to the “3” mark in the “4” column. I finish the mix by adding the hardener up to the “3” mark in the second column and reducer up to the “3” mark in the third column. I now have enough RTS clear to apply an initial thin coat (check my DVDs for details on this first coat) followed by two more medium wet coats. The theme is the same no matter what painting product you are spraying. If you want two coats, add the first ingredient up to the “2” mark, three coats equal the “3” mark, four coats equal the “4” mark, and so on.
So how much paint should you purchase now that you know how much you need to mix to apply one coat?
Looking first at pints, one pint of paint equals sixteen ounces. I throw that out just in case you are looking for a way to use the ounces designation on the mixing cup. Beyond that, about the only time you will see pint cans being used by your paint supplier is when he is mixing a small amount of base color, enamel or single-stage urethane. Almost everything else comes in quarts or gallons.
So how far will a pint of paint take you? If you figure that sixteen ounces equals roughly nine parts as measured on the “per parts” column that means that no matter what the mixing ratio, 1:1, 4:1:1 or something in between, the most coverage you will get out of a pint of paint is about nine coats on that 1967 Mustang decklid mentioned previously.
What that means is that in most cases you can purchase a pint of color and apply three coats to, for example, the hood and one of the fenders on your ride and still have a small amount of paint left over. Remember, a hood is about twice the size of a deck lid. Or, if deck lids are sticking in your brain, you can apply three coats to a deck lid and three coats to a quarter panel, which is somewhat larger than an average fender, before running out of paint.
So how much clear will you need to mix to apply three coats to these two panels?Referring back to the 4:1:1 mixing ratio, you will need to mix six parts of clear to get three coats on something like a deck lid and a quarter panel.
Quarts of Paint
Paint shops have a thing for quarts of paint. That’s because one quart of paint will allow the painter to apply three coats to a quarter panel, both doors on a four-door car, the front fender and the hood without running out of paint. To break the usage into one part equals one coat, three coats per panel totals up to 15 parts. Fifteen parts equal roughly 26 ounces if you move left across the mixing cup from the “per parts” designation to the ounces designation. Since a quart equals 32 ounces, in most cases you will have a little paint left over in case you decide to scratch something.
Gallons of Paint
This is the easiest one. If the plan includes painting every inch of your project you will need to purchase everything by the gallon. That may seem like a lot of material, but if you break it down into coats applied you will see that a gallon will just get you where you want to go.
Let’s break the usage into parts by dividing the vehicle into its separate components. Starting at the top and working down, most vehicles will have a roof panel, two quarters, a deck lid, a rear body panel, at least two doors, two rockers, two fenders, a hood, a trunk compartment, an engine compartment, and an underside. Considering that the underside of most vehicles is huge, I’ll give it two parts. That’s a total of 20 parts if you consider the hood, deck lid, and doors need to be painted on both sides. If each part needs three coats of color that’s a total of 60 coats, or 60 parts. Sixty parts equals roughly 104 ounces which equals almost three-and-a-half quarts.
If you consider that some roof panels and some hoods are very large, you can see that it is probable that you will use every drop of the base color purchased due to the high reducer content, but you may wind up with a little of everything else left over.

Does this method of usage measurement work for every painting product you might want to apply to your ride? Yes, it does, but there is a catch or two. None of my calculations take into consideration that a particular panel may need to be repainted. The good news there is that should you only want to paint a hood and fender and purchase a pint of paint, or need to spray one side of the car and purchase a quart, or plan a complete paint job and purchase a gallon of paint, you should always have a little product left over to deal with any repainting issues.
The other catch is the issue of primer/surfacer.
You purchase a gallon of primer/surface and by the time you have half of the vehicle primed and ready for sealer you are out of primer.
What happened? Usually the excessive use is due to the need to prime all of those parts for a second time. That, in effect, doubles the amount of primer/surfacer required.
Canmaking these usage calculations actually help where cost is concerned? You bet they can. Here is an example:
My paint supplier sells a particular Ford red base color for about $130 per quart. That would translate into $520 per gallon (130 x 4 = 520)if I purchased this paint a quart at a time because I didn’t know how far a quart would take me. However, if I make a few calculations and determine that my usage will be roughly three quarts I can get a discount for purchasing a full gallon of red, as opposed to purchasing three single quarts one can at a time, and my cost per gallon will drop to about $400.
That’s almost the same as my cost would have been had I purchased three quarts (130 x 3 = 390) but the good news is that I have an extra quart of paint in the event that something goes wrong with the project.
Anything Else That Might Help?
There are always tips to share, but the one that I think helps the most concerns the seal coat. This coat goes on wet and shiny and takes several minutes to dry and become dull. That’s a good tip if you aren’t sure the seal coat has dried. If it’s shiny, it isn’t dry.
But getting back to the shiny seal coat, this is your last opportunity to check your work before applying the color. A shiny seal coat will magnify problem areas like missed imperfections and deep sand scratches; all of which must be dealt with before the color coats go on.
It is far better to waste a little sealer by having to redo something than it is to waste a lot of expensive color and clear and still have to redo something. Got a question? Send it along.


