Repairing Trunk Lid Torsion Rods
When a Trunk Rod Breaks, You Can Shop for a Replacement. Or, Make a Repair and Work the Rod Back In Place.
TORSION (OR TORQUE) rods have been used to hold open trunk lids for many decades—and generally they do so without problems or failure.
But recently I had the unusual experience of having one of these rods break. The end of one rod broke off where it connected with the hinge and the trunk lid came crashing down. It sounded like something large had fallen off the wall and hit the car. When I noticed nothing on or up against the car, I proceeded to open the trunk lid. Its newfound weight told me right away that there was a rod failure of some kind.
Even though there was still one rod assisting the trunk lid, it felt extremely heavy. I had never given much thought as to how much lifting action these two torsion rods provide, but it’s substantial.
Once fully opened, the lid would stay up but that’s a time to be cautious. And don’t open or close any doors or it likely would come crashing down again.
A Closer Look at the Rods
There are two rods that run the opening width of the trunk and their tension can be adjusted. Adjustment is accomplished by using one of several notches in the rod support plate.
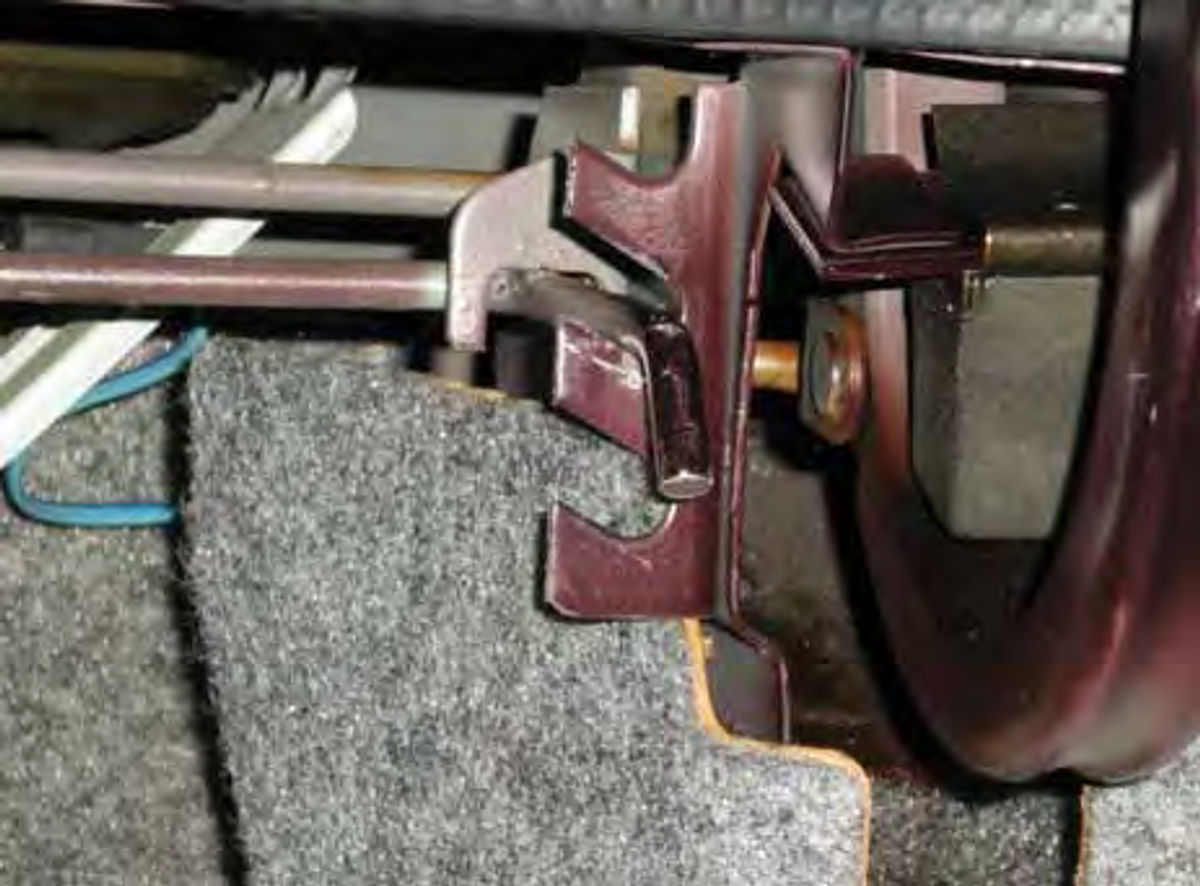
In my application, each rod has three adjustment options. Photo #1 shows these notches with the rod in the central location. Downward pressure is applied against these notches by the rod so the top cutout, though it may not look like the others, is also a functioning adjustment notch. Also notice in the photo several inches behind these is another notch that faces downward. You can see this supports the torque rod at the point where the rod makes its bend. In my instance, grabbing the torsion rods and feeling for looseness quickly identified which one had failed.
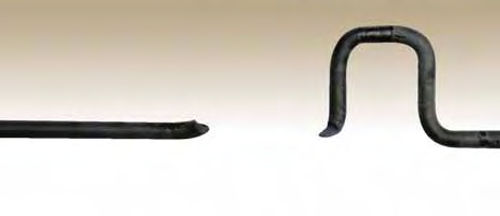
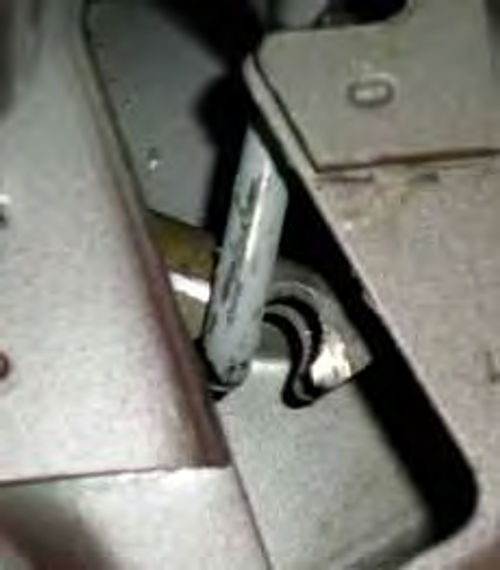
The fact that it no longer had any tension on it made for fairly easy removal. There was still some minor “fishing,” however, to remove the broken section. Photo #2 shows the portion that had broken off. This is the part that hooks up with the movable lever attached to the hinge itself that can be seen in photo #3. Typically this lever is not visible, but when the torque rod broke and I opened the trunk lid it let this lever drop and hang downward. That’s something to be aware of should you ever run into a similar situation.
Once I had identified the problem and went to close the lid, I could feel it binding. The lever you see hanging down in photo #3 was getting wedged within the hinge support (framework) and was pushing upward against the rear deck. Had I forced it closed there could have been external body damage. A temporary or let’s say “emergency” fix was accomplished by wadding up a section of newspaper and stuffing it between the hinge and the hinge support. This kept the lever from dropping down again. That and a “prop rod” allowed me to still make use of the trunk for the next several days until I could deal with the repair.
Repair or Replace?
These trunk torque rods are no longer available new for my ’86 Chevy Caprice so my options were to try and repair it, or crawl into the trunk of a “donor” car at a salvage yard and retrieve a replacement. My back told me to try and fix the one I had and limit my “in-trunk time.”

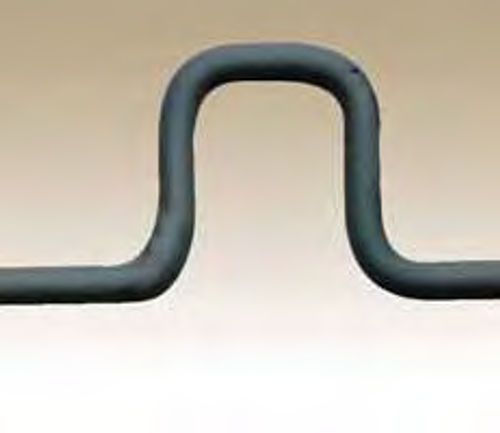
As they say in the medical dramas, “it was a clean break,” for the rod so the two sections were easy to match up, re-align and attempt to weld.
I removed the old paint and thoroughly cleaned the area.
Next I used a die grinder with a 3” cutoff wheel and grooved out the break line around the rod. This was to make sure there was good penetration when welding. To be on the safe side, consider scribing an “alignment line” between the two pieces. This will be a bit of insurance should you start to lose the fit during the grinding.
You can also consider tack welding the pieces together before grooving the remainder of the break area.
For welding, I secured both the rod and broken section in the jaws of my bench vise.
If you had a rod break and are not completely sure how the pieces should be aligned, you will need to remove the second rod to study the relationship of the bends.
Many people have a digital camera these days, so put it to good use and take several photos of how the rods are situated within your trunk before removing any. On my Chevrolet’s torque rods, the bends are aligned in the same direction.
A Stealth Weld
The location of my welding repair on the rod is hidden inside the hinge support channel so no one will see it.
I built it up slightly, leaving some reinforcement weld. I wasn’t exactly sure what to expect but the pieces welded beautifully like any low carbon steel.
The welding was performed with a Lincoln MIG welder using .035 wire and Argon-Carbon Dioxide shielding gas.
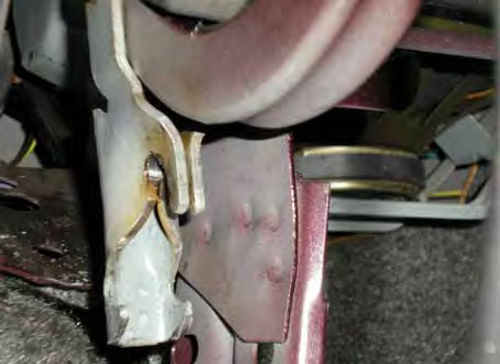
After the repair was completed, I covered the area with a couple of coats of spray can gray primer. Photo #4 shows the final results.
Putting It Back
Replacement of the torsion rod is fairly simple. First make sure you have the trunk lid secured fully open with a prop rod of some kind. While it may sound humorous, being locked inside your own trunk could be life threatening, or at the very least embarrassing. And even if the precaution just saves you from getting conked on the head, it’s worth it.
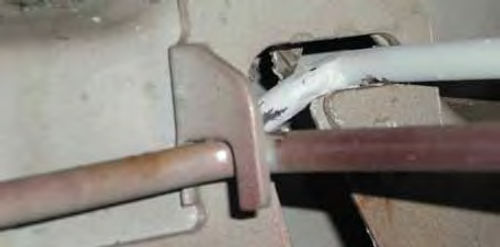
Next, you may need to remove some interior trim (if there is any). This vehicle has some fuzzy gray cardboard to dress things up, and while I could have let it remain in place, removing it gave me a bit more working room. It required the removal of one 1/4” plastic push pin and then a small sheet metal screw with a 1/4” head. Photo #5 shows the newly repaired rod (gray) being inserted through the opening in the hinge support. Keep the bend facing downward while proceeding to extend its end through the pivot hole visible in the photo.

Once that’s in place, the rod can be raised upward and slid into its slot as shown in Photo #6. Make sure the lever will engage with the torque rod as you see in Photo #7. You might have to twist the rod so that the offset is facing downward as much as possible and then reach in with a long screwdriver or something to lift the lever over it.
Remember, there are two of these rods so if you get confused about one’s positioning study the other one. If you’re replacing both, only do one at a time.
Once all is in place at this end of the rod it’s time to tension it. In photo #8 I am raising up on the torque rod (applying tension) while twisting the rod toward the vehicle’s center to get in position. A section of 12” long iron water pipe is being used for leverage in my right hand. With my left hand I am pushing downward to position the back portion of the rod into the rear notch you saw in photo #1. A pipe will probably work in most situations; however, some vehicles do require a special tool.
Should you encounter a situation where the spring assist becomes less than sufficient, adjust the rods to the next higher notch. Note that the adjustments don’t have to be the same for both sides. If both are already at the highest tension notch, the rods have become weak and will need to be replaced.
If you’re installing a pair of torsion rods that came from another vehicle, try them both at the lowest tension setting first, and progress higher if needed. These rods carry a tremendous load so there’s no need to work them harder than is necessary.