
A Quick Fix for an Oil Pump
After a Dozen Years the Engine Ran…But There Was No Oil Pressure. Fortunately, Some Oily Sandpaper Solved the Problem.
The engine hadn’t been started in 12 years…and when it fired up, the oil light on the instrument panel immediately lit up.
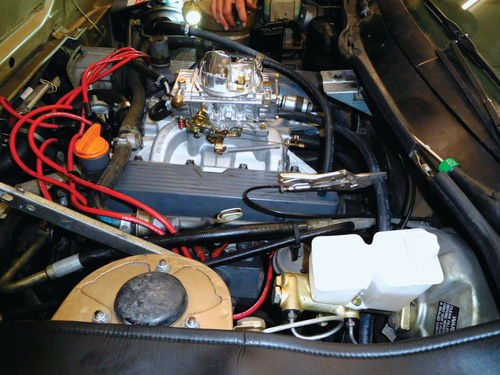
The engine didn’t sound right either. And we also had trouble getting fuel to the new Holley four-barrel carb. In order to get the fuel up and start the engine, we had to bypass the normal wiring and power the in-tank fuel pump with a battery charger hooked to the wire leads.
We suspected oil pressure issues and hooked up a mechanical gauge to get an accurate reading. It gave us a reading of zero. The needle just didn’t move at all. In addition, there was no oil in the oil filter. We weren’t feeling too happy. The customer already had about $2000 into an intake and carb conversion that was supposed to add 30 horsepower, so we didn’t want to think the engine was worn out.

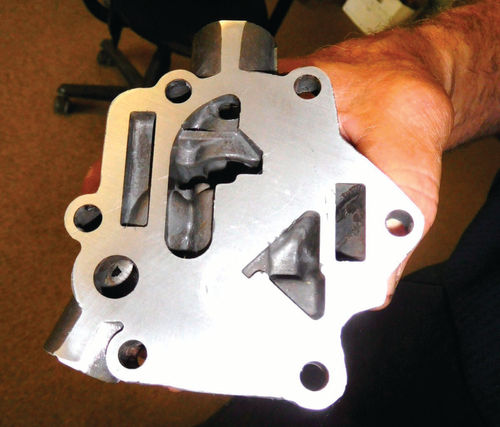
The car had an external oil pump. We pulled it off and took it apart and noticed two things: 1) The gasket between the pump body and the block seemed as if it had been damaged. When the pump was removed, part of the old gasket stayed on the engine. 2) The pump surface had some light scratches on it.
Grit Was the Culprit
“It’s a rotary vane type of oil pump made of aluminum,” said Dave Sarna, a former automotive technology instructor at Fox Valley Technical College in Appleton, Wisconsin. “Some grit got caught inside of the aluminum housing and it scratched and damaged the deck. Sometimes the oil pump gears get damaged, but luckily these look good.”
Sarna noted an aluminum oil pump can also get damaged by over-torquing fasteners. “The pump body warps if it’s torqued too tight,” he said.
Time to Go Shopping
We took out a parts catalog to see if a new or rebuilt oil pump was available. No dice.
We could get the gasket from several sources for about $2.50 plus shipping. Shipping on the gasket alone was around $7.50, more than twice what the part cost (somebody’s getting rich). New gears were available from another source for $193, but ours looked good so we decided to reuse them.
While waiting for the shipment, we disassembled the oil pump and cleaned all the pieces in the parts washer. The scratches on the flat surface or deck of the pump were obvious. They looked shiny, while the test of it had a gray color.
Making a Fix With Sandpaper

The shiny scratches on the deck were mostly circular in shape and the wear was actually very light. To be honest, I had my doubts that a small, thin new gasket and a couple of pieces of black sandpaper were going to get oil pumping again.
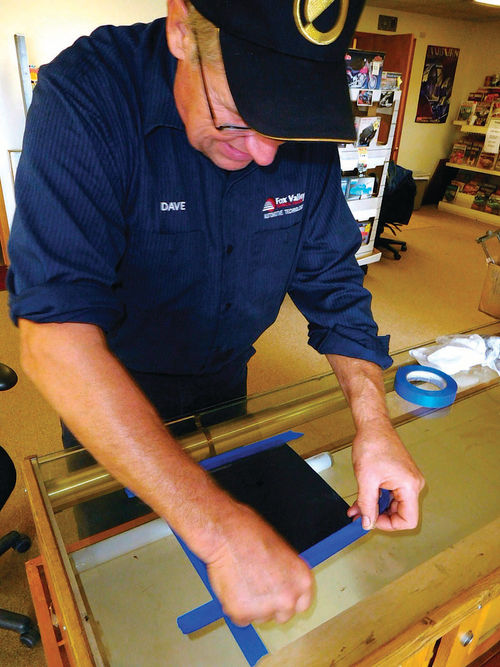
Dave Sarna took the pump body from the back area into the front of my shop, Gunner’s Great Garage, where we have an old wooden cabinet with glass windows and a glass top. Sarna explained that it’s best to use a pane of glass or a machinist’s surface plate under the black sandpaper when you’re trying to repair light scratches on the deck of an oil pump. “You need to move the pump over black sandpaper taped to a very flat surface,” Sarna explained. “Most people don’t have access to a surface plate, so a pane of glass works well.”
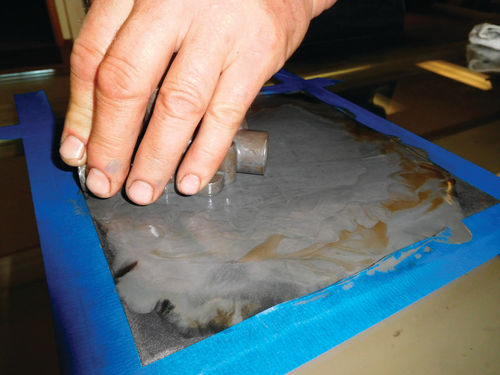
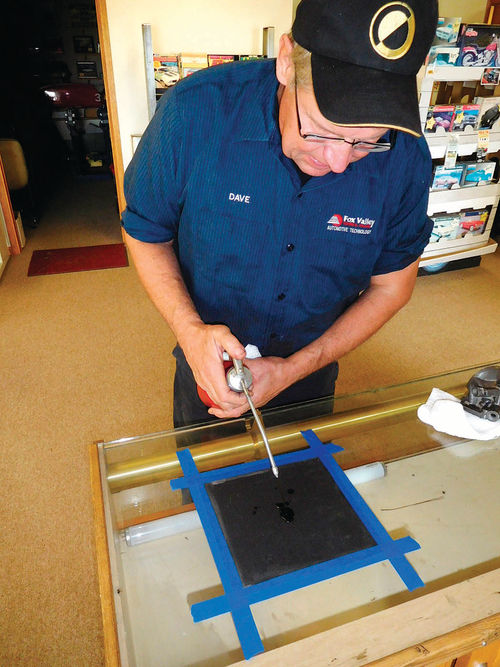
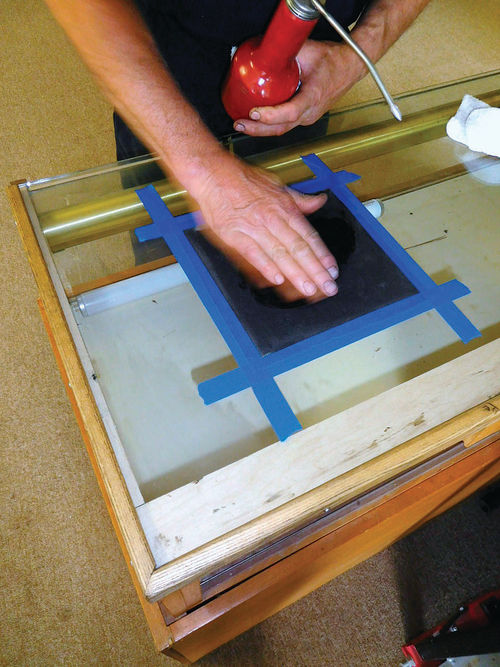
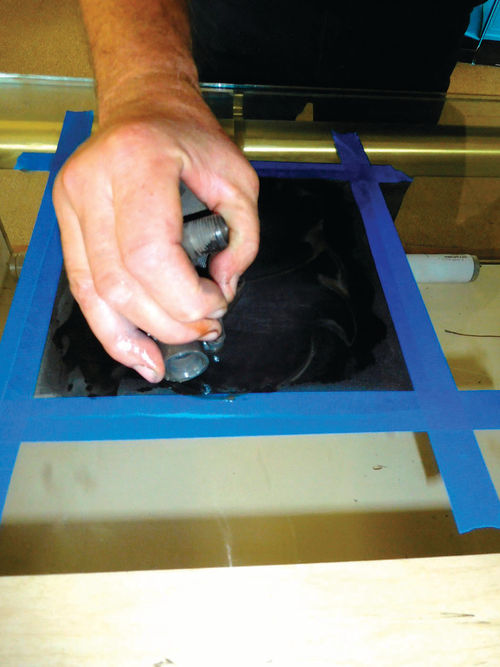
Sarna used painter’s blue masking tape to stick a piece of 240-grit black sandpaper to the glass surface. The blue masking tape can be removed more easily than regular masking tape once you’re through with the job. Once the sandpaper was taped down on all four sides, Sarna used an oil can to squirt a few drops of oil on it. Then he firmly gripped the oil pump with the deck side pushed hard against the glass. “You move the part you’re surfacing in a figure-8 pattern,” he said.
Editor’s note: Silicon Carbide sandpaper usually is black or blue-gray in color and often features a waterproof backing. It can be used on wet or dry surfaces and is a good choice for polishing or using between finish coats on metal, plastic and fiberglass. It is less likely to clog than other sandpapers. The author reports that “If you use 3M brand they call it ‘Imperial Wetordry Automotive Sandpaper’ and if you buy it at Harbor Freight they call it ‘Wet/Dry Silicon Carbide Paper.’”
Turning to a Different Paper
Sarna moved the pump smoothly back and forth over the oiled black sandpaper for 15-20 minutes. As he did so, the circular scratches in the deck of the pump began to disappear. When the surface became very smooth, he switched to 600-grit black sandpaper that was also taped down to the glass and lightly oiled. The higher-grit black sandpaper removed the sanding scratches left by the 240-grit sandpaper and made the surface of the deck even smoother.
Sarna pointed out that when you first begin the surfacing operation, the really high spots that were caused by the grit cutting into the surface will come off very quickly. “After they are gone, the aim is to flatten the whole surface down to the depth of the light scratches,” Sarna emphasized. “When you’re doing that, you’re taking off quite a bit of material and you don’t want that stuff to get into the engine later and ruin the bearings. What you want to do is give the whole oil pump a good bath in the parts washer and follow with a hot water rinse.”

After finishing the surfacing of the oil pump, Sarna reassembled the pieces. The cavity for the gears was packed with petroleum jelly (not grease), as recommended in the workshop manual for this particular car. The new gasket was installed during the reassembly steps. Then the oil pump was re-installed into the opening in the engine.
Still Some Problems to Be Solved
At this point the electric fuel pump was still being energized with the battery charger and the mechanical oil pressure gauge was still hooked up to the engine. When the engine started, the gauge showed 50 pounds per square inch of oil pressure. Our oil pump repairs had worked.
Since the engine hadn’t been run in more than 12 years, it was slightly noisy at first until the hydraulic lifters pumped up sufficient oil to lubricate the valves. But it didn’t take long before the engine sounded normal and Sarna dialed in the new Holley carb. The engine was running pretty strong, but there was some roughness. Sarna listened and took a pair of Vise-Grip needle nose pliers to pinch off the vacuum line to the power brake booster. The engine immediately smoothed right out, making it clear that a new or rebuilt brake servo was needed.
We still had one problem remaining… the fuel pump could only be energized remotely, rather than by the ignition key. An Internet search turned up the reason—the fuel pump circuit for this car sends power through the ignition switch, the oil pump sending unit, an inertia switch and then to the fuel pump. We had removed the oil pressure sending switch to hook up the mechanical oil pressure gauge. Unhooking the gauge and putting the oil pressure switch back solved the problem.
The only mechanical fix left is to send the brake servo out to be rebuilt. After that we should have a smooth-running engine with good oil pressure.


