Searching FOR A PERFECT GARAGE FLOOR COVERING
He’s Tried Several Approaches Over the Past Three Decades. Let’s See How This One Works Out.
As proficient restorers, we take our engine overhauls, transmission rebuilds, and pristine paint jobs in stride. When challenged, we learn the necessary skills; seek advice from fellow club members or farm out the job to a trusty expert. That’s the easy part of our hobby. What’s tougher is creating and maintaining a pleasant working environment for restoring and showcasing our prize possessions. What I’ve learned over the years is that regular maintenance is essential to keep my man cave from deteriorating into a grease pit.
The most vexing concern is what to do with the floor. In my case, 60 percent of the space is the shop and display area bordered by tool boxes, work benches, shelving and storage cabinets. The remaining 40 percent, accessible by a double-width overhead door, is the high-traffic zone. Daily drivers come and go, bearing evil drippings in the foul weather months.
Roll Out the Carpet
Over the years I’ve tried different floor solutions with mixed results. The epoxy/urethane coating professionally installed when the aforementioned 60-percent room was added 28 years ago has held up well because I was careful not to gouge that surface with jack stands and the sharp edges of engine blocks drug hither and yon.
My creative trick for that area was to roll out vast expanses of salvaged carpeting. This protected the underlying paint from abuse, soaked up errant liquids and provided a surface friendly to heads and elbows during the inevitable under-car visits. As soon as each of my projects returned to its wheels, I rolled up the soiled carpeting to replace it with fresh material left at the curb by a neighbor. The color coordination was usually less than ideal, but as a garage flooring material, free or cheap carpet is hard to beat.
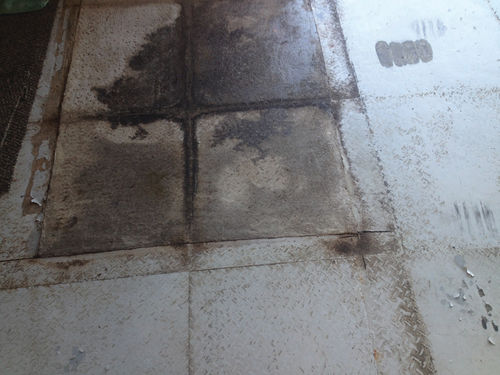
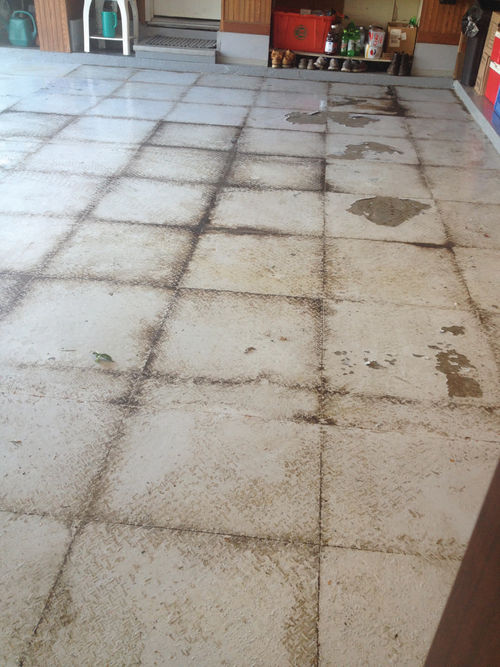
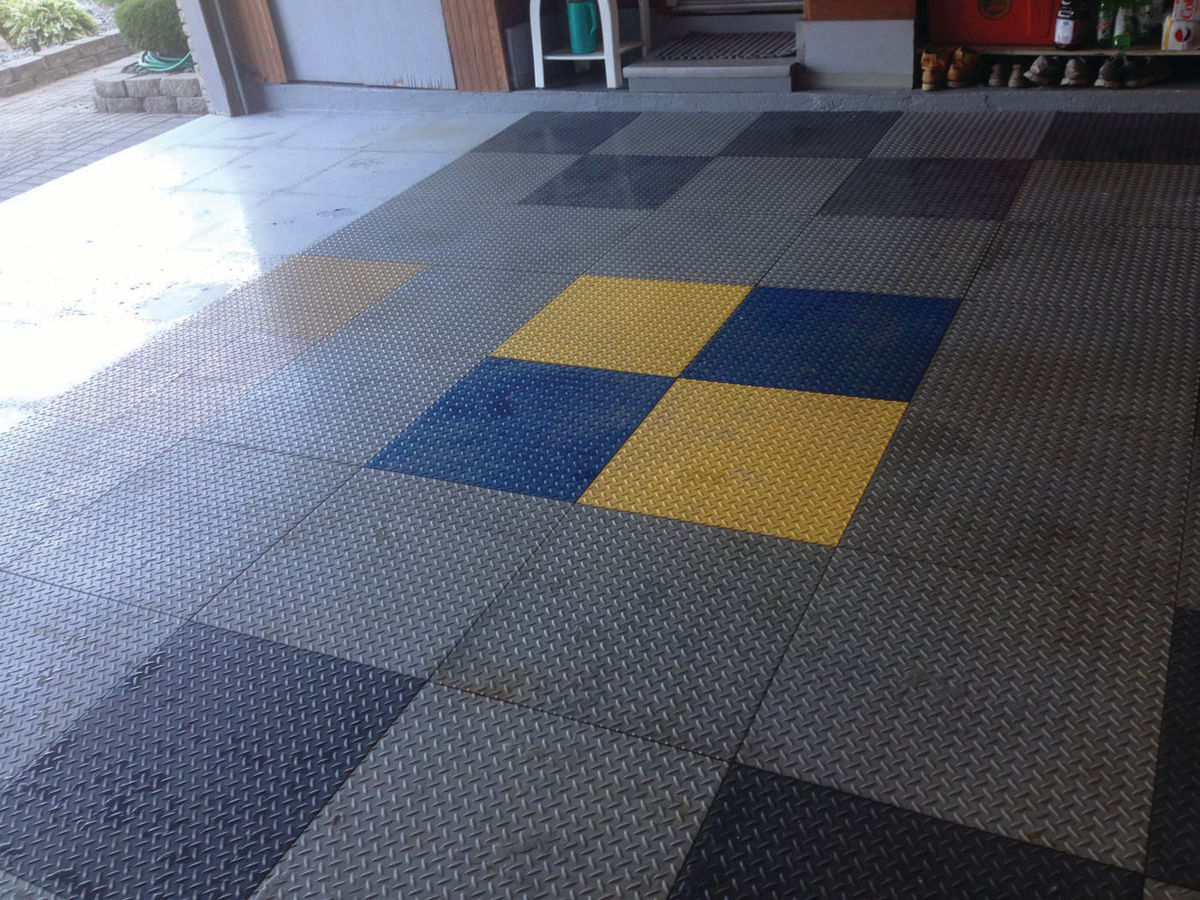
Unfortunately, when weather is a factor, the half-life of recycled carpet can be measured in weeks. On the high-traffic portion of my garage, signs of wear and tear were quite evident in my professional epoxy/urethane paint after a decade or so of use. For the sake of experimentation and to save money, I chose the do-it-myself approach for the refinish. After liberally scuffing the surface with a floor sander, I rolled out paint obtained from an industrial coatings supplier. The resulting two coats gave another decade of service before screaming for attention. To postpone the inevitable, I tried ribbed rubber matting one winter with not very satisfying results, followed by adhesivebacked plastic tiles. The tiles let you indulge your artistic side though they’re expensive and dripped oil and coolant will infiltrate their inevitable gaps. After six or seven years of plastic tile artistry, I was ready for Plan E.
A False Start…Then We Connected
Big box stores and paint retailers offer epoxy materials galore. Unfortunately, here’s what happens with most storebought materials: a car rolls in from the road, the combination of heat in the rubber and the weight of the vehicle prompts a chemical reaction between the tire and the floor coating. Then, when the car leaves, it takes a patch of epoxy paint with it. Don’t let that happen to you!
My goal was an attractive finish with at least a decade of durability. This time expense was a lower priority than confidence in the results so I shopped online for a local professional with pristine credentials. When the first contractor stiffed me on installation day, I turned to PremierGarage. This enterprise touted 195 North American locations on its exquisite website premiergarage.com.
The local MotorCity sales rep hooked me with his pitch citing premium materials, lots of satisfied customers in my area, and a lifetime warranty.
His quote of $4.75 per square foot was steep but not astronomical. The fact I had to wait my turn for a month convinced me this was a successful business unlikely to disappear a month after my job was complete.
PremierGarage’s Jerry Mullen and Elbert Mauldin showed up on schedule ready to work. They toiled for seven hours over three days and never griped when I asked questions or took the occasional picture.
Prep and Begin the Project
My preparation consisted of stripping the plastic tiles and removing most of the adhesive residue with solvent, soap and water. I also hung sheets to diminish the amount of dust scattered from the work area into the 60-percent portion of my garage. It soon became clear most of this effort was unnecessary.
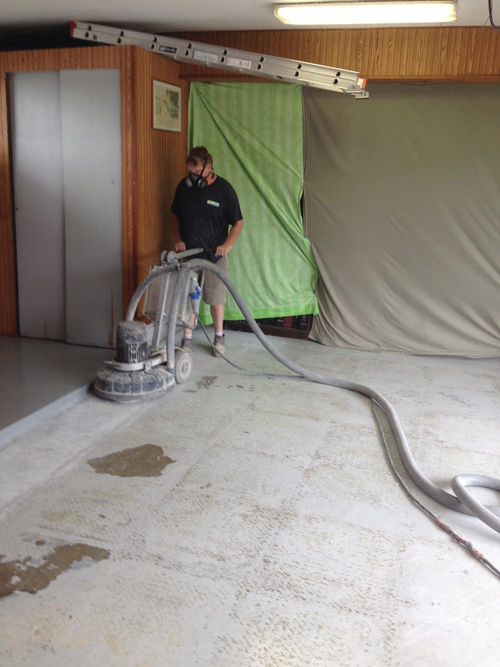
Premier’s first step was to attack the floor surface with a 5-horsepower electric motor slowly rotating a diamond grinding wheel. The dust produced during this step was collected by a powerful vacuum cleaner connected to the grinder with a large flexible hose. Edges and corners were stripped using a smaller grinder also wielding a diamond cutting tool. Short of removing every last trace of old paint, the grinding operation properly exposed the underlying concrete while leveling out every seam and joint.
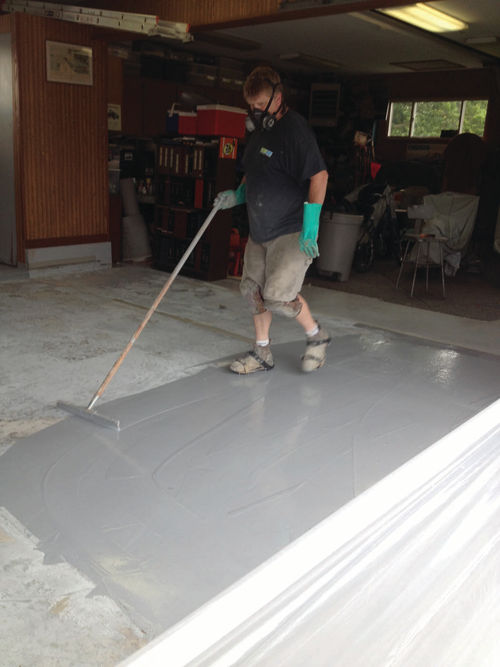
After carefully sucking up any hint of debris with a second vacuum cleaner, joints and cracks were filled with an acrylic latex caulk called “epoxy coat.” The crew waited half an hour for that material to cure before applying the first layer of two-part epoxy with a squeegee, followed by leveling with a finish roller. Mullen wore athletic shoes with long spikes that allowed him to walk on the wet surface without disturbing the freshly applied material.
Round Two Brought a Change In Plans
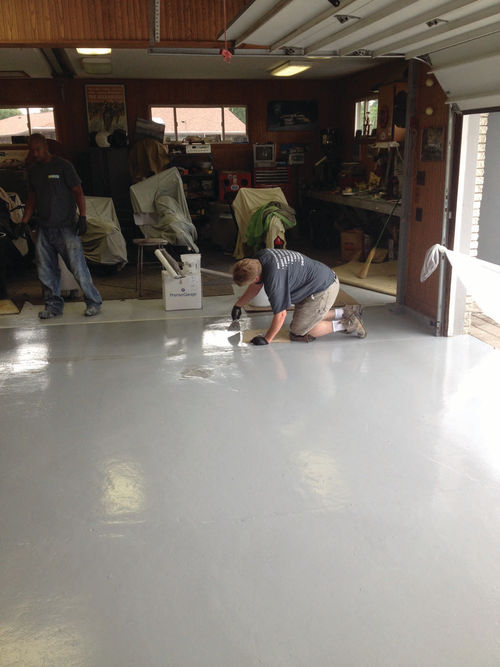
On their second visit, the Premier boys knocked down all the rough spots— such as the remaining edges of old paint raised by the new coating—and added filler caulk in a few locations.
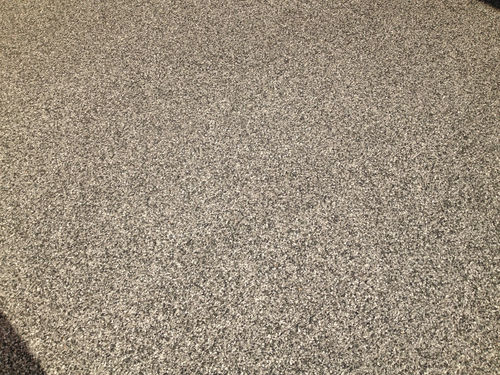
After I pointed out residual flaws, the three of us agreed upon a significant strategic change. Instead of the solid gray-colored finish I had originally intended, we decided to add vinyl color chips to achieve three ends. This mix of white, dark gray and light gray speckles masks underlying flaws, vastly diminishes the traction underfoot and reinforces the final finish coat. Added and spread immediately following the second coat of two-part epoxy, the color chips are the floor’s crowning touch.
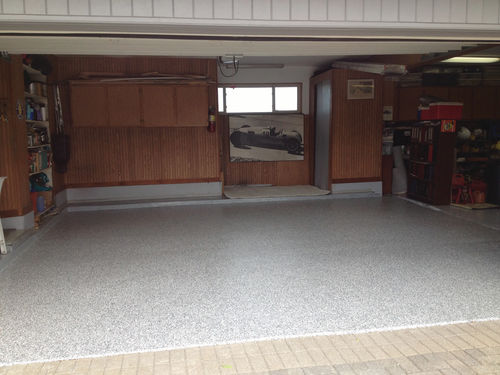
The Finished Flooring
On their third visit, the crew applied the final “polyasparitic polyurethane resin” material after some minor touch-ups to the color chip layer. This clear liquid formulated by Sika Corp. was poured, squeegeed, then rolled out as before. In stark contrast to my two previous epoxy paint treatments, little or no fumes were generated throughout this entire procedure.
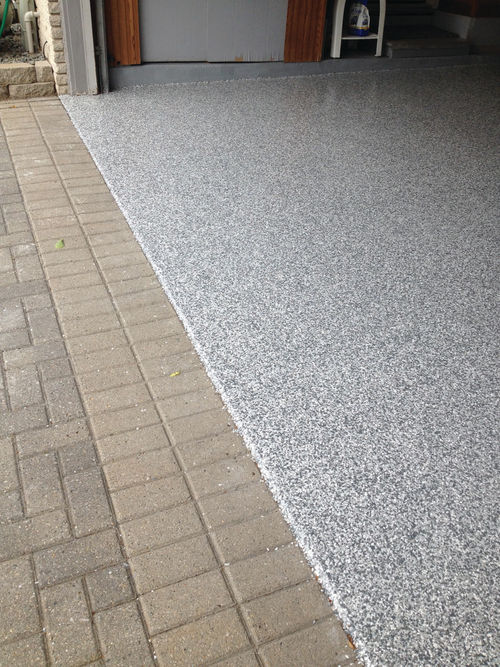
Now that the coatings have cured and I’ve walked across the floor, I’m thrilled with the final results. Ironically, the slightly textured finish resembles carpeting. PremierGarage did a quality job with perfectly finished edges and no mess left behind for me to address. While some might consider $1800 a huge price for a two-car garage coating, I consider this a worthwhile investment that I’m proud to show off to friends.
What I can’t yet share with you is exactly how durable this finish will be. I promise to update this report in a year or two to fill that gap. In the meantime, I wish you the best of luck maintaining your castle’s auto sanctuary.


