
Replacing a Speedometer Cable
The Replacement of a Defective Cable is Just Part of the Task. First You Have to Figure Out How to Get at It to Remove It.
One of the first basic repairs my recently acquired 1982 Toyota Celica Supra P-Type needed to become roadworthy was the replacement of the speedometer cable. After all, it’s pretty important to know how fast you’re going, especially if you want to pass the State Inspection.
The speedometer cable runs from the back of the gauge cluster, through the firewall and down the engine bay under the car to where it screws into the transmission. Replacing this cable requires pulling some of the dashboard apart to disconnect it from the back of the speedometer. Dashes tend to have hidden fasteners holding them in place. Being unfamiliar with what lies beneath those panels and disassembling things incorrectly is how parts tend to get broken. In this case, we’re talking about parts that may be hard, if not impossible, to repair or replace.
Upon initial inspection, the dash appears to be mostly clipped in place. It’s tempting to go to town with an interior tool and just start pulling and prying on panels to get it apart. But I know these ’80s Toyotas—they rarely used clips on the dash assemblies. There are usually hidden bolts and screws holding everything together. But where are they on this dashboard? I didn’t have a copy of an OEM repair manual for Mark II Supras at the time of this job, and the only write-up I could find online no longer had pictures available for viewing (that, or you had to be a forum member to view them).
Determining the Process…
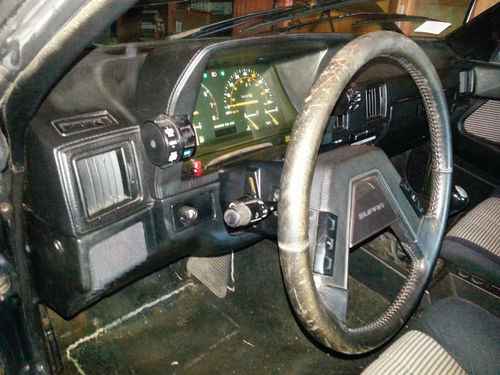
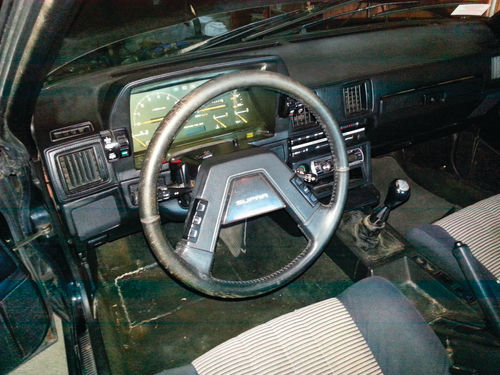
After messing about, poking, prodding and gleaning what information I could from the aforementioned photo-less forum thread, I figured out the proper sequence for disassembling the dash around the steering wheel so as to gain access to the gauge cluster, without damaging anything in the process (Photo 1).
STEP 1: Remove Bottom Dash Panel Under the Steering wheel
That’s right, folks. You work from the bottom up here to get to the gauge cluster. There are three panels that need to be removed in a certain order before you can access the cluster. Thankfully, this is a pretty simple job once you know where everything is located.
First off, there are three Phillips screws on the bottom dash panel under the steering wheel that need to be removed (Photo 1a).
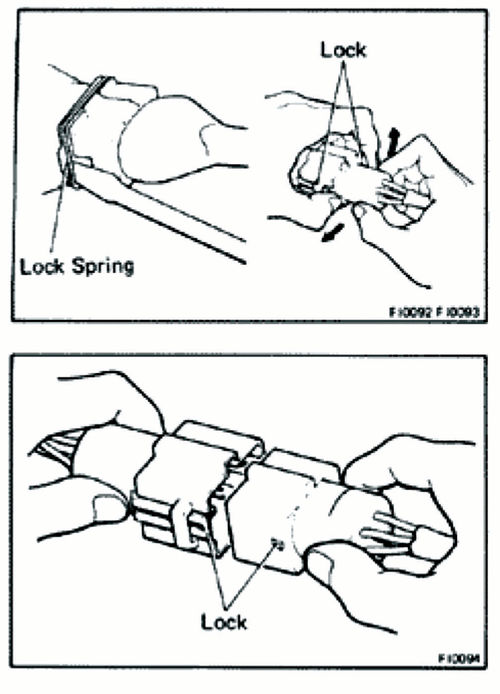
And there’s a plug that needs to be disconnected. These style plugs are kind of a hassle to get apart, you have to pry the tabs out while pulling them apart at the same time. I find using a shop towel helps with getting a good grip. (Photo 2a is from a manual showing how to pull apart electronic connectors without damaging them.)

Once the plug is disconnected, you can remove the bottom panel and set it off to the side. It clamps onto the steering column via a simple clip, so you may need to give it a good jiggle or two. (Photo 2b. The bottom panel is shown with the release end of the parking brake cable to the left while the panel clamp that helps hold it onto the steering column is to the right.)
STEP 2: Remove the Middle Dash Panel.
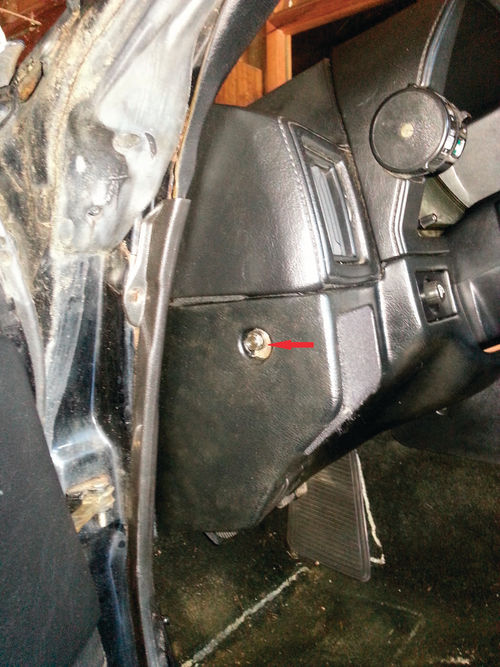
Next, remove the middle dash panel that surrounds the steering wheel. Photo 3 shows a 10mm bolt that needs to be removed on the outside of the panel facing the door.
Then there’s the part that took me a few minutes to figure out. You have to pop two panels out with a flathead screwdriver or interior tool in order to access the rest of the bolts/nuts still holding the middle panel in place:
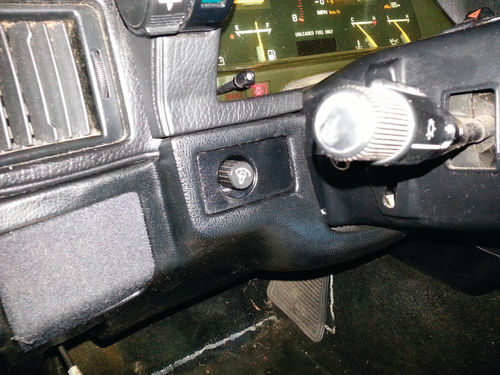
The first panel is behind the dimmer switch to the left of the steering wheel (Photo 4). The dimmer switch knob simply pops off to allow removal of that panel (Photo 5).
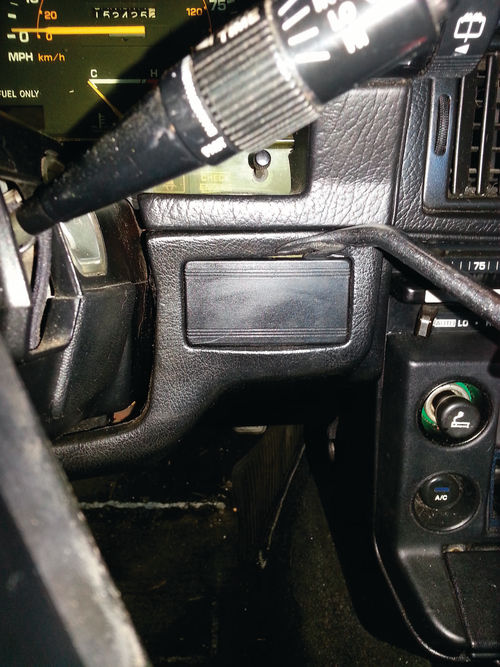
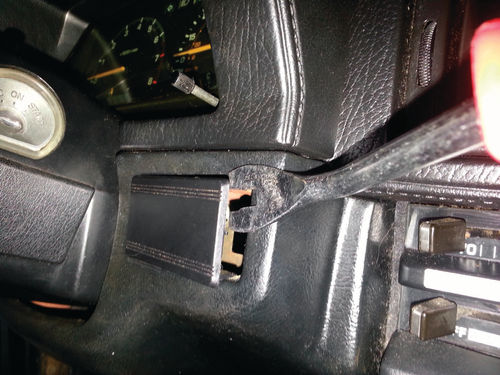
Next comes the blank panel to the right of the steering wheel. (See Photos 6 and 6a. To exercise extra care when removing these panels, wrap the end of your removal tool with a bit of shop towel or other soft cloth to keep from accidentally scratching/marring the dash or accessories.)
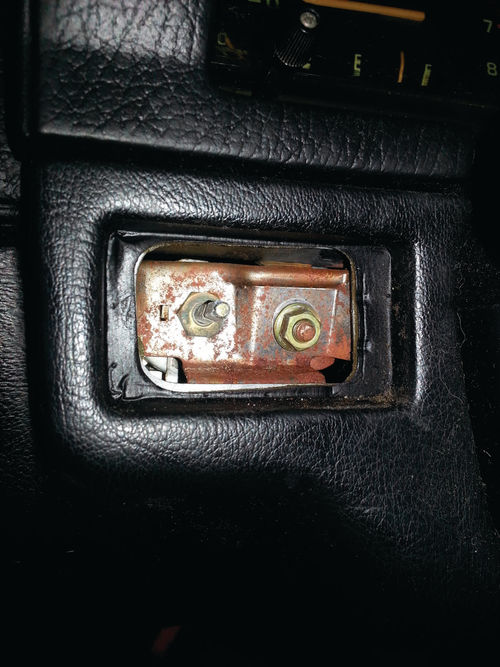
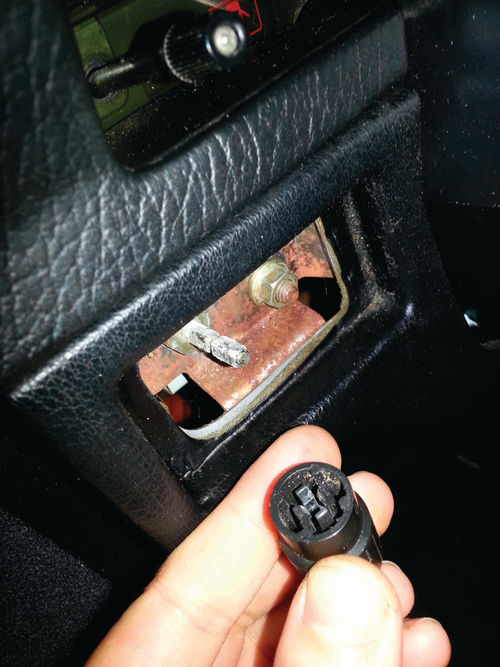
Underneath the dimmer switch panel you will find one 10mm nut, remove that (Photo 7).

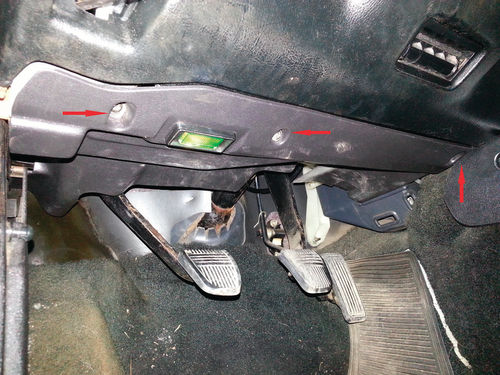
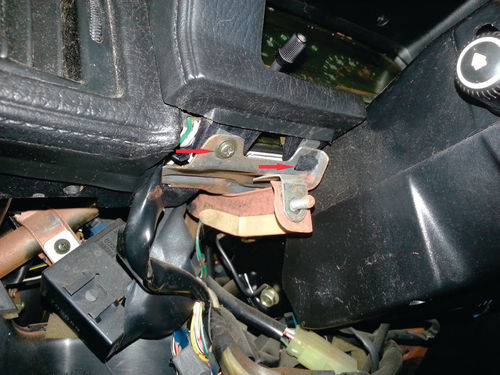
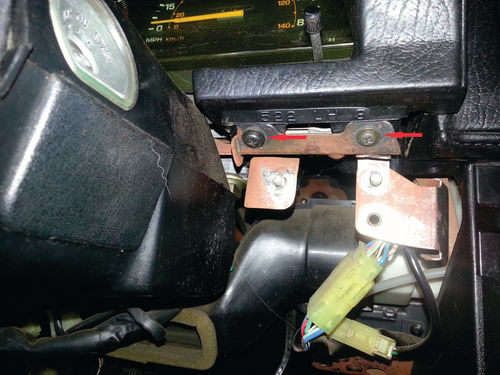
And under the blank panel you will find three 10mm nuts and one 10mm bolt. Remove those. (See Photo 8. The red arrow points to an unseen third 10 mm nut.)
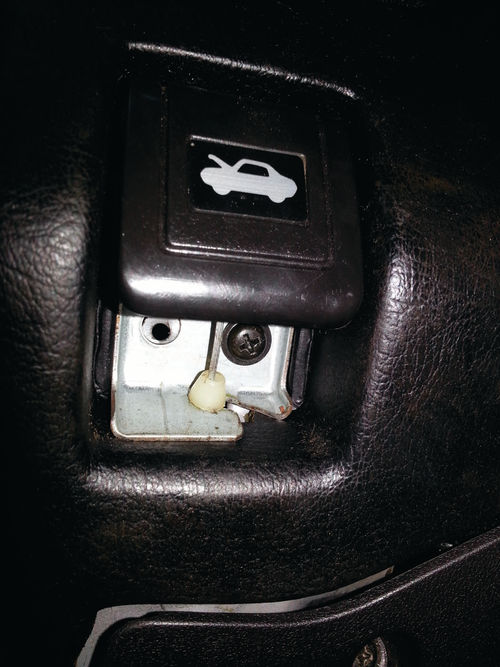
Next, remove the Hood Release. There are two Phillips screws that hold the bracket in place. (See Photo 9. Some of us only have one screw here, it seems. Note to self: Get replacement screw.)
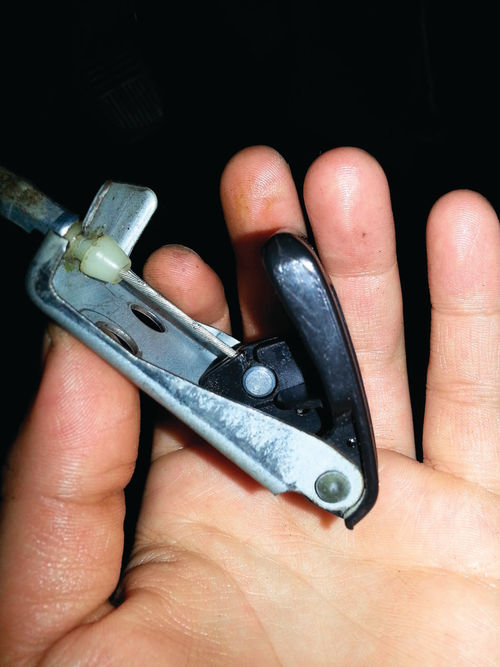
And then the release cable just slides right out (Photo 10).
Unplug a few connectors, and you’re able to move the middle panel out of the way and go on to the next step. You may have to gently wiggle it about to move the panel off the metal brackets it’s been sitting on for however many years.
STEP 3: Remove the Cluster Housing and Gauge Cluster.
Once you have the middle dash panel out of the way, you will have access to the last piece of the dashboard surrounding the gauge cluster.
There’s a total of six Phillips-style screws that need to be removed from this panel:
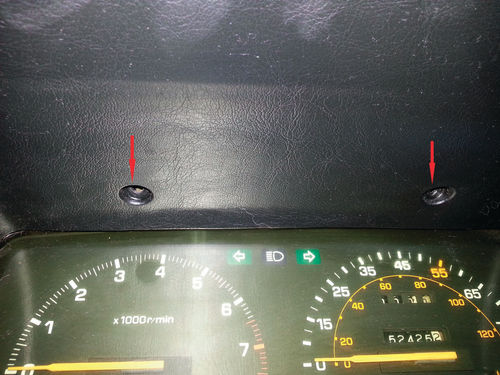
There are four on the bottom, including two each to the left (see Photo 11, although I guess some of us have just one screw left here as well).
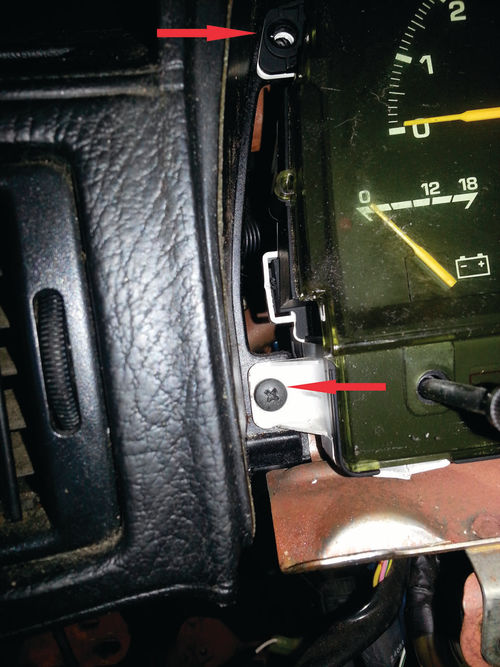
And there are two to the right of the steering wheel, on top of the brackets revealed by those pop-out panels. (See Photo 12. In case anyone notices/wonders like I did… I’m pretty sure it says “LH” on this right-side bracket because these cars were manufactured in both left- and right-hand drive and I’m guessing this denotes a left-hand drive vehicle.)

Then there also are two screws on top, attached to the gauge cluster itself (Photo13).
Once those are removed, you can move the housing out of the way and now access the gauge cluster, which is held in by place by four Phillips-style screws, two on the left (Photo 14) and two on the right (Photo 15). Removal was in progress when I took these shots, that’s why a screw is missing from each side.
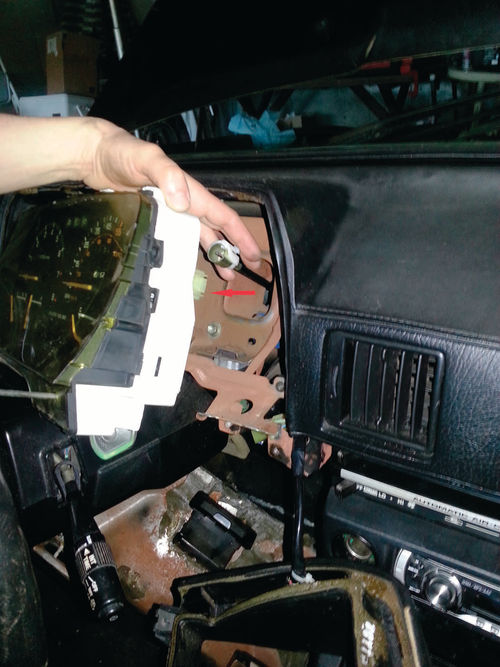
And, voila! You can now pull the gauge cluster forward, and disconnect the speedo cable from the back of it. It will be difficult to move the cluster much until the cable has been disconnected. Slide a hand in behind the right side of the gauge cluster and you’ll feel the cable. The clip holding it in place comes out easily once you find it; just give it a good tug and it should come out. (See Photo 16. The red arrow denotes where the cable hooks into the back of the cluster.)
STEP 4: Removing the Damaged Cable
Now you can start removing the damaged cable.
There’s a gray grommet that holds the cable in place in the firewall. To remove it, simply squeeze while pulling to pop the grommet out of place. Now you can pull the cable through the firewall. The clip end of the cable likes to snag on things, so be sure to guide it gently (Photo 17).
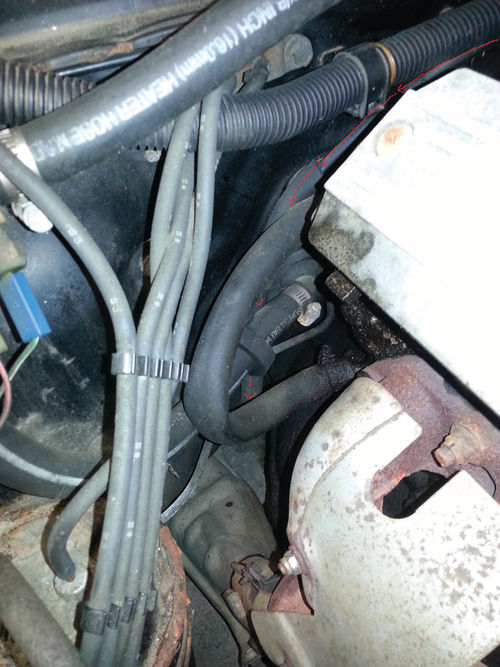
The cable runs along the firewall under part of the wiring harness, and is held in place by a clip. The cable simply slides up and out of it (Photo 18).
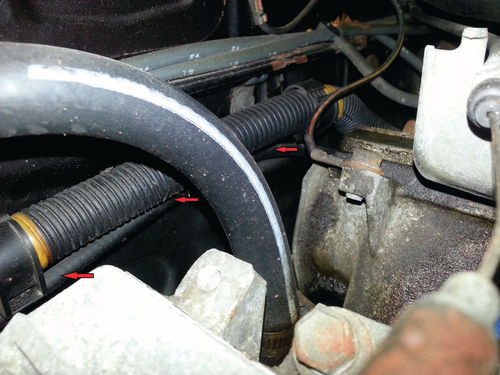
From there, it’s bunched in with some other cables and wiring, and continues running down under the car between the exhaust and transmission (Photo 19).
It’s always wise to carefully study the original layout of any cables or wires you may be replacing when restoring an older vehicle, or any car for that matter, so you can replicate it when installing the new one. I find taking lots of photos along the way can be very helpful, as they can be used as reference points later.
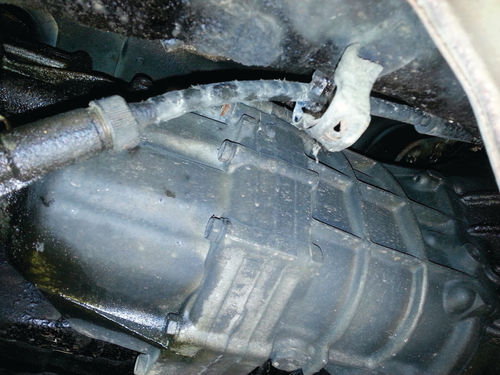

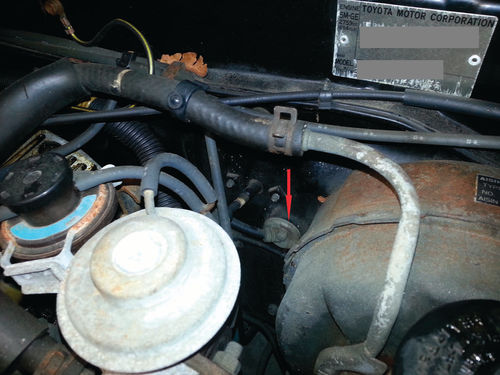
Now it’s time to jack up the passenger side of the car, so you can crawl under the Supra and access where the speedometer cable connects to the transmission. If you look under the car about halfway down, you will see the transmission and where the cable screws into it via a simple round knob (Photo 20).
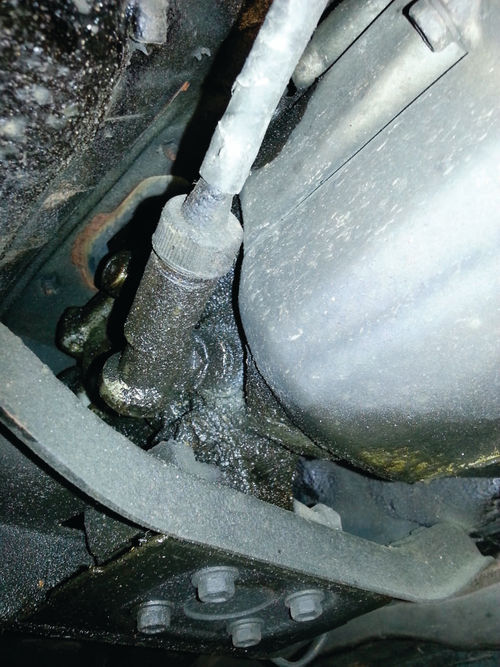
These are generally hand-tight, but on older cars sometimes a pair of pliers is required to break loose the bond after decades of the part not being moved. There’s one clip along the undercarriage that holds the cable in place. It simply slides out of there (Photo 21).
Now we’re done with the disassembly and can start installing a new cable! But first...
STEP 5: Confirm You Have the Correct Part
Among the quirks of these Celica Supras… originally, the speedometer cables were connected to the transmissions via 90-degree adapters, rather than the cable itself screwing directly into the transmission. I’m not sure why this was done. My guess is that since these cars evolved from a pre-existing platform (the Celica), it was less expensive/easier for Toyota to create an adapter for cables currently in use that may have been a bit too short for this new application, rather than design and manufacture entirely new cables. This can be a bit confusing when buying/replacing speedometer cables for this model nowadays. I was able to find some brief information online about someone replacing the speedometer cable on their Mark II Supra. They were able to eliminate the 90-degree adapter altogether, since the replacement cable they received was longer than the original, and it worked fine without the adapter after installation.
So I decided to confirm that my replacement cable was long enough to proceed without the adapter, at which point I too would simply bypass it. If not, well, then, I would call my boys at my local auto parts store to see if they have an adapter on hand. Apparently a “90-degree speedometer cable adapter” is a fairly common part (Photo 22).
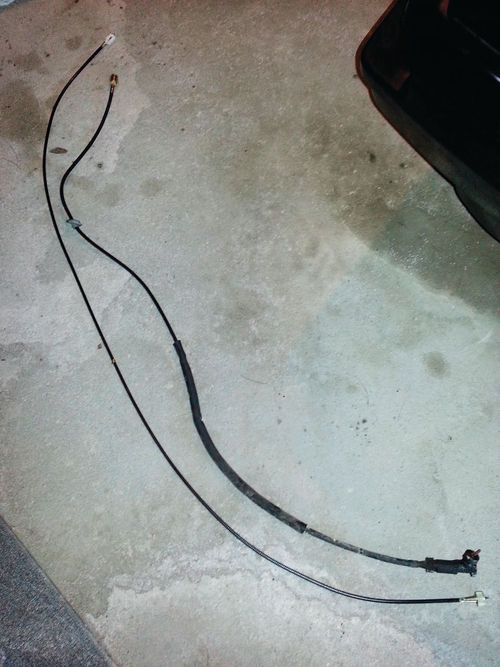
After removing the original cable from the car, I laid it side-by-side next to the new one and found that it was indeed long enough to be installed without the need for an adapter (Photo 23).
However, I noticed the new cable was lacking a firewall grommet and extra insulation in one area where it nears the exhaust. So, while I had the cables next to each other, I marked the new one with the locations of the grommet and insulation based upon where they were on the old one (a silver sharpie or whiteout comes in handy here).
I then cut the grommet and insulation off the original cable with a sharp razor blade so I could install them on the new cable once I had it back in the car.
STEP 6: Install the New Cable and Reassemble the System
Once you’re confident you have the right part ready for the job, you’ve cleaned out any gunk inside the transmission where the cable connects, and you’ve lubed up your transmission end of the cable, you may proceed with installing the new one.
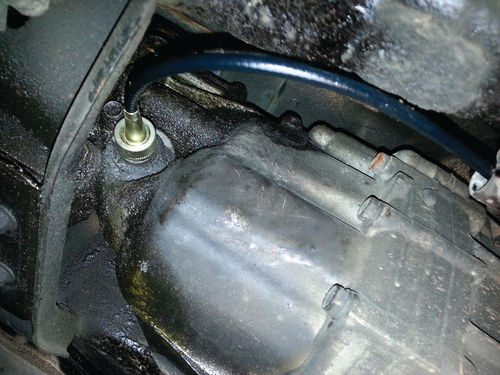
I prefer to do this from the transmission end first, tracing my way back along the path of the original cable to where it connects with the gauge cluster in the dash. (Photo 24 shows the new cable screwed into the transmission.)
Once I had the new cable routed up into the engine bay, I put the car back down and finished running the cable along the firewall. At this point, I wrapped the gray firewall grommet from the original speedometer cable around the replacement, popping it back in place as I ran the cable through the firewall and fed it into the cabin. I never wound up re-using the original cable insulation as I found it wasn’t necessary. Then I crawled back into the cabin, pulled the cable through the firewall being careful not to be too aggressive should the end clip that attaches to the gauge snag on anything, and popped it into place in the back of the gauge cluster.
From here on out, it’s simply a matter of putting the cluster and dash panels back together in reverse order of disassembly. The Dimmer Switch panel and Blank Access Panel simply pop back in place and the Dimmer Switch Knob itself just slides back on.
Remember to reconnect any electrical plugs you disconnected along the way! And you may as well take the time to clean everything up while you have it apart, especially if you’re lucky enough to have an intact dash, a rare find in a vintage Toyota (Photo 25)
Next, Renata will discuss the Toyota Supra and its history, and maybe talk you into wanting one for your garage.


