
THE LITTLE PRINZ PART 10

The front end comes apart, the parts hunt comes together and the body shell comes home.
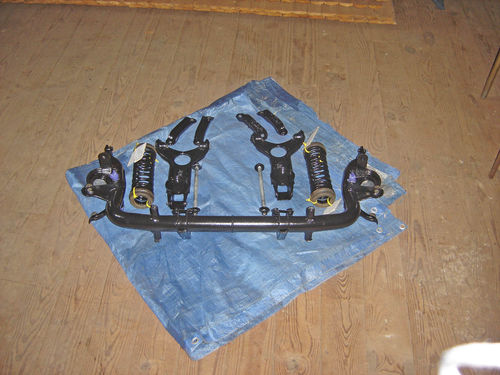
When I last checked in, I had gotten most of the front end apart after pressing, drilling and cursing my way through the many rusted cotter pins holding me back. I then began the search for replacements for the variety of rubber bushings that are used to dampen vibrations between the wheels and the main suspension carrier. In the meantime, there were two final pieces of the front end that still needed to be addressed: the kingpins.
Final Disassembly Turns on Kingpins
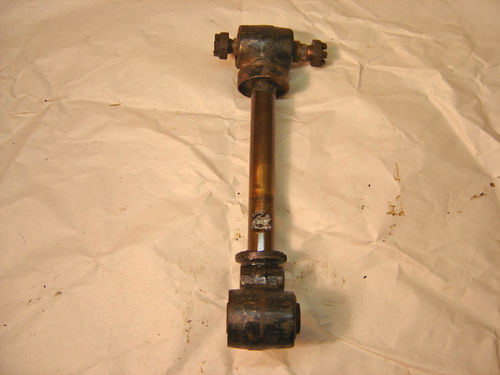
The wheel hubs ride on kingpins and bushings so they can rotate from side-to-side, kind of like a door on a hinge. One was very stiff, so I needed to see whether it was just old with dried grease holding it or if there was something else going on. Either way, both sides needed to come apart for cleaning and inspection.
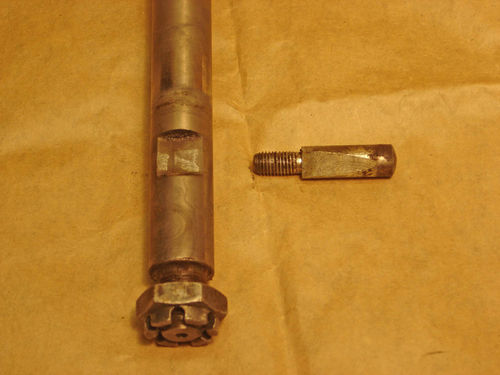
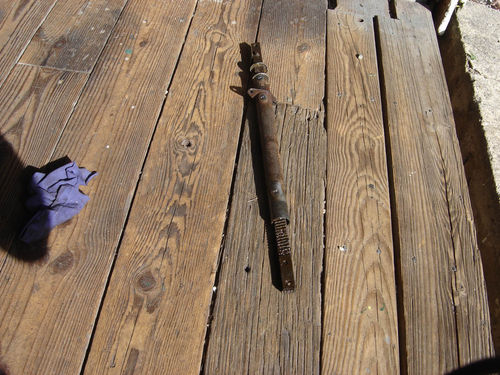
The top and bottom of each kingpin has collars that attach to the upper and lower control arms. The top collar is an integrated part of the kingpin itself, which slides down through a sleeve in the wheel hub to mate with the bottom collar, which is a separate piece. The kingpin rides on a bronze bushing in the sleeve and is lubricated through a grease fitting. A nut and (yet another) cotter pin at the bottom keep everything together. A small wedgeshaped bolt also passes through the bottom collar and engages with a slot in the kingpin to further lock things tight. Those wedge-shaped bolts were the first things that needed to come out.
While these bolts had a nut and washer at one end, the other end was rounded. They are wedges and are not intended to be turned, therefore no need for a hex head. So, instead of rotating them to back them out, they needed to be pushed straight through. This proved surprisingly difficult. I first naively tried tapping them out with a brass punch. Nothing. It was clear I’d have to find a way to press them out.
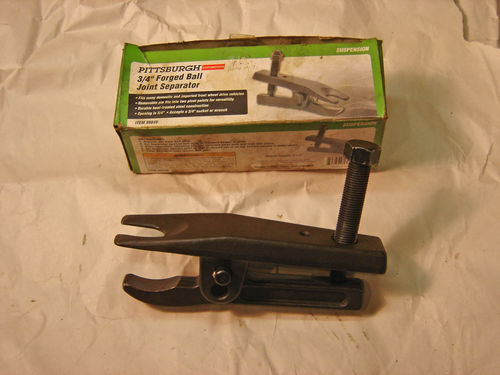
The manual, once again, called for the use of a special little pressing tool to extract them. As a substitute, I found my small ball joint separator could be made to work. It’s a cheap tool purchased from a discount big-box tool store for a previous project, but it has proven very effective on a number of occasions. I found a large, deep nut to put under one side of the separator, fitting it over the rounded head of the wedge bolt to give it room to push out. On the first hub, I was surprised how much force it took to free that retaining bolt. But the tool proved its worth once again. As in the removal of pressed-in ball joints, I cranked away on the separator until the bolt finally released with a loud “pop.”
I wasn’t so lucky on the second hub.
This time, no amount of pressure from the tool would free the bolt. I had soaked it in penetrant, as I did the other, so I expected it to give. But when I saw the bolt was actually starting to bend, I backed off. The last thing I needed was to bend it over or snap it off. I was able to straighten it gently, so it could at least pass through the opening if I was able to coax it loose somehow.
I went through my usual litany of heat, penetrant and pressure to try to free the retaining bolt, with no luck.
Finally, I decided to try adding a little vibration into the mix. A friend of mine has always extolled the virtues of using vibration to loosen stuck components, especially when trying to overcome a shear force, as was the culprit in this instance. I’ve followed his advice with good results in the past, freeing things like ball joints and tie rods in minutes after having wrestled with them for hours with the traditional pickle fork and hammer.
So I did one final soak of the bolt with penetrant, applied pressure to it with my ball joint extractor and turned away to set up a small air hammer I have to see if the combination of penetrant, pressure and vibration might finally do the trick. Perhaps just the fear of a good throttling by the air hammer got the part quaking on its own, because while I was still setting up I again heard a loud “pop” and looked over at the workbench to find the bolt had finally come free. Whew! A lucky break.
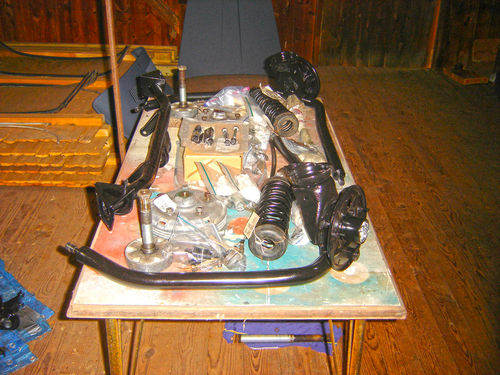
The kingpins and the bronze bushings they ride in actually looked OK. However, there seemed to be very little grease present and washers that are supposed to be at top and bottom were either missing or had disintegrated. I’m not sure whether they are supposed to be steel or some kind of plastic or fiber. Where the bottom one would sit there was a thick, crusty layer that looked like either dried, dirty grease or the remnants of what almost looked like a cork gasket (?). Perhaps these were soft washers that were there more to provide some sort of grease seal than a wearing surface. More items to add to the parts hunt…
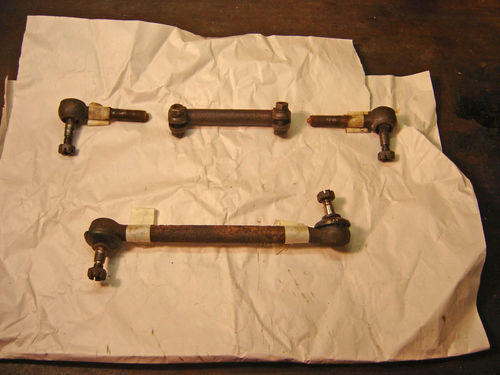
Fortunately, I had an easier time with the tie rods. As on most vehicles, the tie rod on one side had adjustable ends, one with a left-handed thread and the other right-handed, while the other tie rod had fixed ends. The adjustable one came apart pretty easily after the usual soak in penetrant and the rod will be reusable after some clean-up, though the ends will need to be replaced. They are loose and sloppy, perhaps due to wear resulting from dirt getting in, since they were missing their rubber dust caps. The ends on the other tie rod were similarly compromised, so still more line items for the parts list.
I noticed that the tie rod ends had no grease fittings. In fact, there seems to be a shortage of grease fittings all over the car. I learned that this was one of the selling features NSU actually bragged about back in the day: the simplicity of maintenance. NSU used components that were sealed and supposedly good for life, eliminating many routine maintenance items and, therefore, cost of ownership. It’s one more example of how advanced German engineering even found its way into low-cost basic transportation and foretold the use of features that are commonplace today.
The Parts Hunt Goes On (and On)
While disassembly of the front end added to my parts wish-list, assistance from members of the former U.S. NSU Club simultaneously helped to chip away at it. Once again, Frank Baker came to my aid with a bunch of brake parts and some missing trim rings needed to complete my headlight assemblies. While I now have a full set of lights for the car, there are still a few brake parts I’ll have to seek out from suppliers in Germany.
The removable tie rod ends are thankfully available, as are those kingpin washers, but the fixed-end tie rod looks to be a problem. It may turn out to be another area where I’ll have to improvise, but given that it’s a critical steering component, I’ll have to be careful. I was also able to locate some of the rubber bushings used in the front end, but a couple are still proving elusive. In addition, I’ve got to find some suitable shock absorbers, which will be more difficult due to the fact that the front and rear units are different.
Finally, while tear-down of the steering rack unit showed it to be in good shape, the boots at either end had basically disintegrated and finding new ones to fit is proving surprisingly difficult.
One problem I keep running into with parts like this is that all the online sources basically go by vehicle year, make and model. Needless to say, a 1959 NSU Sport Prinz seldom comes up as a choice on their menus. Very few vendors allow you to match parts up by size. This is one of those situations where I yearn for the traditional, locally-owned auto parts store, where you could go in and the crusty old-timer behind the counter would actually try to help you line up a substitute. Most of the local auto parts places in my area have given way to the big-box, generic auto parts stores with some kid behind the counter who only knows what his computer spits out and has probably never even worked on a car himself.
Seeing What Shape the Body’s In
Meanwhile, I was contacted by the folks at American Dry Stripping, the media blasting company in Milford, Connecticut, that I had entrusted the car to. It hadn’t required much of a leap of faith. I had worked with these people before and found them to do an outstanding job. They are very accommodating and even arranged transport of the car to their facility and, from there, to a body shop for the epoxy priming. They let me know the car had come up in their queue and would be blasted clean in the next few days. When it was done, I went down to see the finished product in the brief interval before it went over for priming. The two shops work closely, as once the car is cleaned, priming needs to be done quickly to prevent flash rusting. During that time, the car must be handled carefully, avoiding bare hands so that oils aren’t transferred that could also accelerate rust.
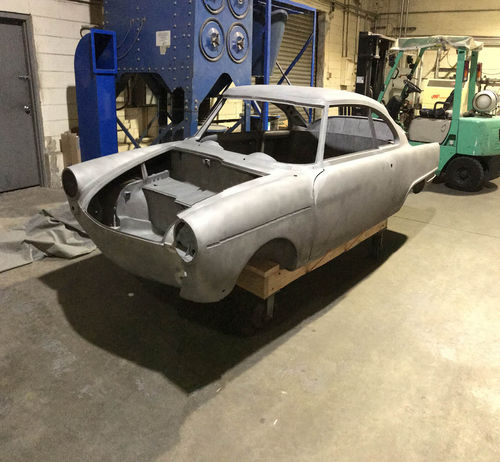
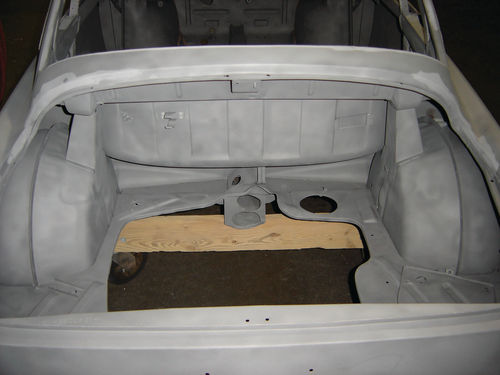
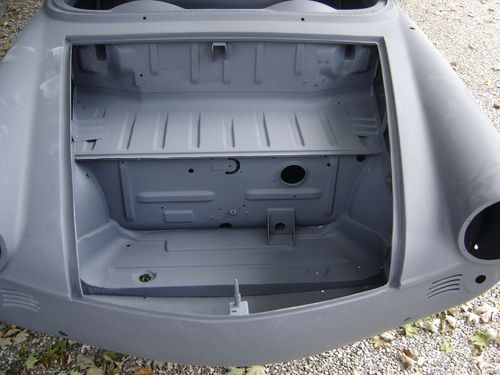
The car looked fantastic. Every speck of rust, paint and filler was removed, leaving a uniform matte grey finish, ideal for adhesion of the primer. In the dim light of the blasting shop, it almost looked ghostly. Every crevice on the surface, undersides, interior and front/ rear compartments was spotless. This is not inexpensive, but it’s money well-spent. The car had rust, peeling paint and grime everywhere and there was no way I could have gotten it to this state on my own using mechanical scraping or chemical strippers, no matter how much time I put into it. Plus, despite all my close scrutiny and efforts to get at least all the welding done before this stage, the stripping uncovered one or two areas that I missed. They aren’t a big deal, though the repairs will disrupt the primer in some spots. But those spots can easily be touched up with epoxy primer now available in rattle-cans.
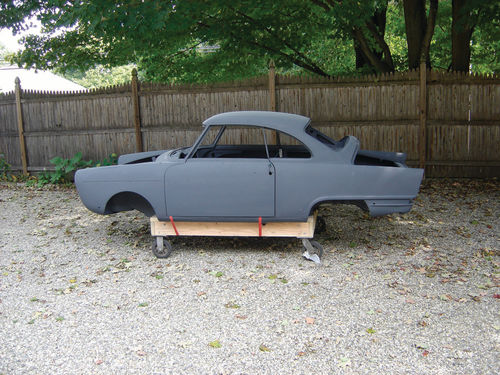
Back Home & Looking Good
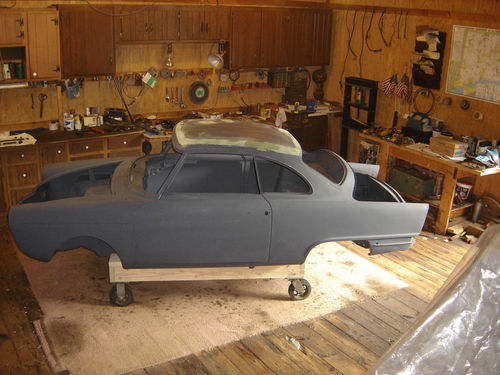
A few days later, the epoxy priming was done and the car returned back home. It was great to see it all one, uniform shade of dark gray primer after all the time spent wearing a patchwork of paints, primers, fillers and rust. I could now really visualize how cool the car will look when finished. That’s still a ways off, however, and the car will go through more polka dot phases as I do the final body clean-up. So it’s on to finish bodywork, using as little filler as possible just to smooth out the welds, minor dings and rough surfaces before subsequent priming, sanding and final paint phases.
I have no illusions of achieving a concours-quality finish, but I do want to do the little car justice.
Much of that subsequent body work will have to wait until spring, however. Temperatures are dropping with the advance of fall and winter weather here in the Northeast and my unheated barn isn’t suitable for the use of fillers and paints. But I’ll have plenty to do over the winter, so I’ll hopefully have further progress to report. I’ve learned from past experience that, just like our aging bodies, it’s important to keep a project moving.
As the old saying goes: “If you rest, you rust.”


