
THE LITTLE PRINZ PART 5
Disassembly of the 1959 NSU Prinz Continues and Construction of a Special Cart Was Necessary to Keep the Project Rolling. Then the Shocks and Doors Proved to be Troublesome.
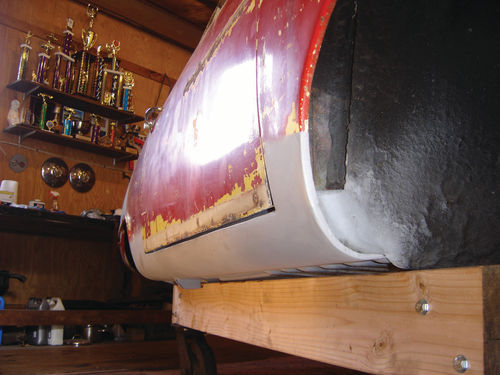
When I last checked in, I had re-skinned most of the roof of my NSU Sport Prinz, eliminating the sunroof and some other issues. It was now time to address damage in the front nose of the car. This would include patches to the inner wheel wells, where the front suspension would be in my way. So it seemed a good time to remove the front and rear suspension systems, along with other remaining components. This would be required anyway before the car eventually went in for media blasting and epoxy priming. But to get it there, the car would need to be rolled onto a trailer or flatbed. So I needed to create some form of cart.
The Patient Gets a Wheelchair
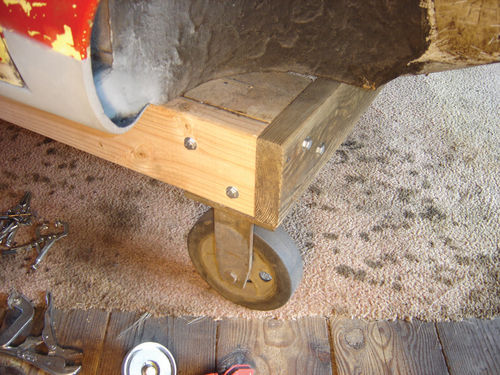
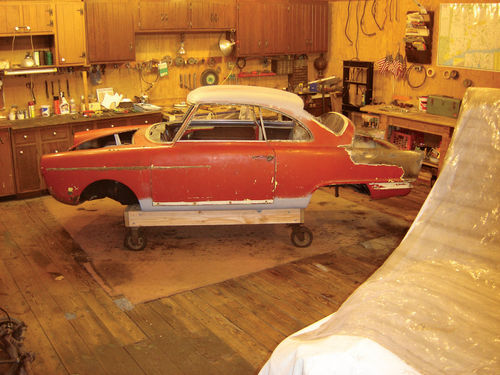
As I’ve said, part of the fun for me in doing a project like this is figuring out ways to get things done with what’s onhand. I’d seen some body carts for sale but, aside from the cost, they were all too wide. The rocker panels on the NSU actually dip down a little lower than the floor pan, so anything that extended all the way across the underside of the car would risk damaging them. I supposed I could build some sort of narrower platform on top of one of those carts. But I reasoned that if I were going to do that, I might as well just make a narrower cart.
I already had a cart with casters that had been left in the barn when we bought our house. I had never used it; it had been tucked away in the back and forgotten. It was very heavy-duty and looked like it might have been used in a factory or for carrying luggage in a railroad station. It had large, ballbearing casters that would certainly handle the load. But it was too short and narrow to use as-is. Again, I’d have to build some kind of wider platform on top of it to support the car. That would be too tipsy. So, instead, I borrowed its casters to serve as the basis for a totally new cart.
I made a simple square frame of 2”x6” lumber, set on edge and reinforced by pieces of 6”x6” posts at the corners. I sized it so that the cart would sit just inside the rocker panels and jacking points on the sides, while ending at the edges of the floor pan in the front and back. At those ends there were spot-welded seams that protruded down, much like those found under the rockers of today’s unibody cars. Since those are used as jack points on today’s cars, I figured they’d be strong enough to support the ends of this car, especially given its reduced weight when stripped.
I lag-bolted all the corners together and mounted the casters directly underneath them, where the load of the car would be transferred straight down through the 6x6s to the wheels. It certainly seemed sturdy enough. By using my existing casters and mostly scrap wood, I only had to purchase one piece of lumber and the lag bolts, making my total investment less than $25. Now the only trick was to get the car onto the cart. Before I took that step, however, there was one more thing to do.
What Lurks Beneath the Undercoating…
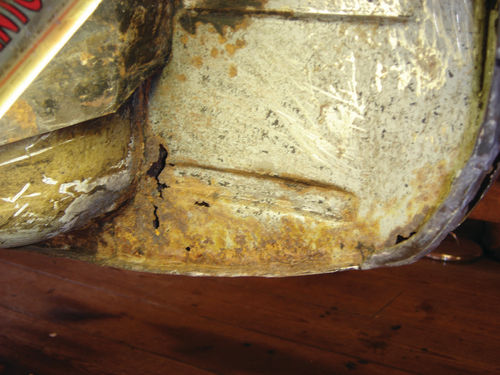
When I had done the rockers (April), I’d stripped back some of the undercoating to get clean areas for welding and to ensure I didn’t set the car (or my barn) on fire in the process.
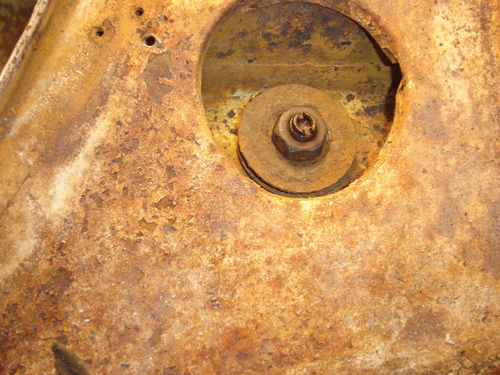
The undercoating practically fell off in some areas, but most of it required quite a bit of scraping. I was lying on my back under the car doing this, so I didn’t want to use chemicals or heat. I did it the hard way with just a paint scraper. Once I started, though, I kept going. The media blasting outfits I’d talked to had cautioned that any undercoating would need to be removed beforehand or it would ruin their media. They could do it for me, but it would be done the same way— by hand, with scrapers and at their labor rate. They suggested I save the money and do it myself. Aside from cost savings, it would prove to be a prudent move anyway as it revealed some surprises.
The undercoating appeared to have been applied at the factory. There was clean metal with a coat of the original white paint underneath. But even though the coating seemed intact and pretty well adhered in many places, I still found spots where rust had started. Often these rust spots only showed from the bottom, with nothing visible on the other side. It’s a cautionary tale: undercoating can hide a lot of sins. I’ve seen lots of cars for sale with heavy undercoating, some of it looking suspiciously new. I always wonder what damage might lurk beneath it.

Even though mine looked uniform and original, I found low areas of the floor pan that had clearly been scraped free of paint (presumably when someone bottomed out at some point) and then been covered up with undercoating. Those areas had developed considerable surface rust. So, certainly when re-doing an old car in its entirety, it’s best to get it all off so you don’t face surprises later. After it’s cleaned, primed and painted, I’ll have to decide whether to undercoat it again to ward off rust. The car is never going to see salty roads again as long as I have it, but there’s still the potential for chips and road rash, so it still may be the prudent thing to do. After all, I’ll have all the photos and documentation to assure any future buyers that I’m not hiding anything. But it’ll be a while before I have to make that decision.
We’re On the Cart
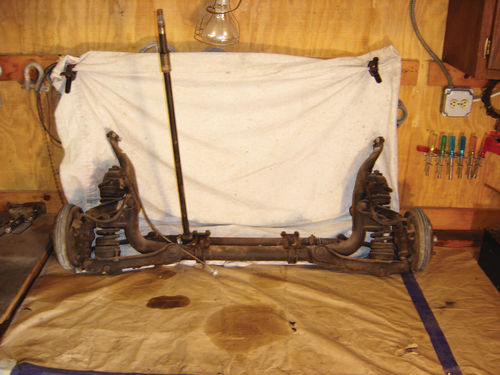
I had to make sure I scraped the undercoating off as far as the points where the car would sit on the cart, as access to the main floor pan would be limited once the cart was in place. The point where the body would rest on the cart at the rear end would also block my reach to some of the forward mounts for the rear suspension. So the rear end had to come out first. I jacked the car up high enough at each end to allow the cart to roll underneath, then supported it on jack stands.
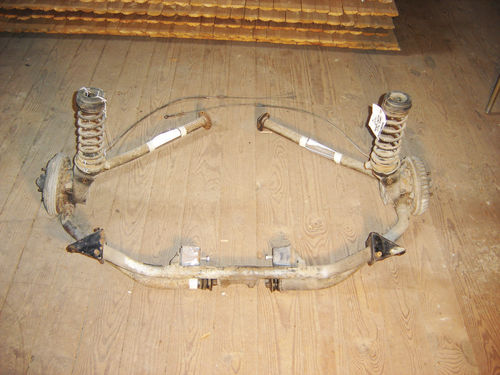
Since the rear suspension had three basic components, I supported the car on the central, rear-most piece so I could remove the two side pieces with the wheel hubs. Now I was able to roll the cart under the car, lower the back end onto it and remove that last piece of rear suspension. The front suspension sat completely clear of the cart, so the front end was lowered onto it next. Removal of the front suspension was pretty straightforward, though it did require me to jack up the front of the car enough to allow the steering column to slide through and clear as the suspension was lowered.
The cart worked great. The weight of the body held it firmly in place, with no sliding around. The casters easily handled the load, allowing me to move the car around at will to simplify further work. Of course, I’d have to find a way to fasten the car down to the cart and, in turn, the cart to any trailer or flatbed when it came time to transport it. For now, though, my focus returned to the removal of everything else down to just the bare body shell.
Getting a Grip on a Stubborn Shock
Actually, once the front end was out, I had to return to the back end to remove some last components that had given me trouble earlier: the shock absorbers.
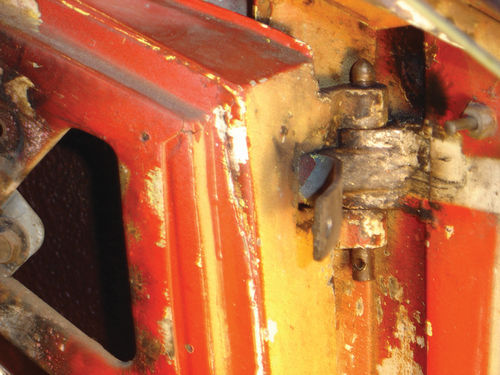
The rear shocks connected from the wheel hubs up through the coil springs into mounts on the body. The problem was that those top mounts were up on the rear shelf, below the rear windshield, and were both sunken and at an odd angle. This made it very difficult to get suitable purchase on the nuts at the top. I was at least fortunate in that I had removed the rear windshield. I can’t imagine how difficult it would be with that windshield in place. Making matters worse, the rusted nuts wouldn’t budge despite repeated applications of penetrating oil, heat and torque.

Part of the problem was that the upper body of the shock turned with the nut. That top portion couldn’t be adequately gripped from below as it was buried in the shock tower. Instead, the nut’s holding power was supposed to be overcome by using a screwdriver in a slot at the very top of the stem. This slot, together with the largest screwdriver I could find, were no match for countering the holding power of that rusted nut. Nothing, not even an impact wrench, had any effect. It seems the designers didn’t anticipate this type of corrosion in this spot.
I needed to find a way to hold that top portion of the shock from below. I thought about similar situations where I’d needed to apply torque remotely over a long reach and through a narrow opening.
Then a potential answer hit me: a plumber’s basin wrench. For those who’ve never used one, basin wrenches have a long stem with a “T” handle at one end (like that on a C-clamp) and a toothed gripper at the other end, much like the jaws of a pipe wrench. Basin wrenches are used to deal with nuts securing faucets and water lines underneath sink tops. Those nuts are often buried in narrow gaps between the deep sink basin and the back of the cabinet. Even if they can be reached, there’s no clearance around them to allow the use of a normal wrench.
I found one of my larger basin wrenches could, in fact, reach up through the shock tower and engage the top half of the shock absorber body. But, since I was working alone, I needed a way to keep it in place and keep the jaw tension on the body while I applied a wrench to the nut on top. So I strapped the wrench to the shock with a hose clamp once the jaws were engaged.
As I turned the nut on top and the shock turned with it, eventually the “T” of the basin wrench handle hit the side of the wheel well, preventing the shock from turning any further. At last the nut came free. Luckily, when I went to repeat the process on the other side, that nut broke free much, much easier. I breathed a sigh of relief. Situation resolved.
The Interior Has Been Removed… But the Doors Won’t Budge
I continued gutting the car. Out came any remaining interior components, including the pedal assembly, handbrake mechanism, choke control and heating ducts. I emptied the dashboard carefully, labeling each of the gauge and switch locations and recording each wire connection. The wiring was somewhat hacked up, so I’ll need to make up a new harness. This will be a challenge given the limited documentation I have, so I was sure to label everything and keep the original harness intact as I’ll likely need to refer to it.
The dashboard itself is an integral part of the body shell, so it stayed in place.
Everything else—control cables, brake and fuel lines, the horn assembly, etc.—came out, leaving just the metal body shell, as planned.
The final thing to come off the car was the serial number plate, riveted to the front bulkhead between the passenger compartment and trunk. I wanted to be sure to preserve that so it can be riveted back in later.
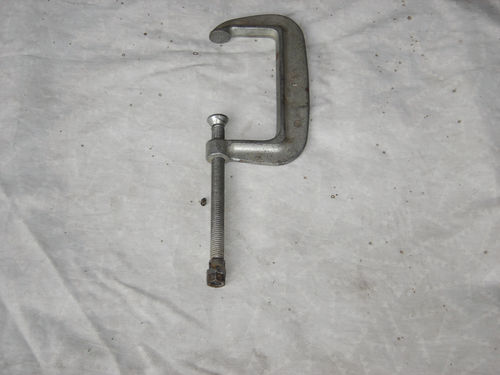
I had removed the front and rear trunk lids at the beginning, but now I hit one last obstacle: the doors. The upper hinges have pins that need to be removed, but so far no amount of penetrant, heat or pressure has been able to free them. Part of the problem is that they are buried so deep in the door jamb that it’s impossible to apply adequate force to push from the top or pull from the bottom. I’ve, again, resorted to improvising a “space-age tool” out of a C-clamp, but so far, no luck.
I don’t want to get too aggressive and damage anything, so I’m going to set those door removal efforts aside and turn my attention back to fixing the beat-up nose of the car. Hopefully, I’ll have more progress to report in that area next time.


