
THE LITTLE PRINZ PART 3
After Some Hammering and Straightening, It’s Time to Move on to Some Very Precise Metal Cutting, Forming and Welding.
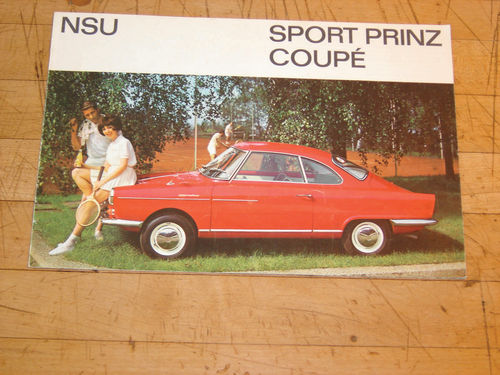
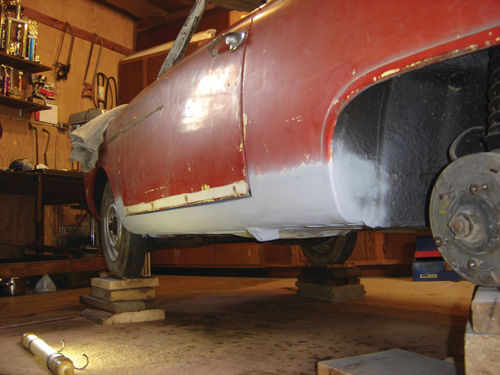
In my last installment (March) I began the bodywork on my NSU Sport Prinz. I was encouraged when I was able to eliminate some dents in the rear and straighten out one of the tail fins. So I moved on to the next entry on the list of challenges—the rocker panels, which would prove to be an even more ambitious project.
Day of Reckoning With the Rockers
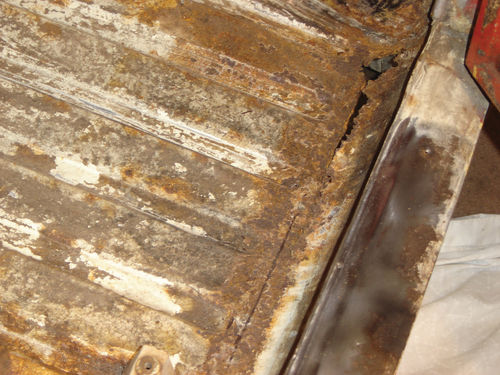
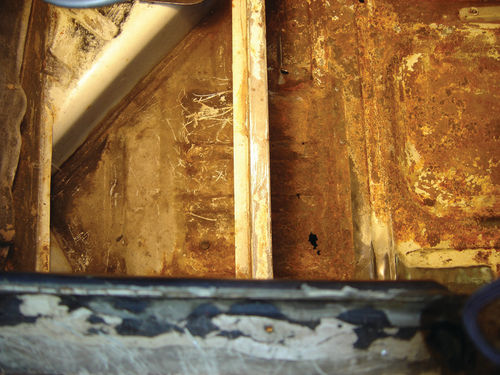
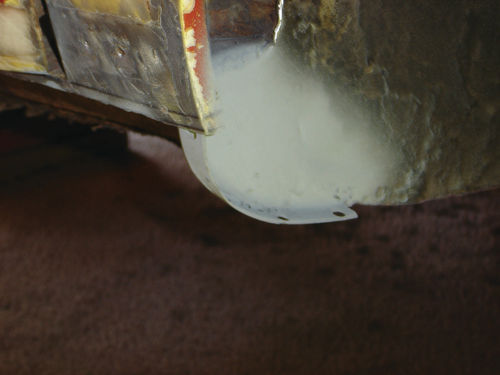
The rockers were obviously rusted through, but I had to find out just what I was dealing with.
I first pulled out the remnants of rotted carpeting inside. Then I used a wire wheel inside and out to remove any paint and filler. I started with the passenger’s side, which seemed the worse of the two.
As I moved forward toward the front wheel well I found that someone had used some creative techniques to cover the rot and try to keep water out. They actually applied multiple layers of what looked like driveway sealer, alternating with plastic sheeting. This reminded me of when I was a kid and my mother would put Wonder Bread bags over our socks to get by with leaky winter boots until we could afford new ones.
I shouldn’t be too critical. My friends and I resorted to similar fixes with our first jalopies. We’d rivet chicken wire, tin cans or even window screen to serve as backing for a generous slathering of filler or fiberglass to cover rot holes. There was many a time when a hard door slam left these plugs laying in the street.
In this same vein, I found a dent in one of the rockers that someone had filled with lead body solder about an inch thick. I’m surprised the car wasn’t listing to one side under its weight.
Measure Twice, Cut Once
Before going further, I needed to stand back and look at the overall structure of the car. I didn’t want to start cutting haphazardly. It’s like remodeling a house. Before you start removing walls, you’d better determine which are bearing a load and take steps to adequately support the floor above. If not, you might end up with your attic in your kitchen.
There’s a central “spine” running down the middle of the NSU. Besides providing structure, it’s actually a conduit used to run control cables, brake and fuel lines and the wiring harness from front to back. Oddly, it’s also used to transfer heat from the air-cooled engine to the front to warm the cabin. It seems risky to have brake and fuel lines, as well as vinylcovered wiring, in a passageway used as a heating duct. But I have to believe the German designers knew what they were doing. Unfortunately, one thing they didn’t anticipate was that this tunnel would end up as a cozy home for mice. I pulled all sorts of nest material out through access hatches in the bottom. I’ll have to thoroughly clean this out and somehow disinfect it so I’m not breathing mouse droppings later. I ran into this with my VW van, too. But at least in that case the heating tube was removable.
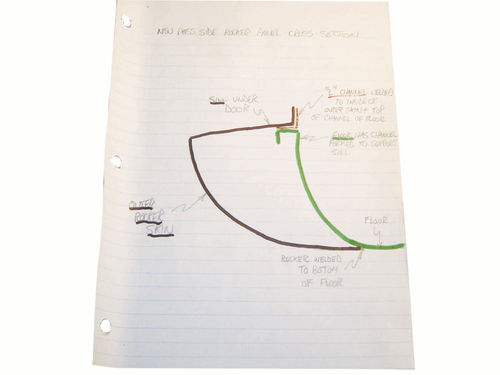
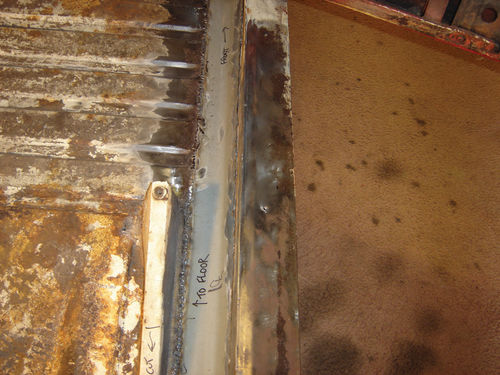
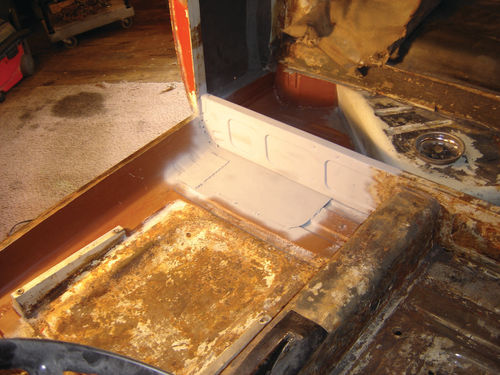
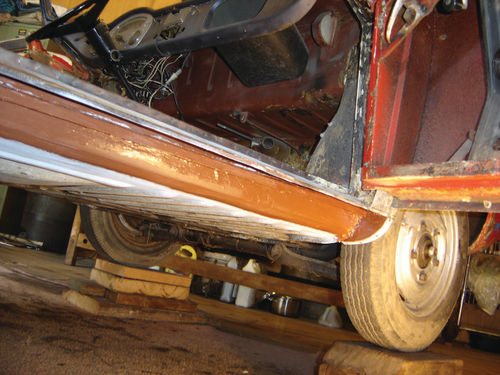
Coming off that central spine is another sideways reinforcement brace behind the seats and under the rear shelf. Parts of this would need to be cut out temporarily to patch the floor and inner rocker. The floor pan actually curves up along the sides to meet the inside edge of the door sill, essentially forming the inner rocker panel. The outer rocker panel curves down under the car from the outer edge of the door sill and is welded where it meets the floor pan. This created a nice “V” cavity with no drainage or ventilation, allowing moisture and road salt to settle and slowly eat away at the metal.
Fortunately, when I started cutting away the rot, the metal farther up toward the door sill was solid with just some surface rust. This was also true of some channels under the sill, which are presumably there to give it further rigidity. I felt that with all that left in place, there’d be enough structural integrity that I wouldn’t have to do all kinds of bracing before cutting the inner and outer skins.
Beyond preserving the structure, I learned one also needs to fight the urge to start cutting away metal before making replacement pieces. You need the old pieces in place to serve as a guide, taking lots of measurements and pictures. Rushing in and cutting things out prematurely can leave you scratching your head as to how the new one should look, running over to the uncut side of the car and trying to picture and form a mirror image piece. The old adage “Measure twice, cut once” has new meaning here. To get my measurements and shape right on the rockers, I found a flexible ruler and a profile gauge to be invaluable.
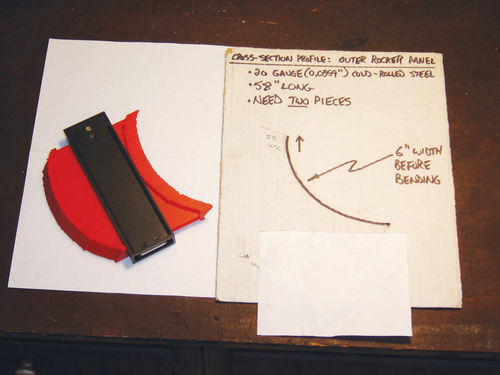
The outer skin had a gentle, but varying, curve going from top to bottom. Yet it appeared to be uniform from front to back, with no flares at the wheel wells, etc. Forming that gentle curved profile in a piece of the 20-gauge steel I intended to use for all my repairs wouldn’t be too hard, but keeping it uniform from front to back would be. So I opted to have a local metal shop make these pieces for me. I didn’t want any waves or bulges in the outer rocker skins. I used the profile gauge to draw an accurate outline for them to roll the piece of steel.
The inner portions were another matter. Again, they had a gentle curve to them, but they did not run straight from front to back. They angled inward just past the rear of the door. So I decided to make these pieces myself in two parts, welding them together where they took that turn. These would be on the inside and covered with carpeting, so any lack of uniformity and extra weld seams would be hidden. However, they did have to be welded up to the existing floorboards. Those seams would be visible from underneath. So I spent a lot of time cutting, welding and grinding to get them as neat as possible.
Complex Stampings Compound the Problems
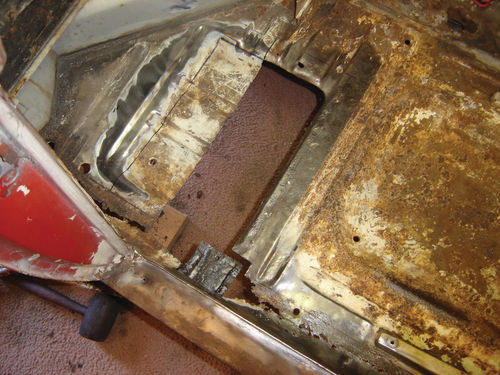
Adding to the problems on this side was the fact that the rot extended into a piece of the floor that was unique to the passenger’s side. There was a depression in the floor pan behind the seat and under the shelf that didn’t appear to serve any purpose. I suspect that the pan must have been shared with another NSU model where that depression served as a battery tray or perhaps the floor to a storage compartment. In the case of my car, the factory had simply welded a thin sheet over the depression where it extended out from under the rear shelf, presumably to just provide a flat surface under the carpeting. They had then welded a small, thicker plate over that to provide backing for the jack point below the car. The depression was a built-in problem, creating a low point for dirt and moisture that led to its eventual rotting out.
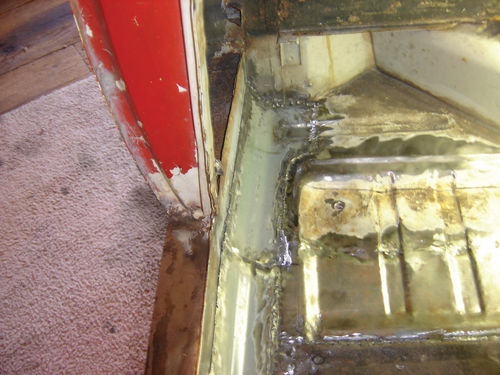

Here, I faced a dilemma. I could just cut that entire depression out and replace it with flat flooring, as was present on the other side of the car. Or I could try to patch it. Only about half the piece was compromised by rust. I’ve faced this choice before with my cars: do you replace a deficient component, especially when it serves no purpose, or do you restore to original?
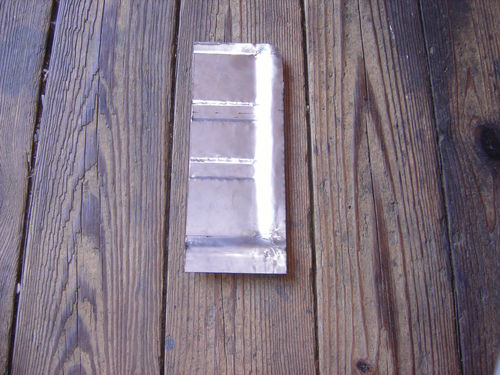
In this case, I opted to stick with the original design. I wanted it to look right if someone got underneath or put the car on a lift. This meant I’d not only have to create a dished metal patch, but I’d have to find a way to replicate the beads that had been rolled into the bottom for strength. I’d also have to make them match and line up with the existing beads, since I’d only be cutting out half the depressed pan from the floor.
I don’t have a bead roller, so this was going to be tricky. But it was the kind of challenge that I, perhaps perversely, find fun. I had seen some video examples of hammer-forming metal over a die. So I cut and ground a scrap piece of ¼” steel to the general shape of the indentation. I firmly clamped the sheet steel over it and gradually hammered it down over the die. The result was good; the shape and depth of the indent matched the original. There were some dimples from the hammering, but I gradually worked most of those out. I still had to find a way to dish out the overall piece, though.
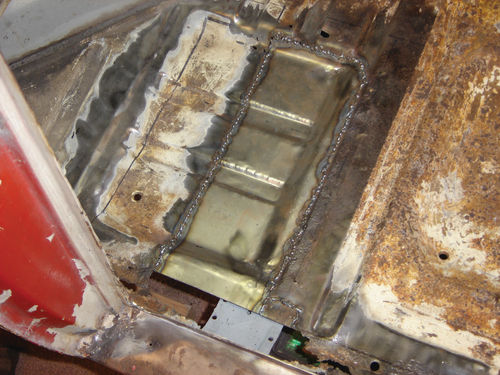
I used a process of bending, hammering over anything I could find to approximate the shape, and some cutting/welding/grinding to get a close approximation. Once I was satisfied it would do the job, I cut out the old metal and welded in the patch. I’m fastforwarding a bit here. I actually spent a lot of time fitting, welding and grinding, especially under the car, to make it as unnoticeable as possible. All-in-all, except for the slight seam across that depressed area, it came out pretty good.
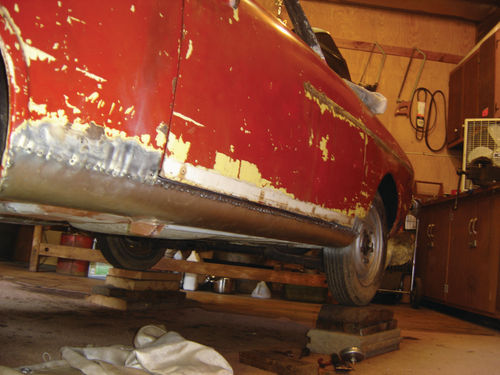
Some Precision Skin Care
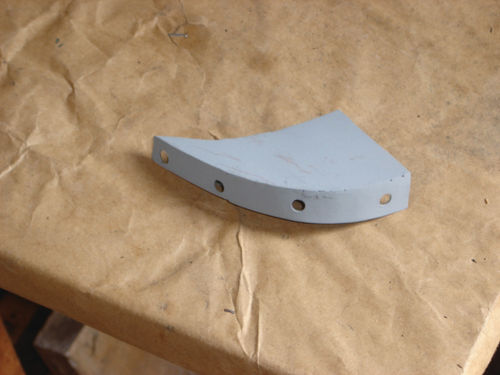
Fitting the outer skin required more care, as any major mistakes would be very visible. I had the metal shop make the skins a bit longer than needed since I wasn’t yet sure how I was going to handle the curved and folded ends required at the wheel wells. Luckily, I found the end at the rear wheel arch was surprisingly solid, so I cut around it when removing the old metal, leaving something to weld onto.
The front edge was another story. Not only was the lip compromised, but the piece of the inner wheel well to which it mated was rotted as well.
I spent a lot of time making profile traces and cutting cardboard patterns of these pieces so I could replicate them. Getting them right was essential to ensure the rocker sat properly and the end continued the arch of the wheel opening. To that end, one thing I did splurge on was a set of shrinker/ stretcher tools (total sale price of $200, including a plate for mounting the tools in a vise). I knew I’d need to make some metal bends that I wouldn’t be able to handle cleanly any other way. The shrinker and stretcher would prove to be invaluable as I went along. I formed the new lip as a separate piece that I then welded to the rocker skin, rather than trying to form it out of the extra metal on the skin and risk deforming the whole thing.
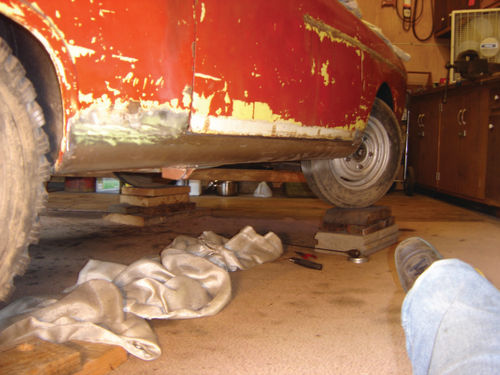
Before welding everything in place, I cleaned the surface rust off the underside of the door sill and support channels, treated them with a phosphoric acid rust neutralizer and then primed and painted them for protection. I left the primer and paint short of any areas where I’d be welding and instead coated those spots with a high-zinc weld-thru primer. I needed to put something on there since, once closed up, there’d be no access to further treat those weld seams. Perhaps down the road I’ll drill some holes and spray in some further rust preventers to coat this corrosion-prone spot.
After everything was welded in, I again spent a lot of time grinding and blending to hide the seams, adding a thin coating of waterproof filler and a temporary coat of primer to finish the job. I then went on to repeat the process on the other side, which was a bit easier, given the simpler floor pan and my newfound experience.
I May Wind Up With a Car After All
What I’ve covered here in a few pages took many hours over a number of weeks. But I learned a lot and feel my odds of actually completing this project rising as I tackle each major problem area. Continuing onward and upward (both figuratively, in terms of difficulty, and literally in terms of the actual car), the next challenge is the heavily-damaged roof. I’ll share my experiences with that in the next installment.


