
THE LITTLE PRINZ PART 8
It’s Time to Wrap Up Some of the Bodywork and Turn to the Mechanicals. Guess What…Parts Aren’t Readily Available.
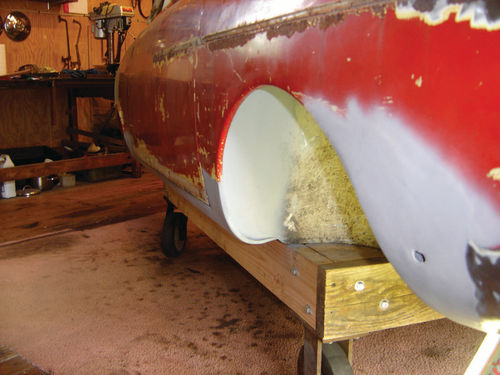
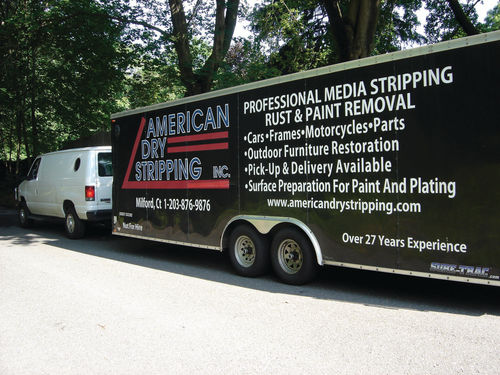
Once the rough bodywork was completed on the 1959 NSU Sport Prinz, the shell would go out for media blasting and epoxy priming. Then, attention would turn to the mechanicals—rejuvenating what’s there and locating what’s not…
Securing a Patch With Panel Bond
As described in my last installment, there were a number of final repairs to be made to the body before sending it out for blasting and priming. The largest effort involved closing up those cavities that had been cut into the back of the front wheel wells. Once again, this meant cutting and fitting patch panels, though with a new twist.
The holes extended out to where the wheel well met the fender. I didn’t like the idea of butt-welding that edge of the patch to the inside of the fender. If I created a flange at a right angle along that edge, then I could plug weld to the fender, but that would show inside the wheel well and serve as a trap for moisture and promote rust. I needed to turn the flange the other way, inward behind the wheel well, so it wouldn’t be visible. But then it also wouldn’t be accessible to weld. Instead, I’d attach it using panel bond.
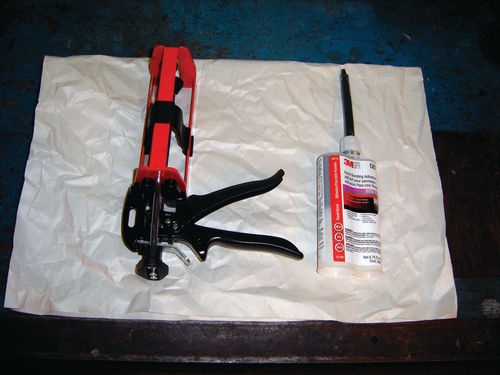
For those who haven’t used it, panel bond is a super-strong epoxy that is widely used in the manufacture of cars and even aircraft today. It has been tested and proven to be as strong as, if not stronger than, welding in appropriate applications. It is approved and even recommended by many car manufacturers as a repair process. I had used it before with good results. It’s expensive, but I already had an extra tube plus the special applicator gun from that earlier project.
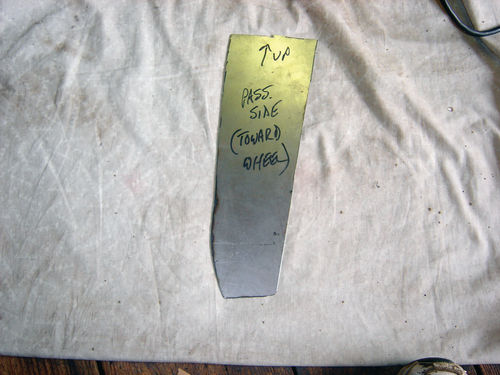
Since I wouldn’t be able to clamp the bonded joint, I made sure the patch fit tightly so that when I welded the inner portion it would put pressure on the bonded area. It seemed to work well, with the cured panel bond providing a strong joint and a waterproof seal between the wheel well and the fender.
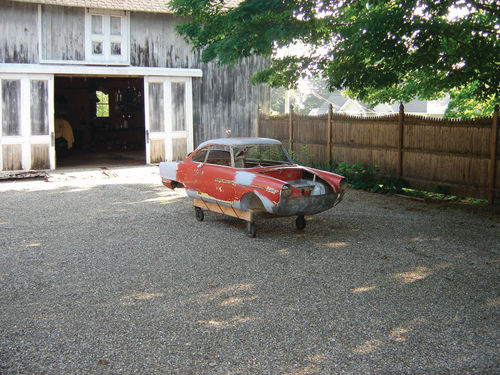
With those and a few other final fixes, the body emerged from its cocoon to head off for blasting and priming.
The body cart (first seen in the August issue) proved a godsend at this point. My driveway is long, narrow and downhill, with a couple of tight turns.
There’s no way the blasting company could have gotten their 26-foot trailer up to my barn. Fortunately, the small size and light weight of the little car made it easy to handle. It would have been a different story with a couple thousand pounds of Detroit steel.
Starting Simple on the Mechanicals (Or So I Thought)
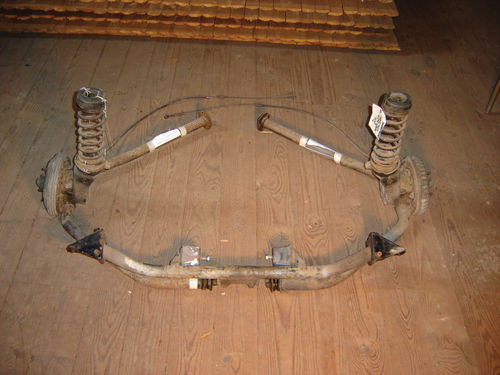
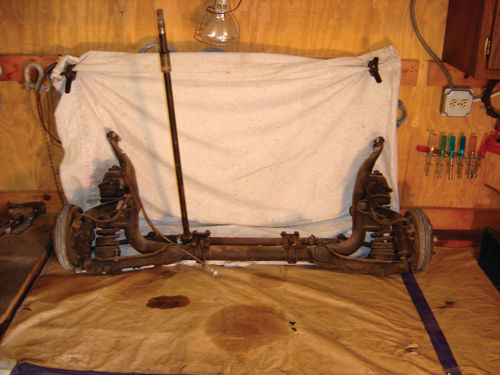
In switching over to the mechanicals portion of the project, I thought I’d start with the simpler rear suspension. It’s a pretty basic swing-arm setup. The individual pieces are connected to each other and to the body with rubber bushings. These were all shot and at first I was afraid I wouldn’t be able to find replacements, so I’d have to make my own. I’d even read of people successfully doing so using liquid rubber or polyurethane poured into plaster-of-Paris molds.
Fortunately, I was spared the effort when my friends at the NSU Club in Ireland came through once again with a set of replacement bushings. I have to admit, however, that I’m still interested in trying the do-it-yourself method. I suspect I’ll get another chance as things go along.
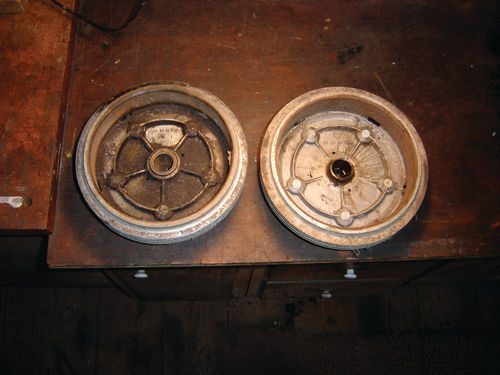
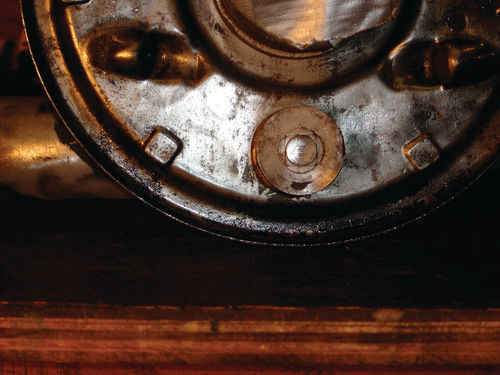
My first surprise awaited me when I started disassembling the rear end. When I removed the brake drums, there was nothing underneath—no shoes, spreaders, springs; nothing. The brake cylinders were there, but of course all rusted and frozen. I’m hoping I’ll at least be able to rebuild those. The emergency brake cables were there, too, and in surprisingly good shape. As for the other parts, let the search begin…
In fact, I had to add one more part to that wish list: one of the brake drums itself. The previous owner had actually put two different drums on the rear, one of which was clearly incorrect. I had some spares among the pile of crusty old parts I got with the car, but only one fit this car and it was pretty beat up. Someone had obviously taken a hammer to it and flattened the outer face considerably. It also had a broken lug nut stud which, unlike most cars, are molded into the aluminum drum and, therefore, not replaceable. Finally, one of the cooling fins on the drum also had a chunk missing. While anything is repairable, I decided I’d look for a replacement rather than trying to rehabilitate that mess.
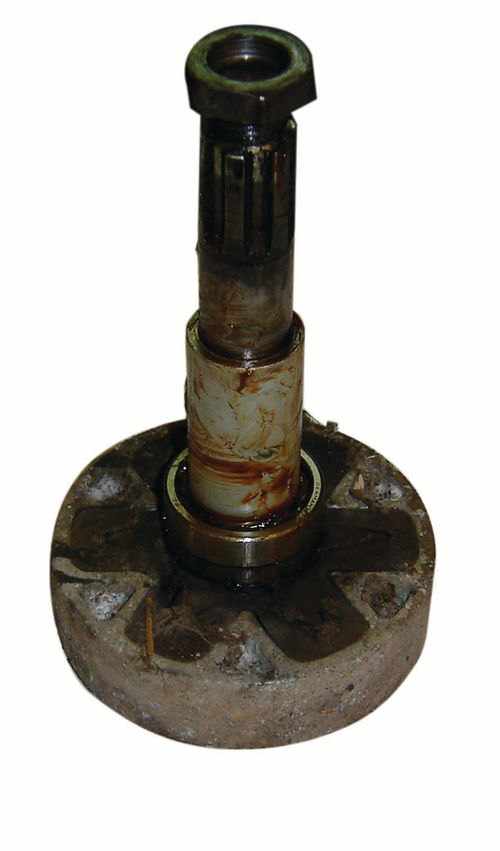
Disassembly of the rest of the rear suspension was fairly straightforward except for getting the axle spindles out of the hubs. The manuals optimistically showed the hubs being tapped out gently with a soft hammer. That may have been doable when the car was in for service during its normal life, but not after enduring 60 years of use and abuse. No amount of hammering, pressing, penetrating oil, etc. would make them budge.
I was afraid that if I damaged the spindles or hubs I’d really be in a tough spot. Recalling some words of wisdom from a Clint Eastwood movie—“A man’s just got to know his limitations”—I took the parts to a local auto machine shop. They had them apart, undamaged, in no time. I considered that money well-spent.
Curing Some Ills With Home Remedies
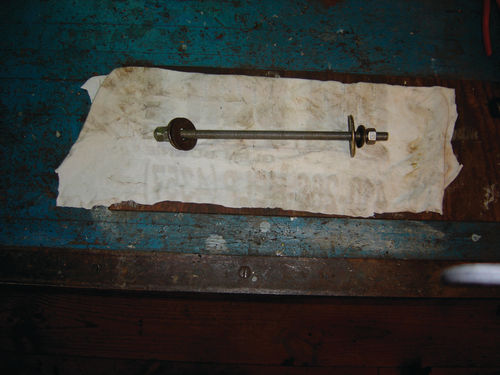
While the inner bearings came out with the spindles, the outer bearings were left pressed in the hubs. They had to come out to be cleaned, inspected and possibly replaced. I knew I could handle at least this part of the job myself. I don’t have a set of bearing pullers, but I had created a homemade version earlier that fit nicely here. It’s pretty primitive, using just threaded rod, nuts and washers, but it got the job done.
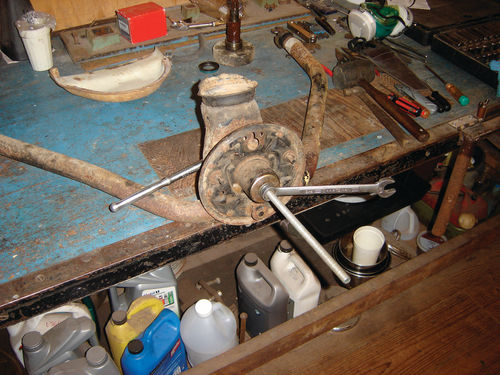
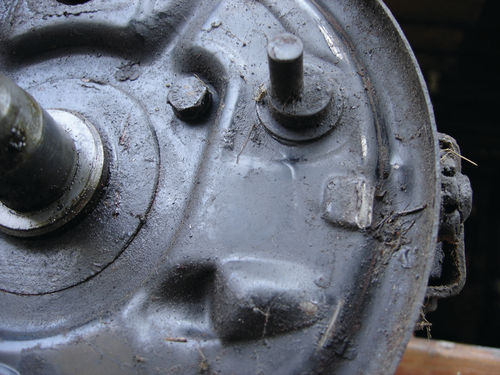
I thought I was finally ready to start cleaning up all the components when I realized I hadn’t yet taken off the backing plates for the brakes. With all the other cars I’ve worked on, this usually just required removing a series of bolts. I found two bolts holding these plates as well, but taking the place of the third bolt was a block at the bottom against which the brake shoes rest. Rather than a bolt, it had a strange sort of rivet that went through the block, the backing plate and right on through the wheel hub. The head of the rivet was the same at both ends. At first it looked like some sort of c-clip arrangement, but closer inspection revealed it was clearly not intended to be removed and the manuals mentioned nothing about doing so. I couldn’t understand why the designers put this here when the two upper attach points were held with normal bolts. Go figure.
I really wanted to get the backing plates off so I could thoroughly derust and paint the areas behind them to prevent further corrosion. Also, the brake shoe adjusters, which are the rotating cam-type and are fixed in the backing plate, were frozen. So I was hoping to soak the whole plate with the adjusters in some penetrant to free them up. If I couldn’t get them free, I’d have to replace the plates anyway.
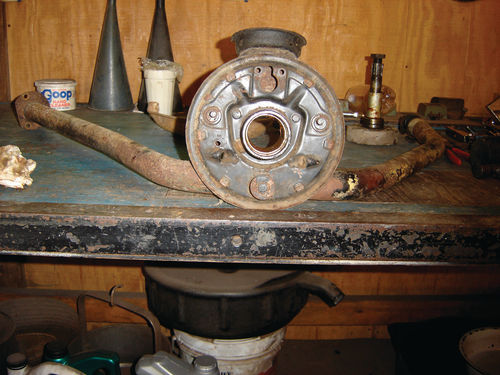
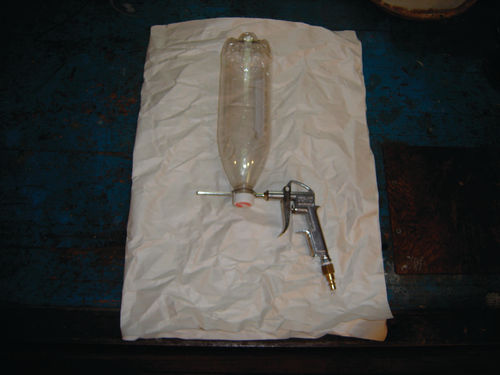
Before I resorted to gorilla tactics that I might regret later, I decided to consult some of my new contacts in the now-dormant U.S. NSU Club in case I was missing something. To my dismay, they confirmed that the backing plates really couldn’t be removed and the adjusters were not made to be replaced either. So I realized I’d have to get more creative if I didn’t want to go searching for entire new swing arms. Starting with the cleaning of the rusty surfaces, I decided that the best way to get down in between the pieces was with media blasting. But the swing arm and hub assembly was too big to fit in my blasting cabinet. Here’s where another homemade contraption came to the rescue.
I had seen an on-line video (can be viewed at www.youtube.com/watch?v=k6L_ArXCbYs) with instructions for making a homemade portable spot blaster out of a cheap air gun and a soda bottle, so I gave it a try. For about a $5 investment, it worked like a charm. I tried using crushed walnut shells as a blast medium at first, but had to switch to aluminum oxide to cut through all the crud. The small size and long nozzle of the blaster allowed me to get down into all the crevices. I plan to etch the metal with phosphoric acid before priming and painting, which should also neutralize any remaining specs of rust.
To free the adjusters, I turned to another home remedy, this time a penetrant made of 50% acetone and 50% automatic transmission fluid. After soaking them repeatedly for several days, I dried off the excess so I could apply heat without setting things on fire. I also found I could just grip the inside of the adjusters with a small pipe wrench to apply torque without chewing up the outside adjusting nuts. Success! Alternating heat, torque and penetrant over a couple of days finally broke the adjusters free. Now I could forget about the need to remove and replace the backing plates and concentrate on lining up the missing brake components.
A Very Welcome Parts Source
About this time my parts hunt bore some surprise fruit as well. I’d attended literally hundreds of car shows in our area over the years and had never seen an NSU automobile before. That’s part of what attracted me to my little car—its uniqueness. So I was pleasantly surprised when an NSU appeared at a recent show. Not only was it an NSU, but it was a Spyder—basically the convertible version of my Sport Prinz, but equipped with a Wankel rotary engine. As discussed previously, these are pretty rare cars, appreciated for the fact that they were the first volume production rotary-powered cars. This one turned out to be owned by another member of the U.S. NSU Club.
Ironically, he had bought the car from a Mazda dealer who had used it in their marketing of Mazda rotary-powered cars. It eventually ended up stored in the back of their shop. It was in beautiful original condition, though it required some mechanical work to get it back on the road. The owner also has a number of other NSU vehicles, some of which share parts in common with mine. Generously, he had some spares he was willing to part with. So a two-hour drive and some digging through boxes led to that missing brake drum and some other components.
That’s something I’ve always found when meeting other fans of a particular model or marque, especially through owners’ clubs: they’re usually happy to help where they can.
I don’t expect to get anything for free; after all, scarce parts have value and many of these people have significant amounts of money tied up in their inventories. But I usually find owners to be fair in the prices they ask. They often seem to be just as interested in seeing the cars preserved as in making any profits. That’s a refreshing difference from some commercial parts retailers or sellers on auction sites.
Moving Forward
I still don’t have everything I need to finish the rear end, but I’m getting there. After that, it will be on to the more complicated front end, dealing not just with brakes and suspension, but steering.
With cold weather looming, and no heat in my barn, I want to get as much disassembly, cleaning, repairing and painting done as I can. I don’t like to do anything that involves excessive dust, fumes or flames in my basement. So I’ll focus on re-assembly and parts sourcing during the winter to keep the project moving.
I’m also trying to keep a close eye on costs. After the media blasting and priming, other big-ticket items like paint, chrome and interior work await. My goal is to keep out-of-pocket costs in line with what the car hopefully will be worth when it’s done. That doesn’t include all my labor, of course. I have to just chalk that up to entertainment expense. Hey, some people pay for golf greens fees or ski lift tickets, right?


