Restoring an Engine Compartment, Pt. 1
He Thought He Could Take an Easy Approach, But That Didn’t Work. So He Stripped the Bay and Cleaned, Painted, Repaired…
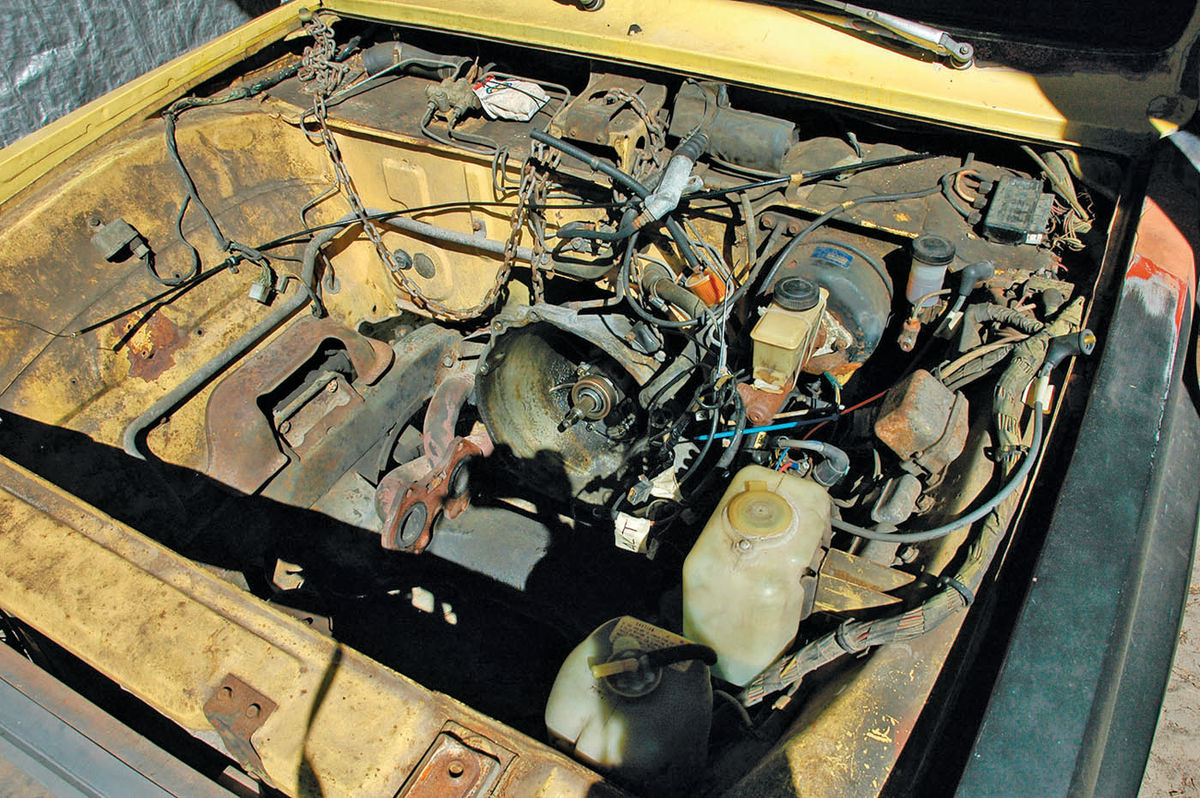
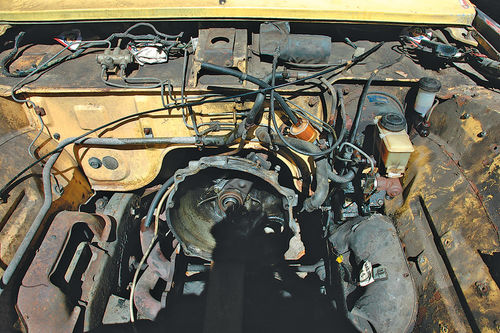
THIS PROJECT BEGAN as an experiment.My goal was to produce a first class engine compartment restoration while removing as few underhood components as possible. It soon became apparent, however, that this method was impractical on a 36-year old truck with a lot of flaking paint, grunge and surface rust under the hood.
In the end I stripped out everything except the steering box, fuel and brake lines that go to the rear and a few miscellaneous cables. As the wiring harness did not easily lend itself to complete removal and could be largely tucked out of the way, I disconnected all its under-hood components and laid it across the fender out of the way for attention later on.

Even Rare Rides Wear Out
This particular truck is a Mazda Rotary Pickup, one of 1654 produced for the 1977 (and final) model year, according to Ward’s Automotive Yearbook. It was my daily driver from 1983 until my first son was born in 1997 and has been in frequent use every since, with two notable exceptions, when my family moved to Ireland for a year in 2004, and, more recently, during a year-long search for an essential (and apparently non-existent) part for the original Hitachi four-barrel carburetor. (For more on Hoyt’s automotive adventures in Ireland, see the November issue.)
Over the years I have attempted to keep this rare truck as stock as possible but finally gave up with the carburetor and replaced it with a Holly four-barrel on a Racing Beat intake on the advice of my friend and long-time, trusted mechanic Quinn Holton. Holton was a Mazda service technician when the first generation Mazda rotaries were new. He now owns and runs — with the help of his son, Derek — Holton Automotive in Gainesville, Florida, and probably knows as much about early Mazda rotaries as anybody alive.
Becoming a Father-and-Son Project
Thus began the chain of events that led to the engine bay renewal. When I brought the truck home after Derek installed the beautiful Racing Beat-Holly setup, it was hard to ignore how bad the rest of the truck looked by comparison.
I had been pondering the benefits of accepting more-or-less rat rod cosmetics, since it already looked the part with original Mazda yellow paint alternating with various patches of multi-colored primer on body work I had done over a period of years.
Contrary to common belief, Mazda rotaries are very durable and dependable if treated properly, but they don’t do as well as piston engines in extended storage. The internal seals tend to degenerate if they aren’t driven occasionally. The truck ran very well with the new intake setup, but it began to blow white smoke on startup, a sure signal that coolant was getting into the oil and fuel, with the most likely culprit being the internal water seals. The engine at this point had been untouched in the truck for 22 years, since I had the factory-rebuilt long block installed by a Mazda dealer in 1989 to replace the original that showed evidence of having been abused by the former owner.

Since reality had caught up with me anyway, I decided to abandon the rat-rod concept, pull and rebuild the engine and finish this restoration job properly, beginning with the engine compartment. My youngest son, now 15, has also taken an interest, and we have set a target date of March 2015 to take the finished truck to a local car show.
Ease of engine removal is one of the joys of working on these old, simple, mostly pre-electronic rotaries, but ample instruction on this is available in various repair and maintenance manuals, so I will not go into it here.
Cleaning and Paint Preparation
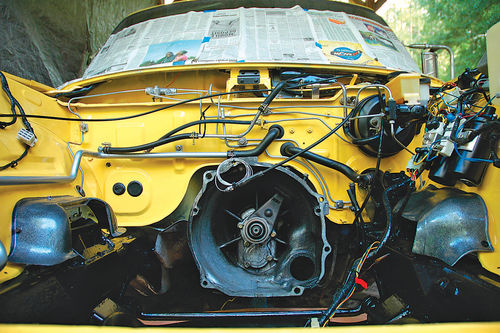
This probably took more time than anything else and was the least fun. After I had stripped out everything but the steering box, some brake lines, the hood-release and speedometer cables and blocked holes through the fire wall, I (repeatedly) washed the engine compartment with Simple Green cleaner, a stiff scrub brush and, in tight, hard-to-reach places, sometimes a toothbrush.
Simple Green is inexpensive and effective, and is non-toxic and biodegradable as well. However, the petroleum grunge one is removing in this kind of operation is not. So I placed old plastic shower curtains covered with newspapers underneath the truck to catch the runoff. The newspaper absorbs a lot of the runoff, the plastic shower curtains collect more, and I scooped up suspect soil underneath for good measure and then disposed of the whole mess in the manner appropriate to plastic motor oil containers.
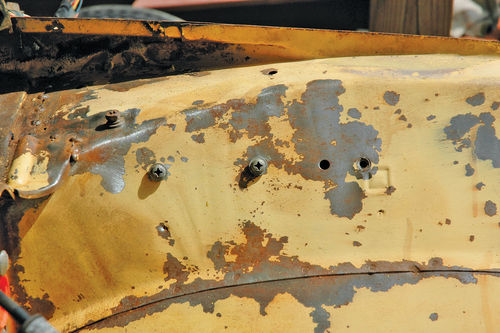
After I had removed the grease and grime, I spent a lot of time with abrasive fiber wheels and wire brushes removing surface rust and loose paint. I used a foot-long extension where necessary.
Once I had sanded or wire wheeled all areas of surface rust and loose paint, I washed and degreased the entire surface of the engine compartment again.
Applying a Rust Converter/Primer
When I was satisfied that the engine compartment was clean and free of loose paint and most surface rust, I sprayed the entire surface with Skyco Ospho, a phosphoric etching rust converter/primer that removes most rust and turns any that remains to a very hard, inert iron phosphate coating.
I probably should say a word about my painting strategy for this project at this point. Not wanting to use paint strippers that could seep into other areas on the truck that I don’t want to strip or subject to corrosion, and not owning a media blaster, I decided to live with what paint remained after the treatment described above. I realize that painting over patches of 36-year-old paint is heresy to pros and generally not a method that should be recommended. But I have used this process on numerous repairs on this truck (some 10-15 years old) and the paint has held up very well. My experience with this truck indicates that any paint I have difficulty removing with robust wire brushing, sanding and application of acidic rust remover will probably stick as well or better than any primer I might apply. I am not necessarily recommending this for other situations, just describing what has worked for me. While the resulting paint job is not perfect, neither was the brand-new factory paint under the hood on a Japanese pickup (or probably any pickup) in 1977.
After the Ospho has worked for an hour or so, I wipe it off the painted surfaces and wipe any excess off the bare metal. It is not intended for painted surfaces, but, in my experience, does no harm to a surface you are planning to paint if left on for a while. Depending on humidity and weather conditions, a white powder may form on the Ospho-treated bare metal surfaces as they cure. If the loose white powder develops, wipe it off before final painting prep.
Priming and Painting
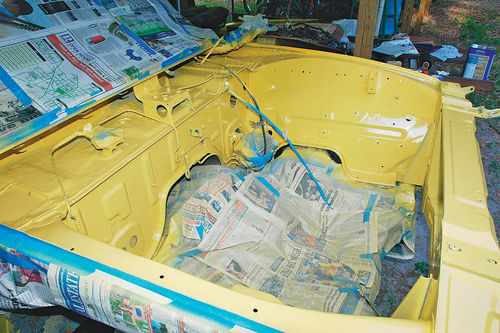
After I gave the surface a final cleaning with low-odor mineral spirits, I applied a high-build primer appropriate for the intended PPG Delstar DAR acrylic enamel top coat. When it was dry, I inspected it, sanded and re-primed any problem areas, including feathering — with 400-grit paper — any obvious ridges where paint joined bare metal.
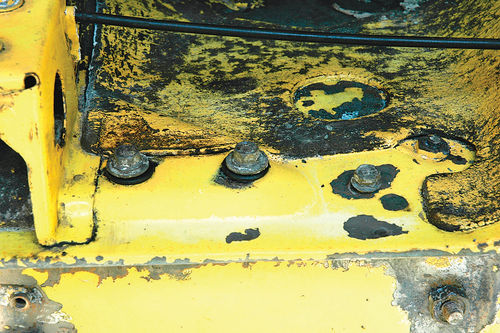
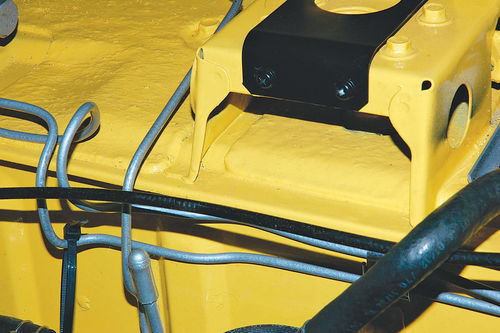
I then sprayed two coats of PPG Delstar DAR acrylic enamel in the original “yolk yellow,” 1977 Mazda paint code YQ. (Nobody would name an auto paint color “yolk yellow” today.) I had to do some touch-up in hard-to-reach areas such as on the firewall shelf under the windshield. Prior to painting, I had masked off the frame and suspension, steering box, dual braking system valve, the first foot or so of the wiring harness where it exited the fire wall and some cables and lines I left in place.
I had to think awhile about how to treat the factory applied asphaltic sound-deadening mat on top of the fire wall shelf. This frequently gets scraped off during restoration. But one of my goals is to maintain as much originality as possible, plus I didn’t want to give up the sound deadening. I examined the underside of the shelf inside the truck, underneath the dash, and found very little evidence of rust. I sprayed the water-thin Ospho under the mat where there were any gaps to take care of any hidden rust, cleaned the surface as best I could with Simple Green, wiped it with mineral spirits, let it dry and primed and painted it as I did the metal. The paint so far (six-plus months) appears to be adhering just fine.
Details: The Restoration of Underhood Components
The details are what make a project look really good — or bad, if they are neglected. I was faced with a particular challenge in renewing some flexible plastic and rubber parts that probably have not been available for decades.
Working With the Suspension Shields
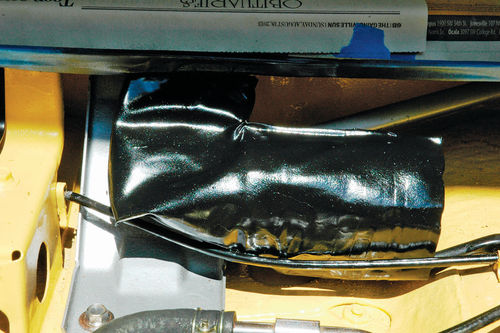
Among these challenging components was a molded rubber shield that covers the suspension opening on the driver’s side. There is a similar shield on the passenger side, but it is made of stamped sheet metal! This is odd but is in fact the original, stock setup. This rubber shield was mostly disintegrated at the rear.
I initially thought the rubber shield was beyond help but decided to clean it up anyway. The rear, tatty portion was all gooey, probably from leaking or spilled brake fluid over the years. In the end, I cleaned and repaired the rubber shield in a multi-step process. There was enough left for me to determine the stock shape. I used a good-quality duct tape to hold the remaining pieces together and approximate the original shape and contours. I then coated the reconstructed area with 3M Super Strength adhesive, making sure the edges of the duct tape in particular were bonded to the original material. I then brushed as smooth a coat as possible of Gardner Bender Liquid Electrical Tape on the entire repaired area. I did this a couple of times to achieve a surface I was satisfied with. When all this had cured, I applied several spray coats of Performix Plasti Dip Multi-Purpose Rubber Coating and let the repair cure for another couple of days.
The original passenger’s side metal shield appeared to retain residue of a very dark army drab paint. Despite having owned two of these trucks, one from new in 1976, I could not remember nor find any reference to the original color of these shields, other than the ugly drab paint residue, so I decided to go with something I liked and that looked good. I primed and painted both shields first with Rustoleum Hammered black and then, before it dried, with Rust-Oleum Hammered silver, giving the surface an attractive mottled appearance. The “hammered” Rust-Oleum does a good job of covering surface imperfections and making an irregular surface look good.
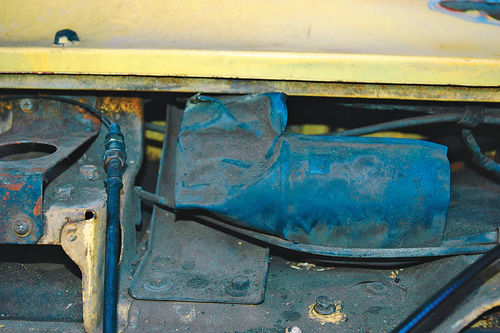
The Wiper Motor Cover…
The flexible plastic cover on the wiper motor is another item that commonly is discarded during restoration work as it becomes very brittle with age. For this repair, I carefully removed and then cleaned the cover. I used a good quality electrical tape, 3M Super 88, to cover the rips in the cover, being very careful to lay the tape strips parallel to each other all the way around the cylindrical cover, parallel to the edges of the cover and with tape edges touching but not overlapping so the seams would not be noticeable. I then sprayed two coats of Performix Plasti Dip Multi-Purpose Rubber Coating and top-coated with Rust-Oleum Satin Black, leaving the repair virtually undetectable.
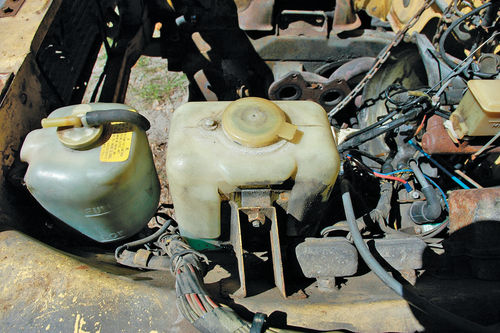
…And the Coolant Reservoir and Washer Tank
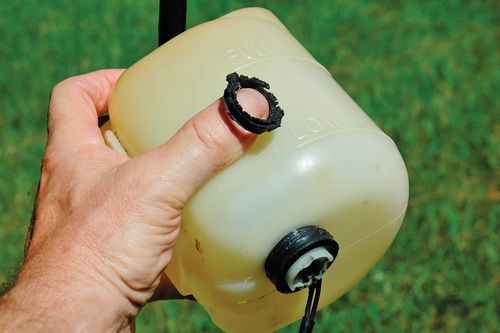
The coolant overflow reservoir and the windshield washer fluid reservoir, both original stock items, mostly just needed a good cleaning, though I did have to reconstruct a rubber grommet/sleeve assembly that seals the fluid level sensor through a hole in the bottom of the coolant reservoir and holds the electrical connector for the sensor outside the tank. This grommet was a complex male/female rubber item. The part that seals the hole in the bottom of the tank was not reusable. To repair it, I trimmed off the rotten piece that plugs into the bottom of the tank and glued on (with 3M Super Strength adhesive) an ACE Hardware-sourced rubber grommet with the correct inside diameter/outside groove to secure it in the hole in the bottom of the tank. I then finished it with more Gardner Bender Liquid Electric Tape and Performix Plasti Dip spray.
The windshield washer tank needed cleaning and cosmetic restoration. I cleaned and repainted the tiny windshield washer pump motor on the bottom of the tank, cleaned the electrical contacts and replaced the tubing that feeds the washer jets. Both these tanks are a bit yellowed with age, but they are stock and original. I was able to carefully clean and retain the original yellow coolant tank mixture decal with its instructions in English and Japanese.

Next we’ll work with the wiring, the brake master cylinder, the steering gearbox and the VIN plate. We’ll also get to see the finished product.


