
THE LITTLE PRINZ PART 16
After Seemingly Endless Body Work, the 1959 NSU Sport Prinz Coupe Passes a Major Milestone and Emerges With a Fresh Face.
People are always surprised when they hear how long it took to restore a car. Firsttime restorers are always surprised by the cost. These are flip sides of the same coin; time is money. This is especially true of the final body work, priming and paint, where labor is a major factor. So it pays to do as much as possible yourself. Still, there’s no substitute for experience.
Getting Ready For Prime Time
Readers may recall that I had done most of the major dent repair and patching before having the car media blasted and put in epoxy primer. I knew I’d have to do more finish work with body filler to smooth over seams and remaining dimples from the repairs. But the blasting and priming revealed some of my original work was lacking. It also exposed spots I had missed completely. There’s nothing like having a car in a uniform coat of primer, and out in the daylight, to spot all the flaws. So further welding and hammering were required. This took quite a bit of time, as I was really trying to minimize the amount of filler I’d need to use. I didn’t want this car to become another “Bondo barge.”
When the time for filler did come, I tried to use only good-quality brandname products. These can be expensive. Quality fillers alone run about $60 a gallon (made more painful knowing that 95% of it is going to be sanded off).
I initially made the mistake of trying to cut costs in other ways, such as in sandpaper. I purchased some economy self-adhesive rolls online that clogged constantly and wore down quickly. A local body supply place carried a much higher quality (and cost) version, but I was skeptical. How much difference could there possibly be in sandpaper, right? Wrong. The new stuff cut through the filler faster, clogged less and lasted much longer. The savings in time and aggravation was well worth the extra money.
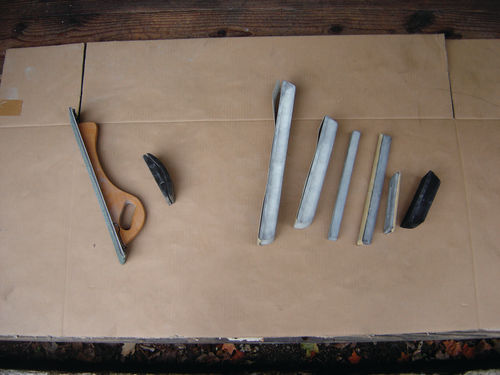
I also splurged on a set of foam sanding blocks, which proved indispensable. At first I fumbled with the basic blocks and board I already had. These proved either too small (following all the ripples in the body rather than spanning them) or inflexible (unable to follow the curve of body panels). Worse yet were the ridges created when I resorted to just folding over pieces of sandpaper and pressing directly with my hand to get into certain areas. The blocks eliminated these problems, helping me achieve a much more smooth, even surface.
I also used a powdered guide coat to highlight lows and direct my sanding. Inevitably, though, there were a number of places where feathering out the edges wore through the epoxy primer down to the bare steel. This seemed like a sacrilege, breaking through that nice, uniform epoxy seal to reveal the metal and leave it exposed to start rusting again while I finished other areas of the car. I had to coat it with something, but what?
Reach for a Two-Part Primer In a Spray Can

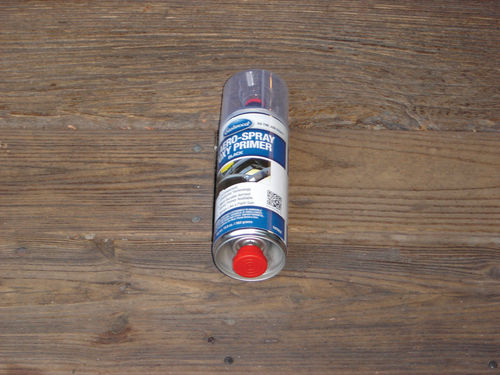
Many restorers simply use an aerosol selfetching primer to cover these spots, but I was concerned about compatibility and adhesion with later primer coats to come. I also worried about the possible effect the etching primer’s acid might have on the underlying filler. I would have preferred to re-spray with the same epoxy that was originally used, but I don’t have the equipment or controlled environment to mix and spray two-part epoxy primers. Even if I did, since I’m doing one panel at a time, I’d have to repeat this process a number of times as I went, wasting a lot of paint and chemicals for clean-up. So I instead opted to use a two-part epoxy primer sold by Eastwood in a special aerosol can. It’s basically a can within a can, with a mechanism to puncture the inner container holding the catalyst so it can be shaken to mix with the actual primer in the outer can. Once mixed, it has to be used within a day or so or it will cure in the can. At about $22 per can, it’s also expensive and not an economical way to do a whole car. However, the NSU is pretty small, I’d only be hitting the repaired portions and I figured the added flexibility it would give me would be worth it.
Before proceeding, though, I checked with the body shop I planned to use for later priming and painting. I didn’t want to put anything on the car that would come back to haunt me later. Even though this epoxy was a different brand from what they had initially put down, they felt it would be fine. Since the car would be sitting for a while before the next priming steps, they’d need to sand the whole surface anyway before proceeding. They did suggest I sand the areas to no finer than 120-grit before putting down the epoxy to ensure good adhesion. It’s great to have a shop like this that’s willing to work with you.
Some Body Work Lessons Learned
Going through all this finishing and prep, I learned a number of lessons that might benefit others attempting this for the first time:
* Take the time to make any metal repairs as smooth as possible to minimize filler.
* Use good quality materials; any extra expense is worth it in the long run.
* Use sanding blocks and guide coats to get things smooth, especially over large surfaces.
* Beyond your eyes, use your hands to check your work; it’s surprising how sensitive your hands can be in detecting imperfections not visible to the naked eye.
* Even fully-cured, quality fillers might have a slightly gummy outer layer that will clog your paper quickly; don’t be afraid to use a coarse (60- or even 40- grit) paper to cut this and knock down rougher areas before proceeding with finer sanding.
* Adding too much hardener to the filler cuts its working time, but even a proper mixture will cure quicker in hot weather; mix only what you need and can apply before it starts to cure.
* Thorough sanding to level the surface and eliminate edges is essential. This takes time, patience and elbow grease. Use light pressure, let the sandpaper do the work and vary your direction of sanding strokes in a cross pattern to avoid digging deep scratches in one direction.
* If you see high spots coming through around an area that’s still rough you should STOP sanding and either fill in the lows or do a bit more hammer and dolly work to knock down the highs. Resist the temptation to dig into those lows with your sanding block to smooth the surface; you’ll be defeating the purpose.
* The old adage “Perfection is the enemy of good” applies here. I was constantly finding small imperfections in areas I thought were done and going back over them yet again. You have to know when to stop or you’ll never finish.
That last point is perhaps the most important lesson I learned from this part of the process. Body work is tedious and repetitive and often leads to what I call “project fatigue.” This is when you frankly get sick of looking at the thing. You keep working and working, yet still find flaws and never seem to get ahead. It’s frustrating and it’s why many projects stall. I found that when I reached that point, I needed to accept the fact that it was as good as I was going to get it. If I wanted to go beyond that, I’d need to turn to the pros.
I had actually considered doing the final priming and painting myself, but decided to have those steps done professionally. I didn’t want to undo all the earlier work by laying down some sloppy paint job. This is the way things tend to go: in for a penny, in for a pound. Once you’ve got one part done so nicely, you don’t want to spoil it with sub-standard work elsewhere. That’s why restorations always seem to take twice as long and cost twice as much as initial optimistic estimates.
Cosmetics—paint, chrome, interior, etc.—are often the most expensive part of any restoration. Mine is no exception. Even working with a good shop, as I had, the painting process was costly. But, in the end, it was worth it. Despite my having spent as much as a week on each body panel, these guys still found things I had missed. I’d scratch my head in disbelief when they’d show me some ding or dip in the metal that I had completely overlooked or a spot I hadn’t gotten quite right. They assured me that the work I had done was solid and probably saved hundreds of hours (and many dollars) of their time. I’m not sure if they were just being kind, but I accepted this as high praise from guys who have been doing this for over 30 years.
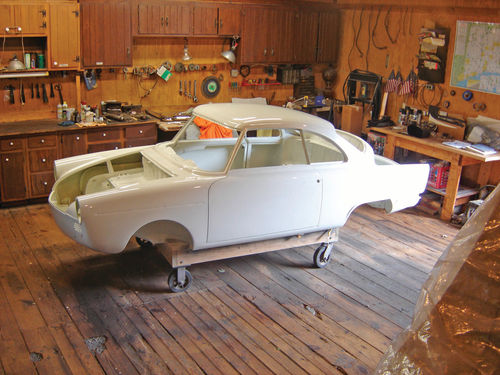
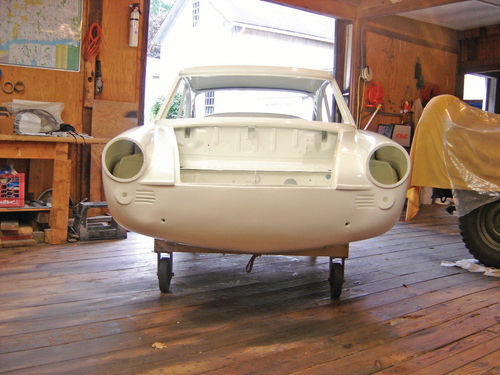
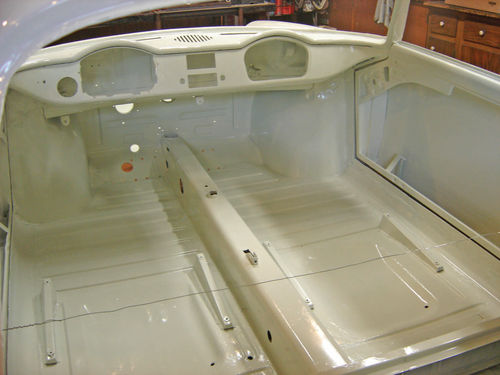
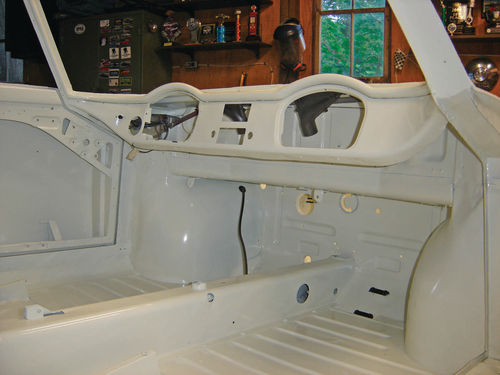
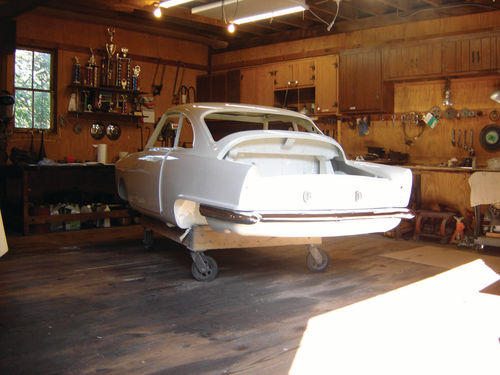
A Car Is Born
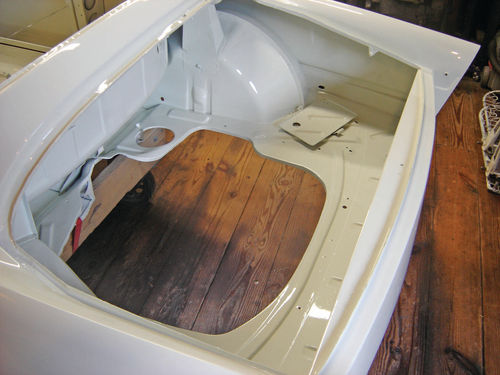
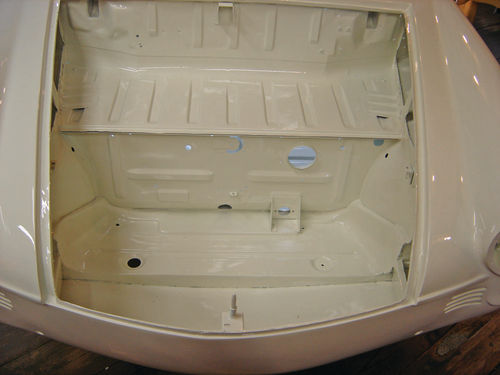
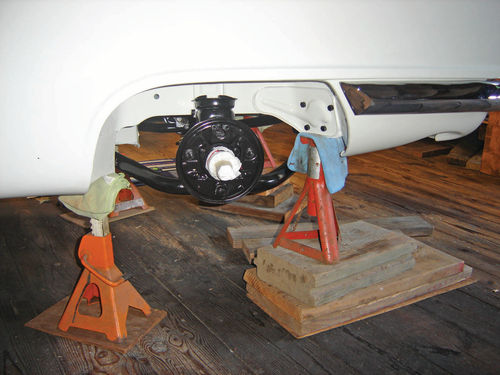
The shop’s diligence paid off. The car came back looking like a porcelain egg shell—appropriate, given this was essentially the start of the little car’s rebirth. Now I couldn’t wait to see it grow. I began to immediately re-populate it. For me, this is the best part of any restoration. You’ve turned the corner from tear-down to build-up. You’re assembling clean, refreshed components. Each piece brings it closer to completion. It’s like a big model kit. I had the front-end installed in days. It was already assembled as a complete unit and was pretty bulky, so I made up a wooden saddle to hold it steady and at the right angle as I raised it on my floor jack, but it went in pretty smoothly. The back end, however, proved a bit more difficult. I kept it in several pieces, in part to make the weight more manageable. It also mounts with a number of rubber bushings that all have to be lined up, so jockeying everything into place as a whole would have been tough.
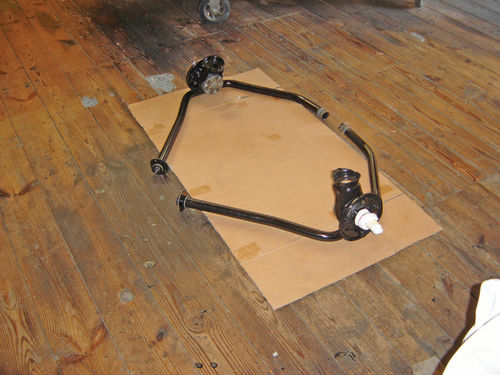
I got it together but the final pieces— the springs—posed a new challenge.
Devising a SpringInstallation Method
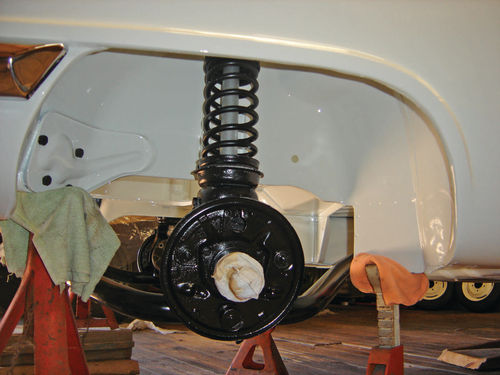
When I removed the springs from the car I followed the procedure in the manual and simply put a jack under each wheel hub, removed the spring stops and gradually lowered each swing arm until the springs were no longer under compression and simply lifted them out. Installation was to be the reverse. However, with the new, stiffer bushings installed in the rear end, I found the swing arms didn’t come down as easily to allow the springs to be inserted into their seats. If I really pressed down on them, I might get enough clearance, but since I was working alone, there was no way to both press the arms down and insert the springs with just my two hands.
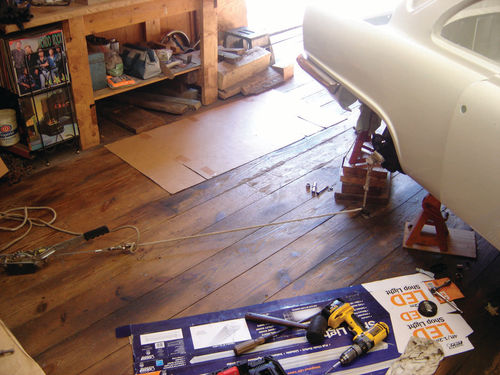
The logical answer was to use a spring compressor. While I don’t have one, I was able to get a free loaner from a big-box auto parts store. However, the springs are so small and the space to insert them so cramped, that I couldn’t get the spring into position with the big, bulky compressor installed. Rather than trying to devise some hokey and dangerous method to compress the springs, I decided instead to find a way to pull those swing arms down enough to get the relaxed spring into place. I found the answer using my trusty come-along.
I screwed an eye-bolt into the wooden floor below the wheel hub, tied a line over the hub and ran it down through the eye to my come-along, which was attached to my heavy workbench (also bolted to the floor) at the other end. This gave me the leverage to pull the swing arm down just enough and hold it there while I popped the spring in place. It didn’t take much pressure, but I still worked quickly and kept my fingers out from between the coils of the spring just in case. Crude, perhaps, but it got the job done.
For motivation, I try to reward myself after a tough challenge like the springs with the installation of easier little things, like some of the “bling” that make the car look whole again. The first thing to go on was my newly-refinished back bumper. While chrome appointments like this are supposed to be highlights on a car, in this instance it’s the clean body that shines in comparison to the less-than-stellar job of the re-chroming guys.
Problems With the Chrome Shop’s Results
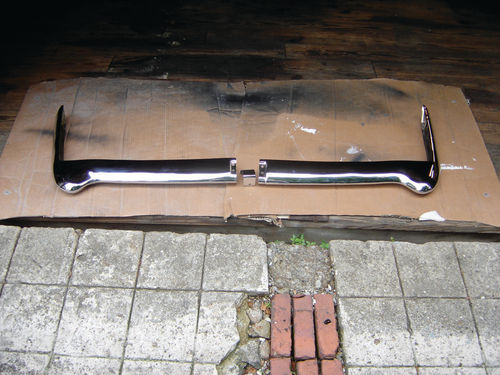

After a long wait and a lot of money, the re-chroming outfit had finally let me know my rear bumper was ready. It had had the usual issues when I took it in: the chrome was flaking and there was surface rust present, there was one area of rot-through that needed repair and some dings needed to be hammered out. I reviewed this with the owner and he didn’t indicate any of that would be a problem.
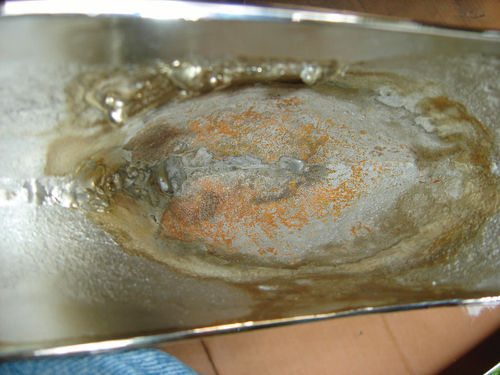
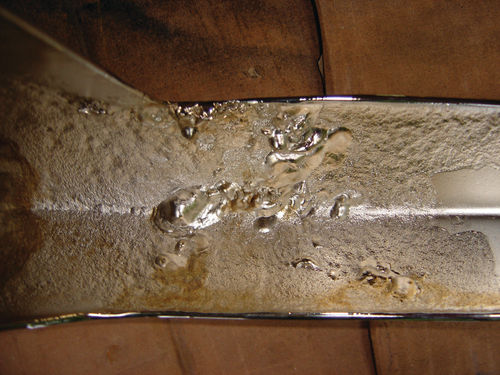
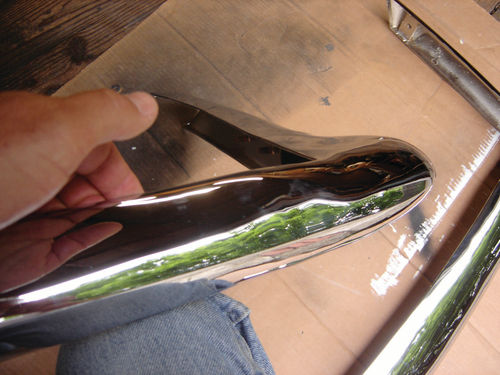
However, when I picked up the bumper I was disappointed. The exterior surface chrome was nice and uniform. However, on the back some of the deep recesses had not been cleaned or coated and remained rusty. The chromer said this was normal, as their process couldn’t get into deep areas like that. This surprised me, since the process involves immersion in a chemical bath. But even if that were true, in my view the shop should have at least used mechanical means to clean off the rust and treat those surfaces, even if it was just with paint. The rotted-through portion had also been clumsily repaired. Instead of cutting and replacing with new metal, they had simply sealed up the holes with large blobs of weld. Finally, I noticed that the dings had not been ironed out. They claimed they were too close to the welded patches, and the metal too thin to do anything about them.
This was very disappointing. I have no illusions of attaining a Concours-quality level with this restoration, but I expected better workmanship. I have a lot of other chrome components that will need refinishing and, needless to say, I won’t be giving them to this shop again. In fact, this confirms my earlier fears that I really have to look into chrome alternatives if I hope to finish this car within any reasonable timeframe and budget.
Considering Options for the Underside
I’m also weighing options for the car’s new soft, white underbelly. Recalling all the effort it took to scrape off the old undercoating, I was hesitant to even consider re-applying anything to the bottom of the car. It had all been blasted, primed and painted along with the topsides and looked so nice and clean. Still, I worry about road rash and rust setting in again.
Certainly, cars at shows with mirrors set up to display the spit-and-polish on the undersides always impress. Plus the absence of thick undercoating gives future potential buyers confidence that there are no issues that have been plastered over. And the paints used today are much more chip-resistant than in the past, so protective undercoating might not be as essential, especially when the car isn’t a daily driver. Looking into the issue, there’s great debate on this subject. But the one consensus seems to be that if you are going to coat the bottom of your car with something, rather than the traditional soft, rubbery undercoatings…the thing to use is truck bedliner.
There are a number of these products available and I’ve spoken to several restoration outfits who do this as a matter of course, especially if the owner plans to actually drive the car and not just trailer it to shows or put it on display. The best products are two-part catalyzed mixtures. Some can be rolled or even brushed on, but the preferred method is to spray it so the product gets into every nook and cranny. They adhere tenaciously. They are tough as nails and don’t crack or puncture to admit and trap water the way undercoatings often do. And they wash clean of dirt and grime, keeping the underside looking good. Some even offer sound-deadening qualities.
Some fellow restorers might recoil in horror at the thought of putting this on my car, but my thinking is this: First, I have detailed photo documentation to show any future potential buyer that this coating was not put on to hide anything. Second, while these cars may have left the factory with a painted bottom exposed, many were undercoated by the dealers in recognition of the need for protection. So having a coating on there might actually be more representative of what these cars looked like back in the day. Finally, I’ve seen first-hand how rust-prone these little cars can be and I want to be able to drive this car without worrying that every rock I kick up could plant the seed for its demise. After all this work, I feel an obligation to do what I can to protect it. But I’m undecided on what direction to take at this point.
Still Miles To Go Before I Sleep
As of this writing I was losing the weather here in the Northeast, so work in my barn slowed considerably. I’ve met my goal of at least getting the car back on its own feet (well, tires) and off the cart, but there is still plenty more to do. There are missing pieces to source, seats to be upholstered, trim to be polished. I’ll do what I can in my basement, with a target for completion of the car next spring. Well, maybe summer…


