
THE LITTLE PRINZ PART 2
The Restoration Has Started With Lessons In Removing Dents and Straightening a Damaged Tailfin.
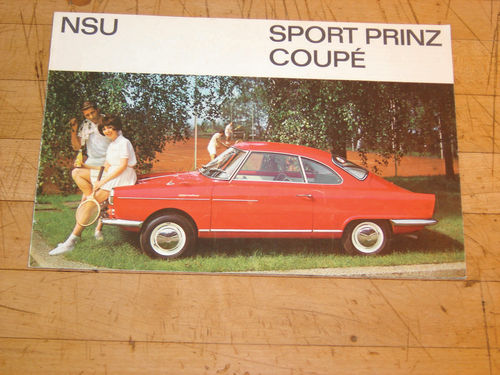
In the initial article on my quest to restore a 1959 NSU Sport Prinz (December), I described how I was approaching the project carefully. I wanted to be sure it was doable before investing a lot of time, effort and money. I’ve seen too many abandoned projects for sale on Craigslist.
I first had to convince myself that I could salvage the body shell, doing the work myself. Then I had to see whether missing parts could either be found or fabricated to make the car whole again. Most importantly, I had to at least be able to build or find a workable engine. Once I was reasonably confident these criteria could be met, I decided to go ahead and plunge in. I rationalized that, if nothing else, it would be a good low-risk platform on which to practice and (hopefully) improve my skills. After all, the car was small, relatively simple and not some valuable museum piece. I wouldn’t have tried doing this with some priceless Ferrari.
A Learning Vehicle
When I did my first full restoration (a 1951 Willys M38 Army jeep), I was able to do all the work myself except for the extensive rust repair and paint. I wanted to save the original body, so I had to farm it out to a pro. He did a beautiful job and nearly 10 years later, the jeep is holding up well. However, that project taught me that the most expensive part of a restoration is usually the bodywork. If I wanted to continue, I’d need to step up my game.
So on my next project, a “frame-on” resuscitation of a VW van to driver quality, I opted to tackle the bodywork myself. This consisted of repairing all the usual rot spots. I welded in components like rocker panels and a rear valence panel, learned to butt weld commonly available patch panels such as rear wheel arches, and even made some of my own patches for a couple spots on the floor and body. I learned how to blend in touch-up paint and, overall, it came out pretty good.
The NSU would be much more ambitious. I didn’t have the luxury of readily-available patch panels; I’d have to make everything myself. I’d also have to tackle some more structuraltype work, such as severely rotted inner and outer rocker panels, as well as a damaged roof. Plus I’d have to finally put that set of hammers and dollies I’d bought at a flea market to use, learning to remove a number of dents and dings.
Filling a Need
My plan is to take care of all the major bodywork up front, such as dent removal and welding in patch panels to repair rotted areas. Then I plan to have the whole car media blasted and coated in epoxy primer before doing finish-up body prep.
This brings up the whole subject of the use of fillers.
I’ve gotten pretty good at buttwelding in patches and grinding them smooth to blend in the repair. But I’m not at the level where I can make them completely disappear. I use modern fillers to do the final smoothing.
While I will try to minimize the use of filler throughout the project, I think people get too hung up on the desire to eliminate them completely. After all, many cars (including mine) were constructed with lead body solder used to smooth over certain welded joints. It was the material available at the time. Today, we have advanced fillers which are arguably easier and safer to use. If the original makers had had these technologies available, I’m sure they would have used them.
The key, as always, is to use them appropriately. That brings up another whole debate I’ve discovered over whether fillers can and should be used only on bare metal BEFORE any epoxy primer is applied, or whether they’re safe to use on top of the primer as I plan to do. As with most controversies, the more you read the more confused you become. There are as many proponents as detractors. The bottom line for me is that I plan to follow the process the pro used on my jeep body and, as noted, it has held up well for nearly 10 years now.
This project is going to take a while, even after the body is finished. As I remove old paint to do repairs, I’m going to leave a lot of bare steel exposed. I’ve learned the hard way that that leads to flash rusting, especially if you touch it with bare hands and get sweat and body oils on the surface. The welds, too, become nesting grounds for rust. Having the body completely blasted clean then coated with epoxy primer will seal it and allow it to sit without danger of new rust forming while I get the rest of the work done.
All that said, as I do the individual body repairs, I plan to coat the weld seams with a bit of waterproof filler and then cover the exposed metal area with a quick spray of rattle-can primer. This is just to try to retard any flash rust from forming and to allow me to handle the car without worry until I bring it in for blasting. It will all be removed in that process, but that’s OK.
Starting Small…With Success
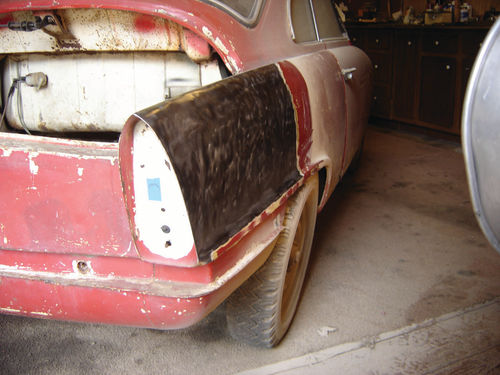
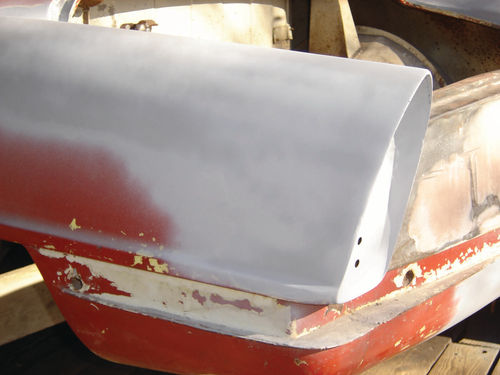
I figured I’d start with some of those dents first, hoping to build my confidence before taking on the larger problems. I began at the rear end of the car where there was damage to both tailfins. The driver’s side was particularly nasty. It not only had some folded and crimped metal, but the whole fin had been pushed inward about an inch and a half. So, still a bit unsure, I started with the easier right fin.
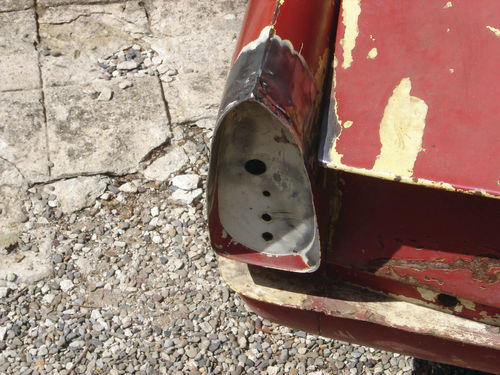
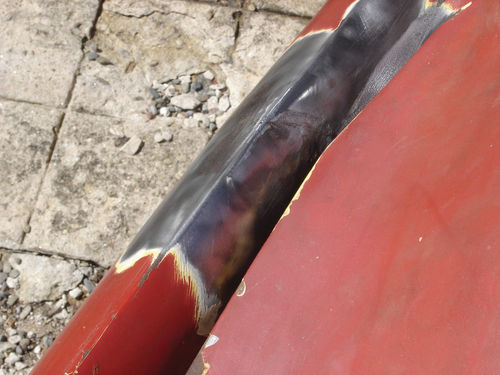
After reading many articles and watching many videos on working metal with hammer and dolly, I tried the “hammer-off-dolly” technique on the dent in the right fin. Basically, when dents like this occur, it’s like a stone being thrown into a pond—the metal in the center is pushed in, but there is actually a “wave” of raised metal around the outside periphery. So instead of just hamming the dent out from the inside, a dolly is used to apply pressure to the peak of the indentation inside, while gentle hammer taps are applied around the outside edge on the raised portion. The key is to go slow and easy. Finesse rather than brute force is the rule.
Low and behold, it worked! Before my eyes, the dented middle slowly pressed out and the raised “wave” around it slowly flattened. It wasn’t completely invisible, but a very slight amount of filler would even out any remaining ripples or hammer marks.
Straightening Up That Fin
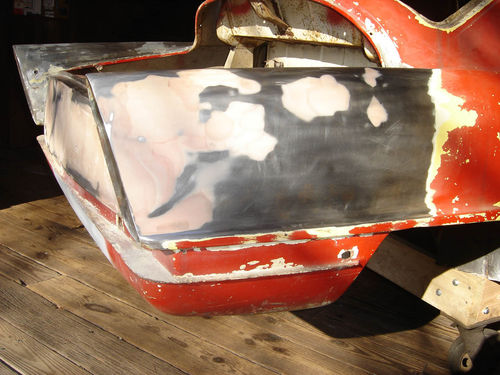
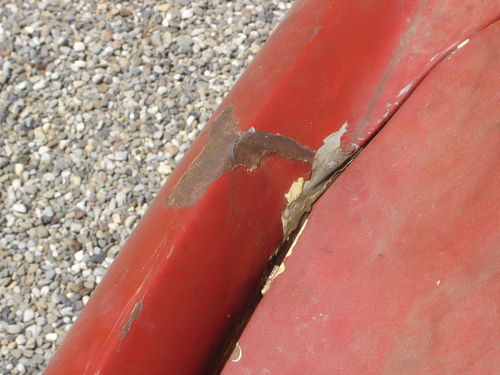
Encouraged, I moved my attention to the more challenging left fin. Here again, persistent use of hammer and dollies eventually worked out most of the crimped metal, though a crack had formed that had to be welded. Once that was done I had to figure out how to pull the overall fin back into alignment.
The movement of the fin had caused a crease on the upper edge a foot or two toward the front of the car. I figured the best way to proceed was to use hammer and dolly on that point while at the same time applying pressure to move the fin back out where it belonged. But how to apply that pressure without hammering or bending at the back edge? Finally, I had an idea.
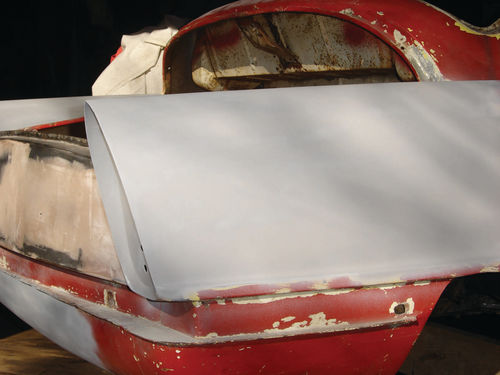
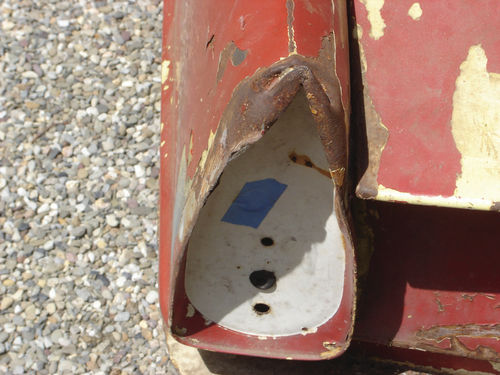
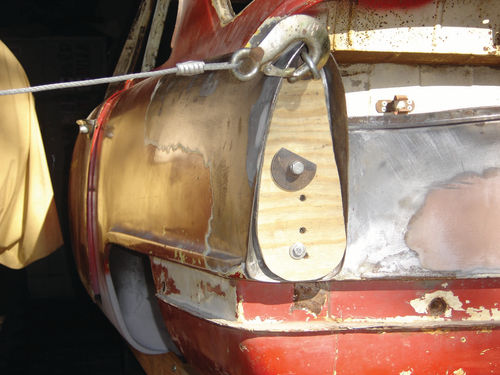
I had no taillights and there were holes in the back plates of the fins where they would normally mount and the wires would connect. I had just gotten that back portion reasonably straightened out. So I made up a plywood plate that would just fit in where the taillight should be. I bolted it in place through the existing holes, using a big ring bolt in the topmost hole. I then pushed the car to the entrance of my old barn so the ringbolt would line up sideways with one of the main barn supports. I put another ringbolt into the barn support at the same height as the one sticking out of the car and strung a come-along between the two.
I slowly ratcheted up the tension on the come-along as I used the hammer and dollies to work the metal at the crease. Slowly but surely the fin pulled outward as the crease straightened out until I had the whole thing back in alignment. Again, there was a slight crack at the crease that required a small weld. But after grinding and a little filler, it was barely detectable.
I began to think: hey, I might actually be able to do this! But with each successive step, the job would get harder and harder.
A Stressful Panel Situation
Next up was the need to address the rotted rocker panels, the inner portions of which were actually extensions of the floor pan. The car is of frameless, unibody construction. Even though it has a central spine, the rockers are undoubtedly structural elements. Without thought and care, I was afraid I might cause the little car to sag or even snap in half, as they’ve been known to do.
I’d lose a lot of sleep tackling these pieces of the job, but there was no turning back now. I’ll save the details for the next installment…
An International Parts Search
In the meantime, my hunt for parts continues concurrent with the work on the body shell. My new best friends at the NSU Club of Ireland have been extremely encouraging and helpful in the effort to line up missing components. I’ve also got a lead on a possible parts source in Argentina. This is presumably a result of considerable German migration to South America in the early part of the 20th century and a likely desire to have a little piece of home in their adopted country. I don’t know how many NSUs may have found their way there, but I hope the lead pans out.
As with any restoration, this project has now become a lesson in history and culture as well as mechanics and design.


