THE LITTLE PRINZ PART 11
Completing The Front End Has Required An International Effort and a Little Creative Thinking to Replace Irreplaceable Parts.
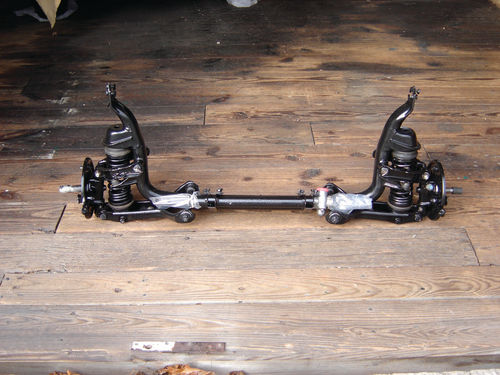
In my last installment I described difficulties encountered in final disassembly of the front end and my growing concern over availability of some key parts I’d need to get it all back together. While not all there yet, a little bit of improvising coupled with a lot of help from my friends in the Ireland NSU Club and parts suppliers in Germany has brought the suspension closer to completion.
Finding and Replacing Bushings Proves Difficult
The pieces of the front end connect to one another with a series of bushings to dampen vibration, provide flexibility and, sometimes, to act as torsional springs. This latter type is called a Silentbloc bushing and typically consists of a steel shell containing a rubber core through which passes either a steel sleeve to accept a bolt or a steel stud to accept nuts at either end. They must be press-fit into various parts of the suspension, which promised to be difficult in some cases.
None of them were obviously damaged or destroyed, so I didn’t want to press them out until I had replacements. I was afraid I’d wreck the old ones in the process only to find new ones were not available. In fact, I started to question whether I should mess with them at all; following the old adage “If it ain’t broke, don’t fix it.” This is a temptation every restorer faces at some point, especially if you’re trying to stick to any kind of budget. But, beyond outward appearances, there was no real way to assess the bushings’ internal condition. While they might have been OK, I had to own up to the likelihood that they had never been refreshed in the car’s 60 years of life. I really needed to replace them.
Help From Across the Atlantic
Local and on-line searches turned up little. One of the commercial parts suppliers in Germany did offer a couple of them, but not all. For the others, I turned to the folks in the Ireland NSU Club for help and they once again came through for me. They were also able to provide some new old stock (NOS) rear shocks and even threw in a couple of steering rack boots, though they cautioned that the boots appeared to be somewhat degraded from age. More on that later.
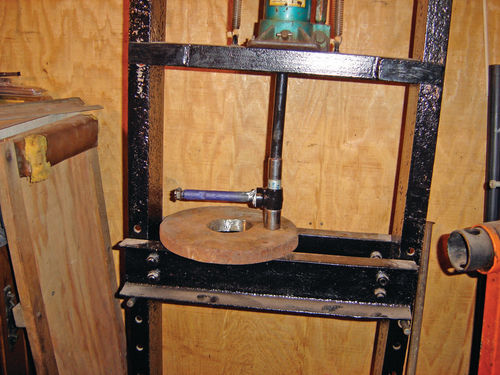
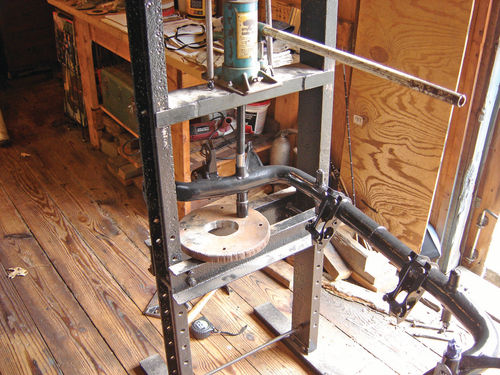
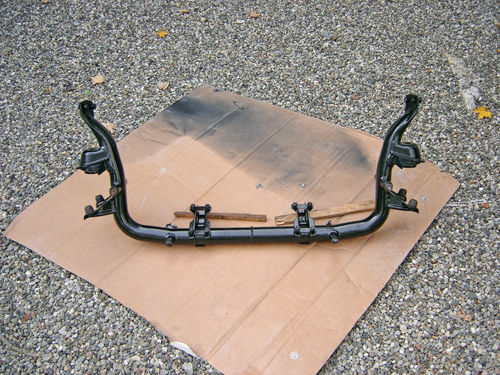
Once all the bushings were in hand, it was out with the old and in with the new, using a variety of home-spun configurations. This involved finding sockets or pieces of pipe to use as rams that just matched the diameter of the bushings’ metal shells. They had to be small enough to pass through the opening behind the bushing, yet not so small that they’d press against the bushing’s rubber center and damage it. At the other end, a socket was needed of sufficient diameter to accept the bushing as it came through. To do the pressing I used a combination of a vise, my high-tech threaded-rod bearing puller and my homemade hydraulic press, which really helped on the larger ones. I’ve learned that success with any press operation always lies in the set-up. Getting the various parts perfectly lined up required a lot of trial and error. I guess it’s why my local shop charges $45 per press operation. Given all the parts that needed doing, I was determined to do these myself. This proved especially tricky when dealing with the two very long bushings in the main suspension carrier, which is itself a long, irregular component that had to be supported just so.
But eventually I got them all. Now I could start reassembly of the front end with a clear conscience, knowing I wasn’t cutting corners. I did reuse the original castellated nuts with dreaded cotter pins, but this time I used stainless steel pins so they’ll hopefully be easier to remove next time. One set of bushings, however, did not have holes for the pins; they were apparently intended to receive nylon lock nuts, as has become the norm. Surprisingly, I found lock nuts of this size and thread pitch (M12x1.0) very hard to find. So it looks like I’ll have to drill holes for the cotter pins myself.
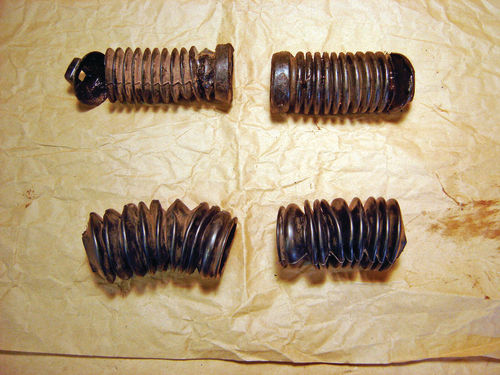
Before that, I still had to address the last piece of the front end: the steering rack. Happily, after a cleaning and examination, the rack itself proved to be in good shape, requiring just a refresh of the grease. The boots were another matter, however. The old ones were destroyed and the pair the NSU Club had kindly provided were dried out and cracking with a few holes already resulting. I needed new ones.
Unique Rubber Items Present a Tough Restoration Challenge
I’ve often noticed cars at shows that, while beautifully restored, would still retain cracked, faded items like plastic emblems or, in particular, rubber seals around windows. Having faced such problems myself, I have come to understand this isn’t usually a matter of the owner skimping in the restoration. It’s the fact that replacements are sometimes just not available.
With metal parts, worst come to worst, you can usually create a suitable replacement yourself or have it made up. But unless you’ve got a rubber molding and extruding factory in your basement, you’re at the mercy of what’s available from aftermarket suppliers for things like weather stripping, door seals and, yes, steering rack boots.
As with CV joints, tie rod ends and ball joints, the boots on a steering rack are critical in keeping dirt and moisture out and grease in, to prevent failure of the component. There are many manufacturers of steering rack boots for most cars. However, almost all require that you search their inventory by year, make and model of car. Rarely, if ever, do those options include a 1959 NSU Sport Prinz. Most boot manufacturers do not allow you to search by size to match up something from a more mainstream model. Even boots touted as “universal,” with ends that could be trimmed to fit various diameters, were all too big or too long. Granted, the NSU boots are pretty small, but I thought there must be something out there that would work.
I thought about what other types of machines might use a flexible rubber bellows in this way and it occurred to me that motorcycles often use boots on their front forks. But a check indicated many of those were still too big. I needed to think smaller, as in mini-bikes.
Sure enough, I found what I think may work. The old Honda minibikes from my childhood are popular among restorers and they use a boot on their front forks that just might be about the right size. They are readily available and fairly cheap (about $20 a pair), so I think I’ll give them a try if the German suppliers can’t provide originals.
Like Boots, Finding Vintage Shocks Can Be a Problem
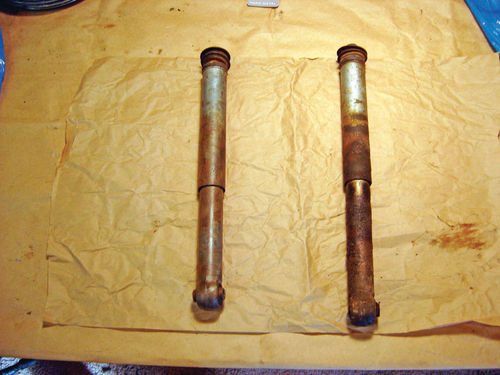
Next to the boots, the only other missing components for completion of the front suspension were the shock absorbers.
While the Ireland NSU Club folks came through with the rears, the front shocks are different and they had none on hand. Just as with the boots, I’ve found that most shock suppliers only allow a search by year, make and model which, for my car, again means they show nothing.
Several manufacturers, however, do have charts available showing critical dimensions and attachment types (i.e. stud, eyelet with bushing, etc.) for their current models. However a search of these turned up nothing, except two different manufacturers’ models that were both discontinued.
I explored the possibility that my old ones might somehow be repaired, but that apparently is not doable. Then I hit on a company that will actually take modern shocks and modify them to fit your specific application. I’m going to pursue that option and will report back on the results so others who run into the same issue can consider it as well.
Sometimes You Just Have to Improvise
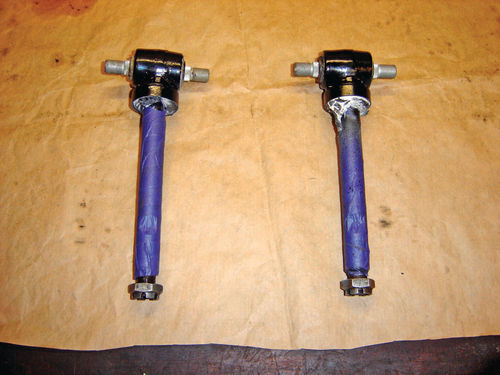
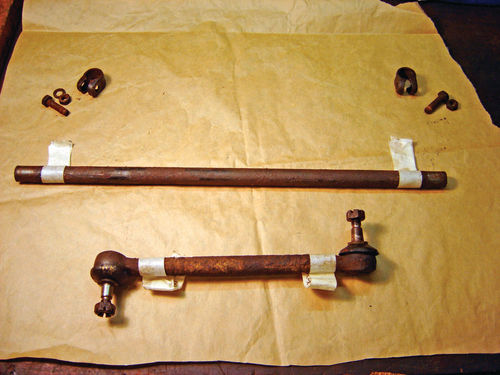
Last time, I described how one tie rod had adjustable ends, while the other had ends that were fixed in place. This is pretty typical for most cars I’ve encountered. After all, you only need adjustment on one side to be able to set alignment, etc. While I obtained replacement ends from that German supplier, he did not offer the fixed-end tie rod, so I was left scratching my head as to how I was going to deal with that.
Then I had an idea: I had replaced the front-end components on my old VW van and saved the old parts, one of which was its adjustable-end tie rod. While it’s much longer, a quick check showed it to be the same thickness and diameter, with the same size threads in the ends as the NSU. This means all I have to do is cut it down, weld it together and install adjustable NSU tie rod ends to the right length and orientation of the old unit. I’ll just lock them into position with the normal clamps and I’ll be good to go. It won’t be exactly original, but then the exact original simply isn’t available.
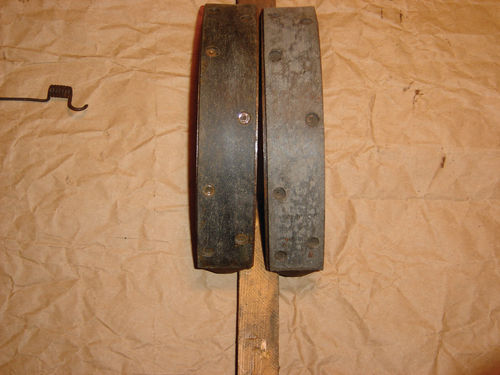
Debating the Use of Old Brake Shoes
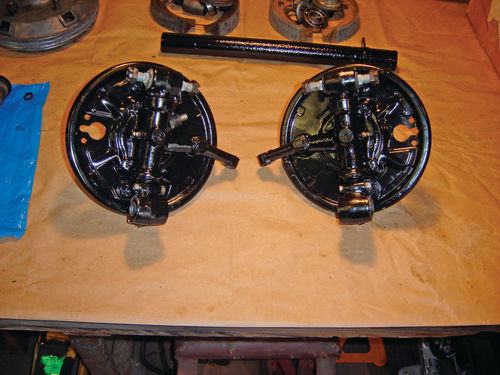
Aside from the suspension itself, I still need to address the brakes on both the front and rear ends. For the front end, I had lined up a missing brake drum and gotten good, used cylinders from my friend Frank Baker of the U.S. NSU Club. The car did have a set of nearly-new front brake shoes, but they had gotten soaked with brake fluid, oil or grease as the car sat and leaked over the years. I’ve run into this before and my default was always to just replace them, but these are harder to find and more expensive, so I set out to learn whether there was any way to effectively clean and reuse them.
I learned this is a subject of great debate. Many old timers insist this was standard operating procedure in years gone by. The shoes would be de-greased with brake cleaner, simple detergents or other solvents, or sometimes heated with a torch or even boiled in water to drive the oil out. Then any glaze would simply be scuffed up with sandpaper and the shoes put back into service. Others insist that all the cleaning in the world will never get the oils out and, when the shoes get hot in service, the oils will come to the surface and compromise braking.
I tried cleaning the shoes using some of these methods and, while they looked good, I just didn’t think this was an area in which I wanted to take a chance. An alternative to buying new shoes is to buy the linings, which are also available with the appropriate rivets, and revive the existing set. But without the right rivet tools to ensure the new linings are properly secured, it looks like I’ll simply replace the shoes entirely. There are areas where I’ll look to cut costs, but being able to stop the car is not one of them.
Some NSU Stablemates Came Up for Sale
As noted at the onset of this saga, what got me into this project in the first place was my addiction to the classified ads. Coincidentally, I was recently perusing the local (New Haven, Connecticut) Craigslist and spotted a pair of NSU Spiders for sale. Again, these are the convertible, Wankel-powered counterparts to my car and are very collectible.
A closer look revealed they were being sold by the same guy I bought my car from! He had told me he had them and that he planned to keep them, but situations change. I must admit I was tempted, but I have my hands (and barns) full already. But if anyone is interested, they just might still be available when this installment goes to print—that is, if my experiences haven’t scared you off.


