Restoring a 1987 Buick Park Avenue
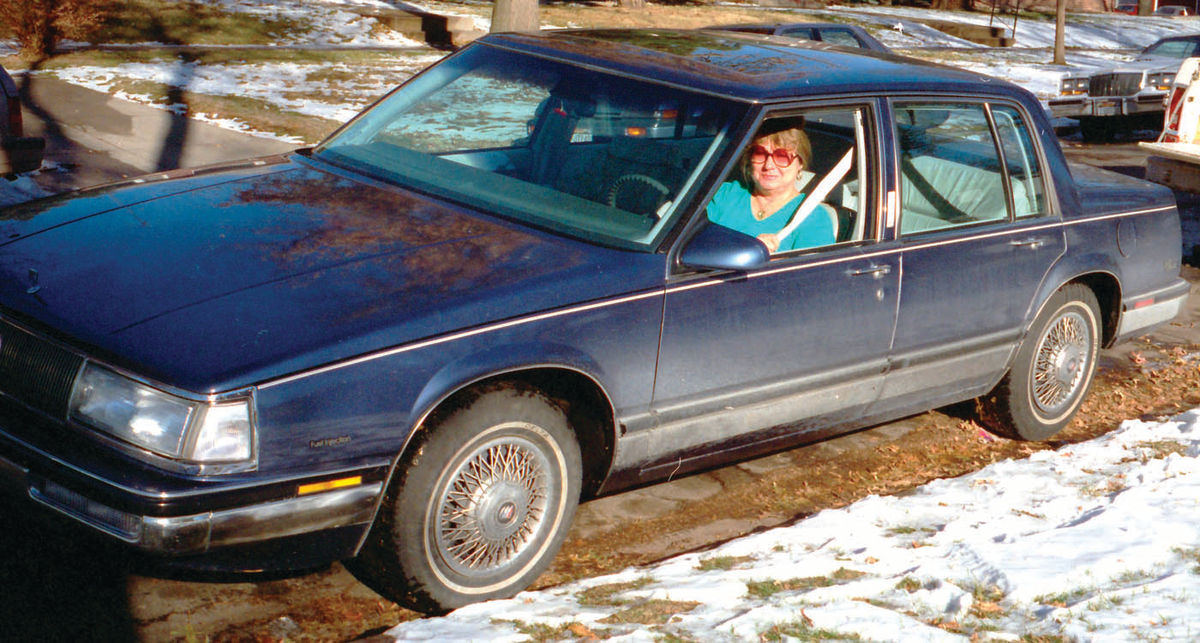
When I eased up to the stoplight in my 1987 Buick Park Avenue, the kid in a souped-up little Honda next to me rolled down his window and shouted over the boom of his stereo: “Your mother’s car!” Now how the heck did he know? It is my mother’s car (Photo 1). She gave it to me in 1995 when she bought her next Buick—a red 1996 Park Avenue. I believe she came to regret her decision: the new Buick just never suited her as well as the blue 1987 luxury liner, with its dove-gray leather seats, automatic- on Twilight Sentinel headlights and soft- closing electric trunk latch.
On the other hand, by giving it to me, Mom—who is gone now—guaranteed that her favorite car of all time would live in perpetuity. She well knew that her only son tends to fix ’em up and drive ’em forever.
Crunch Time
Under my care, the blue Buick generally fared well for several years. Then, one fatefulday in 2002, I lent it to a girlfriend whose name I have since purged from my mind for all the painful memories it evokes.
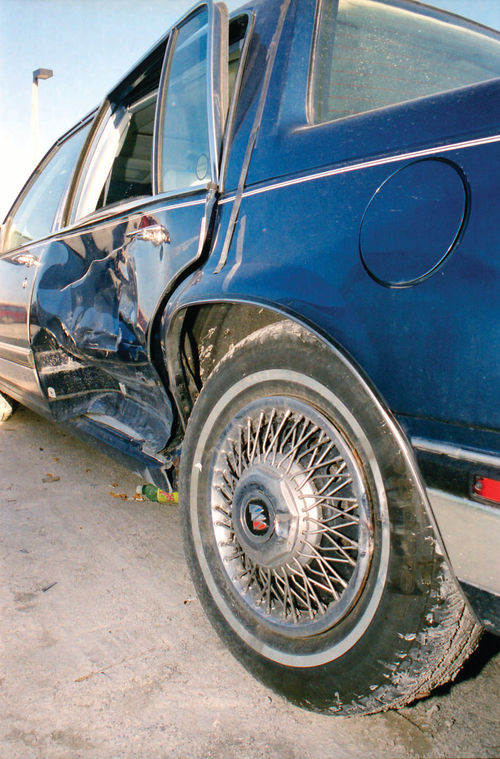
Linda—(Ouch! So much for my mental purging!)—staged a glass- busting, metal-crunching crash in which my Buick formed the top of the “T” in a spectacular collision (Photo 2).
My insurance totaled the car, which I kept, and paid me $1725—just 8% of its $22,154 sticker price from 16 years earlier. For three reasons, I repaired the Buick: 1) I couldn’t buy a used car as nice or as comfortable for anywhere near $1725; 2) I knew the car had many happy miles of driving left in it, and 3) I’m a sentimental cuss.
Repairing the car involved buying, for $500, a rust-free silver 1987 Park Avenue from a salvage yard. It had come into the yard one week earlier from an address that was, quite literally, right across the street from my girlfriend’s house. I’d seen the car many times. What are the chances of that in a city of 200,000?
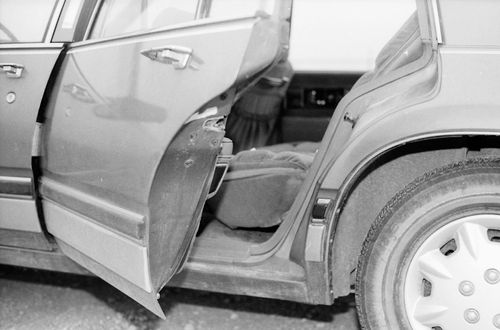
From the silver donor car, my body shop removed the left rear door, the left rear suspension and the curved “dog leg” structure between the door and the rear- wheel opening (Photo 3).
Although repairs, which included repainting most of the left side of the car, cost me about $1000 more than the insurance settlement, I considered it a good investment.
The parts car, in fact, was the “silver” lining in the dark cloud of the crash. Determined as I was to keep my Buick, it made sense to get a parts car while nice ones were still available. It was parked inside, a donor-in-waiting.
A Bouncy, Noisy Ride
Fast-forward five years. By 2007, as the now-revived Park Avenue was approaching 156,000 miles, some problems cropped up. Its struts wore out, turning the car into a mobile bounce house. The steering developed the unwholesome habit of hanging up—catching momentarily—when I rounded a corner. Sharp rattles from the front end advertised worn-out ball joints. The inside rearview mirror fell off.
In short, the car became not only annoying but hazardous to drive. So I parked it...just until I had time to get around to it, mind you.
Having a small fleet of other cars and trucks to drive and maintain, I never quite nudged the Buick onto the high-priority list, although I did start the engine regularly. One day, however, after three years in mothballs, the car’s engine cranked as usual but failed to start.
Meanwhile, I got tied up creating a better life for my legion of lucky automobiles. This involved constructing a storage building and shop on some farmland I bought and then moving all my cars and myself from the city to the country.
The dust settled and with it a great calm descended upon the land. Eventually, I turned my attention back to the Buick. “Hello?” I called. “Where’s my favorite Park Avenue?”
By this time, “Parkhurst” had languished for five years, long enough for the gas to sour. (In fact, I later discovered that the bad gas and resulting rust-producing condensation had ruined the fuel pump, which is actually submerged in gasoline inside the tank. The bad pump is what kept the engine from starting.)
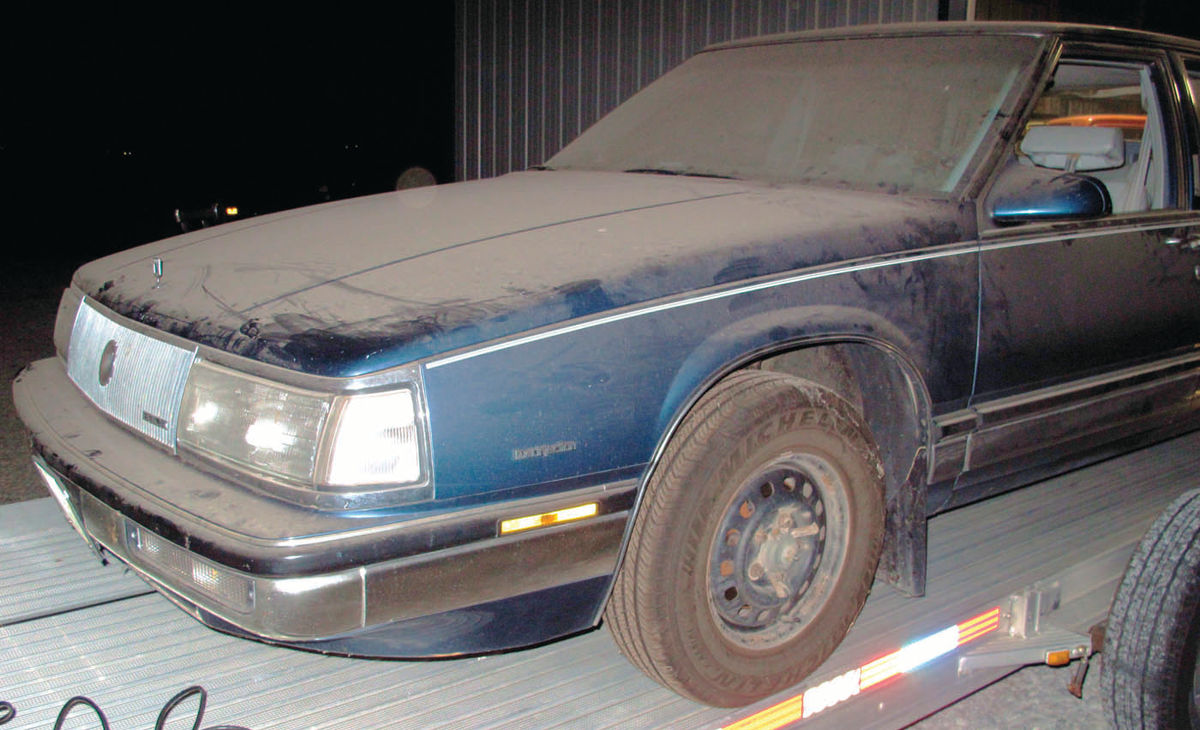
Flushing the gas tank and fuel lines, therefore, was tops of my to-do list for the Buick’s resurrection. Other repairs, big and small, included fixing the grabby steering, loose suspension, tired brakes and more (Photo 4).
Give Me 150,000 More Miles
And here I had a critical decision to make: Would I be content to merely catch up with repairs and delayed maintenance to coax a few more miles out of an aging car? Or would I be happier—and smarter—by investing more time and money now to earn a bigger payoff down the road? A payoff in the form of, let’s say, another 150,000 miles of carefree driving?
Opting for the latter option, I decided to rebuild everything necessary for the Park Avenue to reliably reach 300,000 miles. My specific goal: let’s replace everything now that I know will go bad by 300,000 miles. Besides preventing breakdowns on the road, the idea, of course, is to avoid having to crawl under the car every Saturday afternoon to repair or replace yet another component.
Starting the Dormant Buick
To shake the car awake, I need to get the Buick’s 3.8-liter V-6 engine running again. Already I was suspecting a bad electric fuel pump—or had its circuit merely blown a fuse?
As you might suspect, the fuse wasn’t the culprit as the engine refused to start even with a new 20-amp replacement in the circuit.
Under the hood, I cracked open the main fuel line, following the shop manual’s procedure for releasing line pressure. There was no line pressure. Using a hose clamp, I attached a chunk of heater hose to the gas line’s 5/8-inch flare nut and routed it downward into a gas can.
When I turned on the ignition, which is supposed to activate the fuel pump for approximately two seconds, nothing happened. The shop manual mentioned a fuel pump relay under the hood. I swapped it with the relay from the silver parts car and again I cranked the engine: nothing happened.
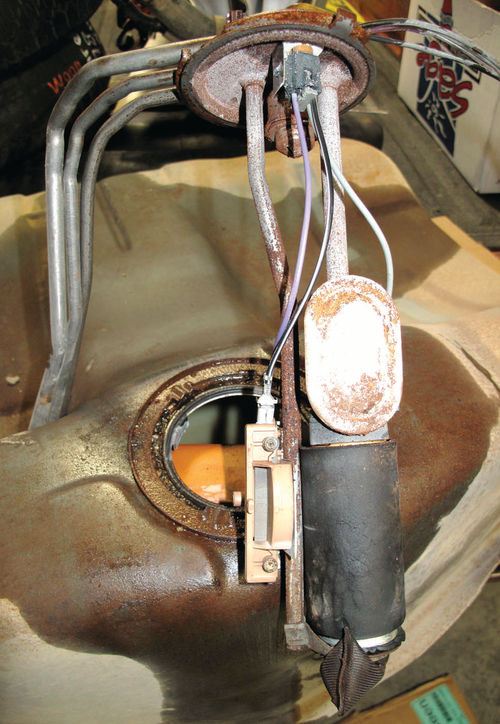
With the ignition turned on, the gas needle drifted off the high side of the scale beyond “F” (Full), signifying trouble in the gas gauge sending unit, which is integral with the fuel
pump. Whatever the exact problem, the fuel pump and sending unit needed attention.
A friend familiar with General Motors cars floated this theory: The fuel pump got plugged with bad gas or some rust particles that had formed inside the tank, tried to pump and burned itself out, something he said could happen even without popping the circuit’s fuse.
Off With the Tank
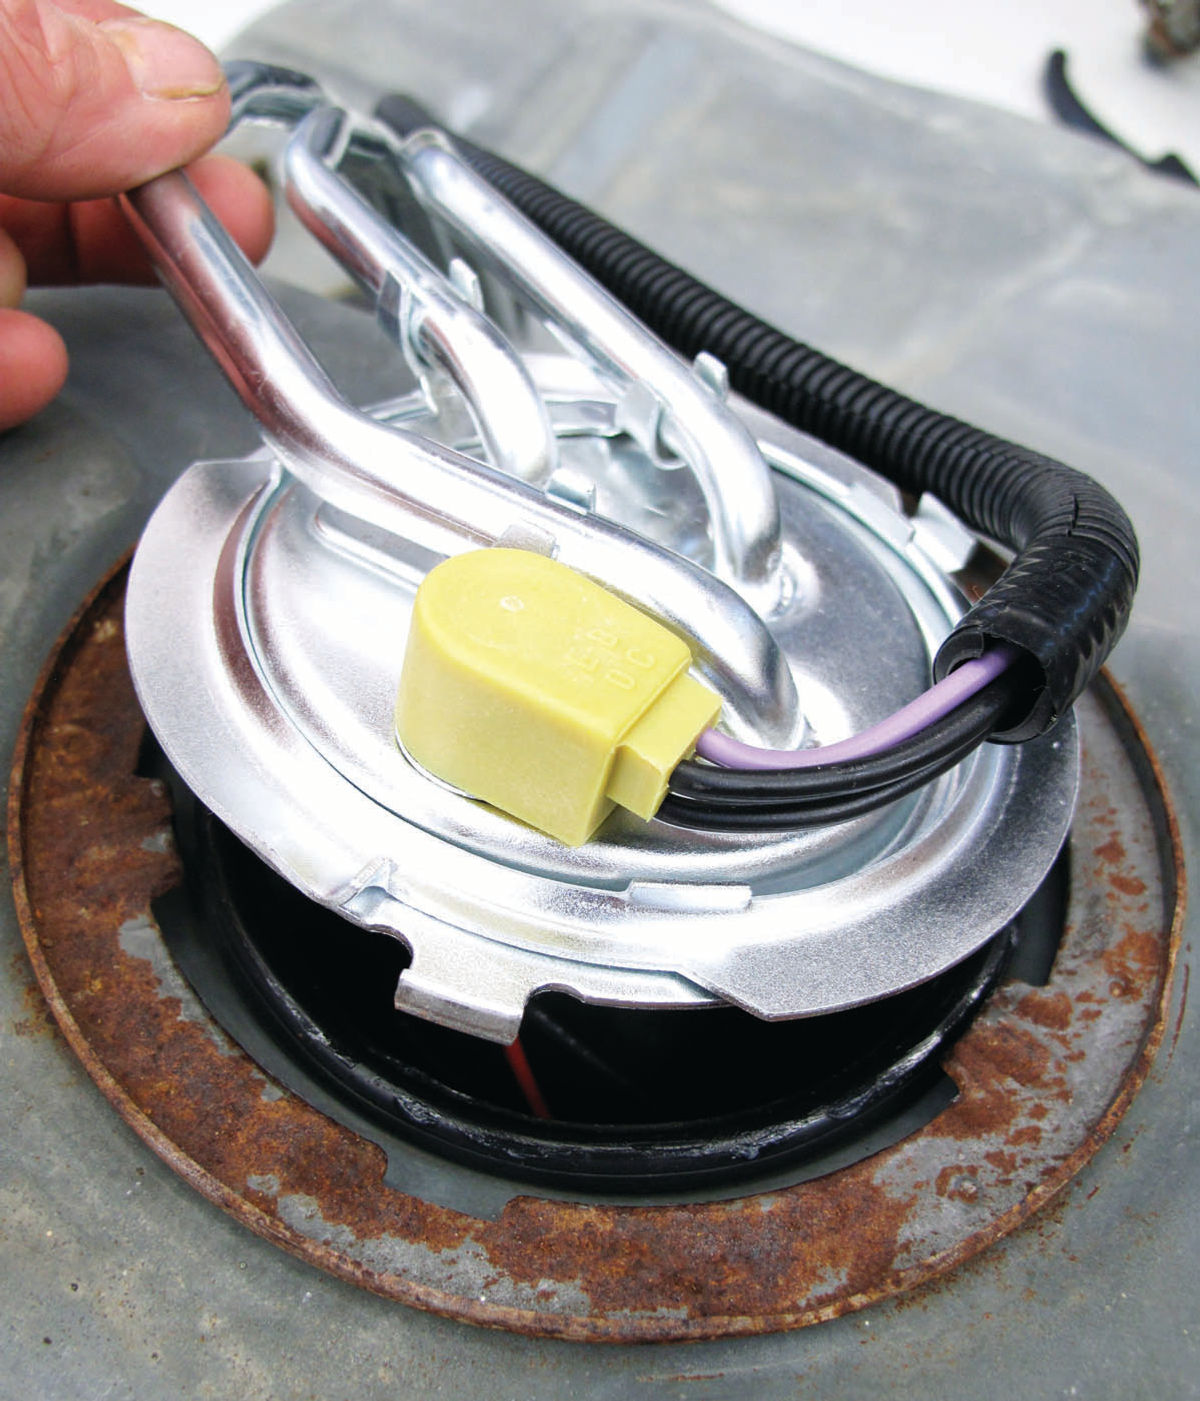
So the tank must come out, with these five steps: 1) drain the gas; 2) remove the filler neck and vent-tube hoses; 3) disconnect the main gas line to the engine and the two gas-return lines; 4) detach two tank-retaining straps, and 5) separate the chassis wiring harness from the fuel pump’s pigtail wiring.
This latter step requires some nimble juggling: you must pull out a lock pin and disconnect the wiring while in the midst of lowering the tank.
The approximately five gallons of gas left in the tank added nearly 40 pounds of extra weight. Because the tank lacks a drain plug, I wasted 10 minutes trying to shove a gas-siphoning hose down the filler neck. It couldn’t pass the two nearly 90-degree bends.
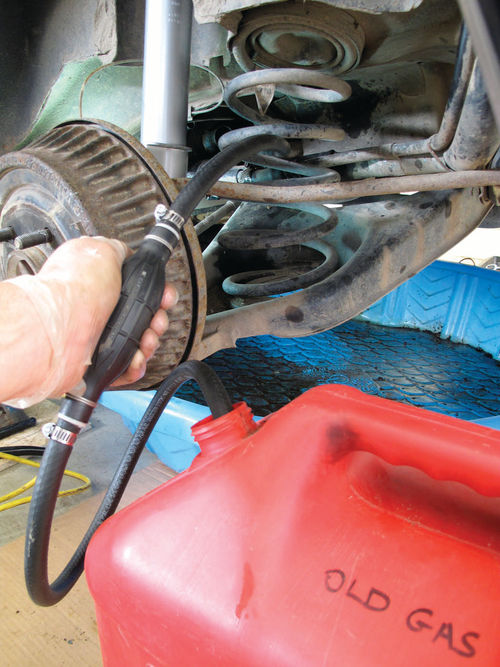
After pulling the filler-neck hoses from the left rear corner of the tank—these needed to come off anyway—I managed to snake my siphoning hose through the shorter pathway this created (Photo 5).
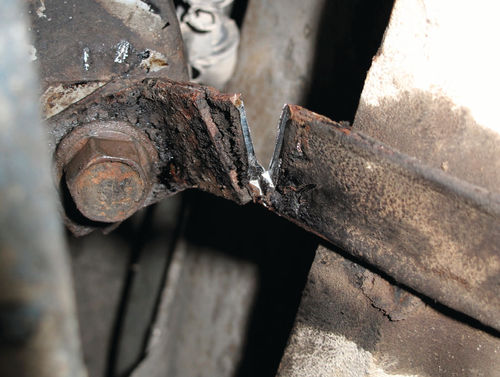
While removing the bolt attaching the right tank strap, its speed nut broke and began spinning freely. Due to cramped quarters I couldn’t reach the nut (Photo 6).
The Strap Must Go!

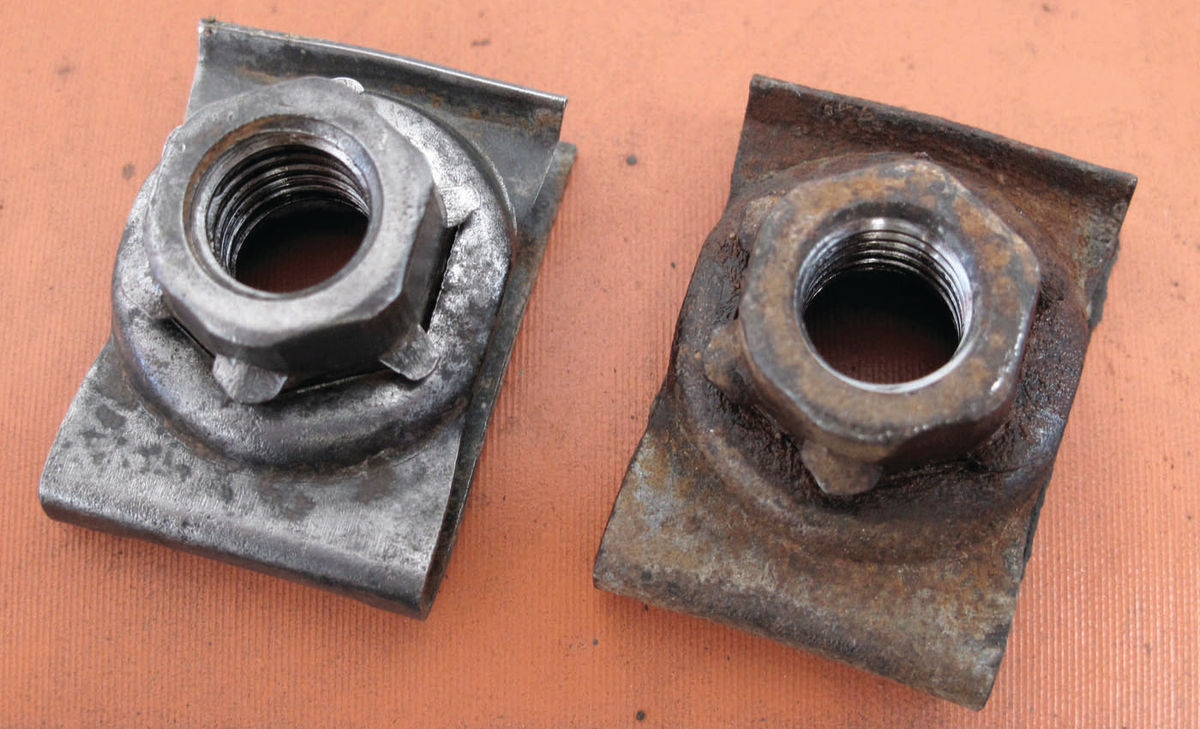
Much as I disliked the idea, I elected to snip the strap with long-handled bolt cutters. (A grinder could ignite gas fumes.) My silver parts car supplied a replacement (Photos 7 and 8).
By supporting the tank with a floor jack and large block of wood, I lowered it a few inches to disconnect the combination fuel pump-sending unit wiring.
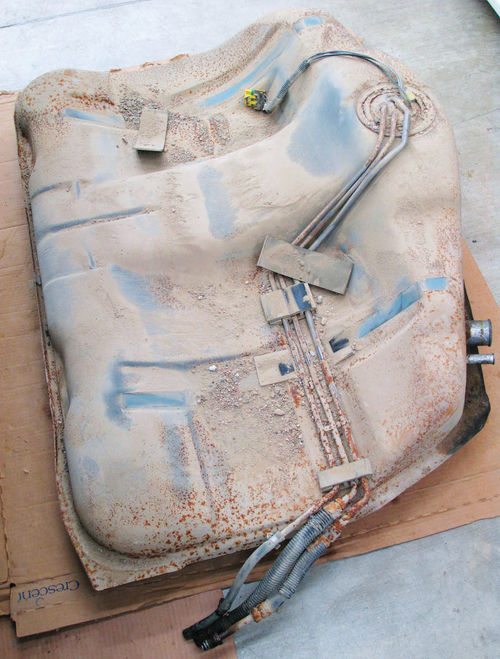
When the tank’s right front corner hung up on the exhaust pipe and shield, I had to push the jack forward, tilt the back of the tank downward and wrestle it out from the car’s left side. It took longer than my recounting might suggest and left me wearing some of the fine dust and gravel that had accumulated atop the tank (Photo 9).
After a few light taps on the tabs of a lock ring, I removed a rusty fuel pump-sending unit (Photo 10). As I’d suspected, rust had blossomed inside the Buick’s gas tank. Rather than spend hours cleaning and sealing it, I removed the tank from the Buick’s parts car, a minor diversion given that I needed one of its tank straps anyway.
The donor tank looked showroom new inside, mainly because I’d run it dry on Coleman lantern fuel (white gas), which leaves no residue or varnish behind. Condensation rarely occurs in a dry tank. By contrast, I’d allowed the gas level to drop to a few gallons in my Mom’s stored Buick, practically inviting rust-inducing condensation to form.
A New Pump and Flex Hoses
There’s no point in pairing a nice, clean gas tank with 30-year-old rubber hoses. Accordingly, I bought new hoses for the filler neck and vent line.
Question: Could I use the parts car’s fuel pump-sending unit? Answer: no, for two reasons. One, when I wired it to Parkhurst and dropped its float, the car’s gas gauge registered half-full instead of empty. Two, its fuel pump didn’t run.
I installed a new fuel pump-sending unit after all (about $100 from Rock Auto, www.rockauto.com), using a new grommet and lock ring. I brushed some anti-seize compound between the unit and lock ring so, years hence, the parts will separate easily for servicing (Photo 11).
To properly assemble my new parts to the parts car’s gas tank, I followed a photo I’d taken during the disassembly phase (Photo 12).
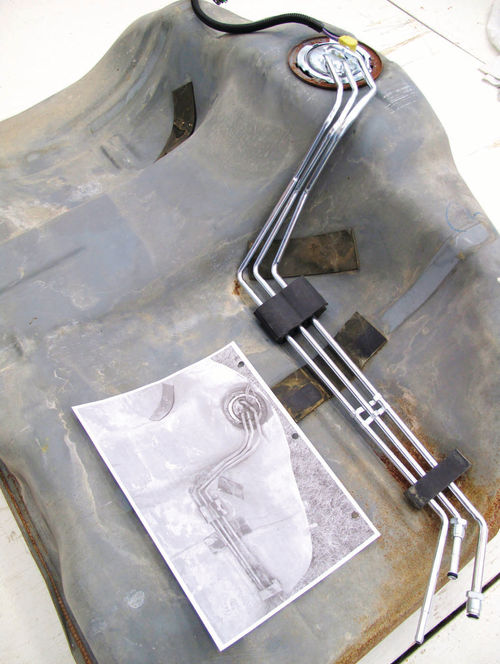
The three metal tubes shown in Photo 12 attach to short flexible couplings to allow for removing a gas tank without snapping the metal tubes. Given my goal of driving for another 150,000 trouble-free miles, I bought a new flex coupling from Rock Auto.
Modifying a New Part
A curious problem arose with the middle of the three metal lines coming off the new fuel pump. Specifically, the flare at its tip was wider than the original flare: it wouldn’t drop into the female flare nut “socket” to seal itself against a rubber O-ring. A leak at this union was therefore inevitable.
A Rock Auto rep set up a three-way conference call involving me and a tech with Dorman, maker of the new fuel pump- sending unit with the integral tubing. Once we established that the flare merely aligned the parts and had no sealing properties—the O-ring did that job—the solution was simple: file its circumference.
Despite the Rock Auto rep’s warning that I’d forfeit my right to return the part if I modified it, I modified it. Because the flare’s diameter was .305 inch versus the socket’s .300 inch, I lightly dressed the outer edge of the flare with a flat needle file (Photo 13). Suddenly, the parts fit!

Later, once I’d installed the tank, I followed another suggestion from the helpful Dorman technician by turning on the ignition several times to fully pressurize the system. He knew that the fuel pump revs up for two seconds every time you turn on the key. This allowed me to check for leaks at both connections before I actually started the engine—a safety precaution. I had no leaks.
A Tricky Gas tank Installation
Several tricks—none mentioned in the shop manual—will speed up the job of installing the tank. One is to mount the filler neck-and-hose assembly inside the car’s left quarter panel before you raise the tank. The tank actually interferes with moving this assembly far enough forward to push its top back up into the quarter panel’s fuel- door area.
Second, tape the fuel pump-sending unit’s short wiring harness to the back of the tank or risk trapping the wiring above the tank and out of reach. Finally, plug the two openings (filler neck and vent) at the tank’s left rear corner to keep dirt out as you jockey the tank into place. Once I’d reconnected all lines and hoses, I added gas and then reattached the battery’s negative terminal. When I turned the ignition key, I heard two seconds of buzzzzzzzz coming from the gas tank. My new fuel pump was on the job.
I turned on the ignition perhaps a half- dozen times until I heard sloshing from the engine compartment, where fuel was wending its way around the “fuel rail” that feeds the fuel injectors.
A quick check revealed no gasoline seeping or dripping at the unions between the tank and engine. And the engine started right up, proving once and for all that a working fuel pump is a beautiful thing.
In the next installment, we’ll replace the Buick’s front and rear struts, free the old tie- rod ends using an inexpensive puller, and re-stick the inside rearview mirror.


