
Restoring Mom's Car
Even With a 30-Year-Old Car Many Parts Can Tend to Be Rusted In Place and Put Up a Fight. And, Hey, Look At the Grooves In That Brake drum.
Editor’s note: This time, Curt deals with the “raspy” rear suspension links so they can be greased. He also performs brake and transmission work in his quest to coax another 150,000 miles out of his hand-me-down 1987 Buick Park Avenue.
Last time, I’d removed the Park Avenue’s right-side “rear suspension link” which, like the tie rod at the front of the car, keeps the wheels aligned. I had replacement tie-rod ends on hand for the twin links’ screw-off outboard ball joints. The inboard ball joints were permanently mounted, however, and felt very stiff, even raspy.
Rather than pay $288.93 apiece for new links, available only through General Motors, I decided to convert the old sealed joints into greaseable units capable of withstanding 150,000 miles of additional wear. This required several steps.
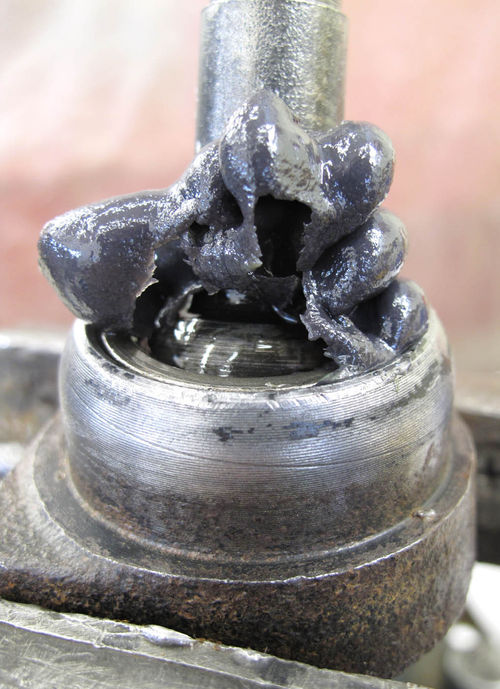
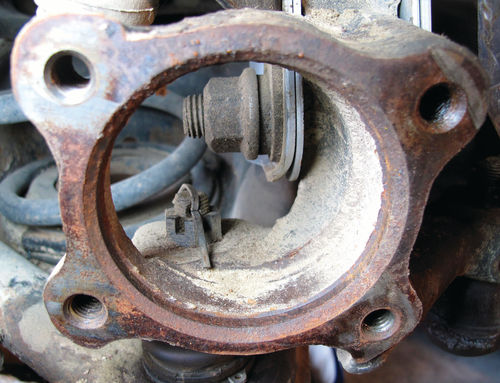
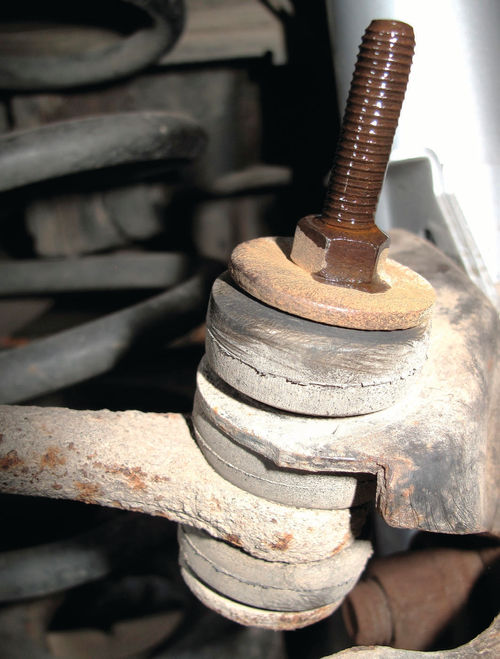
First, I removed a band clamp securing the rubber boot’s large end. By wirebuffing the rust-roughened link rod, I was able to slide off the boot without tearing its tight-fitting small end (Photo 46).

Next, I drilled through the casting into a nearly dry grease cavity beneath the ball joint. I screwed in a zerk, which cut its own threads, and then unscrewed it so I could remove metal shavings with a Q-Tip and a magnetized screwdriver. I replaced the zerk using a Loctite sealant to avoid over-snugging and stripping out the new threads.
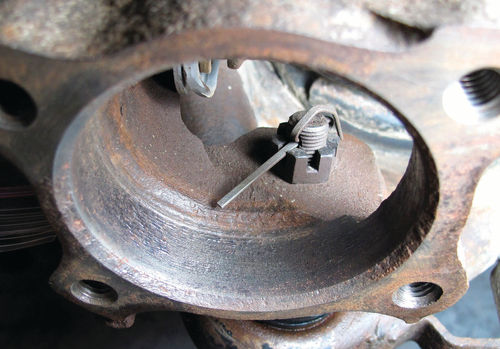
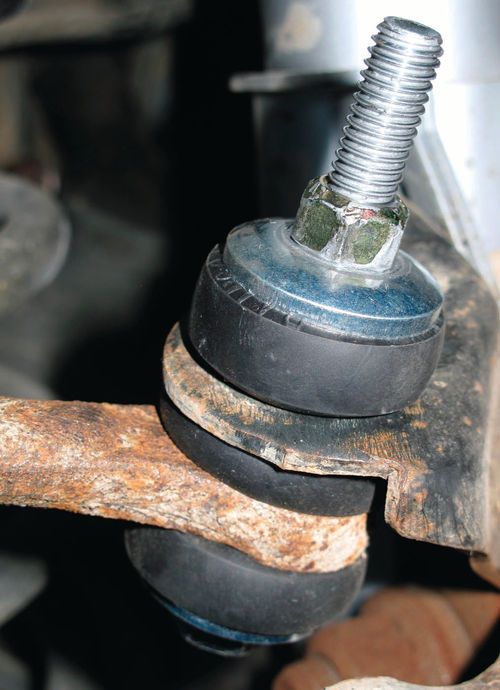
Finally, at my bench vise, I used a grease gun to lubricate the dry ball joint through the new zerk, and then replaced the boot, secured its big end with a hose clamp and reinstalled the link on the car (Photos 47 and 48).

I spun a new rod end (ball joint) on the link’s threaded outboard end, locking it with an adjusting nut to position the new joint exactly where I’d found the old one. The shop I’ll hire later to perform a four-wheel alignment can fine-tune this adjustment. I modified and reinstalled the Buick’s other rear suspension adjustment link in the same way.
A Stuck Brake Drum
The rear drum brakes were due for new wheel cylinders and shoes. Typically, with the wheels removed the drums simply slip off the lug studs, as occurred at the left rear wheel. The right side stuck, even after I loosened the parking-brake cable.
I was forced to pry between the drum and backing plate, which bent the edges of the latter, fortunately marring only its appearance. Eventually, when I got one jaw of my three-jawed slide hammer on the rim of the drum, I gave the slide hammer eight or 10 whacks while rotating the drum to various positions. This freed it.
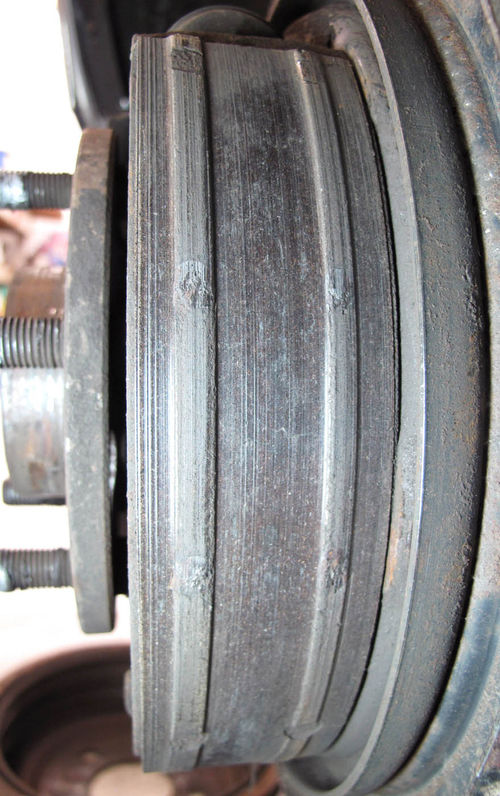
Its removal revealed the reason for the drum’s recalcitrance: the front shoe’s brake lining was worn through to its rivets, which cut two deep grooves in the drum, not only making it difficult to remove but ruining it (Photo 49).
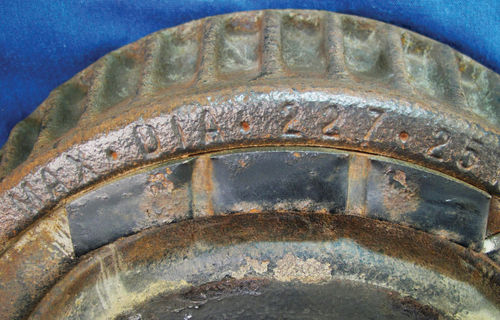
My parts car yielded a good spare drum, however. According to my brake gauge, both it and Parkhurst’s left rear drum measured 225mm in diameter, considerably less than the wear limit (as stamped into the drums) of 227.25mm (Photo 50).
I had both drums turned at my usual brake shop and had new brake shoes arched to fit the curvature of the drums. With such clean, close-fitting surfaces, the Buick Was guaranteed many miles of carefree braking.
Draining Old Brake Fluid
The old wheel cylinders, particularly the right one, were gunky inside. It’s possible that the pistons, too sticky to retract, had kept the brake shoes in constant contact with the drum.
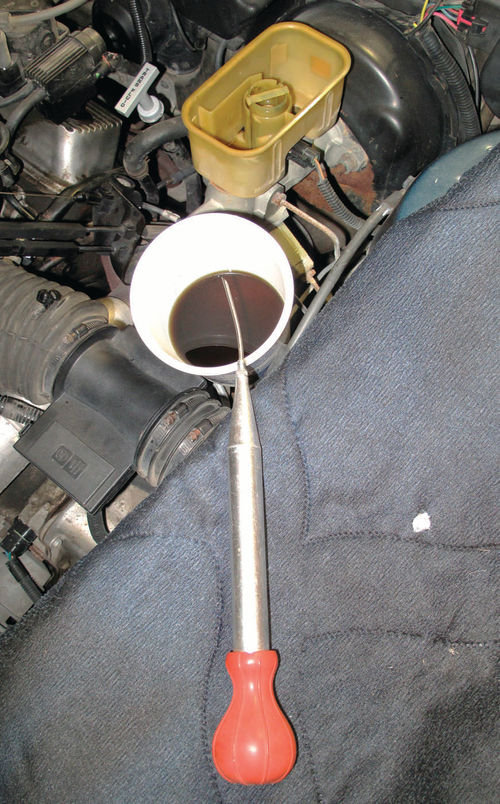
To avoid filling the new rear wheel cylinders with old brake fluid the color of pancake syrup, I used a turkey baster to empty the master cylinder. I wiped down the bottom and sides of the reservoir before filling it with fresh fluid (Photos 51 and 52).
When I disconnected the metal brake lines at the two rear wheel cylinders, I let the fluid flow by gravity until it ran clear, refilling the master cylinder as necessary.
I then blocked the car’s brake pedal down slightly so the master cylinder piston blocked the reservoir port. This prevented the master cylinder from emptying. (When you do this, disconnect the battery or pull the fuse to your brake lights.)
At this point, after taking photos and making a sketch or two, I removed all springs, cables, hold-down pins and the like to strip all rear brake pieces from the car.
Hubs Are Rusted In Place
Just one task remained at the rear wheels: replacing the hubs. As at the front wheels, the hubs were multipurpose parts, each containing wheel bearings and also a flange and five studs for mounting a wheel. The four screws holding each hub to its rear knuckle came out easily, unlike the screws I’d had to heat with a torch while replacing the front hubs.
But the going got decidedly tougher when I discovered that the rear hubs had rusted tightly to their knuckles. I spun a lug nut over a heavy washer on one of the hub’s wheel-mounting flange studs. Using my slide hammer while rotating the flange to various positions, I whacked away until the hub broke free.
To prevent the new wheel bearing and hub assemblies from rusting in place, I polished the inner edges of the knuckles’ hub-mounting surfaces with a drill-mounted wire brush and brushed a coat of anti-seize compound on them (Photos 53 and 54).
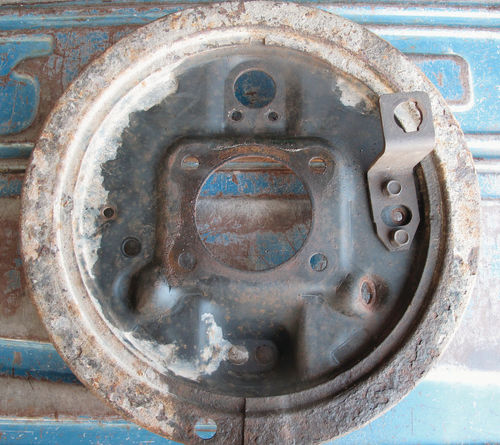
The same four screws that secured the hub also attached the crusty old brake-backing plates—the mounting surface for the rear wheel cylinders, brake shoes, various return springs and the like. Therefore, I removed the brakebacking plates and added them to the pile of parts I was preparing to sandblast and paint for another project (Photo 55).
An Opportunity Squandered
Having stripped everything off the knuckles at each rear wheel, I took advantage of the easy access to replace links and rubber bushings that tie the rear sway bar to the control arms (Photos 56 and 57).
Distracted by other repairs, I didn’t realize that I was just a few simple steps away from uncovering the ball joint under each rear knuckle. Consequently, after I’d rebuilt the brakes and covered up the ball joints again, I wound up hiring a shop to replace these hard-toreach parts. The shop had a special press that could remove and install the ball joints with a minimum of disassembly.
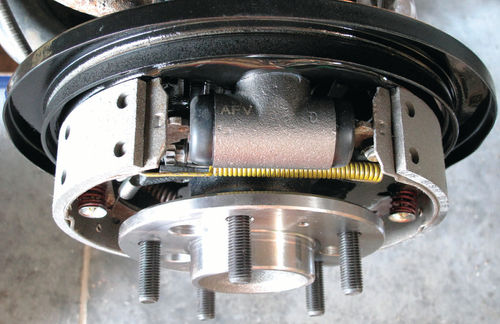
Once the paint had cured, I reinstalled the backing plates and new wheel bearing and hub assemblies, followed by fresh wheel cylinders, the new brake shoes and freshly machined drums, and various small parts from a brakehardware kit.
As I always do, I disassembled the new wheel cylinders to lubricate them with a thin coating of Raybestos brakeassembly lubricant to guarantee a nice, long life. I used photos I’d previously taken to reinstall all the pieces properly (Photo 58).
Two Feel-Good Projects
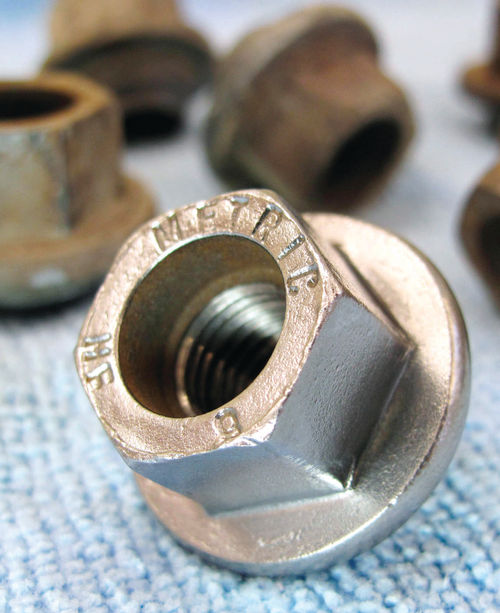
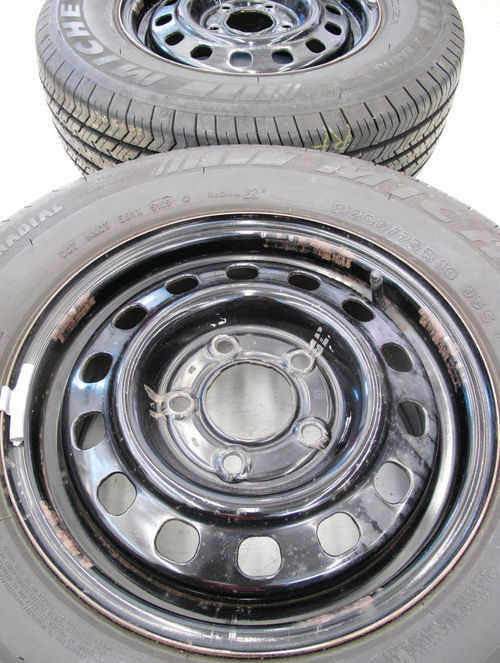
I wrapped up my suspension and brake work with two feel-good projects. First, I brightened the 20 lug nuts by shining their exteriors at a floor-mounted wire-wheel buffer and flushing their internal threads using a drill-mounted cylindrical wire brush dipped in solvent (Photo 59).
Second, I followed up a sudsy scrubbing of each wheel rim by manually applying Meguiar’s Ultimate Compound. I sealed the outsides of the wheels with Mother’s SynWax. Although wheelcovers hide the revived paint, I feel better knowing that the wheels aren’t turning a rusty brown just beyond my view (Photo 60).
Some Transmission Maintenance
At 104,000 miles, I’d removed the Buick’s transmission pan, installed a new filter, reinstalled the pan with a new gasket and topped off the automatic transmission fluid (ATF).
Now, seven years later at 156,000 miles, it was time to repeat this maintenance step. I thought I’d also one-up myself by performing an athome fluid flush.
Accordingly, I hauled in several sheets of cardboard to protect the floor from the inevitable ATF spill. I placed the front of the car on jack stands and then crawled under with a drain pan to remove the 19 bolts securing the transmission pan.
“Secure,” I discovered, is a relative term: some of the bolts were merely finger-tight. My service log revealed that I’d torqued the bolts correctly and also used clear silicone on the bolt threads, which prevents low-torque bolts from vibrating loose and falling out.
The pan gasket apparently compressed over time, causing the bolts to feel loose. Note to self: this time, check and retorque the bolts a couple of months after replacing the pan.
Transmission pans typically lack drain plugs, probably to eliminate any chance of one falling out and cooking the transmission within seconds at highway speeds.
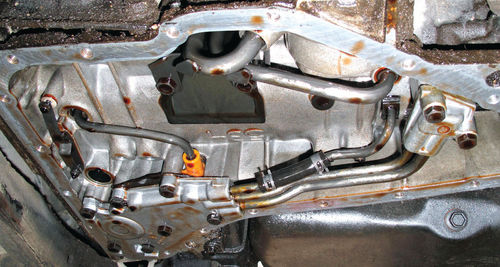
It is a delicate dance, lying beneath a car, loosening bolts to gently lower a pan filled with fluid. The best way I’ve discovered is to remove most of the 19 bolts, leaving perhaps six in place: two at each end and two in the middle, each of these six screwed almost fully out. Then lift one end of the pan higher than the other end to allow the fluid to spill over the lower lip and into the largest drain pan you can find (Photo 61).
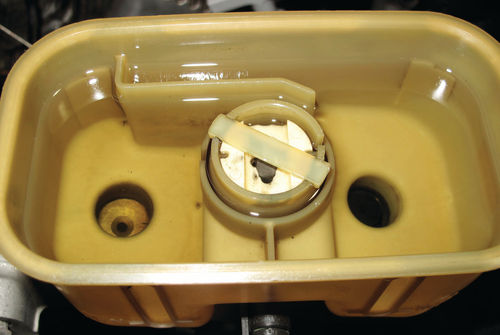
A New Filter and Seal
After flushing the pan with solvent, I rinsed its interior with isopropyl (rubbing) alcohol to avoid any problems that solvent residue might cause.
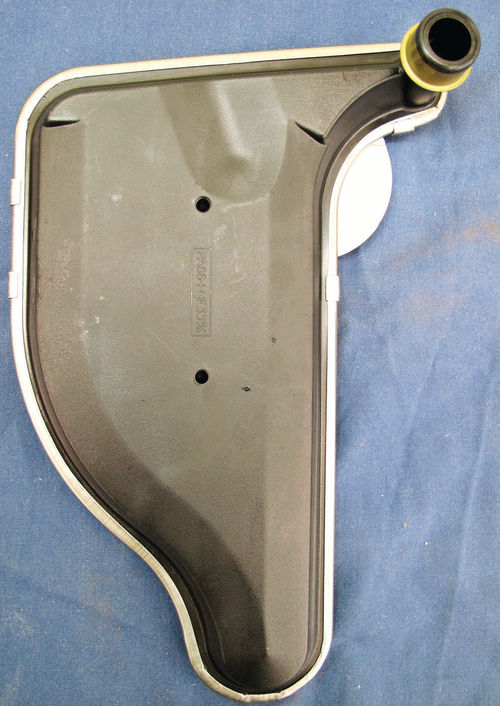
The filter has a snorkel or nozzle on it that presses upward into a hole in the aluminum transmission body. A metal-and-rubber seal, which prevents leakage at this contact point, is what holds the filter in place.
Only when I tried to install my new filter did I discover that the old seal had stuck in the hole. The new filter had a seal already installed on its snorkel; a new seal wasn’t going to fit inside an old seal, of course (Photo 62).
And I do mean stuck: I had to hit the old seal’s flange with a hammer and small screwdriver, collapse it and pull it out using a Vise-Grips.
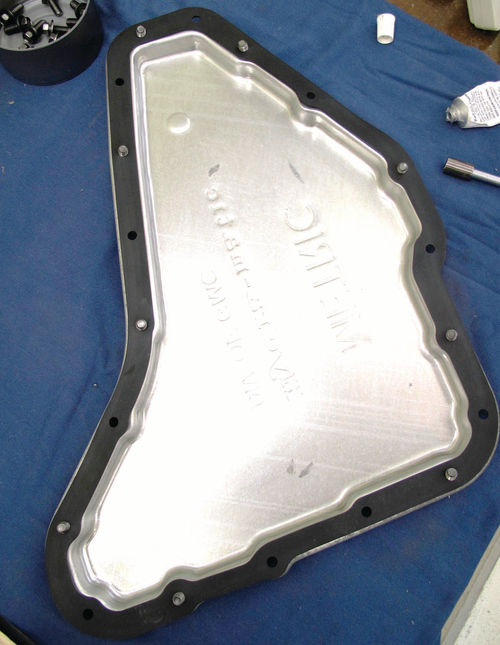
My filter kit from Rock Auto came with a new pan gasket, always a challenge to install because the gasket inevitably wants to squirt out of position. In this instance, I aligned the pan and gasket by screwing every other bolt up through the pan and through the tight gasket hole until the bolt was perhaps halfway in (Photo 63).
I dabbed some clear silicone on the tips of those nine bolts, slid under the Buick and then started them into their holes. I then applied silicone to the tips of the remaining bolts, started them and snugged all 19 bolts finger-tight.
In a criss-cross pattern starting in the middle of the pan and working outward— first forward, then rearward—I began tightening the bolts to 144 in.-lbs. (12 ft.- lbs.) with my clicker torque wrench.
Next time, things go terribly wrong when we try an at-home transmission flush. We recover, however, to not only finish the job but address serious engine and steering problems.


