
Restoring Mom's Car
A Transmission Flush Resulted In a Cleanup Project. Then, After All This Work, Why Does the Car Feel “Harsh?”
Editor’s note: This month we’ll concentrate on the transmission and steering before turning to the timing gear.
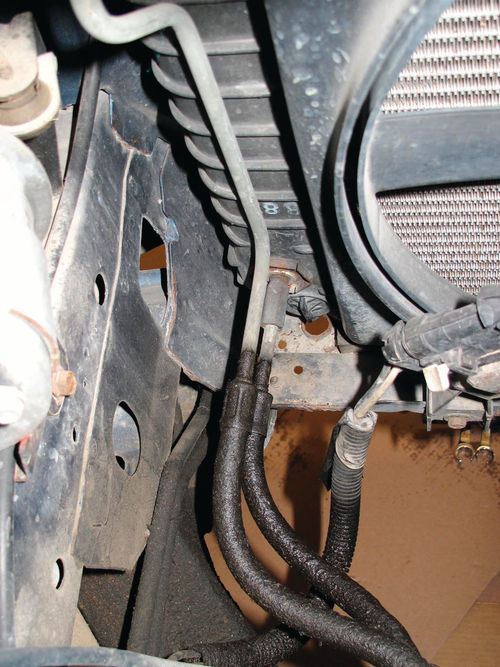
To cool the hard-working transmission fluid, two metal-and-rubber lines carry it forward to the car’s radiator and then back home again.
The hot fluid enters the driver’s-side tank of the Buick’s cross-flow radiator— the outlet, or cooler, side—and flows in a tube through the antifreeze to dissipate heat. Most cars with automatic transmissions have similar setups.
What usually dooms a transmissioncooling line is the rubber section, which allows the line to flex rather than break when the engine rocks in its rubber cradle. Sure enough, Parkhurst’s original 1987 lines were leaking badly at the flex hoses (Photo 64).
Although I couldn’t find replacements on Rock Auto, a nearby NAPA store stocked them. Removing the twin cooling lines went smoothly at the radiator end.
In fact, of the four fittings, the only one that was difficult to remove was the one that headed straight up into the bottom of the transmission. I had to remove the other line first to get access to this one (Photo 65).
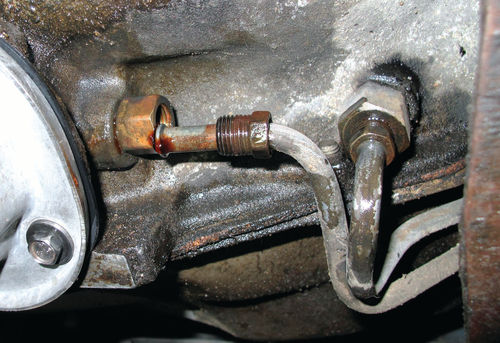
Even so, given the extreme angle at which I was working, neither fitting would accept a flare-nut wrench, which grips a fitting on four of its six sides. Fortunately, I was able to grip and remove the flare nuts by engaging just two flats with a standard open-end wrench.
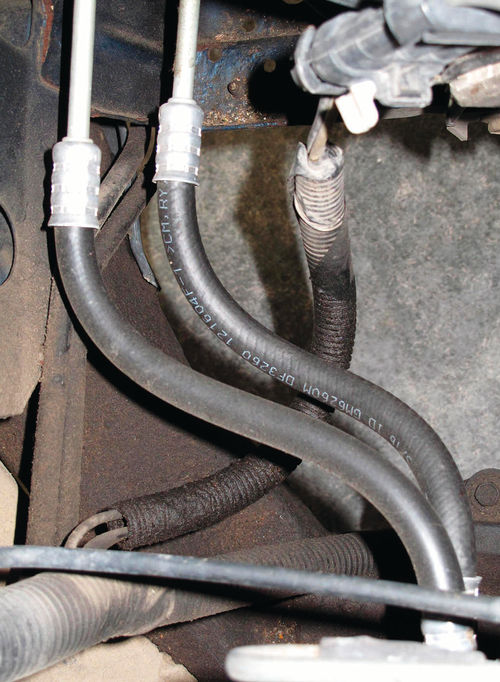
I installed the replacement parts and as I ran the engine to test for leaks— there were none—I marveled at how good the new transmission-cooler lines looked (Photo 66).
According to a helpful local transmission shop owner, my Buick would retain some fluid in its transmission torque converter even after I drained the pan.
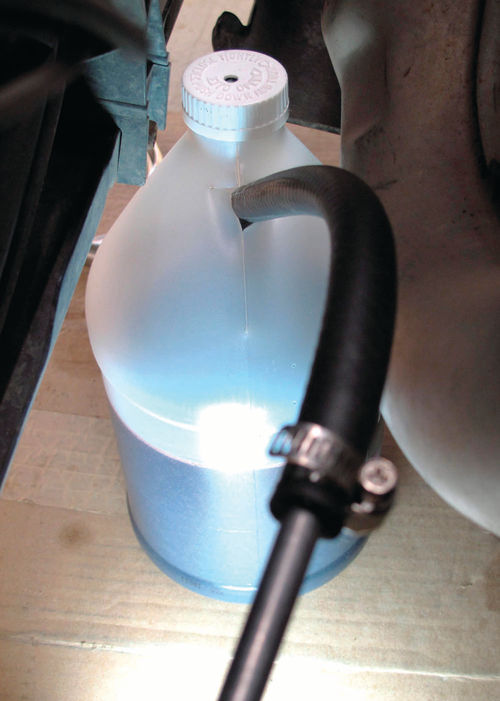
To remove this trapped fluid—in fact, to flush the entire transmission—I made an adapter line to temporarily replace the line carrying ATF from the radiator cooler back to the transmission. I started with a piece of 5/16-inchdiameter brake line, which I flared on both ends. I placed a flare nut on the end that would screw into the cooler. Over the flare at the opposite end, I clamped a length of rubber gasoline hose and slipped its lower end into an empty clear-plastic jug (Photo 67).
To perform the at-home flush, I first topped off the transmission, which was low on fluid after I’d removed the pan. Next I warmed up the engine so it wouldn’t rev like an out-of-control lumber truck.
What a Mess!
Once its idle dropped to normal, I stopped the engine, disconnected the upper cooler line at the radiator, moved its open end aside and attached my adapter line in its place, running its free end into the drain jug.
When I reached through the car window to crank the engine, it started immediately—whereupon pink transmission fluid began spurting all over the front of the engine compartment. Although I shut off the engine within about two seconds, enough ATF shot against the back of the headlights and beyond that I had a considerable mess to clean up (Photo 68).
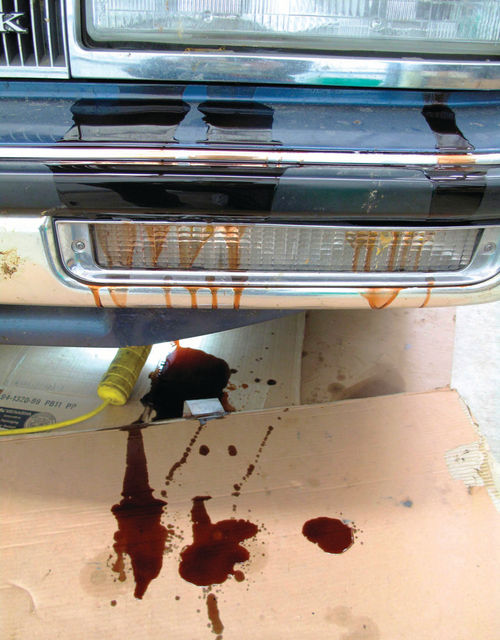
My experiment taught me convincingly that I’d erred. In fact, the upper hose carries ATF toward—not away from— the transmission cooler. I’d inadvertently unscrewed a pressurized line and left it open, with inevitable results.
Sadder but wiser, I reconnected the top line and replaced the bottom line with my adapter hose. Much better. After restarting the engine, I pumped perhaps three quarts of dark pink fluid into the jug while simultaneously pouring fresh ATF (Dexron III) into the transmission through a long funnel stuck in its dipstick tube.
Checking It Twice
To avoid overflowing the 1-gallon jug, I stopped the engine and placed the lower end of my adapter line into an empty jug. Repeating the out-withthe-old, in-with-the-new procedure, I pumped another three quarts of fluid into the new jug making, in all, six quarts of flushed fluid.
I stopped when, to my arbitrary judgment, the flushed fluid took on the bright-pink color of fresh ATF.
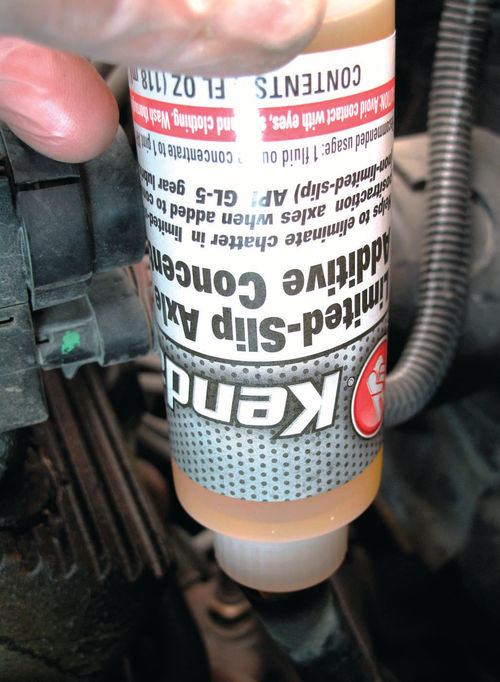
To check the fluid level, I idled the engine for 15 minutes with the car in park to warm up the ATF. While I was waiting, I dumped in four ounces of Kendall Limited-Slip Axle Additive, which I’d been using for the past 10,000 miles to eliminate torqueconverter chatter. It has worked well for Parkhurst (Photo 69).
When I rechecked the level of the hot ATF, which earlier had touched the tip of the dipstick, it now didn’t even register. I imagine the torque converter sucked some up. By adding one quart, however, the fluid level registered full.
Time to Call In Some Specialists
I generally enjoy performing my own maintenance and repairs; at least until transmission fluid erupts in a geyser. But when I don’t have the time, talent or tools to perform a certain task, I’m happy to do what even well-trained doctors routinely do: refer it to a specialist.
Time was becoming an issue. I’d already invested 170 hours in Parkhurst during a very busy month, all so I could resume driving the Buick. I was becoming increasingly eager for this to occur.
Through trial and error, I’ve discovered three repair shops that I use from time to time because they are trustworthy, do nice work and charge reasonable prices.
I’d learned that the special tool necessary to replace the rear ball joints with a minimum of disassembly cost as much as paying a shop to perform the work. I was therefore content to farm out that repair.
Moreover, I didn’t feel comfortable troubleshooting and curing the steering problems I was encountering.
And aiming headlights is such a quick, easy and relatively inexpensive job for a well-equipped shop that I elected to hire that out as well.
A Bad Steering Gear
One shop installed the rear ball joints and aimed the headlights with no surprises or drama. They also investigated the source of the car’s steering quirks: a chattering powersteering (PS) pump and a tendency for the steering to hang up during righthand turns.
The diagnosis: a self-destructing steering gear, which announced itself through various fluid leaks and metal particles floating in the PS fluid. The bad steering gear, responsible for the catch in the steering, also ruined a remanufactured PS pump I’d installed in 2002 at 115,000 miles, hence the pump noise.
The shop installed a remanufactured steering gear and PS pump and flushed the lines to rid them of metal particles. Because both “new” parts offered a lifetime guarantee, you can bet I kept the receipt.
Undoubtedly, this shop could have performed a competent fourwheel alignment. Yet I prefer to use a locally-owned tire store that performs alignments all day, every day on a firstrate aligning machine, and did so.
Time for the First Test Drive…
Sometimes during a restoration or even a mini-restoration like this one, it’s cleansing to sit back, heave a sigh of relief and bask in the warm glow that comes with completing an enormous task. Fire up the old turntable and listen to Frank Sinatra’s “My Way” in all its LP glory.
This was not one of those times. I say so because Parkhurst performed horribly during a test drive after the tire store’s alignment. This was my maiden cruise after the car’s Big Sleep, given that I’d trailered her to and from her previous appointment so my wife didn’t have to drive a second vehicle to assist.
I just didn’t like the hard-to-describe, nearly intangible feeling that I was getting, one well-removed from the smooth ride I remembered. It was partly a vibration, partly a harshness; partly an uncertainty in handling.
Granted, I’d wanted to run several tanks of fresh gas through the engine to see if its rough running—a symptom of its long hibernation—would disappear.
The Harshness Vanishes
I considered, too, the car’s many new steering and suspension parts— from struts to ball joints, sway-bar end links to tie-rod ends and even a new steering gear. Parkhurst’s new stiffer, more-precise ride and handling would certainly clash with my recollections of the car’s previous performance.
Moreover, I reasoned, the fresh ATF may have shocked the transmission, causing a revival of its torqueconverter chatter.
Then, too, I was test-driving the Buick on a rough old state highway that would cause any car to rumble a bit.
Or could I write off the bulk of my misgivings as caused by my need to get reacquainted with the car?
Probably all of the above theories contributed to my feeling of unease, which I still can’t fully explain.
I also discovered that the tire pressure, at 38 psi, was well above its factory setting of 30 psi. I believe I overinflated the tires to more easily winch the dead Buick on my trailer when I toted it from storage to my shop to begin my repairs. Regardless, shouldn’t my tire shop have checked for a correct—and especially uniform— tire pressure before it performed its four-wheel alignment?
However, with the lower tire pressure, and perhaps a smootherrunning engine, better roads and, undoubtedly, some time for me to readjust to the car, the “harshness” problem has simply ceased.
Tending to a Sagging Pipe and Dirty Engine
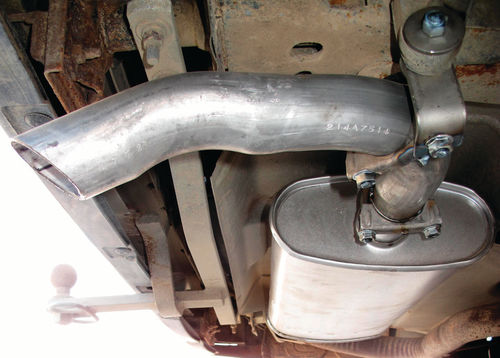
As long as I was soliciting help, I stopped at an exhaust shop I favor to replace a rotten muffler. The shop also repaired a sag in the long exhaust pipe by installing a support and clamp to the rear control arm anchor structure just behind the gas tank. Otherwise, the exhaust pipe was solid (Photo 70).
As the Buick’s to-do list shrank, my mind drifted toward cosmetic improvements.
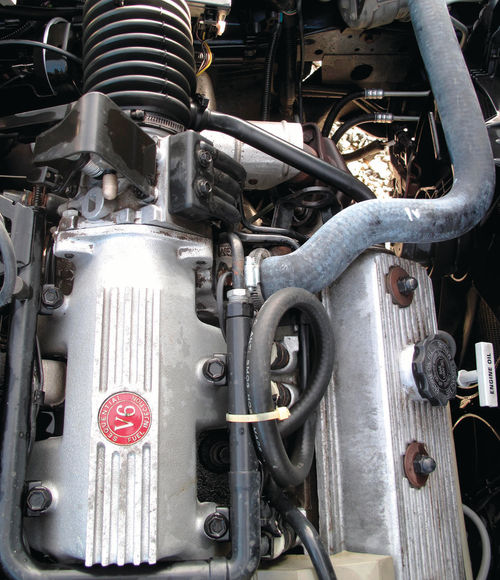
The engine bay, by no means filthy, certainly looked its age, so I washed it.
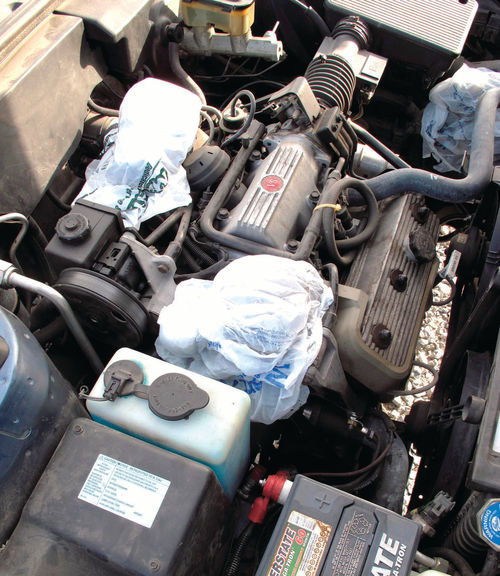
After wetting the engine compartment, I sprayed most of a 32-ounce bottle of Purple Power Citrus Cleaner on the engine and adjacent parts. After a bit of scrubbing with a nylon-bristle brush and a rinse, the engine and environs looked respectable. I’d concentrated much of my scrubbing on the oilsoaked aluminum valve covers; they now sparkled (Photos 71 and 72).
How’s Your Timing Gear?
Just when I’d succumbed to fits of self-congratulation, a friend’s chance remark sent me scurrying back to work. He asked if either my mother or I had replaced the car’s original nylon timing gear. If the gear wears far enough, the timing chain can slip, which allows the overhead valves to collide with the pistons and—WHAM!—your engine self-destructs (or so he said).
In fact, I had no record of such a repair. I decided to correct this situation immediately, before my courage failed me or my luck ran out, whichever came first.
Replacing timing gears involves tearing apart the front of the transversely mounted engine, which faces the right front fender. I created a checklist of 21 steps necessary just to expose the timing chain and gears, plus additional work to replace them.
Out came the battery to free up working space. Off came the right front wheel, two fenderwell splash aprons, a heater hose and the lower radiator hose (after draining the radiator).
After removing some hard-to-reach nuts, I rolled an engine hoist up to the left front fender, attached its chain to a hook permanently mounted on the engine and lifted it slightly off its right front motor mount.
Off came the windshield washer-fluid reservoir, serpentine belt, water pump pulley, the alternator and its mounting bracket. Next I drained the engine oil and emptied the oil filter. Other steps: remove a heater return hose and a bypass hose from atop the water pump; remove the water pump, followed by the crankshaft vibration dampener bolt and dampener.
That Dampener Bolt Wouldn’t Budge
I’ll withhold the excruciating details of the above procedures to focus on the problems—and, boy, there were problems—with the dampener bolt. It refused to budge, even when I hit it with an impact wrench backed by 125 psi of air pressure.
How could that be? Well, air pressure is only half the equation. The other half is air volume. Other urgent projects had booted the Buick and its engine repairs out of my shop and into my storage building.
The little Coleman air compressor there produces 125 psi, it’s true, but at a relatively paltry 6 cubic feet per minute (CFM) of air flow. I use it mainly to fill tires. So there it was: plenty of air pressure but not enough volume.
The solution came in the form of a tow-behind air compressor that produces a hefty 125 CFM at 100 psi— enough volume to run a jackhammer. In fact, my Joy air compressor, a 1950s relic I’d purchased at a construction equipment auction, had spent its life running a jackhammer.
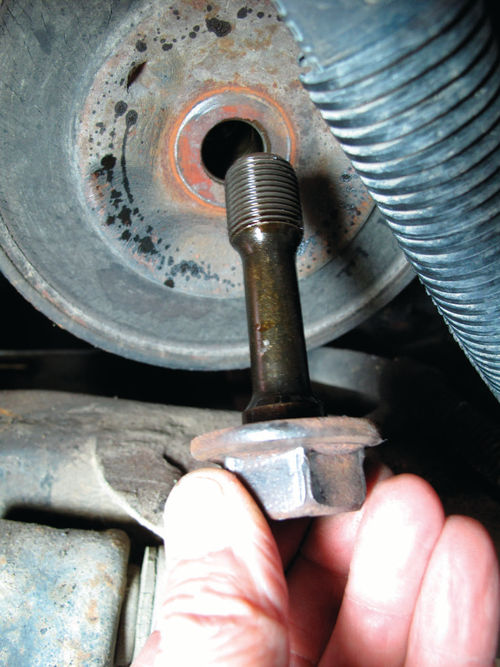
Moving the big compressor close to Parkhurst from the opposite end of my crowded storage building was the hard part. That done, however, it was mere child’s play to spin off the dampener bolt and remove the crankshaft’s vibration dampener (Photo 73).
In the next installment, we’ll finesse— and then bully—a stuck timing cover off the front of the engine. Now…What happened to our timing gear?


