Helpful Painting Products
There Are Degreasers, Reducers, Promoters and Enhancers. Here’s Some Help On How Much You Should Use.
IF YOU READ through the P Sheets (MSDS—Material Safety and Data Sheets) for the painting products you use in the shop, you will find references to the use of ancillary products such as degreasers, anti-static agents, temperature sensitive reducers, fisheye eliminators, adhesion promoters, flex additives and gloss enhancers. Some of these,such as degreasers and reducers, are staple products for any paint shop. The rest are products you may or may not be familiar with, but are products that just might make your next project a little easier to paint.
(Note: All automotive paint product lines carry some form of the below mentioned ancillary products. The ones discussed here are from the PPG line of automotive paint products.)
Here’s the rundown on these products:
Degreasers and Anti-Static Agents
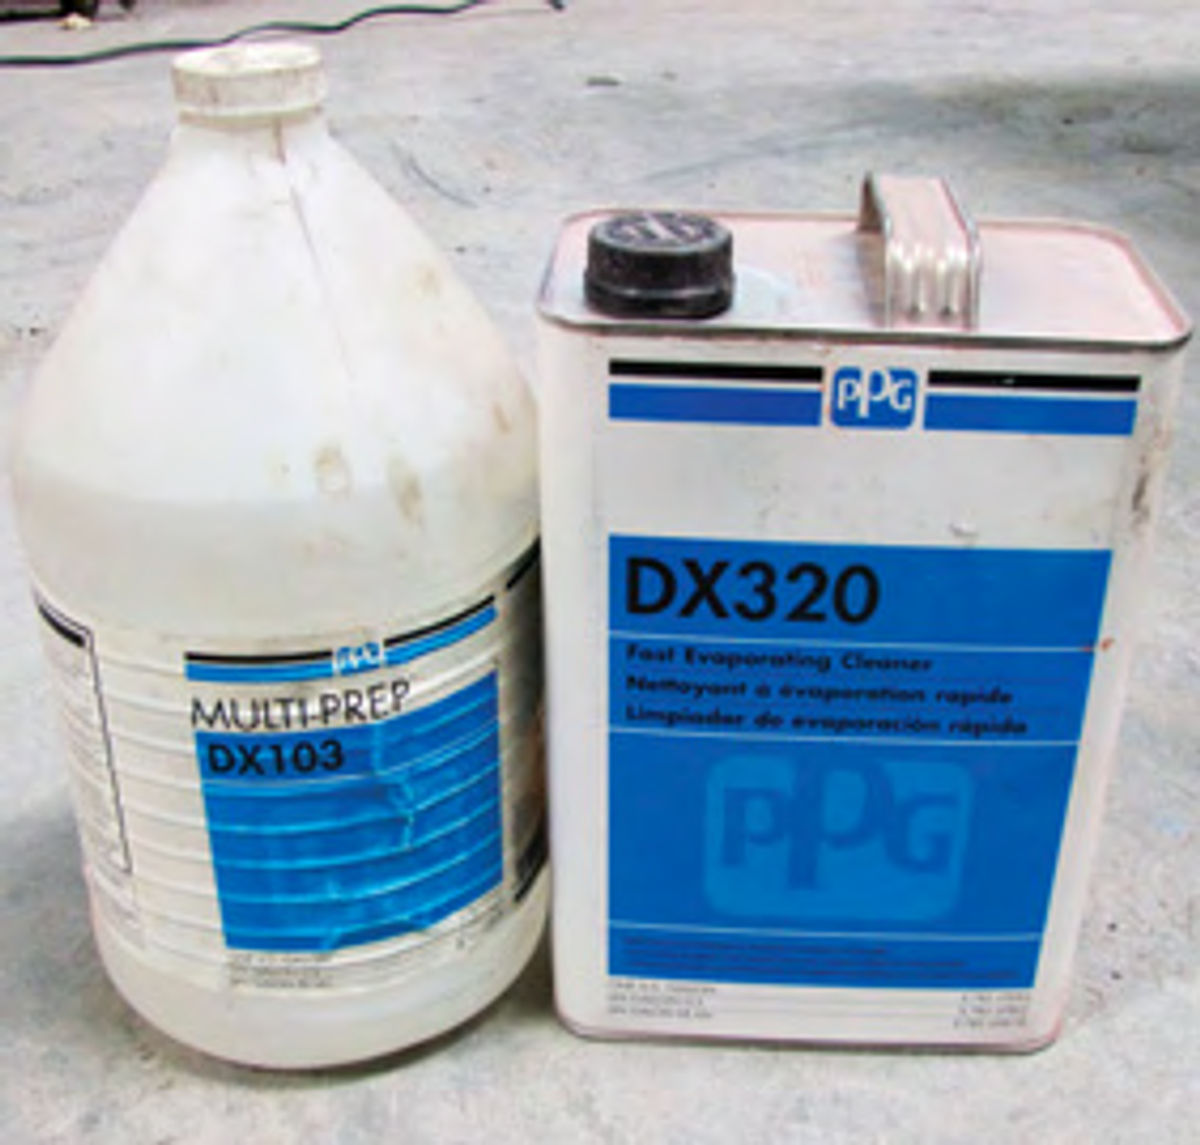
Degreasers are just what the name implies—products specifically designed to remove grease, road tar, oil, old car wax and silicone from all types of metal surfaces prior to sanding, priming or painting (Photo 1). Carefully note the words “prior to” as in you should clean and degrease first, then proceed.
That starts when the vehicle comes into the shop.
Never sand a dirty vehicle; doing so can force contaminants down into the old paint or bare metal and make removing them impossible. Always wash the vehicle with soap and water to get rid of the dirt and grime then degrease the vehicle before doing any sanding, priming or painting.
Which soap should you use? My preference is Dawn dishwashing liquid. Add a little to a clean bucket of water and scrub away.
To degrease a vehicle my preference is to use PPG DX 320 Fast Evaporating Cleaner. This is a solvent-based product so be sure to wear latex gloves when using it.
To use DX320, thoroughly wet a clean, lint-free cloth with the product and wipe the surface. Any contaminants will be lifted off of the surface and a second wipe using a clean, dry lint-free cloth will remove them. Do not allow DX320 to dry on the panel being cleaned. Any contaminants lifted during the initial wet wiping will remain even if you wipe the dried panel with a clean dry cloth.
The catch to using any solvent-based cleaning and degreasing product is that you must read the P Sheets provided for that product to determine what, if any, surfaces should not be degreased using this type of cleaner. For example, the P Sheets for DX320 state this product is safe to use on all O.E.M. finishes, bare steel, and cured and dried urethane finishes. However, this product should not be used to degrease plastic or fiberglass panels as this can generate static buildup.
So, what degreaser can you use on plastic and fiberglass? I can answer that question by also giving you a good anti-static agent. PPG makes a product, DX103 Multi-Prep, which is specifically designed for use when degreasing and cleaning plastic and fiberglass panels. This product also is a great anti-static agent for use when spray painting Corvettes, AC Cobras and anything else made of fiberglass.
To use DX103 as a degreaser, soak a clean, lint-free cloth and wipe. Follow immediately with a clean, dry lint-free cloth to remove the residue.
To use DX103 as an anti-static agent, pour a small amount into a spray gun and mist the surface to be painted. PPG recommends doing this both before and after tacking the panel or vehicle, prior to painting. To give you an idea of how much to use, one quart will mist a ’67 Corvette from end to end, twice.
Who makes a good lint-free cleaning cloth?Try Kimberly-Clark’s Wypall-L40. Your local automotive paint supplier will carry them.
Temperature-Sensitive Reducers
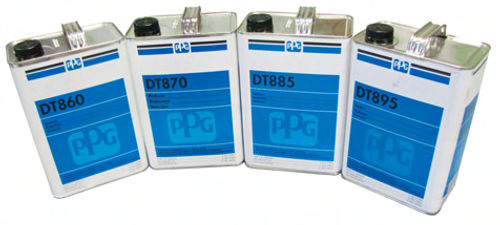
I’m going to step out on a fragile limb and say that any time you darken the door to your local automotive paint supplier and ask for reducer your supplier will be educated enough in his or her product line to get you the correct temperature reducer for your work environment (Photo 2). If not, it might be a good idea to educate yourself on which reducer is going to work best today, tomorrow or six months from now.
Temperature-sensitive reducers are designed to allow each coat of paint or clear coat to dry in 10 to 15 minutes regardless of the ambient temperature. For example, if the temperature in your shop is hovering around 63° F you need what is known in the business as a “fast” reducer. This is a reducer that is going to allow the paint or clear coat to dry within 10 to 15 minutes despite the cool temperature. So what reducer would that be? If your supplier sells PPG products you need DT860. This reducer is designed for use when the temperature ranges from 60-70° F.
Now let’s warm up the shop to 75° F. Now you need a “medium” reducer, or one with a drying range between 65-80° F. This reducer will still allow the paint or clear coat to dry within 10 to 15 minutes. In the PPG line that reducer is DT870.
Now let’s move into the dog days of summer where the temperature is around 90° F. Now you need a “slow” reducer, or one with a drying range from 75-95° F. In the PPG line that reducer is DT885.It is still going to dry within 10 to 15 minutes.
Finally, welcome to Amarillo, Texas, where it gets hot. Now you need a “very slow” reducer; one with a drying range to deal with days above 95° F. In the PPG line that reducer is DT895.
So, what happens if you elect to use the wrong temperature reducer? Let’s say it is 65° F in the shop and you are using a “slow” reducer, one meant for use from 75-95° F. At 65° F the drying time for a slow reducer can easily extend to 20 minutes or longer. Can you say “paint run?” The air is so cool a slow-drying reducer will allow the paint coat to stay wet longer. The longer the paint coat stays wet the higher the chances are that coat will develop a sag or a run.
On the flip side, if the temperature in the shop is pushing 100° F and you are using a reducer rated for use at 65° F the result will be an extremely rough finish because the reducer is drying much too quickly. If you are spraying a metallic color it will be mottled and streaked because the metallics don’t have time to orient themselves within the coat before it begins to dry. If you are spraying a clear coat it will lay down rough with a lot of texture.
Tell-tale signs that indicate the use of an incorrect temperature reducer are runs on a cold day, which means you need a faster drying reducer, and a rough or mottled surface on a hot day, which means you need a slower drying reducer.
Fisheye Eliminator
If you have sprayed paint you have probably experienced fisheye contamination, tiny holes in the clear coat that just won’t cover no matter how much clear you spray over them.
Actually, this problem isn’t confined to clear coats. You also can find fisheye contamination problems in enamel finishes and single-stage urethane finishes. You will rarely find this problem when spraying base coat colors. If you do, you have serious contamination problems and no amount of fisheye eliminator is going to help. It is time to stop, clean, degrease and start over.
So, what causes fisheye contamination and how can you prevent it? Usually fisheye problems originate from panels that weren’t properly cleaned and degreased. It comes from trying to paint over wax, grease or silicone that has not been completely removed before the panel was sanded and painted. Interior panels are the worst. They tend to be caked with cleaning products that contain wax or silicone. Prevention comes from the use of degreasers such as PPG DX 320 mentioned above both before and after sanding.
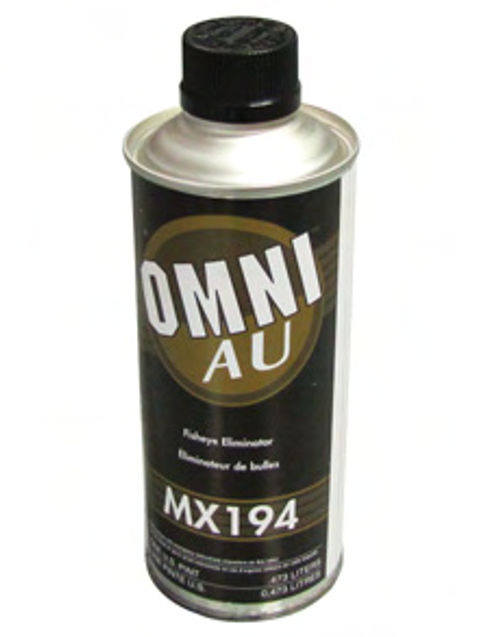
Another culprit people sometimes forget about is airborne contamination. For example, your neighbor may be using a spray wax product or something like WD 40 on his pride and joy where the residues from those types of products drift onto your project vehicle just as you start spraying. By then it is too late to use a degreasing agent and that is when a fisheye eliminator product comes in handy (Photo 3). Add a little to your paint mix and that should stop the problem.
Fisheye eliminator products are extremely powerful which means you don’t need much to get results. The P Sheets for PPG MX194 Fisheye Eliminator state you should use only a half-ounce per quart of ready-to-spray paint. Just add the eliminator to each subsequent coat of enamel, single stage or clear and your fisheye problem should go away.
I do want to add this little caveat. Fisheye eliminator is made up primarily of liquid silicone, the number one cause of fisheye contamination. Graybeard painters will tell you to only use an eliminator as a last resort. The less silicone you spray around your paint shop the better.
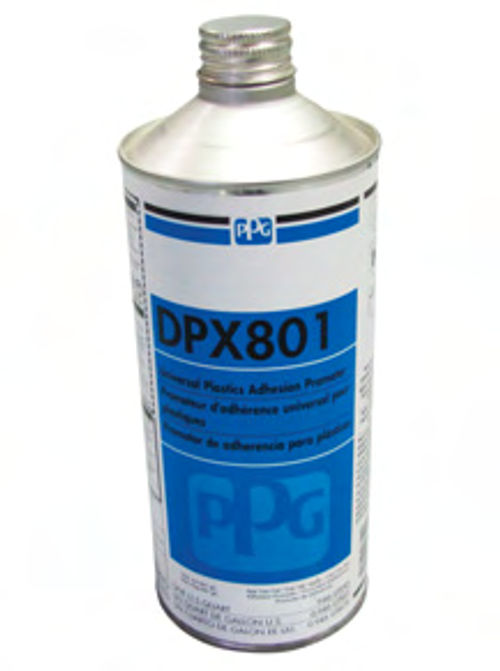
Universal Plastics Adhesion Promoter
Adhesion promoters do one thing; they promote paint adhesion to plastic parts and bumpers. In the restoration world getting paint to stick to a plastic bumper isn’t quite the issue that it is in the commercial body shop world. Not many cars with plastic bumpers are being restored…yet. What we have to worry about most is getting paint to stick to unpainted plastic grilles and unpainted plastic interior trim pieces.
These are pieces that can be difficult to sand and anything you can do to improve paint adhesion is a good thing. What do you use to sand grilles and interior trim pieces? My preference is to use a red Scotch-Brite pad. You don’t end up with deep sand scratches and you can get a Scotch-Brite pad into places a sheet of sandpaper just can’t reach.
The P Sheets state PPG’s DPX801 adhesion promoter comes ready to spray and you should apply one medium wet coat (Photo 4). This product is tinted red to help you see that you are getting good coverage. Allow DPX801 at least 30 minutes to dry before applying a top coat.
Just in case you are working on a car with a plastic bumper, you should always apply an adhesion promoter to any exposed bare plastic then cover that with a coat of epoxy. Epoxy will stick to just about every type of plastic out there including TPO, which is used to make a lot of the plastic bumpers.
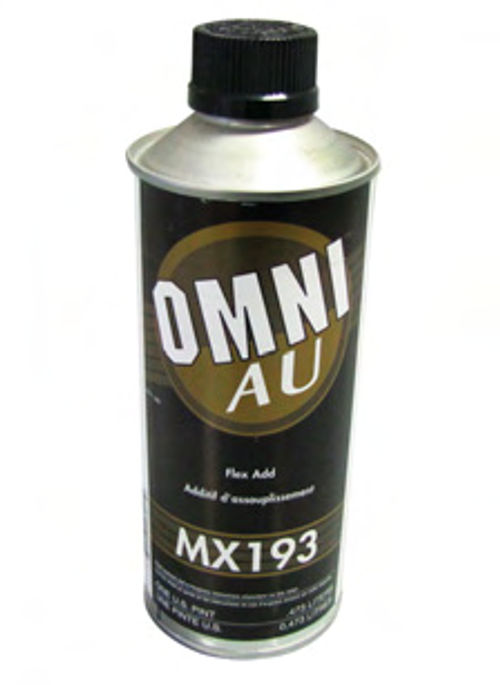
Flex Additive
Adding a flex additive such as PPG MX193 to a clear coat or single-stage urethane finish does one thing, it allows that finish to remain in a pliable state for an extended period of time (Photo 5).
When would you use a flex additive? Flex additives are added to clear coats or single-stage urethane finishes applied to plastic parts that will need to be flexed and bent as they are installed. Plastic bumpers come to mind, and the one that sticks out as a bear to install is the one on the mid-’80s Camaro.
A little flex additive will prevent the paint from cracking as the bumper is twisted and maneuvered into place on the vehicle. However, the thing some people don’t understand about flex additives is that after a period of time, usually a few weeks, the additive dissipates and the paint becomes as rigid as it would be had the flex additive not been used. That is why you see cars with cracked paint on the bumpers parked at the local super store.
Please note that flex additives can be used in primers should the bumper cover need repair and priming, but they should not be used in base color coats as they can prevent base colors from drying.
Flex additives are usually added to ready-to-spray amounts of finish so be sure to check the P Sheets for your particular product before using any flex additive.
Enhancer
People refer to this type of product as a gloss enhancer, but that is really not its function. An enhancer does not improve on the gloss of a finish to make it shinier, rather it slows down the drying process to allow that finish to flow longer and come out smoother (Photo 6).
In effect, what it does is to help reduce the orange peel effect in clear coats and single-stage urethane finishes. That in turn gives the illusion of a higher gloss.
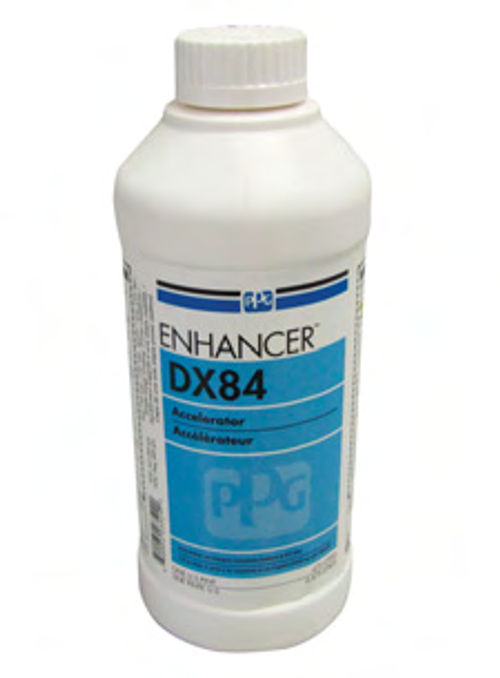
If you are experiencing a lot of orange peel and you are at your wits end to overcome it, an enhancer may be the way to go. Just remember that because an enhancer slows the drying time you have to give each coat more time to dry. How much more time? The only way to know for certain is to touch an area of tape that has fresh clear or single-stage on it. If that area fingerprints but doesn’t become stringy that coat is dry enough to recoat.
Something else to consider when using an enhancer is whether the wind is howling, bugs are thick or dust is in the air. Using an enhancer in those conditions might not be a good idea as the slower drying time will allow the finish to gather up all sorts of bad things as it dries.
As far as adding this product, such as PPG DX84, to the mix, this is another one where a small amount goes a long way. PPG P Sheets state that a half-ounce should be used per ready-to-spray quart of clear or single-stage.
Other Things Worth Knowing About Ancillary Products
Not all cleaners and degreasers are solvent based. Some, like House of Kolor KC20, are water based and even though that makes them a little more environmentally friendly they still should be applied and treated with the same care you would use when working with a solvent-based cleaner and degreaser. That is, always wear latex gloves during application and never allow the product to dry on the surface being cleaned.
Reducers are rated for use within specific temperature ranges for good reasons. You’ll notice that none of the abovelistedreducerswereratedforuse below 60° F. That’s because catalyzed paint has a difficult time curing below 60° F with some types absolutely refusing to cure below 55° F.
On the other side of that equation, opting for a faster drying reducer so that you can get out of the shop quicker can cause solvent pops in the finish. What is a solvent pop? These are tiny holes in the surface caused when the surface dries before the underlying layers of paint have a chance to dissipate the sol- vents within those layers. That solvent has to go somewhere and when it moves to the surface it “pops” through the dried top layer and leaves behind a tiny hole.
Then there is the issue of using a fish- eye eliminator as a gloss enhancer. Yes, it does work to an extent. But that is not its intended use and as I mentioned above spraying pure silicone into the air inside your shop, even when it is mixed with paint, is never a good idea. Always use fisheye eliminator as a last resort.
Finally, there is the issue of using too much gloss enhancer. Sometimes restorers seem to think that if a big hammer works OK a very large hammer will work much better. I’ve seen paint jobs that were forced to sit inside a shop for weeks on end waiting for the paint to dry enough that the finish could be safely touched. And it was all because the painter decided a little more gloss enhancer would eliminate the need for buffing. In one case in particular the painter was right. He didn’t have to buff the finish at all. After waiting several weeks for the finish to cure, which never happened, the vehicle was delivered to me and I stripped it down to the primer using a putty knife and started over. Got a question? Send it along.


