Buying & Owning a Brake Lathe, Pt. 1
They Come With a Range of Features and In Various Conditions. This Time We’ll Inspect and Buy Three Machines.
ABOUT A YEAR ago I was delivering some items sold at our monthly swap meet, and happened to notice an old Ammco brake lathe sitting dark and neglected in the customer’s garage. When asked if he had any interest in selling the lathe, he declined. He then casually mentioned that there actually were two lathes in his garage, the one that caught my eye was just for machining rotors and there was another, older drum lathe that wasn’t operational.
I didn’t pursue it any further, but seeing that brake lathe brought back memories of the machines I had used back in the ’70s and ’80s, although the ones I was familiar with were capable of turning both drums and rotors on the same machine. For me this memory was very similar to finding that car of your youth. I might as well have been sitting in the driver’s seat of my first vehicle. OK,I’ve admitted it before and will say it again, I love tools; even to the point of feeling that I’m addicted to them.
Going Lathe Shopping
Back in the ’70s and ’80sI was a certified auto mechanic, so operating a brake lathe came with the territory. Fortunately for me, my first interaction with a brake lathe was with a brand-new machine, and I was the sole person in that Georgia Texaco gas station to operate it. That in itself was pretty special, as that meant there would be no dealing with a machine covered in grease and metal chips, or finding adapters that had been misused to do things like expand a tail pipe on someone’s exhaust system. Add to that the fact that an Ammco lathe instructor set up the machine and demonstrated how to properly use it, and I was off to a great relationship with Ammco brake lathes.
Well, several months ago that same customer stopped at my swap booth again, only this time he asked if I was still interested in his brake lathes. He stated he would sell them both for $800. It had been awhile since the visit to his garage, and since he had originally indicated he had no interest in selling, I hadn’t investigated the lathes’ condition.
While $800 certainly is a chunk of change, this equipment originally was quite expensive, and is even expensive when purchased used through professional tool suppliers, so the price he was asking quickly drew my attention.
The following week I stopped by his shop to get another look at the equipment.
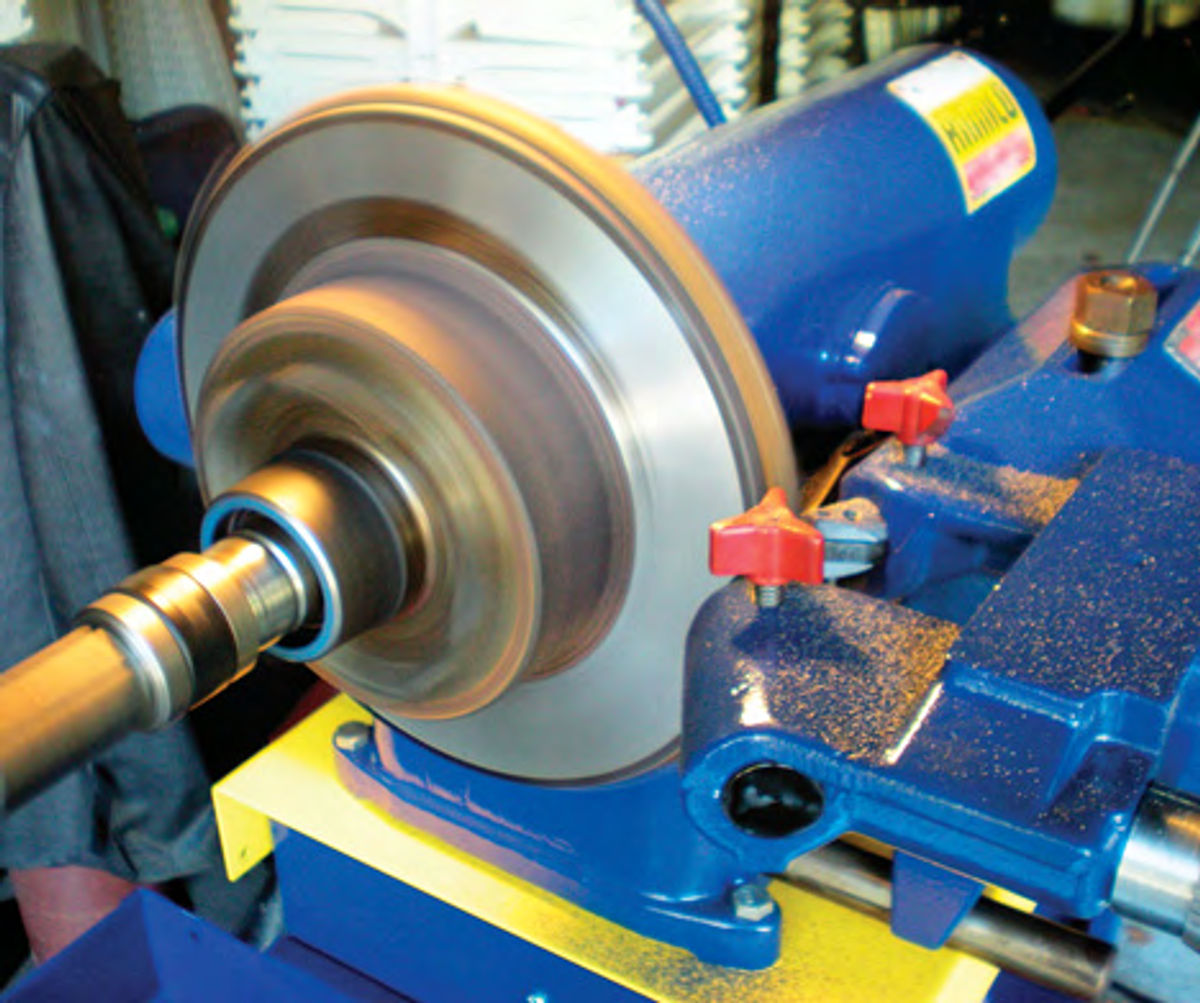
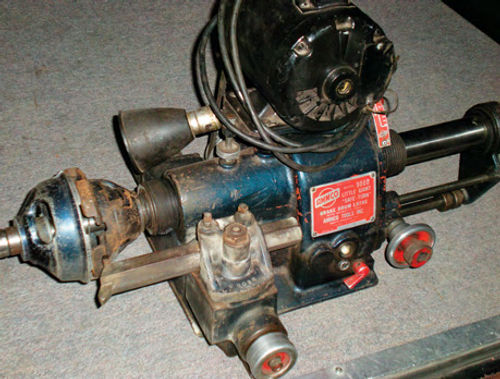
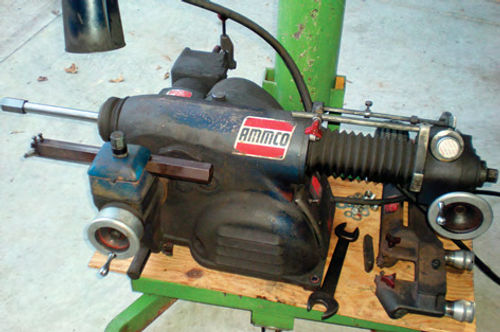
The drum lathe was an Ammco #9000“LittleGiant”(Photo1).It was most likely made in the late ’40s or early ’50s, although that’s just a guess. This machine had problems. The motor would run and the arbor would rotate, but it could easily be grabbed and stopped with your hand. This was an internal problem, not an issue with the motor. Because of this, very little value was assessed to this machine. Possibly it could be a simple repair, but that seldom happens. Photo 2 shows the other lathe, an Ammco #7000 “Hustler.” This machine resembles what you’ve seen in most shops for decades. The cast ing and basic design has changed little over the last 40 or so years. It was designed for turning rotors only, and while that may be looked upon as a drawback, it also has certain advantages. We will get more into that later. (If you notice the crank wheel and side mounted knob look bright red, that’s because they already had been repainted when this photo was taken).
This machine ran well and appeared trouble-free; however it had been bolted onto the bench backward. The arbor must extend out over the edge of the bench as shown in Photo 2. This way the metal chips can be collected in a tray. And the chip tray that was thought to be missing was found tucked inside the back of the workbench. Unfortunately, it couldn’t be removed; it was just a fraction too big. It must have been placed there when the lathe was removed and the workbench top was off. These issues were little more than humorous, and all indicated that it hadn’t been used in quite some time.
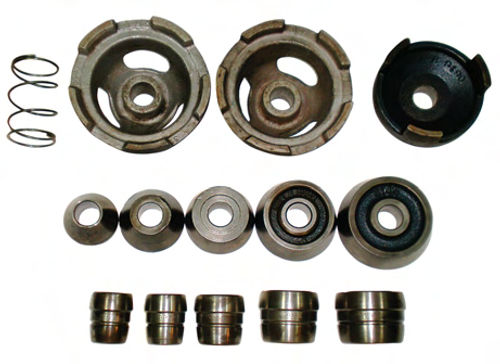
The adapter cones and collars were all mixed together between the two machines, and covered with a coating of rust. It was difficult to tell for sure what was there. The drum lathe (referred to from here on as the “Little Giant”) has a smaller 11/16” arbor as compared to the more typical 1” arbor used by the 7000 (Hustler). So if the bulk of the adapters were for an 11/16” arbor, they could very well end up being useless in the long run.
My mind was assessing what it was seeing; many collars were familiar, but others were either from another manufacturer or were of a much older design. Certainly they could have all been gathered together and laid out for a clear view, and this would have been the smart thing to do, but when the owner announced that he would sell the lot for $550, it virtually sealed the deal.In addition, he produced a new micrometer, a new rotor silencer belt, extra carbide cutting inserts, and an accessory catalogue that were to be included in the price. I decided to think it over for 24 hours. Ultimately, the decision was made, knowing that if I didn’t make the purchase, it would haunt me forever. I would rather take the chance on making a mistake than always wondering “whatif.”
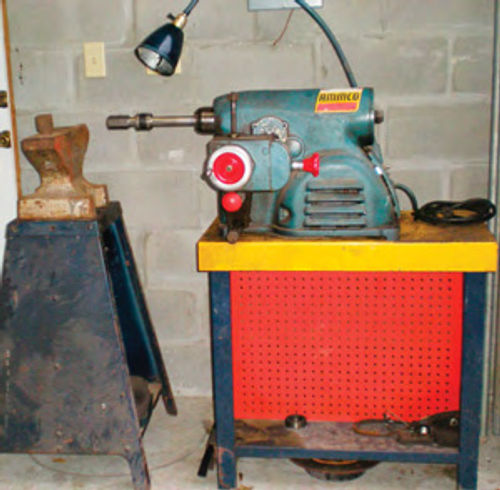
As a side note, look again at Photo 2—sitting to the left of the machine is the base for the Little Giant lathe. If the lathe is found to be un-repairable, this base will serve as an excellent foundation for the anvil you see sitting on top of it. This anvil has been hanging around in my garage for years with no good place for it. A few modifications to make the base portable and straps to secure the anvil are all that will be needed.
Some Heavy-Duty Moving
The next day we returned with the trailer in tow, and all was loaded for the short journey home. My wife took on the task of fitting all the adapters into a plastic tote, while the owner and his assistant helped me hand truck the lathes onto the trailer.
The Little Giant wasn’t bolted to its stand, so it was placed directly on the tongue of the hand truck and easily moved onto the trailer. The Hustler remained bolted to the workbench, and with the aid of a long section of angle iron bridging between the legs of the bench, it was strapped securely to the hand truck and the three of us worked to move it up onto the trailer.
Upon arriving home, the realization of unloading the Hustler without their help sunk in. My wife certainly volunteered to assist, but I didn’t want to risk her getting flattened should the lathe get away from me. Gravity would be working in my favor, at least with respect to exiting down the trailer ramp. It would also be working against me when the lathe was tilted back toward me on the hand truck. The weight of the lathe is somewhere in the mid 300-pound range. Down low on the tongue of the hand truck it wouldn’t be any problem, but mounted on the bench all that weight was waist high when tilted back. Thankfully it was removed without incident from the trailer. Had I to do it all over again, I could have used a hoist and chain to safely lift it from the trailer.Better yet, unbolting the lathe from the bench so it could be placed on the hand truck’s tongue would have been the best means for both loading and unloading it.
It’s Time for Some Tool Strategy
So, what were my plans for all of this stuff?
If the Little Giant could be repaired easily, it and the Hustler would be cleaned up and a functional place would be found for them in my garage.
I know there are some readers out there thinking “this guy is over the top,” and if you look at this situation from the practical side, obviously some will question my decision. But then things are done every day that aren’t entirely practical. For example, to me, purchasing a new vehicle is one of those things.
On the other hand, this equipment could be rejuvenated, then put to use, and if at some point it was no longer needed, it could be resold for a profit.
Also, by machining my own rotors and drums, I can be sure it’s done properly. That might sound funny to some, but I’ve worked alongside other mechanics that I wouldn’t trust to do this task. For instance, many years ago I purchased four new brake drums from a national parts store chain, and they trued them up on their lathe. Before I put them on the vehicle, the bore of each drum was measured to see how closely they were matched, only to find out they were all at the maximum bore! Ultimately they replaced those drums with properly trued new ones, and blamed the problem on the machine, but my guess most likely was “operator error.” After that I started trading with a different branch of the same parts store chain that had a full machine shop. Richard, the machinist there, was excellent. He knew what he was doing and was conscientious. Unfortunately, a few years later when I went back to have some drums turned, the machine shop had been closed, and Richard was now working at a country club.
The Little Giant, Fix or Sell?
With everything unloaded into my garage, it was time to get started. The Little Giant was initially the focal point, either repair it or resell it at the next monthly swap meet.
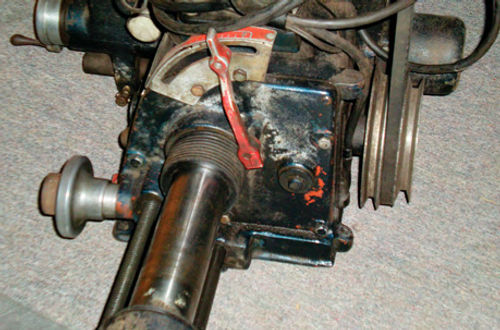
It appeared that draining the grease and unbolting the rear cover assembly, as shown in Photo 3, was the way to get a look inside. Once the bolts were removed the rear cover was slid back on the spindle several inches, and that was enough. Initially nothing obvious was spotted. But then dragging a magnet inside the case picked up several broken pieces of casting, and though their exact origin was found, it answered no questions. I went online to see what information was out there on this machine and came up with an illustrated parts layout.
Unfortunately, it didn’t help much. It was difficult to read, and the illustrations were very coarse and grainy. Possibly it was scanned from a copy of some worn original text. Don’t get me wrong, it was a free download, and I was happy to find it, it just didn’t lead me any closer to finding the problem.
From the onset the decision had been made not to put any real money into this machine, and keep the time spent to a minimum. It would be fun to get it working since it would certainly be capable of handling any passenger vehicle drums I would encounter.
I decided to make one last online search, and this time the name Little Giant led me to a local “4 Sale” Website. Unfortunately, the Little Giant in question there was some kind of ladder. However, I was already at the site, and this was the tool category, so I decided to look through it.
Almost immediately I noticed a listing for an Ammco 4000 brake lathe, and after looking a bit further spotted a second one. Were these things starting to fall out of the sky? It must be a sign of the times.
The Ammco 4000 modelis a combination lathe, designed to handle both rotors and drums; this was the lathe I was hoping for. Suddenly everything looked different to me. It wasn’t unheard of to occasionally spot one of these lathes at the monthly swap meet, but it always seemed there were missing adapters, or uncertainty regarding the operational condition. Although I hadn’t been searching, this was the first time I had stumbled onto a listing like this in a local ad, much less having two offered for sale.
Ammco brake lathe comparison chart
*A kit is available to retrofit these models and allow them to turn both drums and rotors.
** There’s an optional attachment that can be purchased that will allow the lathe to cut rotors up to 19.5” diameter, but that’s added expense, and might prove difficult to locate used.
*** The #7900 twin cutter tool is standard equipment on the #4100, which allows cutting rotors up to 4” thick.
All lathes are equipped with a standard 1” diameter arbor, which will support up to 100 pounds. The optional 17/8” will support 200 pounds, and there was also a combination with an outboard support that was used to support tractor trailer tires and drums combined, weighing up to 600 pounds, although I’m not sure if it’s still in production or even available for the 3850 &3860.
The ads were both short and had a minimal description and no photos,so it was unknown what came with them. They were located in different communities, each about a one-hour drive away. One was priced at $800, the second at $1200. Of course I phoned on the least expensive one first, only to learn that it had been sold.
I then phoned on the other lathe. It was still available and located in a small transmission shop. The owner was getting up in age, and decided to start selling some of his tools. His description convinced me to make the drive to look at it.
The lathe was what I was hoping for, but it was filthy. There was no question it was being used regularly. Instead of light rust, the adapters (as well as the bench; lathe; and anything else) were covered in grease and metal filings. It came with the larger #2400 bench, which stands about 5 1 ⁄2’tall, and has storage for adapters above and below the lathe. Not having to bend over for every needed accessory sounded pretty good. While most of the adapters were the same as those that were with the Hustler, there also was a light truck adapter kit, and some that baffled me. However, any extra adapters can be a big plus.
Some Advice for Those In the Market…
We’ve been talking about several different lathes here, so this probably is a good time to discuss how you can identify a machine model, and also give some idea of how much these items and accessories cost when they’re new.
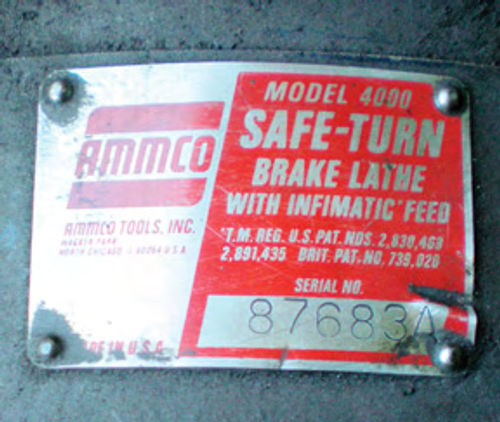
Photo 4 shows an identification plate. It tells you both the model and serial number, and is located on top behind the crossfeed grease fitting on both the Hustler and 4000 model. This ID plate location is most likely the same for models that share this “classic”gearbox casting.
Here are a few prices I found when searching the Internet. Typically all items are sold separately.
One Website offering new adapters listed a basic set for about $800, and if you wanted expanded coverage for 1 ⁄2- and one-ton trucks, add a one in front of that making it $1800. Some adapters can be found for sale used on sites like eBay, but they aren’t giving them away either. Just make certain you can verify their condition. Remember what was said earlier about adapters being used in ways they shouldn’t? It’s common to find abused equipment.
When it comes to the machine itself, a new #4000B (the current model lathe for rotors & drums) was found listed for $6900, while a reconditioned one was on another Website for $3750. (What “reconditioned” actually means would have to be verified.) Used versions are commonly seen offered by tool dealers for around $2200-$2500.
The Hustler #7000 is no longer in production; the #7500 lathe is the updated version for rotors only. New it was priced at $5300, while a used one was available for $1800.
A similar lathe bench, with upper and lower tool boards, was found starting at $500
Remember that things like micrometers, brake drum gauges and silencing belts are all extras. Think about this if you’re considering making a purchase. This is one of the advantages of purchasing directly from an individual. Unless they are in business as a tool dealer, they will almost certainly want to sell all of the items at one price. But you can also expect that if you buy it, you own it, while a reputable tool dealer will generally offer a warranty period.
So, what’s a brake lathe worth when purchased from an individual? The model, condition and accessories will all help to decide that. Ultimately, a lot also depends on the moods of both the buyer and seller at the time of the transaction.
Take a lookattheAmmcolathecomparison chart on page 27. It shows the models you are most likely to see offered for sale, as well as some of their specifications.
Of course there are other brake lathe manufacturers to choose from, and they can do a fine job as well, but Ammco has probably been around the longest, dating back to the 1920s. Because of this, there are plenty of machines and parts out there. Many parts have remained unchanged since the 1970s. While this article focuses on the Ammco product line, the points of comparison can be applied to other manufacturers’ lathes as well.
Now,Back to That Transmission Shop and the 4000 Lathe
While I’m not much of a haggler when it comes to price, I approached the owner anyway, hoping he might budge a couple hundred dollars, but he was firm on the price. There was no doubt I wanted this machine, but where was the money going to come from? My thoughts were now well beyond attempting to repair the Little Giant; instead, reselling both it and the Hustler to help finance this third brake lathe sounded like a pretty good plan.
A deposit was put down, and the next day we returned with the trailer. This time the knowledge gained from the first purchase was utilized, and the lathe was unbolted from the bench. Four young guys were there to help; they did everything from unbolting to moving the lathe and bench onto the trailer.
My wife again took on the task of gathering up all of the adapters and small items and placing them into a plastic tote. This time, however, she had to pass through something of an obstacle course to reach them, walking between a minivan elevated on a lift on one side (and she’s 6’ tall), and an open pit on the other. I cautioned her that there were about 1000 different ways she could get injured in this environment. She ultimately escaped with only a minor head bump when all was said and done.
This buying experience worked out much easier than with the first purchase and all was easily unloaded once we returned home.
Photo 5 shows the Ammco 4000 lathe once it was in the garage. Notice the resemblance between it and the Hustler seen in Photo 2. Both lathes use the same style casting for the gearbox and motor housing, although to the machine’s right is the horizontal feed gear box, for turning brake drums.
What’s Next For My Three Brake Lathes?
There was nothing to be done to the Little Giant other than button it back up, refill it with grease, and price it. At the next monthly swap meet it was sold for $85. With that no longer part of the equation, my attention focused on the Hustler and my #4000. While the plan was to sell the Hustler and keep the #4000, both lathes required a clean-up and similar service.
So, what needs to be done? A good cleaning and repainting of each lathe and bench would certainly make them more appealing for starters. I decided to start with the bench for the Hustler. The top had to be removed from the bench to retrieve the chip tray that was wedged inside, and while doing so it quickly became apparent how easily these benches come apart, making it much easier to clean as well as repaint them.
For some reason the channel that the chip tray slides into had been improperly mounted at floor level. If you go back and look closely at Photo 2, you might spot it on the lower left side of the bench. It’s not very functional in that location,so it was removed and cleaned. Mineral spirits was used to dissolve any heavy grease build-up, and then a solution of Dawn dishwashing soap and hot water was prepared for the final wash of the bench. The channel will be replaced in the proper location after all the painting has been completed.
There also was a large Ammco label on the opposite side of the bench that was lifting and curling up. I wanted to save it, so the area was washed carefully, making sure there was no dirt or debris trapped beneath it. Once all was dry, Devcon rubber adhesive was used to secure it. A small brush was used to apply adhesive to both the label and mating surface. After letting it dry for several minutes, the label was pressed into position and then a small roller tool (actually an old darkroom print roller) was used to make certain it was flat. While using the roller, a few spots of excess adhesive were squeezed out beyond the edges of the label, but naphtha solvent quickly cleaned up the mess.
For paint, the local home improvement center had what was needed. “Sun Yellow” was an exact match for the Hustler bench top along with “Safety Red” for all the tool boards as well as the top of the other bench. Three different shades of blue were purchased. A test was made, and “Regal Blue” was found to be the closest. The other shades that were purchased would be used in hidden areas, like the underside of the bench base.
Next, we’ll take a closer look at the adapters and benches, and perform some maintenance and repairs on the lathes.


