Help me rewire my car
Question:
I am restoring a 1956 Chevrolet 210 four-door sedan with the 235 sixcylinder engine. The wiring is stiff and cracking, and a previous owner has tinkered with things in a haphazard way. Because of that, I think the smart thing to do would be to completely rewire the car. Is that something that can be done by an amateur at home? And if so, who makes wiring looms for these cars?
Answer:
Rewiring a car is easier than it might sound. And luckily there are wire harnesses made for most of the production cars ever built and your 1956 Chevrolet is no exception.
Get in touch with Painless Performance Products (listed below) and order the correct one for your car. And then, before it arrives, get out the shop manual for it and trace a few circuits to familiarize yourself with how to read the schematic. Also, get some wiring pliers and a continuity tester, available from the hardware store. I would also round up Dow Corning insulating compound, a sharp knife and a digital camera.
When your new wire loom arrives, double-check that it is the correct one for your car. If the instructions and labels establish that you have the right harness, lay it all out in the driveway of your house or shop and familiarize yourself with where everything goes using the aforementioned wiring diagram in your manual. Once you see what has to be hooked up where, most of the mystery of rewiring will be solved. Older automotive electrical systems are pretty simple. However, you may wish to take a few pictures at this point just to help you remember the configuration.
Before you start on the wiring, take the battery out of your car completely in order to avoid shorts and problems. Clean up its terminals and make sure it is fully charged while it is out of the car. That way, when you put it back in, you can do a bit of testing, if need be.
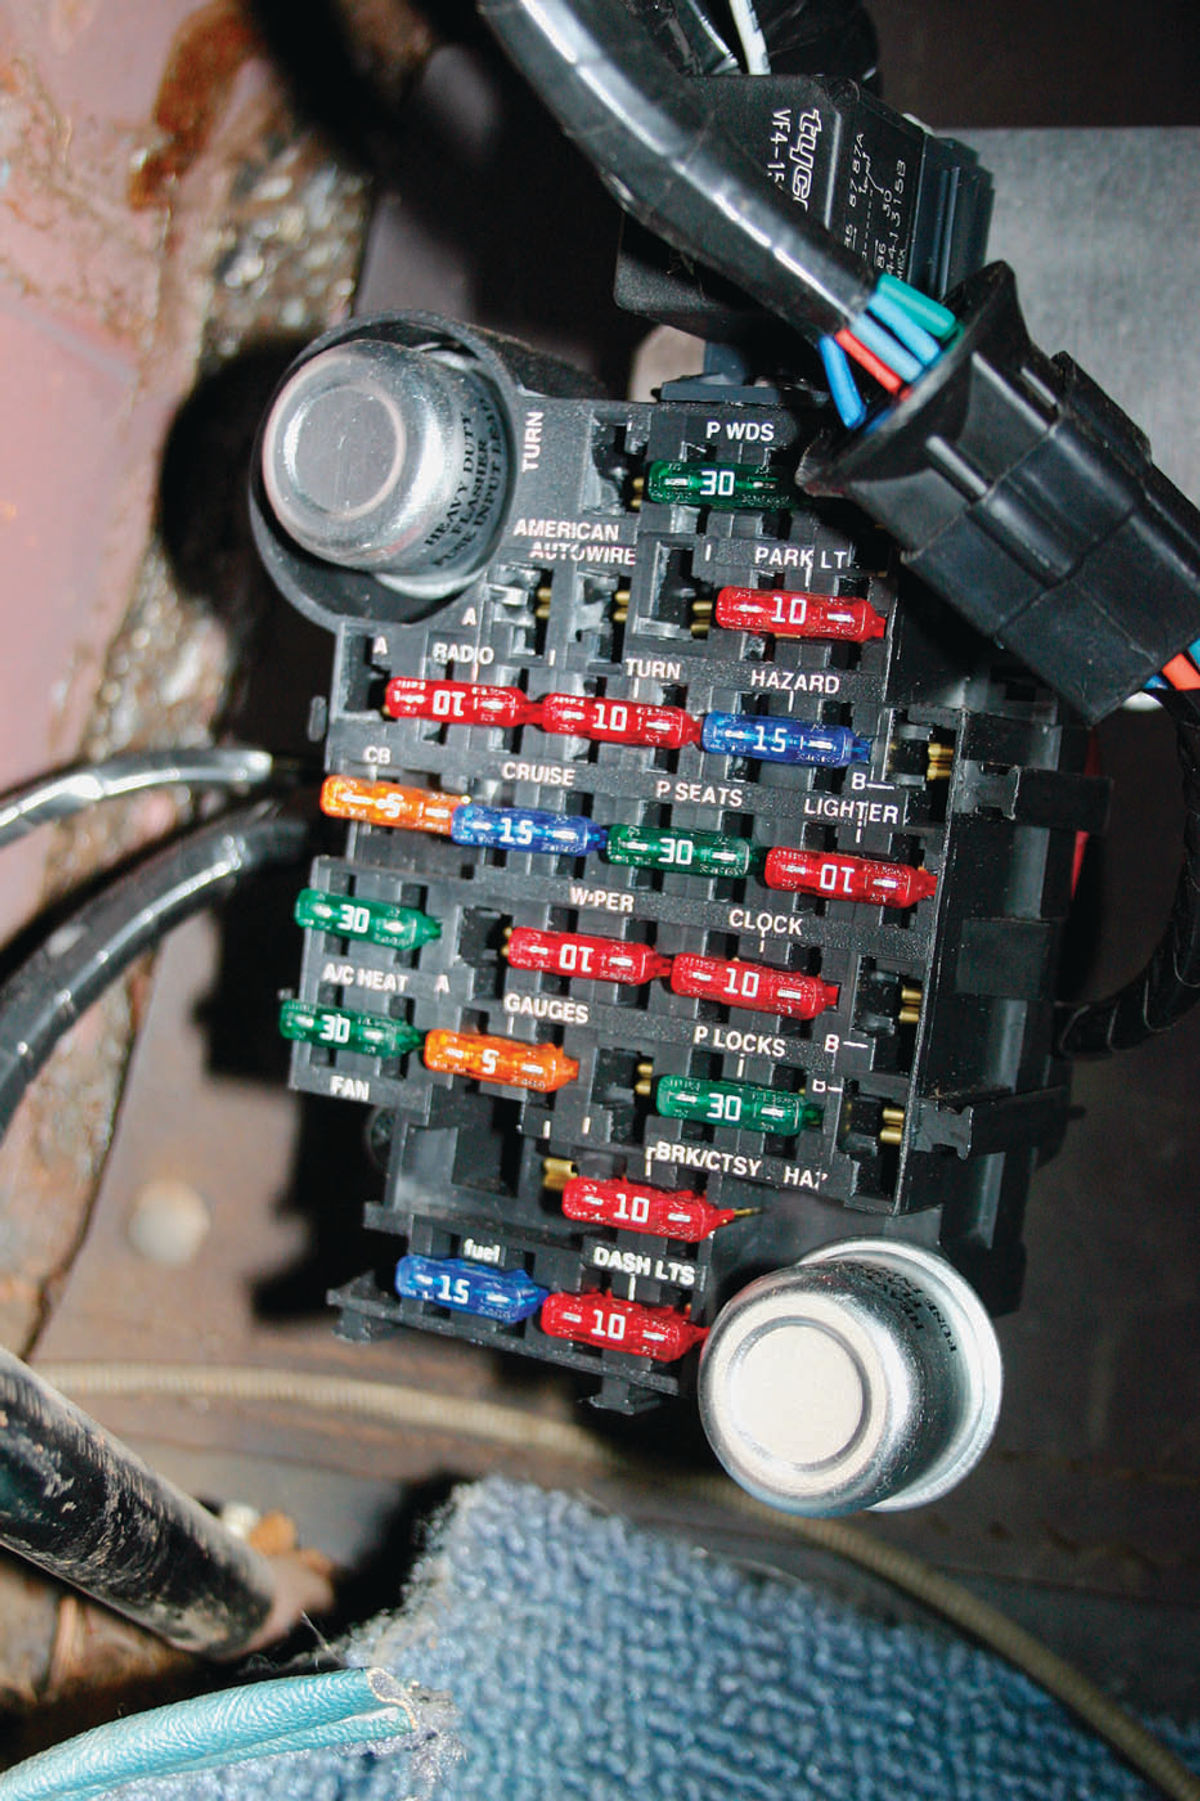
Next remove the old wire harness completely, starting at the instrument panel. You may want to remove the front seat to more easily take the wiring out from under the dash. Remove the glove box, loosen the instrument cluster and pull it back, and then get under the dash and disconnect all of the components. Painless harnesses already have simple plug-in connectors.
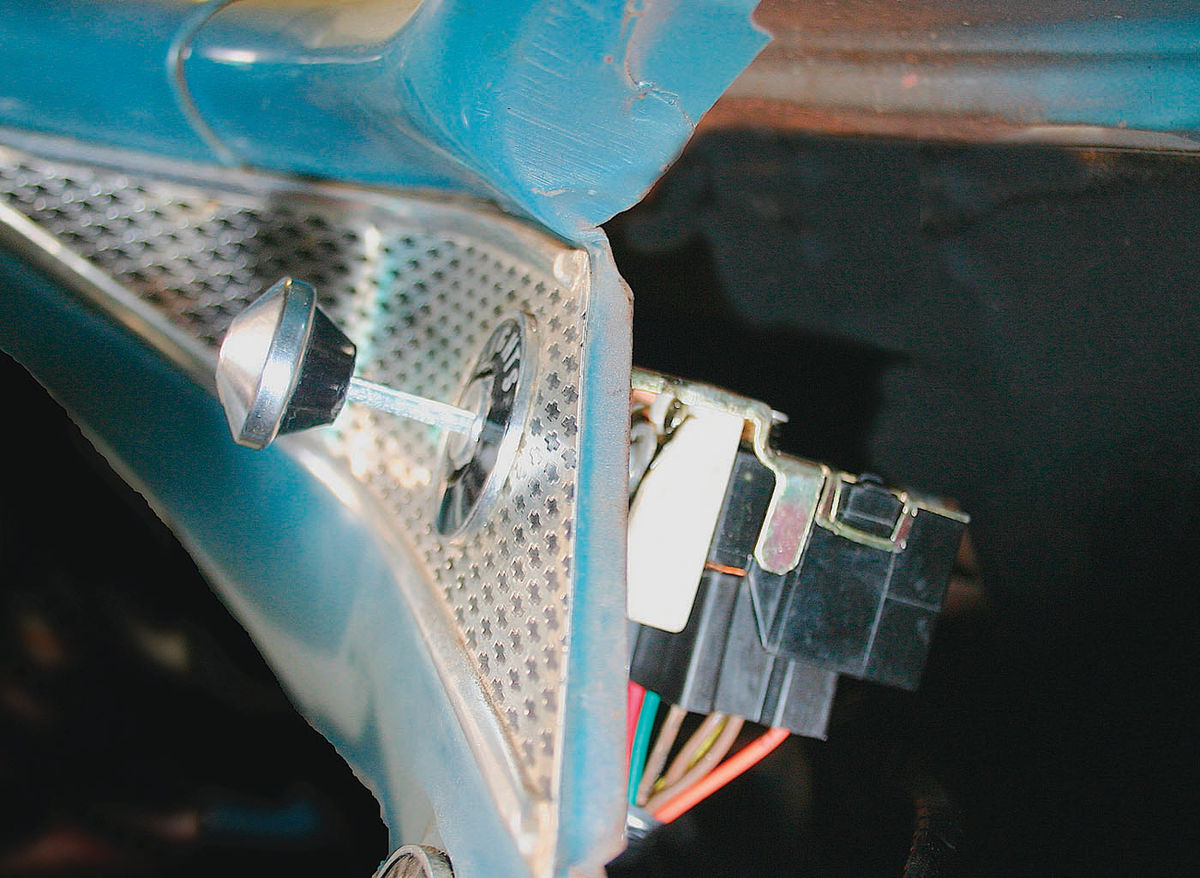
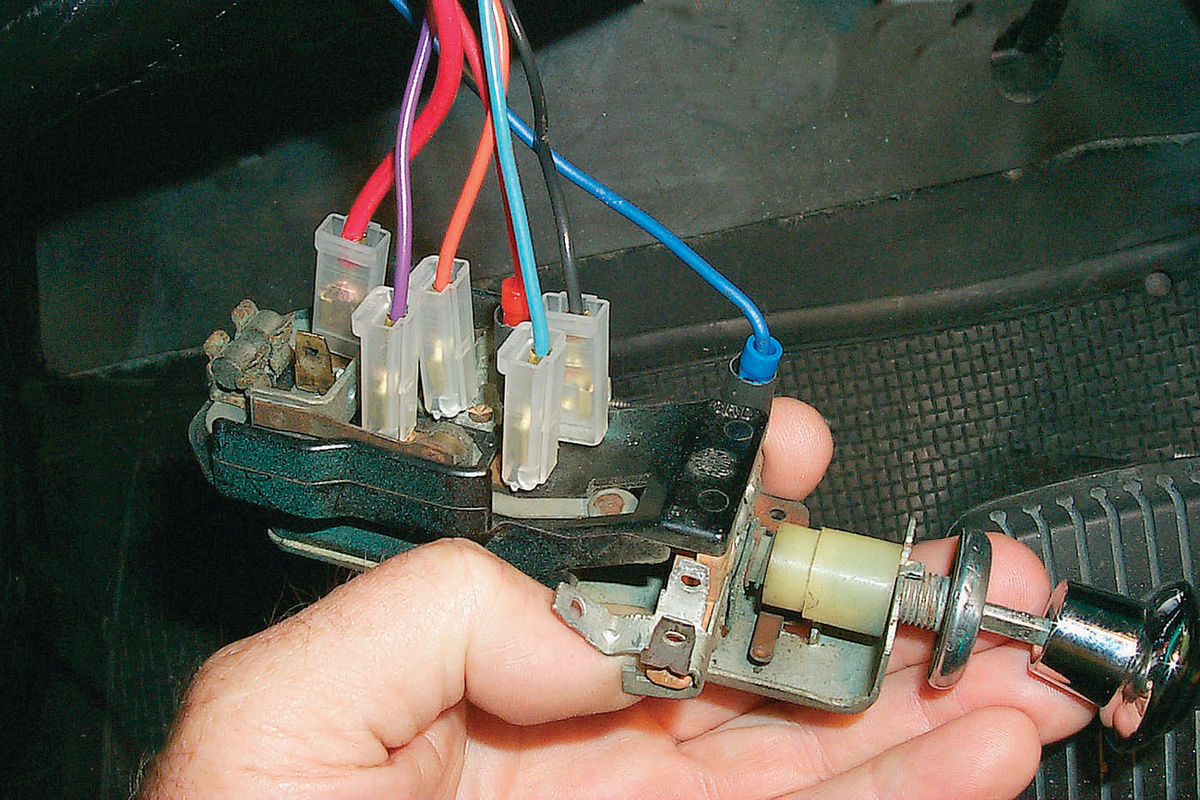
There are several wires going to your light and ignition switches, so you may want to take digital pictures or make sketches as to which wire goes where. A wiring diagram— though harder to decipher—will also tell you these things if you forget. Once everything is loose from the dash, go out and disconnect the rest of the harness at the taillights, headlights, starter and generating system. Save any clamps and fasteners that you might need when installing your new harness.
Your 1956 Chevrolet harness will be made up of separate sub-harnesses that plug in at the bulkheads, making their removal easy, but earlier cars such as the ’55 Chevy had one continuous harness originally. Pull your old wire loom out from under the dash, and cut it only where necessary to facilitate its removal. You will want your old harness to be as intact as possible so you can lay it alongside your new harness to make sure they are the same.
At this point you might note that you also have to make a few wires for any after market accessories though Painless harnesses can be ordered with all sorts of upgrades such as air conditioning. Be sure to use wire that is at least as thick as the original for any accessory. Wire that is too fine will cause unnecessary resistance and burn up, but wire that is larger than the original is even more efficient at conducting electricity.
To get at the gas tank sending unit, you will need to lower the tank. Use a large floor jack for this job and work outdoors, don’t smoke and have a fire extinguisher handy. And when you hook up the new sending unit wire, attach a ground wire to the sending unit as well. Run your ground wire over to the frame or sub-frame of the car. The gauge will not read correctly if the gas tank unit isn’t grounded properly.
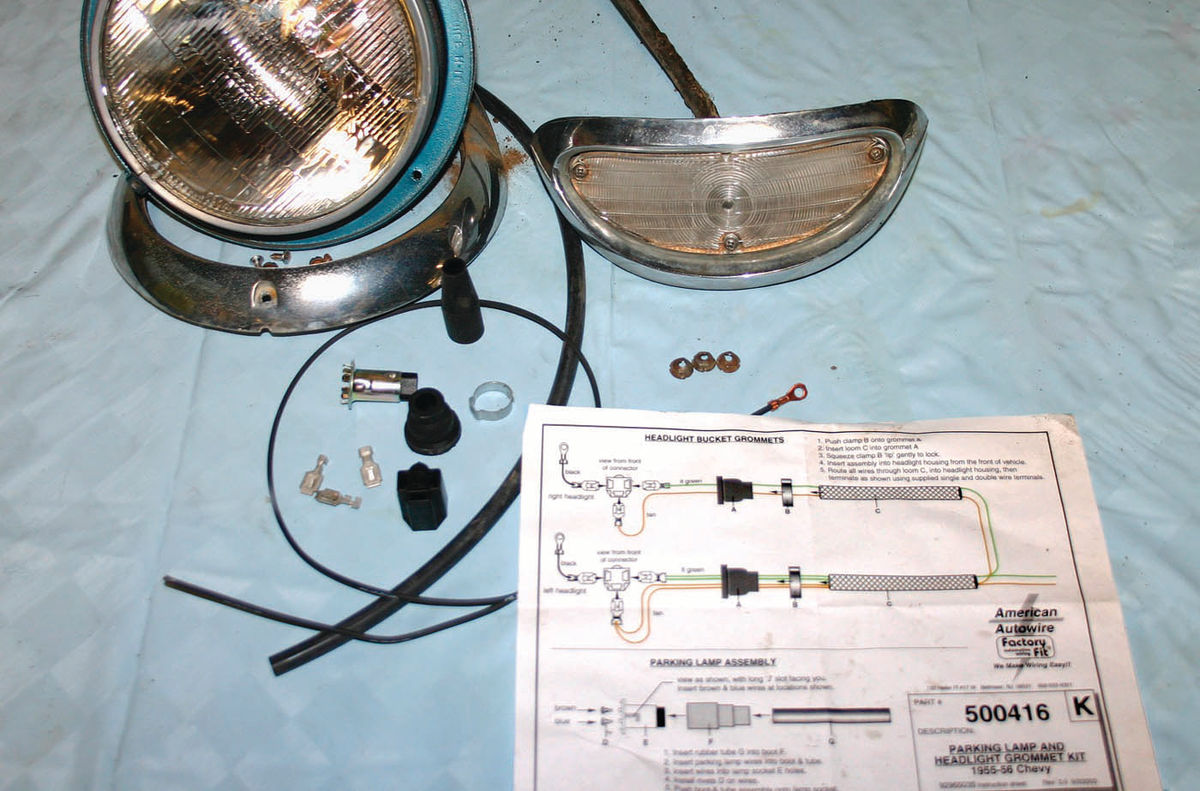
Run the wiring for the lights out to their respective locations, and then place the charging system wiring, but don’t hook up anything until you have determined that the loom is arranged properly and the wires will all reach to their destinations without binding.
Hook up the under-dash wiring first. Clean up and brighten old connectors using fine sandpaper, then smear a little Dow Corning insulating compound on any unprotected connections in order to prevent corrosion. Use a good quality wirecrimping tool available at hardware stores to attach any new connectors.
If you are installing after-market air conditioning, a large cooling fan or a high-amp stereo in a car such as your ’56 that didn’t have these items originally, install electrical relays to handle the current flow requirements. And if your car is equipped with a 30-amp ammeter and you need a 60- or 80-amp alternator to handle the demands of your new accessories, you will need to install a higher amperage ammeter or bypass it altogether and go to a more modern dash-mounted voltmeter, because if your 30-amp ammeter fries you will be marooned at the side of the road until you can fix it.
Once you have the harness installed but before you hook up the battery, go over your list or wiring diagram one more time to make sure you have everything hooked up correctly and all of the connections are tight.
Next, if your car has a clock in the dash temporarily disconnect it. Set the battery back in the car and then attach its ground strap. Now turn off the lights in your garage. To check for shorts and problems, just touch the positive cable to the battery.
If you see a spark, either some accessory is turned on or you have a short circuit somewhere. Check out and remedy any problems before going further. If you don’t see a spark, hook up the clock again and then attach the positive battery cable.
Try each light and appliance in turn. If anything fails to work look for a loose or improper connection or faulty ground. Use a multi-meter to check wires for voltage. Don’t start the engine yet though.
Finally, if your car is equipped with a generator, you will need to polarize the system before starting your car. This is usually accomplished by touching a short length of insulated wire momentarily from the GEN to the BAT terminal on the voltage regulator on your car. If you were working on a different brand of car, you would need to check a shop manual to make sure this is the correct procedure for your generator before proceeding.
If you are doing a classic such as a Chevrolet or Mustang you are in luck because Painless makes topquality wire looms for your car with instructions that make them truly painless to install. For readers who are working on other types of cars, check with your marque club for wire loom sources. Chances are there is one available for your classic too.


