Restoring a 1976 Triumph Spitfire Part 2
It’s Time For Some Work On the Interior, Frame, Firewall and Suspension. There’s Also Been a Change In the Ultimate Plan for the Car.
Work is progressing on the restoration of my 1976 Triumph Spitfire 1500, and the plan, as described in the May issue, has remained mostly intact. The planets have aligned and the requisite space, time and funds are available to tackle the project in earnest...so far.
Since the last article appeared I have uncovered and confirmed some additional information regarding my car from its factory record which I obtained through the British Motor Industry Heritage Trust (BMIHT). The BMIHT maintains factory records on many of the marques of passenger vehicles built in England over the years, and copies of these records are available for a nominal fee. (I had already requested this information for my TR3A which was featured in the August 2015 issue and was pleased with the information provided.)
In the case of the Spit, I entered the commission number on the BMIHT website and about 10 days later received a copy of the factory record. It confirmed the original Delft blue exterior with a black interior, and that the Spit still has its original engine. I also learned that my Spitfire had been built on November 4, 1975 and shipped to California. Other details included key numbers and a list of factory-installed equipment.
All of this information was provided on a laminated, certified copy of the factory record that is suitable for framing. I found it well worth the modest expense. BMIHT can also provide an official letter of confirmation for the date of a vehicle’s manufacture.
Editor’s note: the BMIHT Archive is part of the British Motor Museum in England. Their web site is britishmotormuseum.co.uk.
Turning to the Interior
First on the plan for the Spitfire was the refurbishing of the interior and the hardtop headliner. I purposefully started with the interior and other restoration tasks rather than the usual rebuilding of the engine for a couple of reasons. First of these is that I consider engine rebuilding to be the most enjoyable part of a vehicle restoration and I wanted to keep it as one of the last items to be accomplished, i.e., as a carrot to assure that the other tasks were completed. Otherwise, and I have done this, I might do the engine rebuild and have a nice, shiny new engine sitting for a long period while the rest of the project lays fallow. The second reason was budgeting. I am operating on a limited budget and want to assure adequate funds are available to bring the car and its components up to a safe standard, rather than come up short after I had finished playing with the engine.
The interior on the Spitfire is simple to work on and a good place to start. As mentioned in Part 1, the Spit’s floors were in excellent shape, no doubt due to the car’s desert location throughout its life and the fact that it had been equipped with an optional hardtop that apparently had never been removed. (The hardtop has been put aside for replacement of the headliner and window seals at a later time. It is not a high priority item here in Arizona.)
The seats were removed by undoing a few bolts and lifting them out. I will be evaluating them later, but expect to be recovering the seats before they are installed. The worn and musty carpeting was removed and tossed, and then replaced with new carpeting from The Roadster Factory (TRF; theroadster-factory.com). The carpeting neatly dropped into place after some combination sound deadener/heat shielding was installed on the Spit’s floor pans.
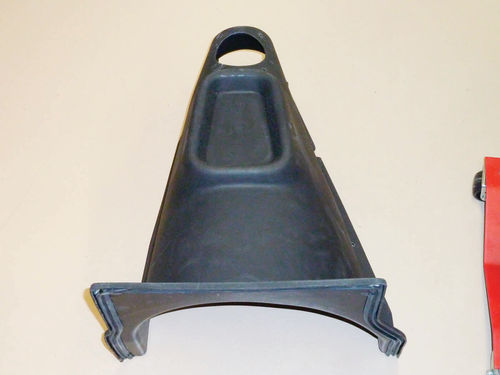
The removal of the carpeting also revealed that the original transmission cover, which appeared to be formed from pressed cardboard, was decayed beyond redemption. This problem was easily remedied in the form of a new transmission cover from TRF.
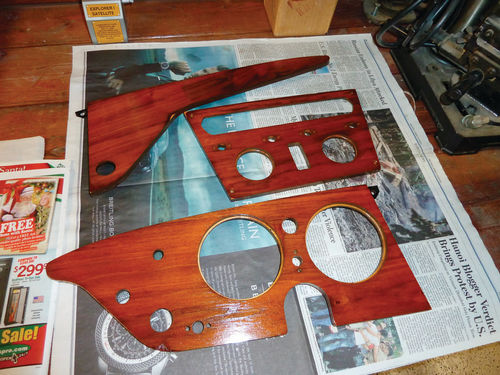
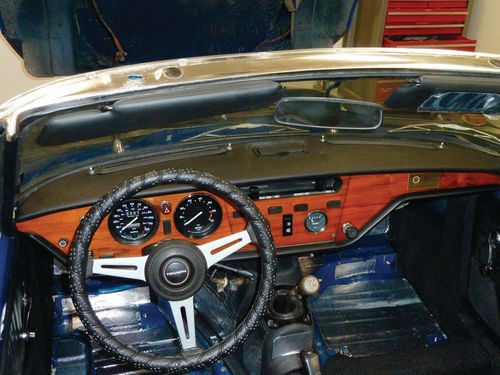
Next came the wooden dashboard and the dash pad. The dash had a wood veneer with a clear coat that had become cracked with age, and the dash pad was brittle and heavily cracked. New dashboards for the Spitfire are available but expensive, so I decided, despite severely underdeveloped woodworking skills, to try to restore the old dash myself. I used a benchmounted belt sander to (very) carefully remove the clear coat and leave the veneer intact. This was successfully accomplished, and, fortunately, the one spot I botched will be covered by a cockpit trim piece.
With the sanding complete, the bare dashboard was cleaned of dust and three coats of wood stain were applied (Miniwax Golden Pecan 245); followed by several coats of a clear protective finish. I am very pleased with the result.
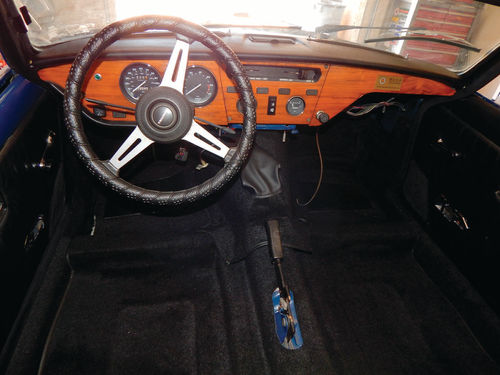
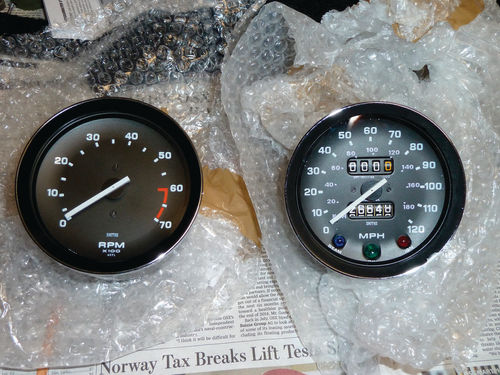
While the dashboard was out of the car, I sent both the speedometer and tachometer to Nisonger Instruments in New York to be rebuilt and to have the tachometer modified to accept an electronic ignition. I had dealt with Nisonger earlier when they rebuilt the speedometer and tachometer for my Triumph TR3A and found that they did good work. Nisonger returned both rebuilt instruments in short order (nisonger.com).
Once the dashboard was repaired, it was installed along with the refurbished instruments and a new dash pad that had been sourced from TRF. The installation was accomplished in an afternoon once the necessary trimming was performed on the dash pad.
One of the side benefits of this task was that I finally found where the voltage stabilizer is located on the Spitfire. I had decided to replace this component after reading that they could fail with age and result in false readings from the Spitfire’s gauges. A new voltage stabilizer had been ordered from Moss Motors, but for the life of me, I had not been able to find the old one on the car. There was nary a hint from my Spitfire manuals or parts listings. Finally, after pulling the speedometer, I found the voltage stabilizer location. (For you Spitfire owners out there, it’s attached to the back of the speedometer.)
The Front Frame/Suspension
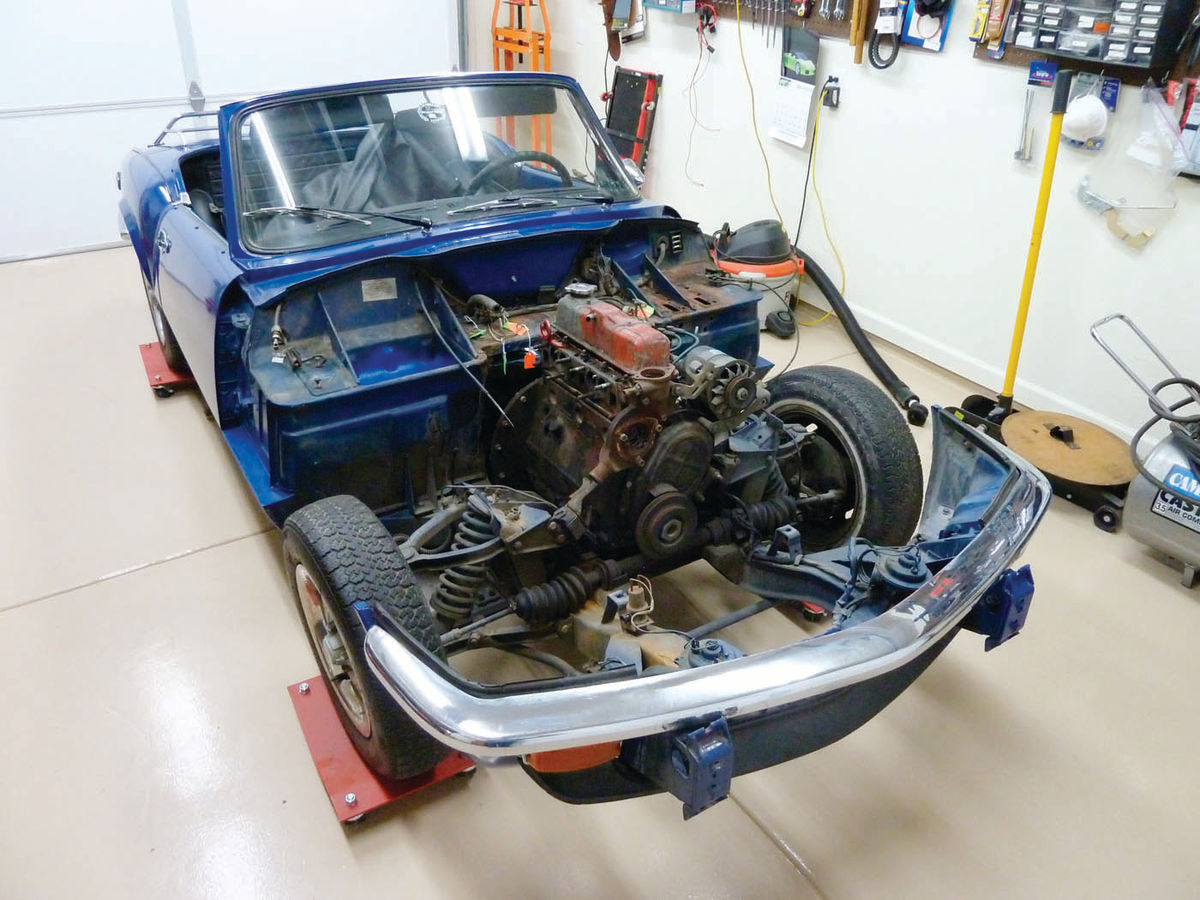
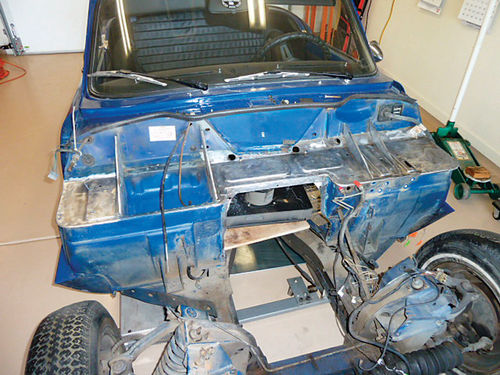
Second on the Spitfire’s task list was a rebuild of the front suspension, but this required some additional disassembly and under hood renovation. Working on the engine, suspension or any item located under the “bonnet” of any Spitfire/GT6 is simplicity itself as the whole front clip of the Spitfire tilts forward for easy access and/or removal.
The removal of the front clip was accomplished in about 20 minutes with the help of friends by undoing two hinge bolts to detach the bonnet from the frame. Since the Spitfire’s engine is going to be rebuilt, it also was removed and placed on a stand. The original 4-speed transmission was removed along with the engine and stored in the back shed as possible future trade goods. (As mentioned in Part 1, this transmission will be replaced with a Ford T5. More about this later in the series.)
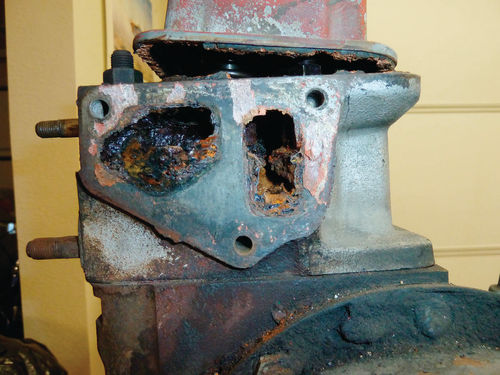
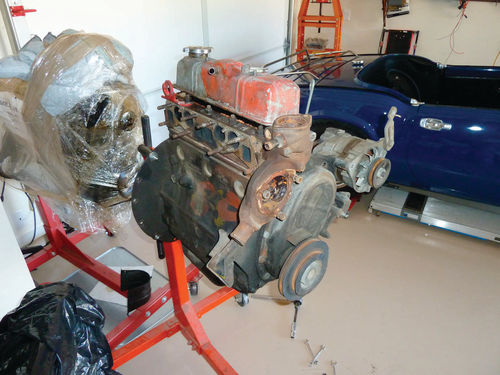
With the engine out, I removed the engine accessories and water pump. What was found upon removing the water pump was not a pretty sight. The Spit had been stored for more than 20 years without draining the coolant and, as a result, the engine water passages are heavily corroded. Whether this can be satisfactorily addressed, or require eventual engine replacement, will be determined once the engine block is cleaned and evaluated.
All of the California-related smog gear, including the single Stromberg 1.50 CD carburetor, intake manifold, smog pump, adsorption canister, air injection lines, exhaust emission control valve, exhaust manifold, run-on control valve, catalytic converter and other related equipment were removed as they would not be necessary. These pieces were not scrapped but stored in case they might be needed again. And they were.
Shortly after the removal of these components a friend in California purchased a late-model Spitfire that had had all of the smog equipment removed and so it could not be registered. The smog pieces I had removed from my Spitfire were shipped to him and he was able to get his car back on the road. Many of the smog parts that I provided are no longer available, so bear that in mind when deciding whether to keep or scrap smog equipment. Your smog parts may save a classic from the scrap heap…maybe even one of your own.
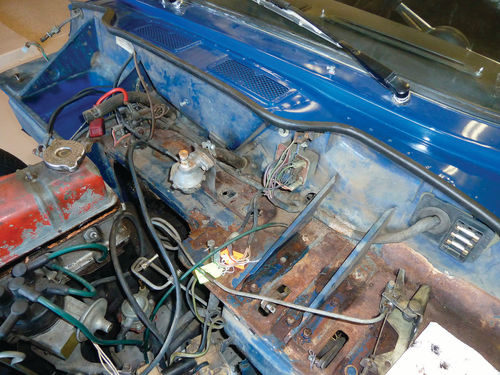
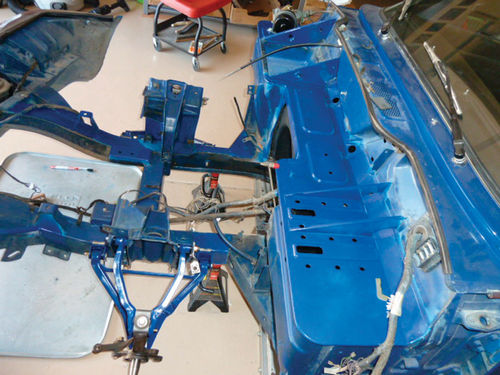
With the engine and transmission out, various accessories on the firewall shelf were also removed including the brake and clutch master cylinders, coil, PDWA, heater control valve and the corresponding brackets for these items. Years of brake fluid leaking onto the firewall shelf had resulted in little paint remaining and a lot of rust. Also, there was a small hole rusted through a bottom corner of the battery box that was easily repaired with some J-B Weld. The firewall shelf repair required removing the rust and repainting. Some of the rust was removed using a rust removal product, but most was removed the old-fashioned way with a wire-wheelequipped drill and a wire brush.
Once the rust was gone, the firewall was repainted Delft Blue using spraycan paint sourced from Automotive Touchup, where I was able to get a paint match to 1976 Triumph Delft Blue through their web site. The Automotive Touchup product is a two-stage paint, i.e., base (color) coat/clear coat, and relatively easy to use. The color match was definitely good enough for my purposes, and I have since used it on other underhood components. Your results may vary.
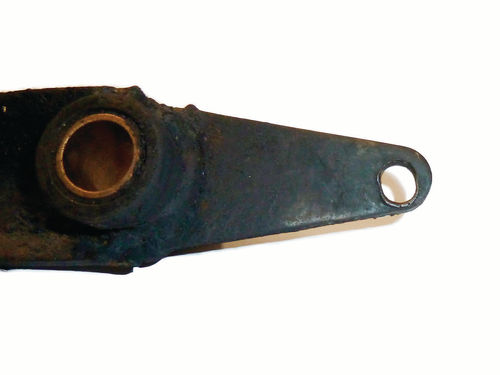
The brake and clutch pedal assembly came out at the same time as the brake/ clutch master cylinders, and the pedals were removed from their bracket for inspection. As I had suspected, the hole for the pin which attaches the brake pedal to the master cylinder clevis fork was elongated from wear. This problem is not uncommon among Triumphs, and probably other vehicles with this type of pedal mechanism, and will result in a “sloppy” pedal feel when applying the brake. Fortunately this wear can easily be repaired by any competent machine shop by welding and re-drilling the hole. The weld material is softer than the surrounding steel of the pedal and so will wear faster than the original, but with the few miles that these cars are typically driven the repair should last many years.
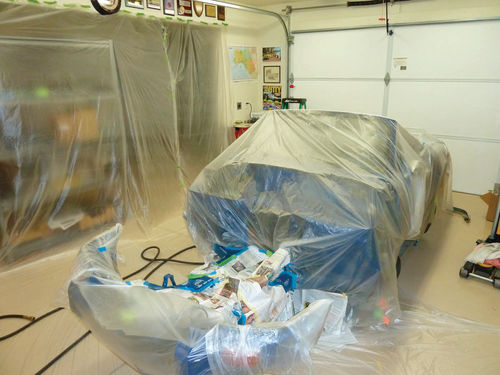

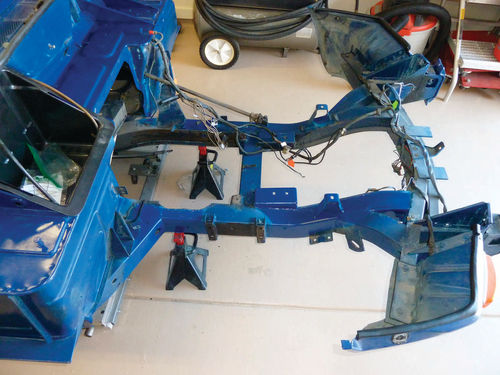
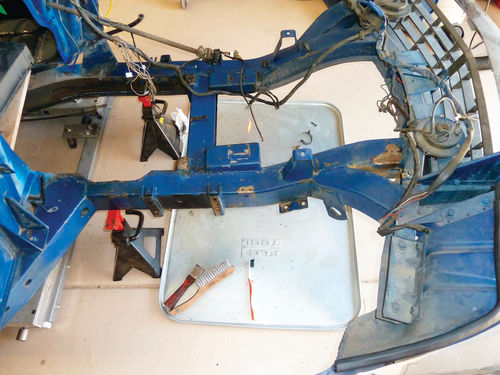
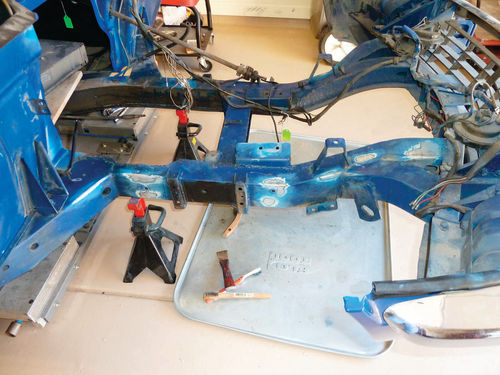
The removal of the engine, transmission and bonnet allowed a closer inspection of the car’s forward subframe. The frame was in very good condition with only some surface rust and patches of missing paint, which was the same Delft Blue as the Spit’s exterior. I decided to use these issues as an occasion to exercise some newly acquired knowledge. (I have been working part-time as a painter’s assistant on aircraft.) Since it was a good color match, I shot a test card with Automotive Touchup Delft Blue and the card was then taken to a supplier of quality automotive paints who mixed a pint of matching single-stage paint. (I decided to go with single-stage paint largely because it is less expensive and easier for a novice like me to use.) I “feathered” and cleaned the areas of the frame to be painted and then masked the frame and covered the remainder of the car, the garage floor, and surrounding shelves with painter’s sheet plastic, this being sufficient for the small job at hand.
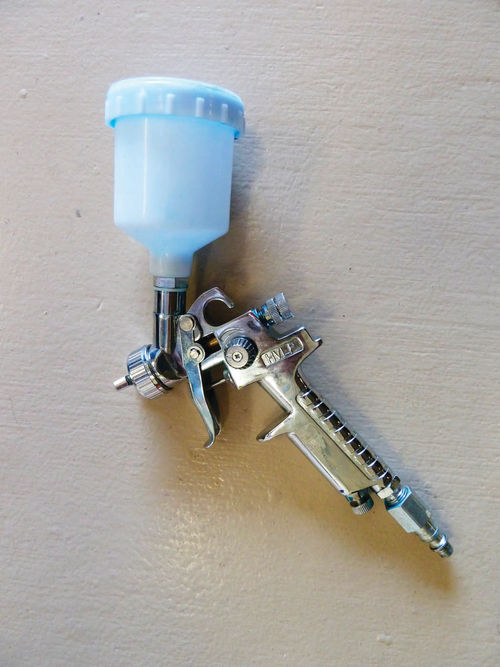
After first applying gray Rust-Oleum Automobile Primer, I gave the repaired areas of the subframe three coats of color with a small paint gun purchased from Harbor Freight. The result was not perfect, but is satisfactory for the level of restoration being performed on this car.
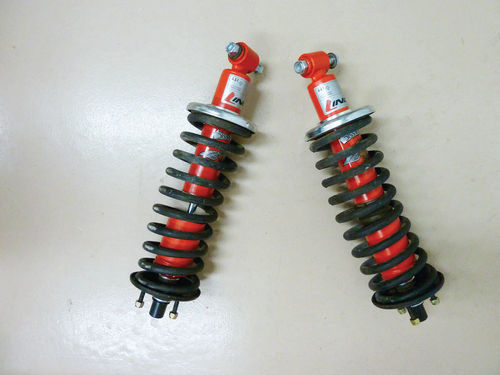
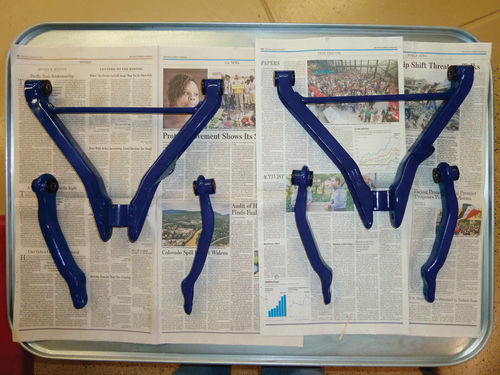
In parallel to the frame cleanup, work was also progressing (albeit slowly) on refreshing the front suspension. The A-arms were sand blasted, cleaned, repainted and new polyurethane bushings installed. The coil springs were compressed to remove the old OEM shocks and install a new set from Koni.
As an aside, finding spring compressors that would work for the Spitfire was difficult. The spring compressor I used for the TR3A could not be used in this application, and coil spring compressors purchased from automotive supply houses were not compatible with the clearances required for installing the new Konis. Finally, I sent out a call for help to the members of the local Triumph club, the Desert Centre Triumph Register of America (DCTRA), and one kind member loaned me the spring compression tool needed. (As has often been emphasized on the pages of this magazine, belonging to your marque’s car club is essential, and members of the DCTRA have come to my rescue more than a few times.)
A Change In the Plans
In Part 3, I will get into the trials and tribulations, victories and defeats of reinstalling the front suspension, but I do want to mention a change to the overall plan for this car.
Once it is finished, the Spitfire will be given to my daughter, Erica, who lives nearby. Hopefully it will be in time for her to drive it to Triumphest 2017. Erica has always shown an interest in the Triumphs (1958 TR3A and 1976 Spitfire 1500) and has provided a helping hand in working on them on many occasions. So the Spit will be hers upon its completion. There is a condition to this, naturally, in that I will retain driving privileges for the Spitfire in perpetuity. And, of course, once the Spit resides in Erica’s garage there will be free space in mine for the next Triumph.


