Restoring a 1976 Triumph Spitfire Part 7
There Were Two Ways He Could Go With the Car’s Engine…Rebuild the Original or Replace It With Something Bigger. Let’s See Which Option He Chose.
The plan for my Spitfire’s engine has gone through several iterations over the years, similar to the engine changes for the Spitfire marque during its production from 1962 until the last one exited the Canley plant in 1980.
The initial Spitfire Mk1 was equipped with a 1147cc displacement inline four-cylinder ohv engine sourced from the Triumph Herald saloon (aka, sedan) that generated 63 bhp, later tuned to 67 bhp for the Spitfire Mk2. That may not sound like much (and, indeed, it was not), but the power was adequate to give the 1568 lb. Spitfire performance notably superior to its contemporaries such as the AustinHealey Sprite and MG Midget.
A more-developed version of the 1147cc engine was the 1296cc which incorporated block and head design improvements and generated 75 bhp. It appeared in the Spitfire MK3 in 1967 and soldiered on well into the 1970s with the Spitfire Mk4.
By the early 1970s, however, the U.S. smog regulations that markedly decreased horsepower along with the additional weight of governmentmandated safety features were taking their toll on the little roadster’s performance. To counteract this, Triumph introduced a stroked version of the 1296cc engine in 1973 that increased displacement to 1496cc for the U.S.- market Spitfire Mk4s. Starting in the 1975 model year that engine was placed in all Spitfires and they were called the Spitfire 1500. But it was a losing battle. By 1976 the so-called “Federal” Spitfire’s 1496cc engine was rated at only 57.5 bhp, less than the original 63 bhp of the Mk1, and that to motivate a car that was 240 lbs. heavier. The Spitfire 1500s were more comfortable and had much improved handling over their Mk1 ancestor, but were not nearly as quick.
More Power Was Necessary
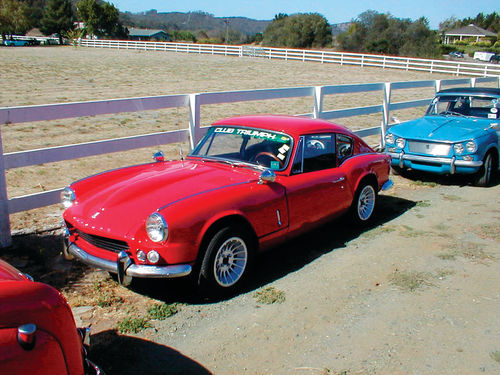
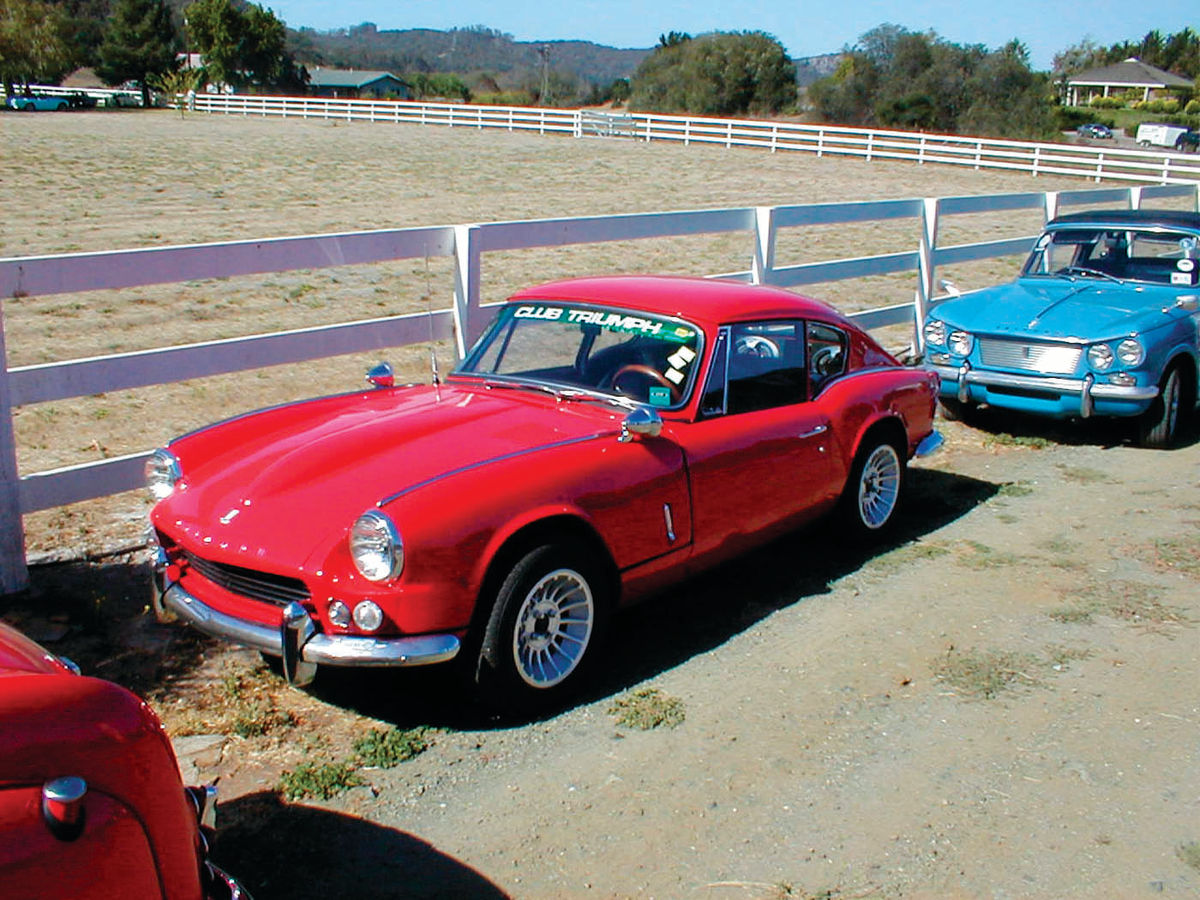
I wanted to improve the lackluster performance of my 1976 Spitfire and considered two approaches to achieving this. The first would be to increase the power of the existing 1493cc engine. This could be done relatively easily by upgrading the engine to its European specifications. The other option was to convert the Spitfire 1500 into a “Spit6.” The Spit6 is a fairly common conversion of the standard Spitfire that encompasses replacing the stock fourcylinder engine with the six-cylinder of the type found in the Triumph GT6 (Photo 1: Triumph GT6).
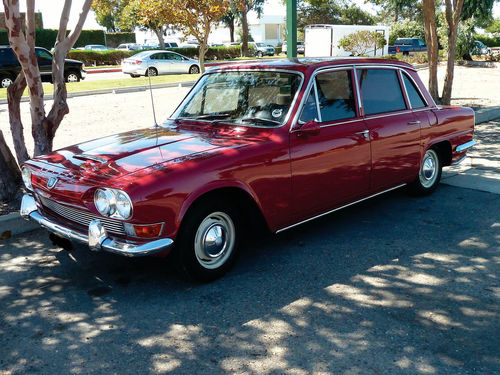
The GT6 was itself a factory derivative on the Spitfire achieved through the addition of a fast-back roof, a 2-litre inline six-cylinder ohv engine from the Triumph 2000 saloon and a pronounced bulge in the bonnet (aka hood) to accommodate the additional length of the six-cylinder engine (Photo 2: Triumph 2000 Saloon).

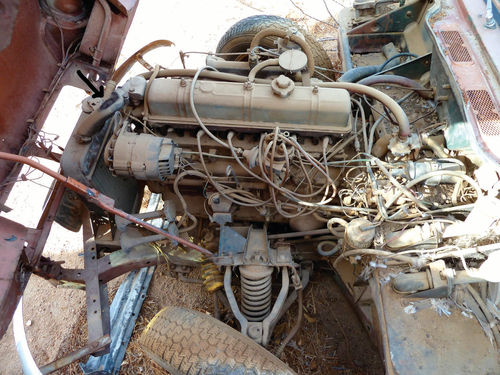
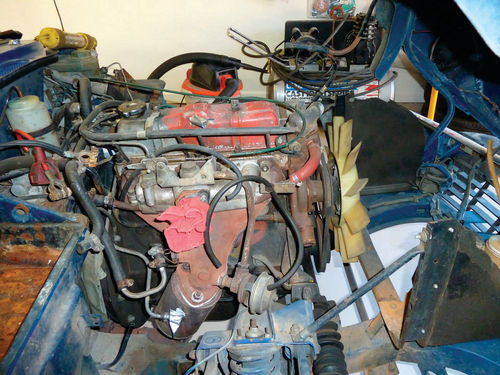
The actual Triumph GT6, of course, incorporated much more than these modifications, but those were the basics. To this end, when the opportunity came to acquire a Triumph six-cylinder engine from a derelict Spitfire Mk1 that had already been subjected to the Spit6 modification, I purchased the entire car (Photo 3: Derelict Spitfire Mk1). Inspection of the carcass revealed the likely reason that the Spitfire had been put aside. The stock Spitfire hood had not been replaced with one from a GT6, and, although the hood’s front had been raised with an ugly pair of homemade hinges, it had not been enough. The top radiator hose had been pinched when the hood was closed. The poor “Spit6” had undoubtedly suffered from severe overheating problems. (Photo 4: A sixcylinder in place).


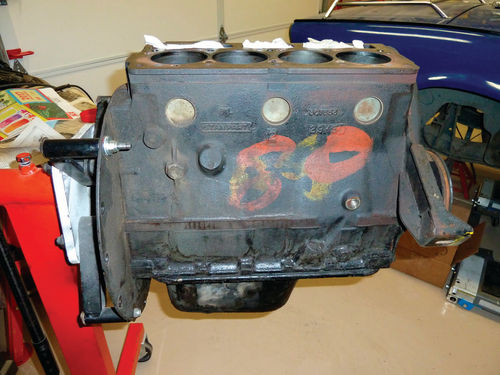
I evaluated the two options. The 1500 engine that had originally come with my Spitfire was not known as an outstanding sports car engine, but it was considered adequate in the Spitfire application (Photo 5: Original 1500 engine). The 1500’s longer stroke over the 1296cc engine from which it was derived translated into lower rev limitations, but it did achieve higher torque, something to be desired with the Spitfire’s growing girth. A significant fault with this engine was that it was equipped with weak crankshaft thrust washers that could break and drop into the oil sump. Aside from loose parts rattling around in the sump, hardly a good thing, the loss of the washers allowed for excessive fore and aft movement of the crankshaft that could result in very expensive damage to both the engine block and the crankshaft. A quick check of the crankshaft endplay by pulling the crankshaft pulley fore and aft showed movement within specifications, indicating that this was not a problem with this particular engine. Other preliminary assessments of this engine were done as well. As documented in Part 2 of this series in the October 2016 issue, removal of the water pump and its housing revealed heavy corrosion in the head’s coolant passages as a result of 20+ years of storage with un-drained coolant. A local machine shop inspected the head, which was declared sound, and the coolant passages cleaned up quite nicely. (Photo 6: Head water passages). With the head removed, the head studs were also taken out with a lot of help from a stud extractor, and I confirmed that the engine had the low-compression (7.5:1) dished pistons. The cylinder walls showed some wear, but no scoring. Corrosion was again evident in the coolant passages of the block. (Photo 7: Pistons and coolant passage corrosion). I had been told by the Spitfire’s previous owner that this engine had been run for short periods prior to its sale to me. It appeared that a rebuild was feasible.
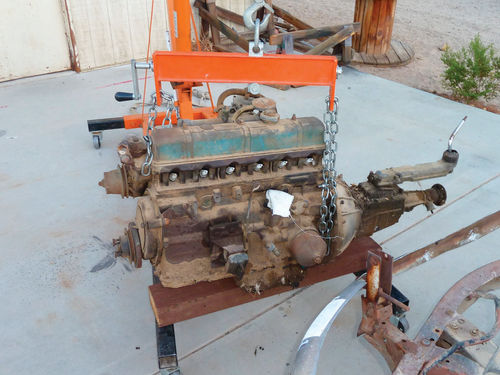
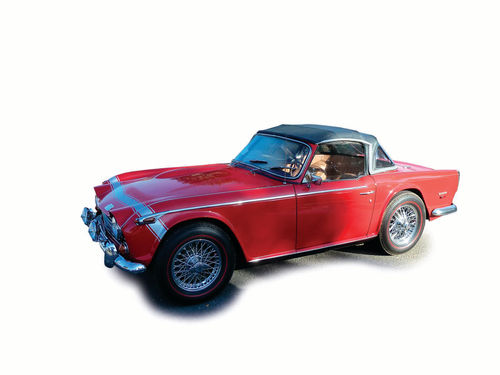
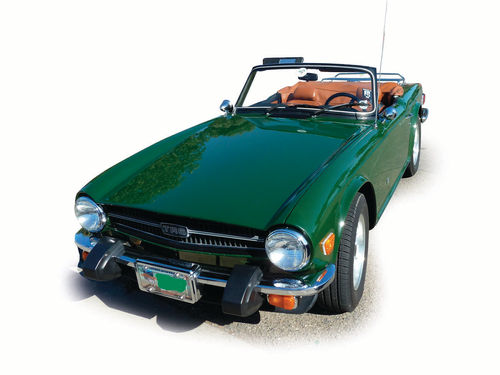
However, the six-cylinder from the derelict Spitfire was a different story (Photo 8: 2-litre six). The 2-litre six was Triumph’s “sporting” engine from its inception in the late 1950s as a distant derivation of the rather plebian Standard 8 saloon’s 803cc ohv four-cylinder, and, in addition to the GT6, it had seen service in various Triumph sporting saloons besides the aforementioned Triumph 2000. The Triumph 2-litre six would ultimately be enlarged to 2.5-liter displacement and used to power the Triumph TR250 and, later, the ubiquitous TR6 sport cars in both carbureted and fuel-injected versions (Photo 9: Triumph TR250; Photo 10: Triumph TR6). This engine was known for its reliability and undoubtedly had the pedigree and performance for a lively sports car. What was not known was this particular engine’s history or overall condition. The derelict Spitfire that provided it had been parked in the open desert for at least 30 years. What could go wrong?
Considering the Engine Choices
Each option had its relative merits. The original 1493cc four-cylinder (“1500”) was lighter in weight than the 1998cc six-cylinder (“2000”), but developed less horsepower in its base 1976 form (57.5 bhp vs. 90 bhp for the six). Installation of the six-cylinder would also necessitate moving the radiator forward and finding a GT6 bonnet (hood) to adequately accommodate the engine’s greater length, and GT6 bonnets are both difficult to find and expensive. I could expect the rebuild costs for the 2000 to be at least 50% higher than the 1500. So, all considered, converting to the “Spit6” would definitely cost more and entail significant modifications to the Spitfire, but it would be faster and “sexier.” Both of these later traits are a big draw for the sports car crowd, especially me.
I pondered the decision for quite some time…and finally determined to go with the Spitfire’s 1500 engine. For less money (a large factor in this project), the 1500 could be rebuilt to achieve horsepower close to the level of the 2000. In its Euro-spec form with twin SU carburetors and 9.0:1 compression, the 1500 generated 71 bhp. With some modifications, e.g., higher-compression pistons (9.0:1 versus the 7.5:1 of the stock U.S. engine), a hotter “street” camshaft and the addition of dual SU carburetors, tubular exhaust headers, electronic ignition and some head work, I thought that the 1500 could achieve 80+ bhp with good reliability. With this setup, the lighter 1500 should deliver performance on a par with what could be expected from the 2000. (The lighter weight would also result in better handling, another important factor.) Time will tell.
Moving Forward With the 1500 Engine
The decision made, the 2000 engine was put on Craig’s List and sold within a couple of days for the same price as was paid for the entire derelict Spitfire. (As an interesting side note, this 2000’s engine serial number revealed that it had originally been installed in a mid-1960s Triumph 2000 saloon. Surprising, as these cars were rare in the U.S. market.)
One decision led to the next. Do I rebuild this engine myself or have it done professionally? As stated earlier in this series, I had planned to rebuild the 1500 myself. I do have experience, having worked on the rebuild of the engine in my TR3A and other Triumphs. There is nothing intimidating or exotic about the 1500 engine; it being a basic ohv design with origins in the 1950s. But I began to feel schedule pressures. The plan was to have the Spitfire ready for my daughter to drive to Triumphest 2017 in September (alas, it will not make it), and there was no hope of meeting that milestone if I rebuilt the engine myself. I therefore decided to have the engine rebuilt professionally while I continued restoration work on the rest of the Spitfire.
As noted in the August issue, the selection of who to do the rebuild was not difficult. Discussions with local engine rebuilders were not satisfactory and I contacted Ted Schumacher of TS Imported Automotive in Pandora, Ohio. I have personally met Mr. Schumacher at Triumphest events and have dealt with him many times when ordering parts. He is very knowledgeable on Spitfires and I trusted him to have the engine done correctly.
The agreement was made for Ted to oversee the engine rebuild, but how to get the engine from Arizona to Ohio? I have never shipped anything the size or weight of an engine, but on Ted’s advice I contacted the people at freightquote.com who were extremely helpful in arranging the engine’s shipment.
I procured a pallet and secured the stripped engine and its ancillary pieces (e.g., head, flywheel, rocker arm) to it with 10 straps purchased from Harbor Freight (Photo 11: Engine stripped for shipment). The engine was loaded on the back of my truck with an engine hoist and delivered to the local shipping center where it was sent on its way. The whole shipping process was simple and cost less than I had anticipated. (Delivering the engine to the shipping center myself helped to keep down the overall cost. I saved about $200 in doing so.)
The 1500 arrived at Hart’s Machine Service, which does Ted’s machine work, in Cecil, Ohio, after a week in transit, and there it was torn down and inspected. Ted had cautioned that if the crankshaft thrust washers had failed, the subsequent damage to the engine block and crankcase would be very expensive to correct, most likely entailing their replacement. Fortunately and as expected from my previous checks, this was not the case and the engine was judged to be a good rebuild candidate. It was then set aside (Hart’s had an eight-week backlog), and I supplied Ted with the basic instructions and goals for the rebuilt 1500:
1.) Block to be boiled out as there is much corrosion in the water passages
2.) Check crankshaft
3.) Align bore
4.) Balance
5.) Inspect cylinder bores for wear. Address deficiencies as required.
6.) Inspect the head. Address deficiencies as required.
Pursuing “European” Power
The overall goal is for the rebuilt 1500 engine to be brought to “euro-spec” power levels, while remaining reliable and streetable. I assumed this may require a new cam, “hi-compression” pistons and rods, upgraded head bolts, etc., and possibly some head modifications. APT (Advanced Performance Technology; aptfast.com) fasteners/bolts/nuts for rods, head bolts, etc., are to be used. Other modifications as required may be done to meet the goal. The installed engine will have twin SU carburetors and an exhaust header.
As it turned out, these tasks and more were done. The original camshaft was reground to be more aggressive and nitrited along with the crankshaft, which had had its journals taken down by 0.010”. The head was modified with larger intake and exhaust valves installed and the block was bored out by 0.030”, increasing the displacement from 1493cc to almost 1525cc. Ted provided me with a list of the work done that showed almost every internal piece had been reconditioned or replaced. The price quoted for the engine work at the start was the price paid after the work was completed, and more work was done than I had anticipated.
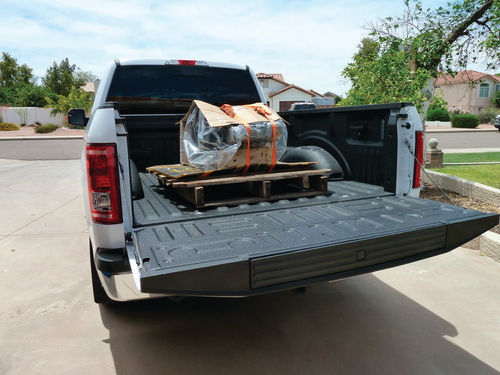
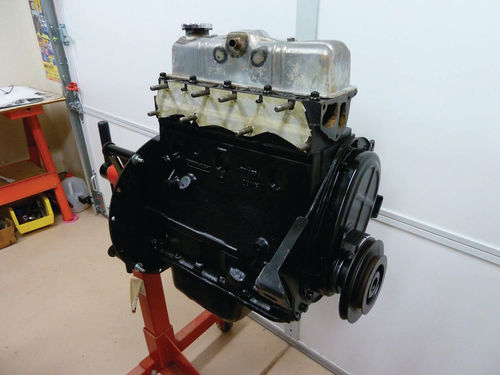
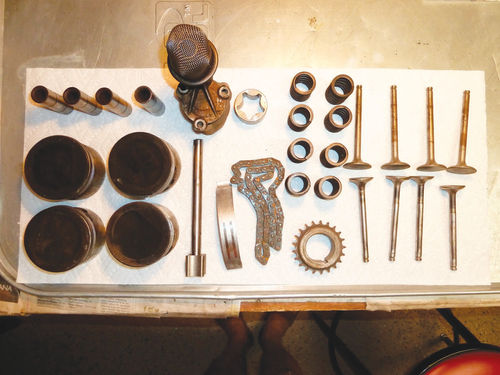
I arranged for the completed engine’s shipment back to Arizona, again through Freightquote, and again it was a very satisfactory experience. Once home, a neighbor helped to unload the palletized engine from the back of the truck (Photo 12: Delivered engine on pallet) and install it on an engine stand (Photo 13: Engine on stand). Included in the shipment was a box containing many of the parts that had been replaced during the rebuild (Photo 14: Some of the replaced engine parts).
The engine’s saga is not completed. There are still accessories such as the water pump, fuel pump, distributor, coil, thermostat, starter, alternator, etc. to be installed, and, of course, the mating of the 1500 engine to the Ford 5-speed transmission and subsequent installation of that union into the Spitfire. But for now I am happy to have the engine completed. Time will tell if the power goals have been met, and that, too, may be the subject of a future article.
Resources
Freightquote 901 W. Carondelet Dr. Kansas City, MO 64114 freightquote.com
Hart’s Machine Service 106 N. Main St. Cecil, OH 45821
TS Imported Automotive/ MotoringXtras 108 S. Jefferson St. Pandora, OH 45877-0475 tsimportedautomotive.com

