Vapor Lock & Boilin’ Over, Pt. 1
These Problems Are Experienced by Many Older Cars & Trucks. Here Are Some Ways to Diagnose and Fix the Situation.
IS VAPOR LOCK your big problem on warm days over 80° or 100°, at sea level or at a 10,000 ft. elevation in the Sierras, or going over 50 mph? How about idling in a parade?
Is The gasoline with 10% ethanol causing the vapor lock? Maybe! Or is your cooling system boilin’ over?
This article will show you some servicing techniques for identifying causes for vapor lock and controlling boil over on your collectible vehicle.
But first, just what is vapor lock and boilin’ over?
Vapor lock: In this article vapor lock is “fuel foaming” in technical terms.
Fuel foaming occurs when “lighter end” gasoline hydrocarbons start “boiling” and forming vapor
Take a look at a pan of water on the stove just before the water temperature reaches 212° F. The same process happens in the carburetor bowl bottom surface at fuel temperatures from 90° to 100° F.
The carburetor handles liquid gasoline until the air-fuel mixture enters the main jet discharge nozzle. That’s when it’s supposed to vaporize.
Vapor lock (fuel foaming) is caused by overheating engines, insufficient fuel supply, fuel pump failures, 90° bends in fittings, cracked fuel lines, collapsed fuel lines, excessive under hood temperatures, engine block overheating, old radiators, and rotted-out block distribution tubes.
Please Note: Any restrictions or sharp bends in the fuel supply system promote vapor lock (fuel foaming) formation.
Gasoline Characteristics
Fuel Testing: Gasoline testing,technical research and development is well documented by the SAE (Society of Automotive Engineers). All gasoline manufacturers follow these tests to measure and control the quality, performance and production of gasoline.
Standardized tests are conducted for octane, vapor pressure (a “biggie” in fuel foaming), and fuel additives to control fuel injection, carburetion and combustion chamber carbon buildup.
Distillation:All gasolines have a “distillation” curve. Generally, gasoline “lighter end” hydrocarbons start to boil as low as 90° F. The “heavier ends” finish boiling at up to 400°F.
Gasoline Vapor Pressure: In the old days(1925) gasoline “Reid Vapor Pressures” were around 4-5 psi as measured using the SAE tests procedures.
This means the gasoline did not start boiling at low temperatures, like in today’s gasolines.
Today Reid Vapor Pressures vary from 9-13 psi depending on climate, elevation, geography and season. One gas does not fit all areas or climates.
The higher Reid Vapor pressures mean, in today’s gasoline, hydrocarbons start boiling at lower temperatures, like 90-100°F. Today’s gasoline provides easier startups and lower emissions during engine warm-up for our modern vehicles.
Modern fuel injection systems operate at 30-75 psi pressure. Vapor lock is not an issue, even with one supply line to the fuel rail and no return line to the tank.
In the later carburetion years (1975- 85), fuel vapor return lines were installed from the fuel pump or near the carburetor. Liquid and vapor gasoline was continually re-circulated back to the fuel tank to minimize vapor lock problems. This lowered liquid fuel temperatures under the hood and inside fuel lines.
Octane: Today’s octane levels are adequate for providing good combustion burns, no pinging (with correct tune-up specs), best mileage, good drivability (no stumbles or bogs), and lower emissions.
The exception to this is some muscle car applications (pre-computer controls) where higher compression ratios (9:1 or more) may cause detonation.
There are additives to boost octane, and/or aviation gasoline (expensive for smooth burns and no pinging).
Boilin’ Over
Now let’s define boilin’ over. If your collectible runs at the specified coolant temperature, and does not lose coolant, the cooling system is OK. If your cooling system boils over every time you drive it and it always needs coolant, then the cooling system needs service.
Bear in mind that your collectible may need the services outlined here to reduce “vapor lock” tendencies even though the cooling system is OK.
Boilin’ occurs when the coolant temperature exceeds 212° F in an open system at sea level. In pressure cap cooling systems, the boil-over temperature increases above 212° depending on the pressure cap rating. When your collectible vehicle boils over, turn off the engine to let it cool. Add water to full up, then get your car home and start determining the boil-over causes.
Causes for Vapor Lock & Boilin’ Over
While there are no quick answers, this article will review causes for vapor lock and boilin’ over and discuss some approaches to repairs, such as: Tune-up, first!, Underhood temperatures, Cooling system service, Radiator repair/replacement, Block coolant leaks, Block distribution tubes, Plugged exhaust, Fuel supply service, Head gasket leaks, Cracked blocks, Carbon buildup, Retarded valve timing and Modifications.
So, let’s get on with the “how-to, what to do and the fix-it.”
A Tune-Up Comes First
In most cases, a good engine tuneup with all engine-related systems serviced, repaired and adjusted to factory specifications will result in a vehicle that starts up and runs very well with no pinging.
I recently tuned up a ’65 Pontiac GTO with tri-power carburetion. The complaint was, “the engine pings at 50 mph during a moderate throttle opening.” The only tune-up misadjustment was the base timing at 4 crankshaft degrees over- advanced from specifications. This misadjustment caused the mechanical and vacuum advance to also be 4 crankshaft degrees over-advanced at 50 mph with a light to moderate throttle opening.
This timing mis-adjustment, causing pinging, leadsto block overheating. The GTO owner was elated at the performance (no pinging) after all tune-up items were measured, found at specification, and the base timing re-adjusted back to spec.
The gasoline octane (91) was not the cause of this pinging.
I must emphasize again that a proper tune-up is your first shot at curing pinging, vapor lock and overheating. The successful tune-up approach includes:
• Battery and starter system service.
• Engine condition (change oil, check compression).
•Ignition (distributor removed, points or electronic module, condenser, wiring, grounds, plugs).
• Fuel (carburetion, filters, fuel supply pressure, fuel flow and fuel line routing).
• Exhaust system (manifold vacuum, heat riser, plugged exhaust, carbon buildup).
•Cooling system (radiator, belts, water pumps, coolant, flush, distribution tubes).
Again, all tune-up systems must be serviced, repaired, and adjusted to specifications,FIRST.This approach will ensure what’s right before you start looking for what’s wrong and causing vapor lock and boilin’ over. As you know,some misadjusted tune-up items can and will cause vapor lock and boilin’ over!
Out of Tune: I would bet lean fuel mixtures, retarded ignition timing, distributor advance curves, and unsound modifications are the leading causes for vapor lock and boilin’ over.
Vehicle Under Hood Temperatures
Collectible vehicle under hood temperatures get pretty hot! Hot enough to boil gasoline in fuel lines and carburetors, leading to vapor lock.
In my engineering evaporative emission test days I measured under hood temperatures during dynamometer road load tests with ambient temperatures from 0 to 120° F:
• Radiator coolant temperatures run up to 180-200° F while driving.
• Under hood air temperatures run at 100°-200° F.
• Under hood air temperatures, after engine shutdown, increase up to 200°- 400° in 30 minutes, and then air, fuel and block temperatures start decreasing.
• Gasoline liquid temperatures inside the fuel line at the fuel pump run 100°- 150° (boilin’) during operation.
• Fuel temperatures inside the carb, measure at 100°-150° (boilin’), during running.
• Fuel temperatures inside the carburetor, engine off, increase up to 200-300° in 30 minutes.
•Crankcase oil temperatures rise up to 150-300° after a 30 minute warm-up.
• Road surface temperatures increase up to 150° (100° ambient air temperatures).
• Fuel tank gasoline temperatures run from 100-125°F on 100°F ambient temperature days.
• Vehicle driveline temperatures are moderate at 100-150° (normal).
These are very general temperature ranges measured on all makes of vehicles from 1950 to 1970 on the road and in temperature-controlled dynamometer rooms with ambient air temps from 0 up to 120° F. I trust by now you have a “feel” for all these high temperatures in all kinds of driving conditions, like sea level to 10,000 ft. elevation and ambient air temps from 0 in winter to 120° in the summer deserts.
It is always a real challenge to keep our collectibles cool no matter what the age or mileage!
Radiator and Cooling System Service
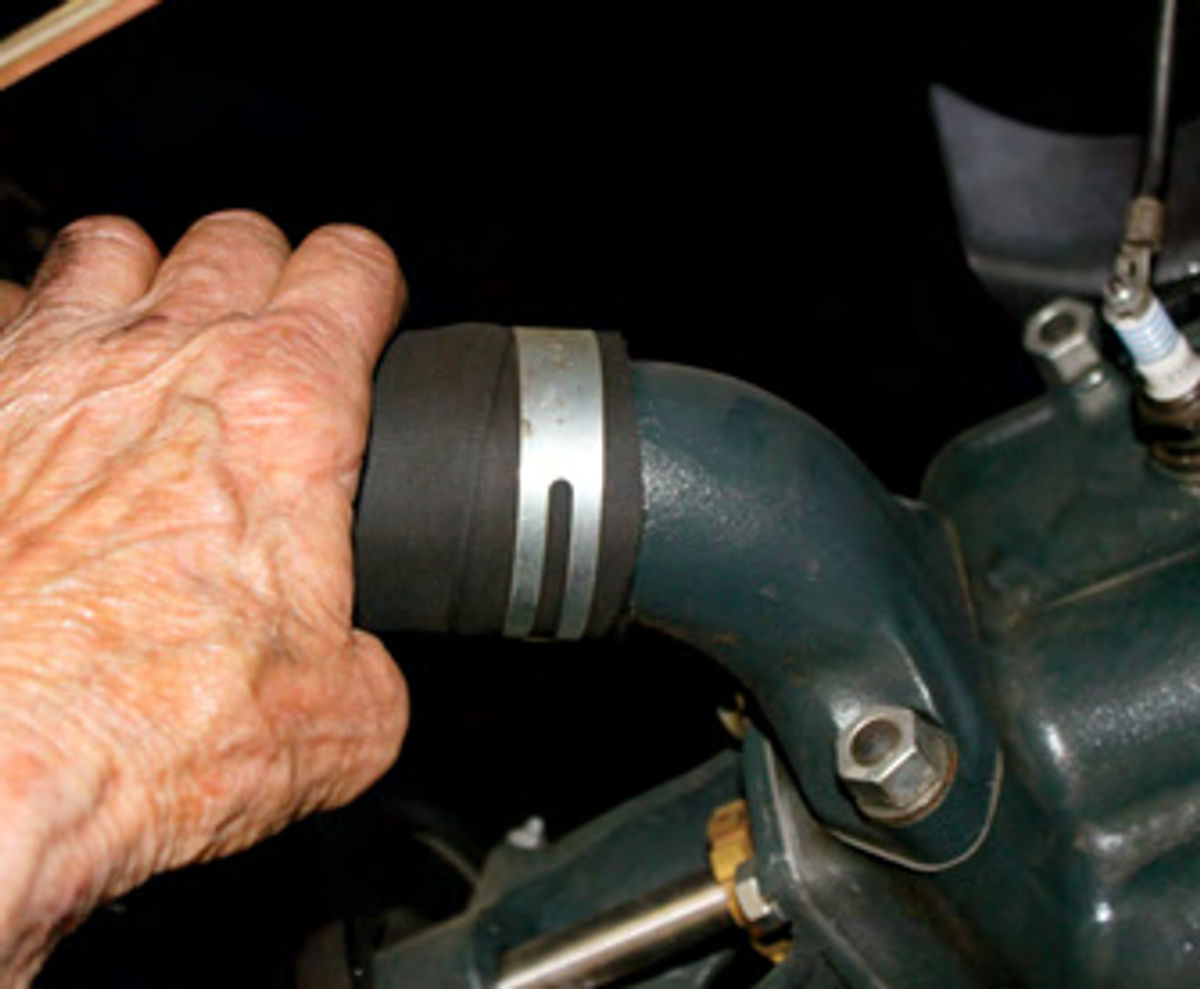
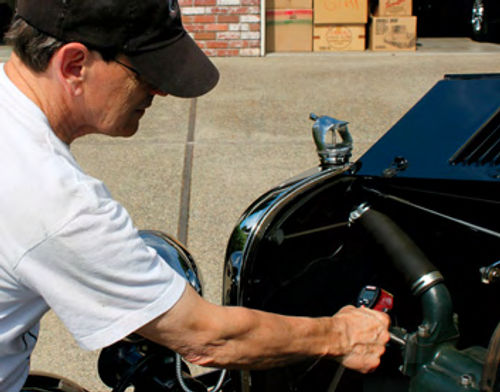
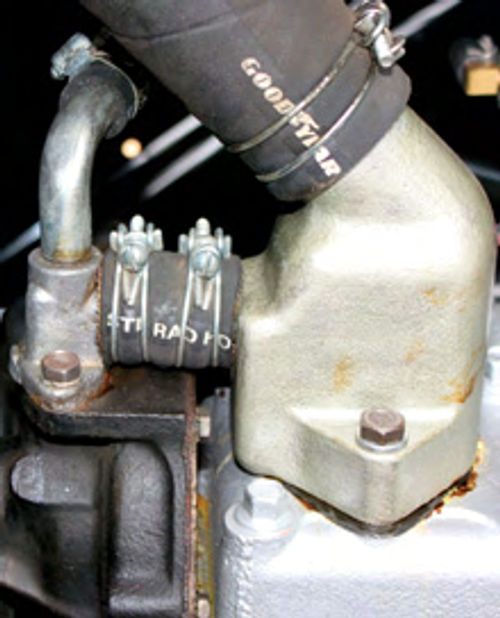
Coolant Temperature: Following a tune-up, you may now want to start your temperature measurements using an infrared temperature gun.Surface temperatures are generally around 50° less than liquid temperatures inside fuel lines and cooling systems (Photos 1A, 1B and 2).
Purchase a temperature gun like the one in use in Photo 1B. They’re generally available at auto parts stores. One brand to consider is Raytek (raytek.com). Their products run from around $60 to $200.
Now that you’ve done the tune-up as outlined above, does your engine still boil over during any of the above driving conditions?
Thermostats: Install a temperature specified thermostat for fast coolant warm-up.
Still boilin’ over? If your cooling system still boils over try some “fast flush” cleaners. Drive your car for 50 miles, drain, remove thermostat (temporarily). Refill with water and drain again. Flush system and refill with coolant (water).
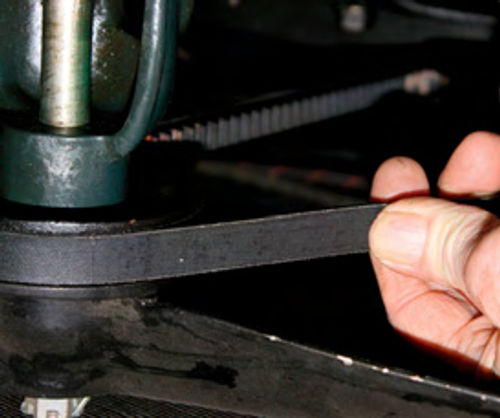
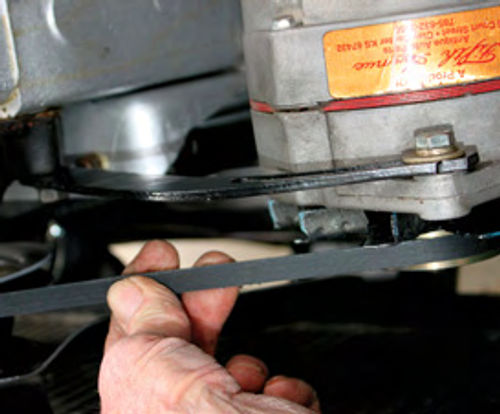
Inspect, repair, and/or replace thermostat, water pumps, and belts. Check belt alignment and adjustment. (See Photos 3A and 3B.)
Watch for radiator hose collapse when revving the engine.
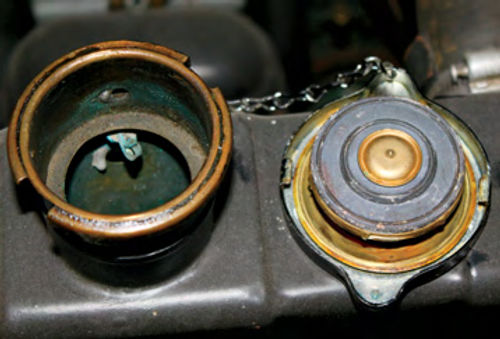
Open Radiators, With Overflow Tube: In open radiator systems (no pressure caps), try water and a “wetting agent.” The wetting agent will allow the coolant to “wet” the internal block surfaces carrying more heat up to the radiator.
The wetting agent will also wet the radiator inner tube surfaces for better heat transfer. This wetting agent process allows more temperature differential between the upper and lower tanks, when coolant flows down through the tubes, than with just plain water.
A good wetting agent (and anti-rust protectant) is 1 cup of “soluble oil” in a cooling system.This Is a StaLube product available at NAPA parts stores. Hyper lube Super Coolant additive, available at auto parts houses, claims a 20° temperature reduction when using water as a coolant. (See Photo 4.)
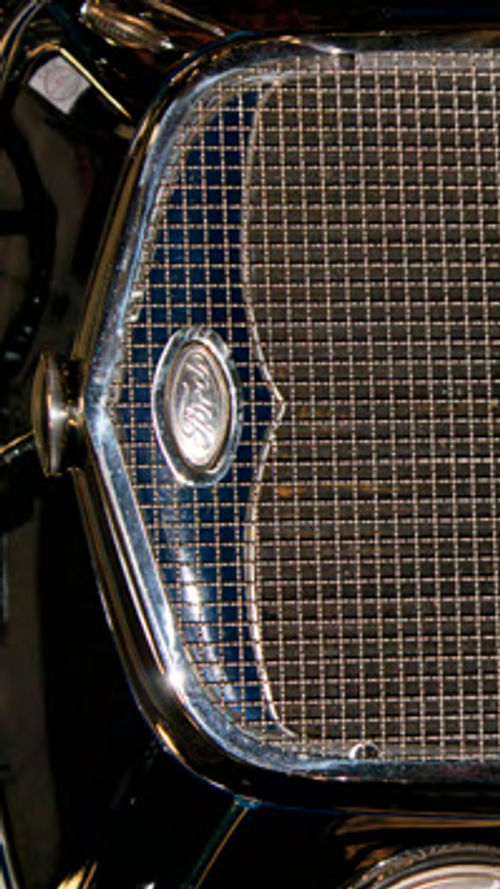
Rock Guards: This was an old-time accessory to reduce fin bending. Air flow is maintained. (See Photo 5.)
Note: In my Model T experience with no water pump, water and a wetting agent is a better coolant than antifreeze and water in “open” thermosyphon radiator systems.
Last year I toured around Nevada City, California, on 80-90°days.Coolant consumption was three quarts during 200 miles of “hard” touring. Driving conditions included 10% grades, “gravel” (rough) roads and 55 mph on straight paved roads. This coolant consumption is normal for a Model T open system just like a boilin’ tea kettle!
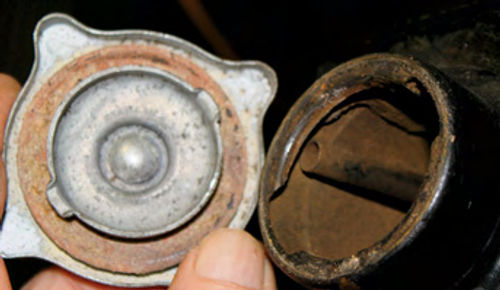
Pressure Caps: In cooling systems with pressure caps (3-16 psi), wetting agents also improve cooling.
Antifreeze coolants work better under pressure than water. Of course you also have the freezing protection.(See Photo 6.)
Coolant: After flushing the radiator and block, install water as a coolant. Add a wetting agent like Hyperlube, Water Wetter, or Sta-Lube Soluble Oil.
In freezing climates install antifreeze and a wetting agent. Change coolant once a year for maintenance.
New Radiator Core: Still boilin’ over? After tune-up and flushing the cooling system, it may be time to consider radiator or core replacement. Radiator repair service shops can provide good technical advice on your cooling system needs. They may also recommend adding extra rows of tubing to help control boilin’ over.
Radiator shops can also backflush the block to remove rust debris.
Note: Old radiator core tubes may lose their bond to the fins resulting in less than-designed heat transfer. Cleaning (rodding out) may not cure overheating problems. It’s time to re-core.
Fans: Old fan blades crack! Then they can break off while running and cause all kinds of hood, underhood, and radiator damage. (Not to mention serious injury if you happen to be working under the hood at the time.) Inspect the fan for cracks. Reproduction fans, in my experience, are produced with good quality.
Pulleys: Pulleys must be the original diameter. This ensures that fans and water pumps turn at the design rpm.
Belt Alignment: Generators, water pumps, crankshaft vibration dampers and idler pulleys must line up. Eyeball belt misalignment by looking down on at least three pulleys for alignments. Perform alignment corrections with washers, brackets and pulleys. Replace and adjust belts to specifications. (Review Photos 3A and 3B.)
Clutch Fans: Clutch fans provide extra fan operation as the coolant temperature increases. Clean the clutch fan temperature control spring of road dirt with a liquid detergent. Inspect the “fan mechanicals” for cracks and loose bearings. Test the fan drag: The fan clutch should have more drag (engine off) on a hot engine than a cold engine. If you’re in doubt of its correct operation, replace the clutch fan.
Fan Shrouds: Quite often, fan shrouds have been removed (if originally equipped). Reinstall a new shroud.
Block, Coolant Leaks: Some boilin’ over may be caused by blown head gaskets, cracked blocks, and/or leaking water pumps. Radiator repair shops can test for these.
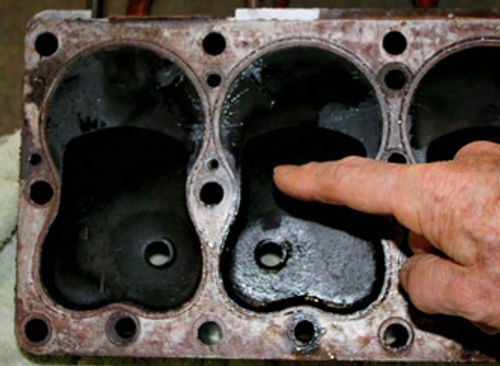
Beware: While “silicate” type block sealers plug up leak sources, block sealers can also plug up small coolant openings between the block and the head. (See Photo 7.)
The five small 1 ⁄4-inch “steam holes” on my ’25 Model T were plugged solid after I used a silicate block sealer to stop a minor pesky head gasket leak out of the right front corner. The block overheated and melted the center main Babbitt. Needless to say, this was an expensive, time consuming repair!
A better approach to block repair is to have a professional test for block leaks and then perform sound repairs.
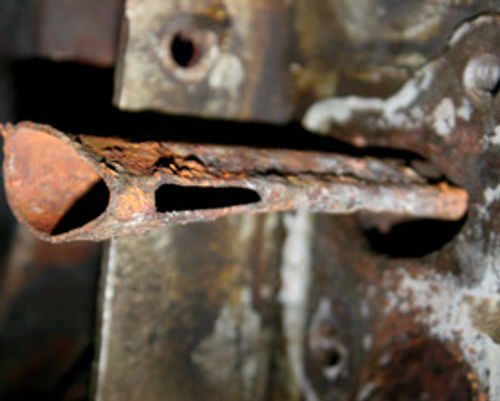
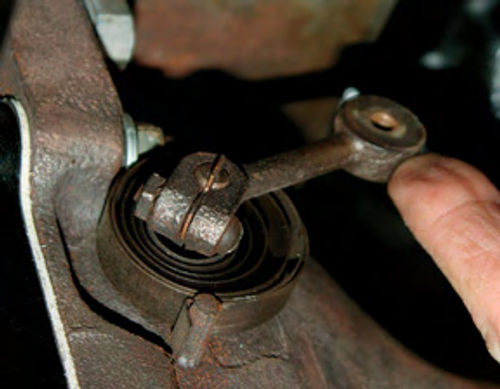
Distribution tubes: These tubes were installed behind the water pump on some ’30s’40s and’ 50s 6-and 8-cylinder engines. They’re designed to distribute the coolant evenly throughout the length of the block. This maintained equal block temperatures from front to back.
Brass distribution tubes held up very well while steel tubes rusted out. (See Photo 8.)
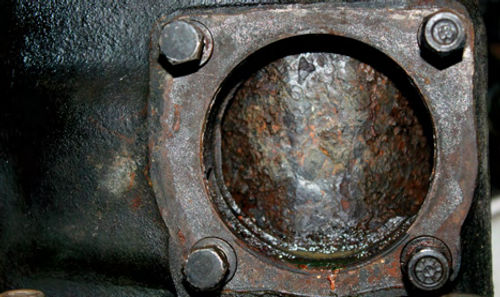
Some, not all, non-distribution-tube blocks use varying size coolant passages in the block or the head gasket to provide even temperatures throughout the block.
Earlier model year Chryslers had no distribution tubes. (See Photo 9.)
I remember helping my dad to replace coolant distribution tubes. Years ago this was our “last shot” in curing boil-over problems in Las Vegas.
A Plugged Exhaust
Plugged exhaust systems can cause block overheating leading to boil over.
Exhaust plugging can also cause new spark plugs to overheat and foul resulting in ignition misfire.
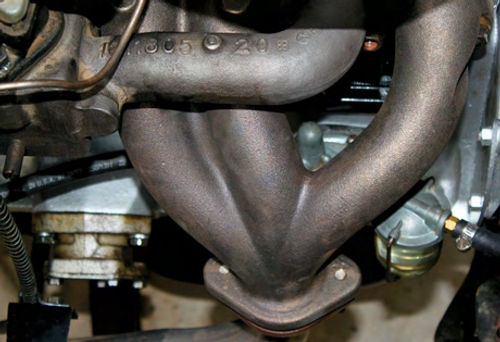
Exhaust header modifications can cause block overheating problems. (See Photo 10.) Underhood ventilation may lower fuel line, fuel pump and carburetor temperatures.
Measure Manifold Vacuum
Manifold Vacuum: After performing the engine tune-up, hook up a vacuum gauge to the intake manifold (windshield wiper vacuum sources). Warm up the engine and measure the manifold vacuum at idle, at 2000 steady rpm in neutral, and during a quick closing of the throttle from 2000 rpm.
Normal Vacuum: On most well-tuned engines with correct base timing, advance, and fuel-air mixtures, manifold vacuum will be around 18 to 20 inches at idle. You should read 19 or 20 inches at a steady 2000 rpm and 24 or 25 inches during a fast deceleration (a quick throttle closing) from 2000 rpm.
Then, run the car on the road at a 40 or 50 mph cruise; then measure the manifold vacuum.
If exhaust plugging is present, the manifold vacuum readings may be significantly less than the normal manifold vacuums outlined above.
Bear in mind that engines with racing cams and some older import engines may have lower manifold vacuum readings than the vacuums outlined above, especially at idle. The lower vacuums are usually caused by “valve overlap.”
Exhaust System Failure: Needless to say, old exhaust systems and mufflers fall apart, plug up, and can cause severe instances of lower manifold vacuum and block overheating.
In addition, some older exhaust systems use “double walled” exhaust pipes. The inner pipe collapses causing exhaust gas restriction and block overheating. The outside pipe surfaces may look normal.
Muffler shops have tests to detect plugged exhaust systems. In some cases they measure exhaust pressure in the system to locate the plugged areas.
Heat risers: Heat risers are installed to aid in fast engine warm-up. Heat risers route exhaust gas heat up to and around the carburetor base for better fuel vaporization during engine warm-up.
Most of the time, the heat riser will freeze up in the “heat off” position and does not provide carb heat during warmup. This is OK and block temperatures may be normal.
In some cases, however, the heat riser may freeze in the “heat on” position. This causes carburetor overheating leading to gasoline boiling. In turn, the carburetor bowl idle and main circuits cannot handle vapor. (See Photo 11.)
The carburetor gasoline should only turn from liquid to vapor while the air fuel mixture is mixing up in the carburetor main circuit discharge nozzles and exiting into the venturi(s).
In some engines the heat riser forces heat up into the carburetor base bottom channels and the channels become plugged with carbon. Carburetor heating is cut off resulting in poor performance during warm-up (the opposite of our fuel foaming problems.)
Next: We’ll take a look at how carbon buildup and fuel supply problems can lead to vapor lock and discuss some helpful repairs and component replacements.


