
To Protect and Preserve, Pt. 1
Once a year, the late Harold E. LeMay would display his vast collection of cars at a show held
on the last Saturday of August. And each year, he and his family would choose a different car to be restored at his shop and then unveil the finished project at the show.
Although LeMay died in 2000, this automotive tradition was continued by his family with last year’s selection of a two-ton, cab-over engine 1940 Chevrolet truck that is the subject of this restoration series. It had been used as a police “paddy wagon” in Southern California and was rumored to have been used as a movie prop as well.
Harold E. LeMay
Harold LeMay was a lifelong collector of everything that interested him, and his appetite was insatiable. Fortunately for the lover of vintage vehicles, LeMay’s interests ranged from cars and trucks that were used as daily drivers to the fantasy dream cars that you yearned to drive.
His collection consisted of everything from a rust bucket to a Concours d’Elegance classic. The stories abound how LeMay, seeing an old car sitting in a farmer’s field would stop and buy it. His collection was so extensive that LeMay was listed in the “Guinness Book of Records” as having the largest private collection of automobiles in the world. At the time, his collection exceeded 2300 vehicles, most of which were American. But as we said, the condition of those vehicles varied greatly, with some more likely to be classified as donor cars instead of project vehicles. One visitor who was given access to the warehouses noted that “some of the cars were stacked on shelves like cordwood.”
But there are plenty to be admired at the LeMay show and others that make for excellent restoration projects.
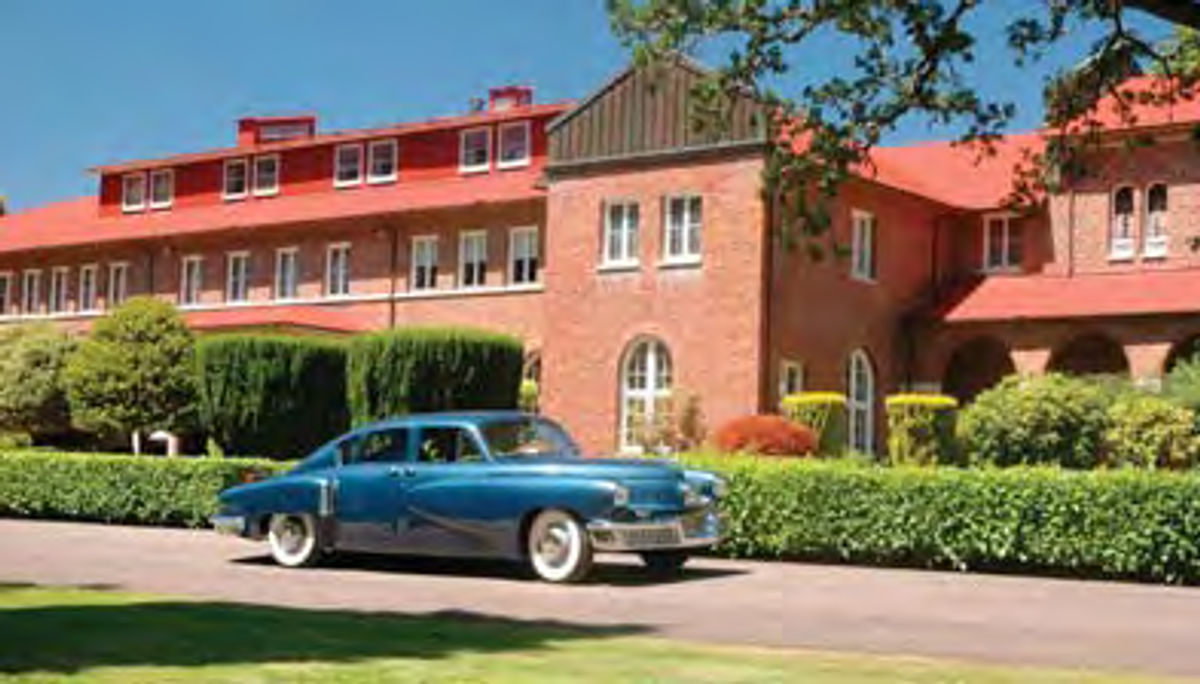
The show is held at Marymount, a former Dominican school and, later, a retirement home for nuns, which LeMay bought and preserved (Photo 2).
The original intent was to use the Tacoma, Washington, school as a storage facility for LeMay’s collection of vintage vehicles, but it has evolved into the starting point for a future automobile museum. In fact, groundbreaking is expected sometime this year for The Harold E. LeMay Automobile Museum, America’s Car Museum, with hopes of opening it in 2010.
The Restoration Shop
The LeMay restoration shop is run by Tom Towers who has been a paint and body specialist all his life. Towers met LeMay at a swap meet in Pomona, California, and LeMay persuaded Towers to join his team.
The shop is equipped for welding, cutting, fabricating, sanding, painting and sand blasting, plus there’s a woodworking shop.
Currently under restoration are a 1961 Cadillac convertible, a 1954 Kaiser Darrin and a 1940s P&H power shovel, which was used during the construction of water lines in the Northwest.
The restoration shop will not be forgotten in the new museum. The LeMay Museum works with Clover Park Technical School and will contain six bays for restoration plus all the accessory areas for sanding, painting, etc.
Restoring the Police Wagon
A total “frame-off” restoration of the feature truck was required to return it to its original condition.
Original parts were used when available, but some parts, such as the box’s roof skin, had to be fabricated.
Since the LeMay collection includes an extensive variety of U.S.-built vehicles, many of the replacement parts came directly from the assembled group.
Years of neglect, vandals and weather took their toll before LeMay purchased the paddy wagon in California and brought it north.
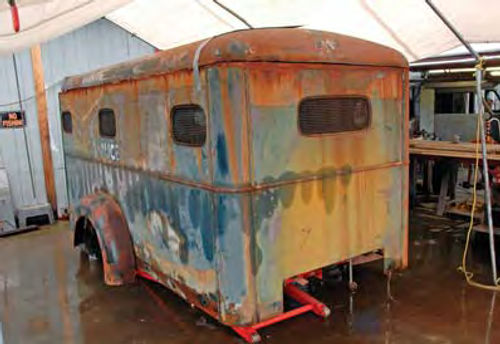
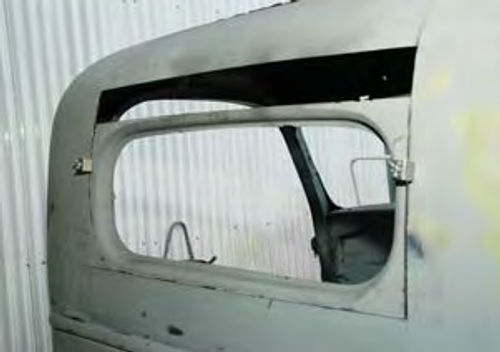
The box, or cage, had to be removed from the frame before a thorough inspection could begin (Photo 1).
The top rear of the cab had been dented, and the damage appeared to have come from a “street artist” who exercised his creativity with a crow bar. The fenders and the cab belt line had rusted, and the wood supports between the rear fenders and the box were rotten. The steps needed to be replaced, and the cab interior needed to be rebuilt.
The first step after removing the cab and box from the frame was to separate the good from the bad. Rain and salt air had done their worst to the roof skin, the bottom of the side rails, the floor and floor cross-members.
The floor cross-members of the box were cut out by Wayne Wilcox, a regular volunteer. The box was laid on its side, and the inside and outside roof skins were removed.
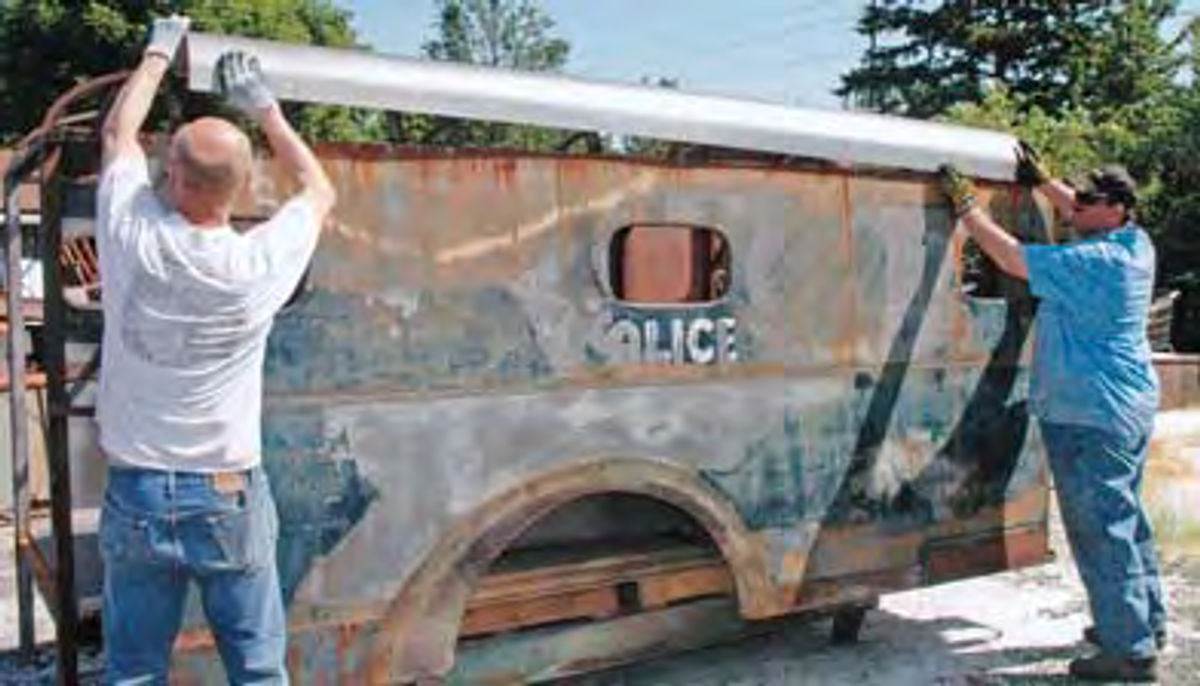
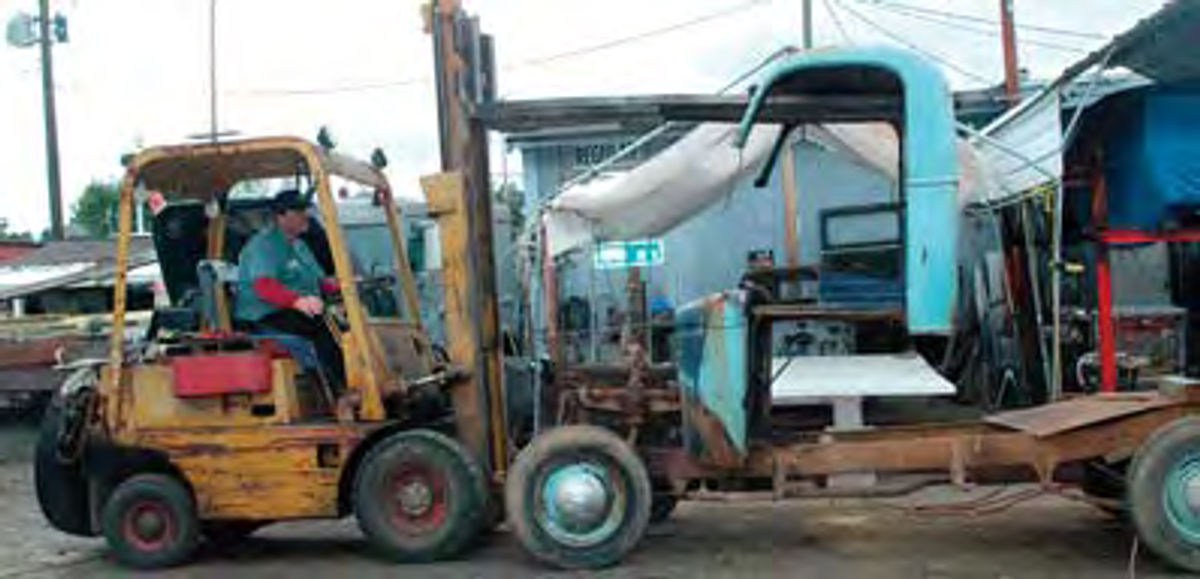
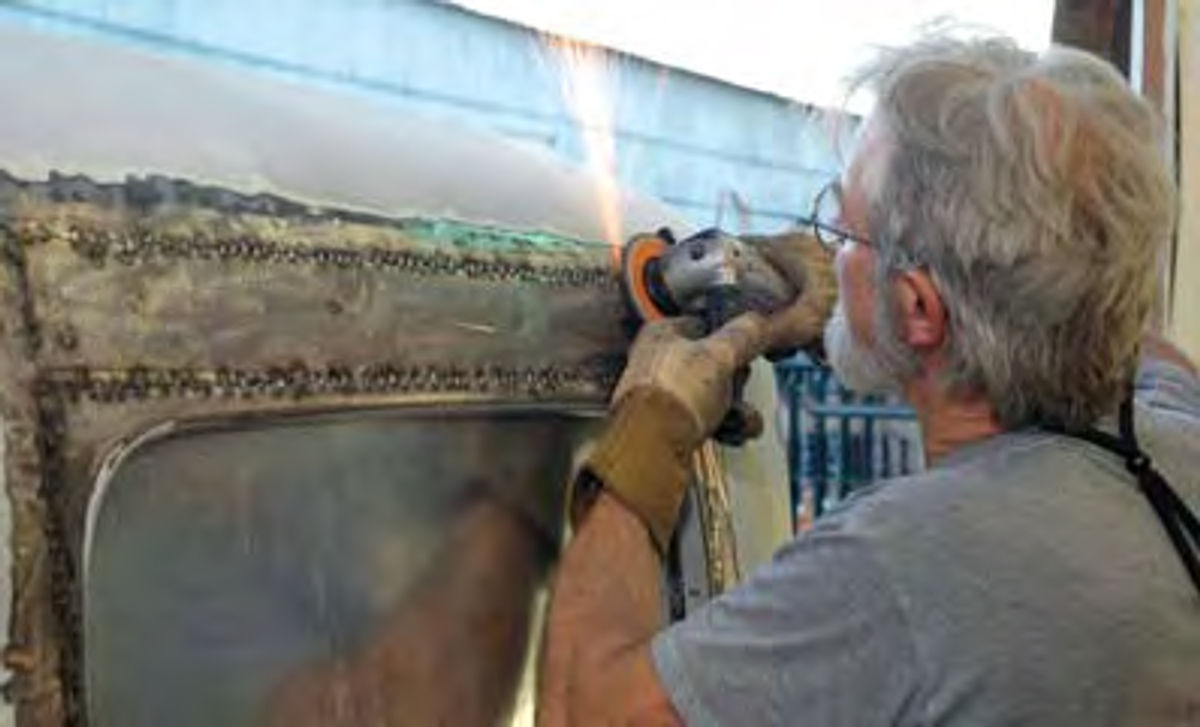
The roof skins were sent to SchneiderSimpson Sheet Metal Co. in Tacoma, where a 12-foot slip roller was used to duplicate the roof. The new skins were laid on the frame and appeared to be correct, though the curve seemed more severe (Photo 3). At the time, the feeling was that these skins could be pulled down to match the frame. They were degreased, sanded to give them a “bite” and primed.
The front and back roof end caps of the box were salvaged, as the stamping would have been too difficult to reproduce due to the multiple compound curves. Welding, leading and extensive use of body filler brought them back to their original condition.
The upper half of the outside skin was also retained and remained attached to the frame. This decision was made because it was believed that re-creating six identical side windows would be too difficult.
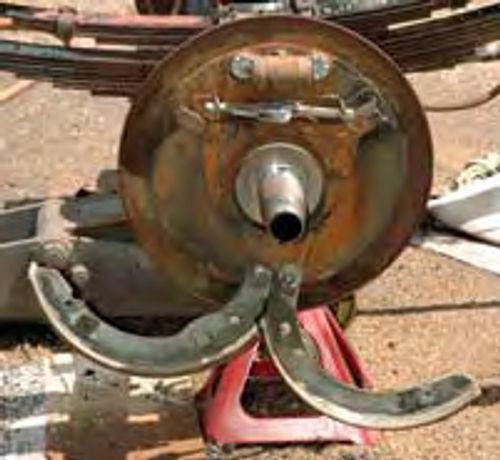
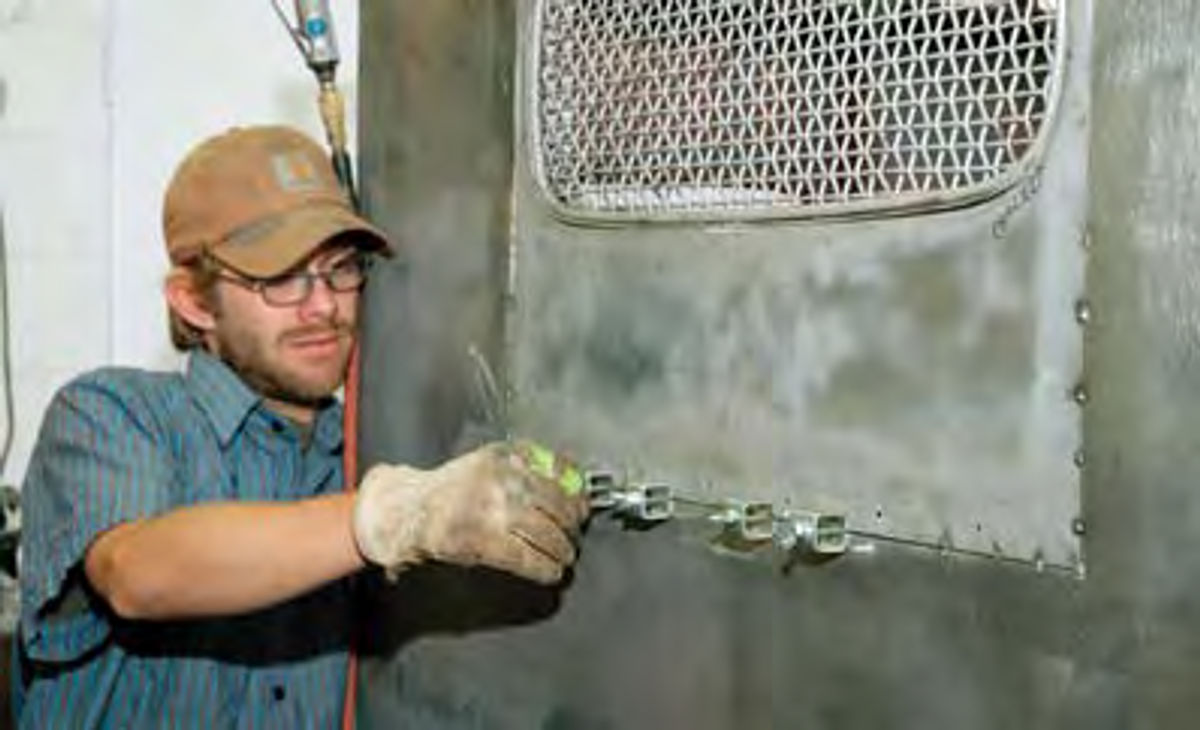
Springs, brakes and axles were removed from the frame and the brake drum was photographed before disassembly to aid during re-assembly (Photos 5 and 6).
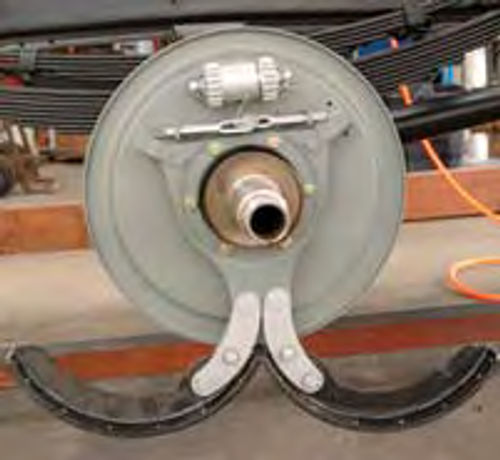
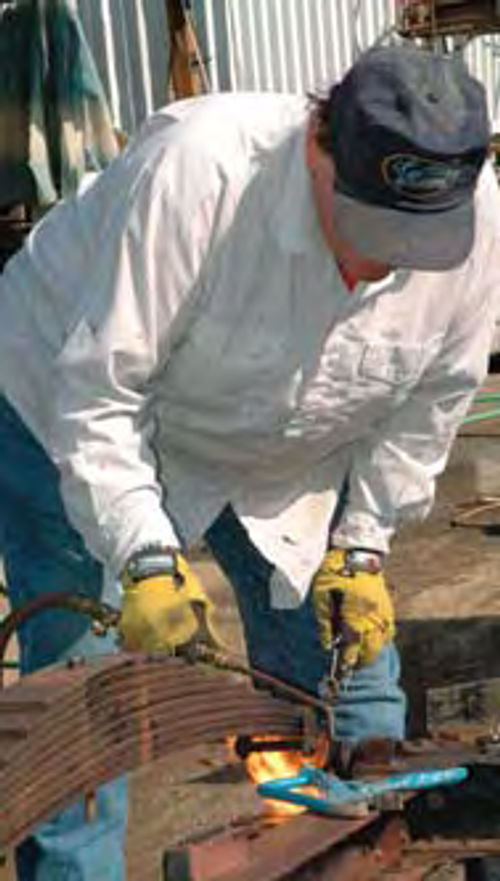
Some of the toughest parts to separate, due to years of rust and road “gunk,” were the retaining pins holding onto the leaf springs. One way to separate the parts is to heat them and spray WD-40 into the connection. The heat draws the lubricant into the joint, freeing it (Photo 4).
Structural Repair of the Cage
The box was sent to the LeMay Enterprises repair shop where Mike Foister removed and replaced the rusted areas. Foister prefers to remove the damaged parts using a plasma torch. First, the floor was sectioned out in pieces. Steel rail supports were temporarily installed to keep the frame from collapsing on itself, and then the rest of the floor cross-members were removed. New cross rails were welded into place.
The cage was turned upright, and a 3⁄16-inch diamond-plate floor was installed. The rear doorframe was in good shape, so it was removed in one piece. This allowed the floor to be picked up by a fork lift with a chain and nudged into place. Final “nudging” occurred with a 12-pound sledge and a block of 2x6.
When finished, the overall unit was 1⁄8inch out of square with the frame, well within specifications.
The side rails, which had rusted at the bottom, were cut and new extensions were welded on to replace the rusted sections. The floor was welded to the new cross members and the rear doorframe was re-attached.
A Replacement Cab Roof
As noted, the roof of the original cab had been severely damaged, but the cowling and floor were in good condition. It was important to retain the floor of the cab as it was specifically designed to fit around the engine. The lower half of the cab also had a unique curved threshold, which was retained. A second cab was obtained from the collection, which had the same roof shape as the project truck, but was originally from a 1947 pickup (Photo 7).
The cab was removed from the truck’s cowling and then it was separated from the seat supports using a spot weld removal bit.
Faced With Window Problems
The team was now down to four weeks until the car show, so, as you might expect, a major problem arose.
When the cab and box were temporarily bolted to the frame, it was discovered that the rear window of the cab and front window of the box didn’t match up. Apparently, the box had been moved to a different frame and cab after it was retired from police service.
Further complicating matters, the height of the seat back wouldn’t permit the cab window to be lowered more than four inches, and the box window couldn’t be raised more than eight inches without damaging the internal supports. Both the cab and the box windows had to be moved to reach a common height.
The cab, which had been ready for painting, presented additional problems as the outside and inside curved skin had to be matched.
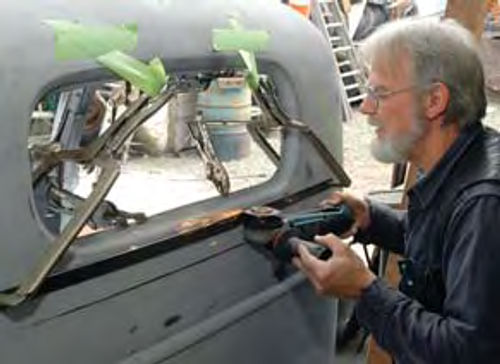
Tom Schwerdtfeger used a cut-off wheel to remove the cab rear window (Photo 8).
He cut four inches from below the window, dropped the window and rewelded it and the four-inch piece to the top (Photo 9). Panel clamps were used to hold the cut metal in place until it could be spot welded. The box proved easier than the cab as there were no curves.
The box window was cut with an extra eight inches of skin at the top, turned upside down and welded back into position (Photo 10).
Protecting the Driver
Then a second problem developed. Unless the wire mesh-covered rear window of the cab could be closed, the driver and passenger would be exposed to the weather.
An internal sliding window was designed, both to protect the driver and passenger, and to remain appropriate for the era. A 5⁄8-inch square tube was selected for the window frame, but bend-ing the tube to match the roof curve without kinking the tube became the problem. This was solved by taping a wire to the Pro 2 bending machine. The inner curve of the square tube was creased with the wire. This produced the effect of shrinking the inside of the tube, allowing it to bend without kinking. Two curved sections were made and a slot was cut in the tube to accept the slider. These were welded with two straight pieces to make a frame.
The slider frame needed to be thin, 20-gauge steel in order to easily follow the roof curve, but that made it flimsy. Schwerdtfeger strengthened the top and bottom edge by splitting a 1⁄4 -inch brake line, slipping the tube over the edge of the steel, and then spot welding the tube in place.
The window, with the glass slider installed, was tack-welded into place. This was a slow process, as too much heat would warp the thin metal. The result was, “weld a spot, grind it smooth and repeat” (Photo 11).
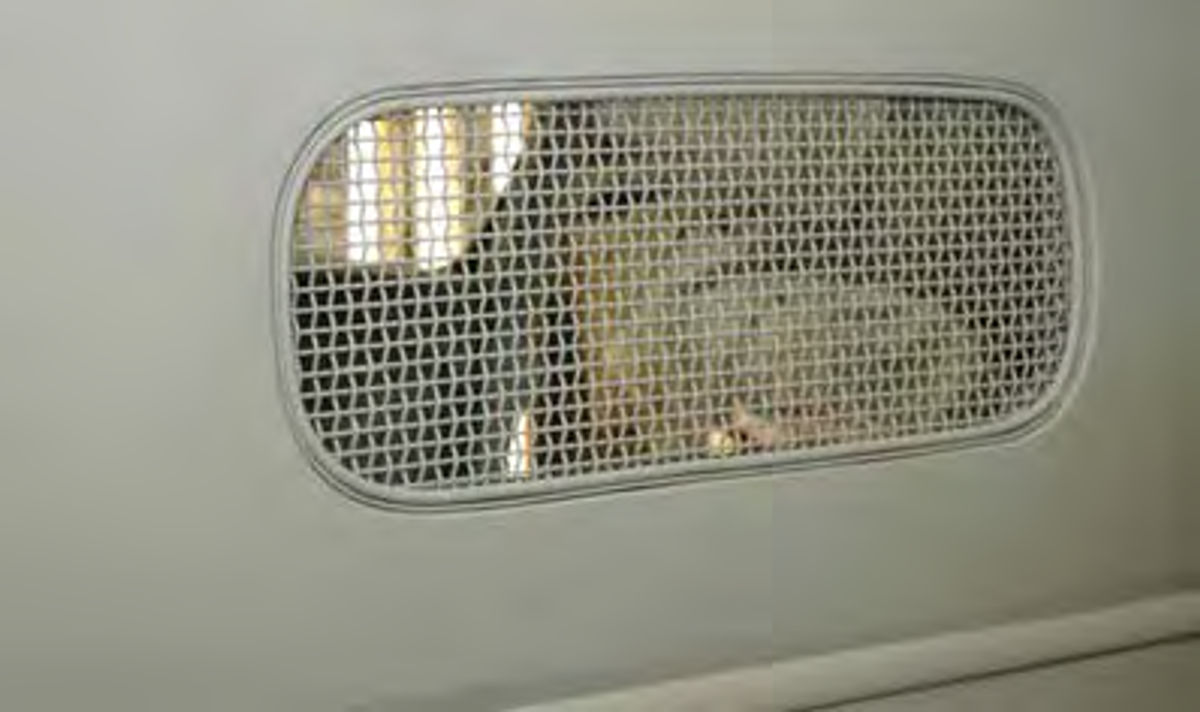
The final step for the rear cab window was to create a new security screen to “protect” the driver from the prisoners. The original screen couldn’t be used since the slider now occupied half of the original thickness of the cab.
Again, using the Pro 2 bender, Schwerdtfeger shaped a 1⁄2 x 1⁄8 -inch piece of bar-steel to create a window frame.
He bent a 3⁄8 -inch rod to fit the frame and tack-welded the two together. The rod served as support for the 10-gauge woven wire, which provided the rear window security (Photo 12).
Small annoyances then continued to plague the restoration. On Day 16, for instance, the entire power grid went down. A squirrel, believing that the insulation in a substation junction box would be tasty, received his last meal, and the restoration team lost two hours.
(Editor’s Note: This wouldn’t be the last of their project problems. Next time, some unexpected obstacles arise as the team finishes repairing the truck body and moves on to sanding, priming and painting. With the show weeks away, the team feels the pressure of a looming deadline.)


