
To Protect and Preserve, Pt. 2
Despite all of the pre-fitting, it was discovered that the box roof skins had the curve rolled too far from
the edge. The curve should have started at the edge of the metal, but actually began about four inches in from the edge. No amount of pushing, clamping or swearing altered the curve to fit the roof rails. New roof skins were ordered and quickly delivered. The correct curve was verified and the skins were cleaned with PPG DX-330, sanded and re-primed.
The skins for the box interior were measured and cut by Jeremy McNerthy. The order for attaching the skin to the box was as follows: first, the outside rear corner pieces, followed by the exterior roof, exterior ends, interior sides, interior roof and then the exterior lower subpanel. The lower outside panel was last since it was a double panel—a 16-gauge skin overlay on 1/8” inner steel sheet. The sub-panel was required to keep the top and bottom side skins parallel.
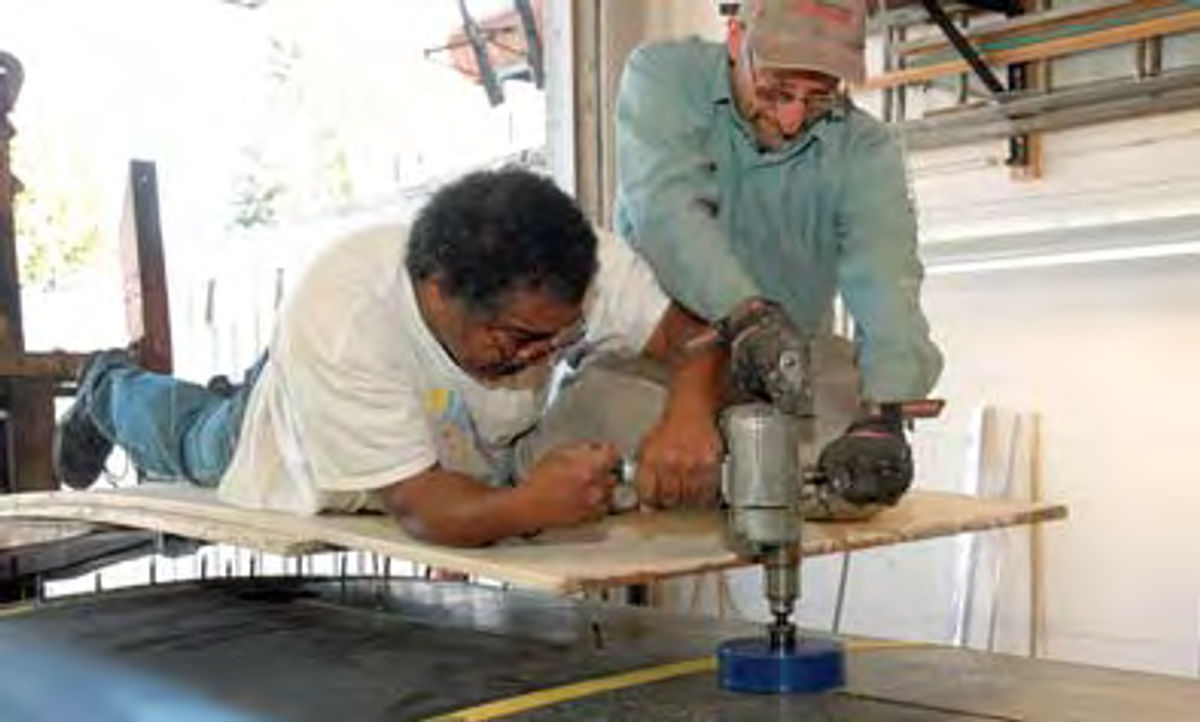
As each section was added, holes were drilled to match the side rails, and then that section was temporarily attached with Cleko clamps (Photo 1). The advantage of these clamps is their holding ability combined with their ease of removal.
When all the interior skins had been measured, cut, installed and confirmed correct, they were removed, and the entire box frame was given a final sandblasting in preparation for priming. Sound deadening pads were glued to the walls
and sealed, and the interior skins were again held in place with Cleko clamps. As the clamps were removed, they were replaced with countersunk rivets.
The edges of the roof skin were attached in a similar manner, but, due to the physical size of the box, the problem became how to drill the air vent holes and rivet the center line of the roof without damaging the skin. The answer came in the form of “The Incredible Hulk,” a 20,000-pound, 1944 Hyster forklift. Cross beams and multiple layers of plywood were attached to the oversize forks, and workers were lifted up and over the box roof. A metal hole-saw was purchased especially for this part of the project (Photo 2).
Finally, the repaired front and back roof end-caps were attached and pulled tight to the frame with “tie-down” straps and “C” clamps.
Working With the Fenders
Chad Boyles is a grandson of Harold LeMay, the late founder of this automotive collection and museum. He also is a student at Clover Park Technical School where he is studying Auto Collision Technology. Among Chad’s tasks was repairing the fenders.
The rusted area of one fender was first marked back to solid metal, and a patch of the approximate size was cut. After the replacement part was shaped, it was used as a template to accurately mark the part of the fender to be removed. Trial and error eventually achieved the correct shape and size for the replacement part.
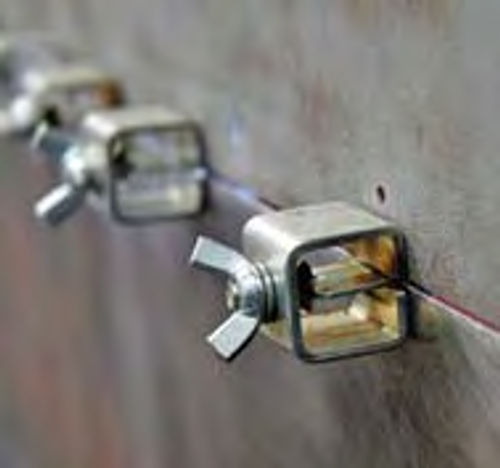
One way to support the replacement part is to spot-weld metal tabs to the underside of the fender, but Tom Towers, the LeMay restoration shop manager, prefers to use Cleko Intergrip panel clamps. These clamps are designed to hold the two panels .040 inches apart for a full penetration weld. A good example of the extensive use of these clamps is shown in Photo 3, where they are used to support the cage window prior to welding.
One area on the compound curve of the fender had been damaged in such a way that cutting and replacing the metal was insufficient. Tom built up the area with lead and smoothed it with a wire brush and rasp, finishing it later with a long sanding block.
Replacing the Rear Doors
The rear doors presented their own set of problems. The original inside and outside door skins were beyond repair and the supporting wood had rotted. Using the old door skins as a pattern, Andrew Tran, foreman of the LeMay Container Shop, made new skins by hand. The replacement wood is 10-ply, medium density overlay (MDO), and the opening for the metal screen window was deliberately cut undersize. Jack Tomasch hand fitted the wood to the metal exterior (Photo 4).

Sandblasting and Priming
Sandblasting followed the patching and welding. The smaller parts were cleaned in a sandblast cabinet, while the larger parts were cleaned in the yard.
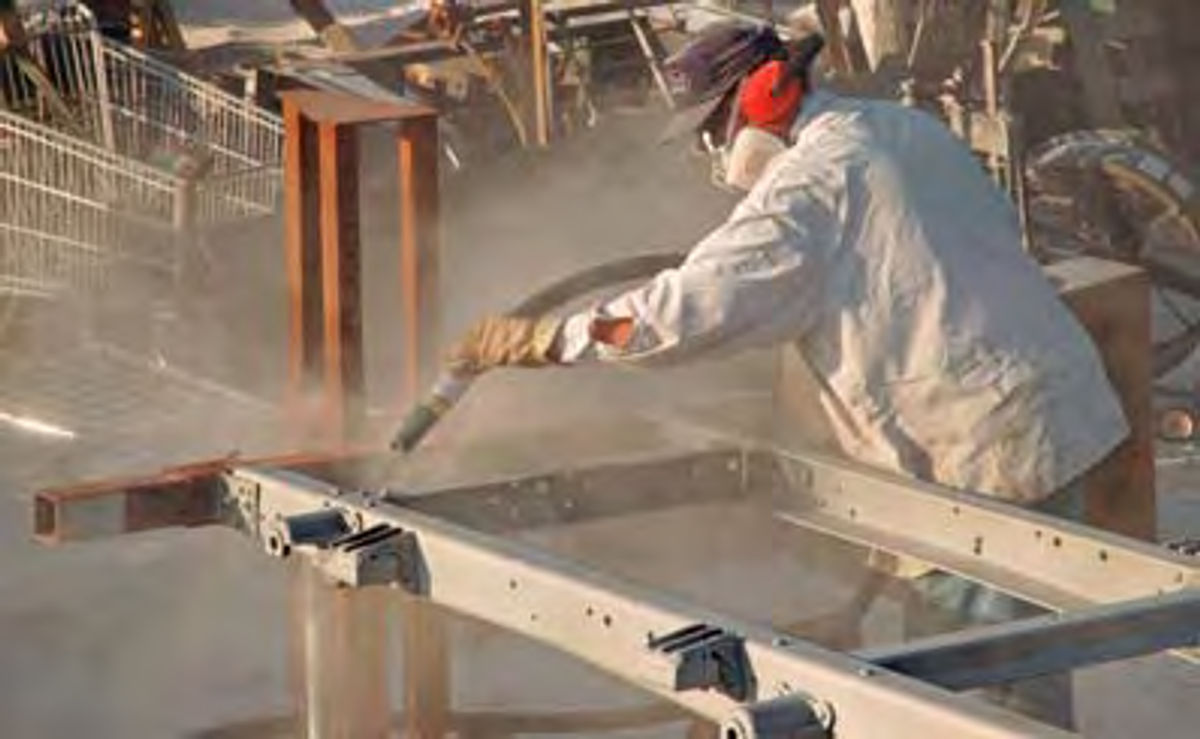
The restoration shop uses a Jaeger rotary air compressor to power the sand-blasting equipment. This 25-horsepower compressor will generate 180 psi, enough to send a 100-pound sack of sand through a half-inch nozzle in 15 minutes (Photo 5). Fortunately, or regrettably, depending on your opinion, the sandblasting can reveal a significant amount of rust.
One feature of the LeMay restoration shop is that they make a lot of the specialty items that they need. One such item is the rotisserie which was used to support the frame. Once the frame had been mounted to the rotisserie, it remained in place through priming and until the wheels were attached. Following the sandblasting, the frame was rolled into a covered area and approximately five gallons of DP-40 with a catalyst was used to fully prime the frame.
Re-Assembly of the Frame
Gradually, the parts came together. The springs, which had been primed, were attached while the frame was upside down, along with the brakes and hubs. A special brake spring release tool, unique to the Huck brake system, was used to compress the brake springs. The front axle was bolted on, and the frame was rotated to its upright position.
The Engine and Drive Train
The truck’s Chevrolet 216 cu. in., inline, 6-cylinder engine was sent out and rebuilt by National Auto Parts of Parkland, Washington. The engine was bolted to the frame (Photo 6), and then the starter, generator and clutch assembly were installed. The radiator frame was temporarily supported so that the engine could be tested prior to final assembly.

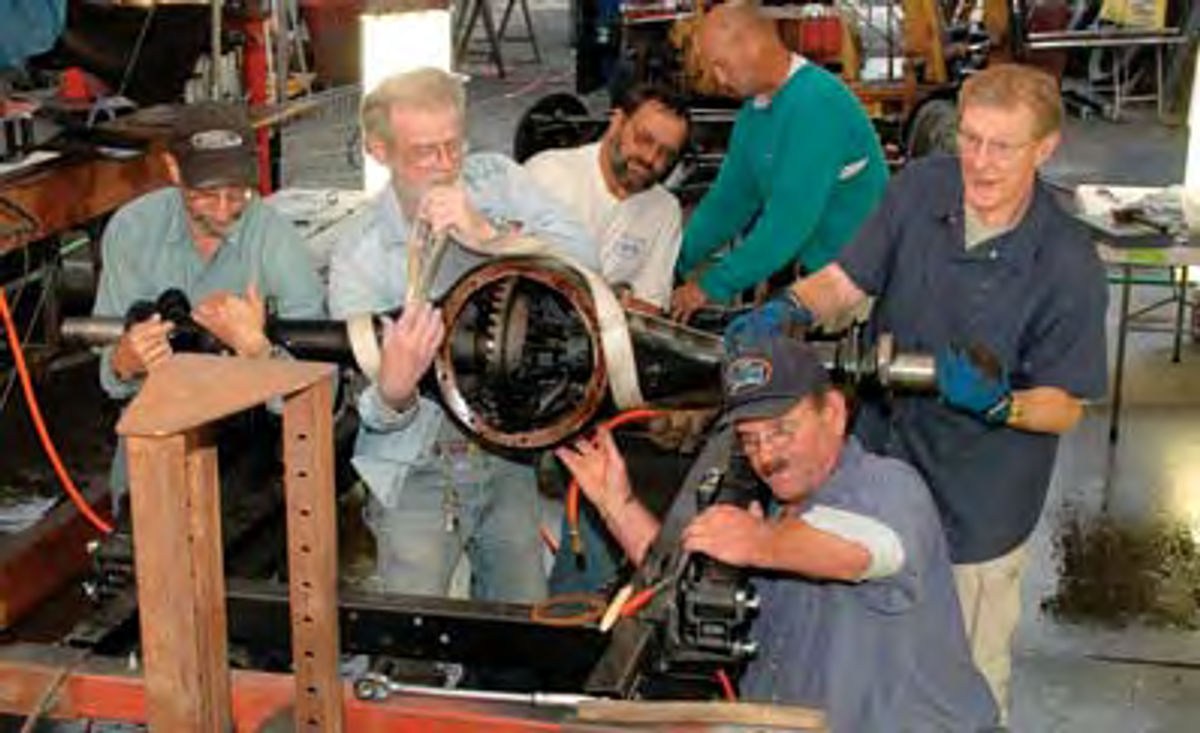
Pure muscle proved useful during some of the re-assembly. Six volunteers picked up the drive train and rear axle and held it in position until the bolts were attached (Photo 7). Morris Tonda, who rebuilt the generator and donated the original AC Spark plugs from his own collection, made the spark plug wires. The plug boxes were dated October 1965.
The engine uses a Carter single-barrel, BB updraft carburetor. Fortunately, Merle Severson, who rebuilt the carburetor, was able to supply two original Carter service manuals from his own collection, an Army Carter Carburetor maintenance manual dated March 31, 1942, and a Carter Motor Tune-up and Carburetor Service Instructions book, copyright 1946, 13th edition, original price—$1.
Sanding & Painting
Tom Towers prefers to sandblast and then apply a primer coat of DP-40 or 90 for protection when restoring a vehicle. Body filler is applied where necessary, followed by an air sander and block sanding by hand.
A light covering of guide coat paint is applied and then removed with a long block sander. As the guide coat is removed, it reveals any minor hills and valleys which may still remain in the surface.
A polyester filler-coat is then applied over the body filler, followed by a primer, which is then smoothed with a long block sander. The primer is sealed, painted, wet-sanded with 320-grit sandpaper and re-painted. It is again wet-sanded with 2000-grit paper and buffed.
The final color for the paddy wagon is dark “Baja Blue,” with the fenders, steps and trim in black. Since dark colors show every imperfection, a significant amount of time was devoted to smoothing the sides, particularly the upper sides of the box.
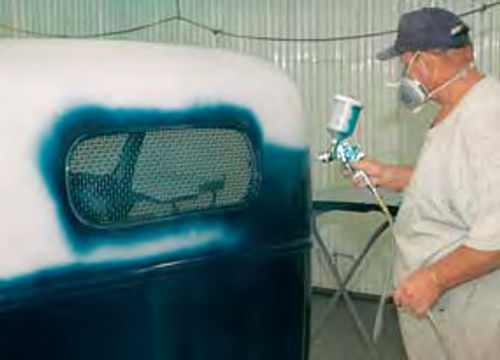
The restoration shop doesn’t have a dedicated paint room, so a large room was cleaned and allowed to sit idle for a day to let the dust settle. The floor was then sprayed with water just prior to painting (Photo 8). For color consistency, Tom Towers mixed five gallons of the acrylic enamel, judging that it would be enough paint for the entire paddy wagon. Eventually, 31⁄2 gallons of the enamel was used just for the box.
Organization, and Other Details
There cannot be enough emphasis on organization, especially on a project this large. This can take the form of parts baggies, labels, note cards and diagrams, or a series of photos showing what went where when it was originally removed from the vehicle. One problem that occasionally occurred with a project this large and complicated, and with so much outside help, was that the volunteer who disassembled the part was not necessarily the same volunteer who re-assembled it.
Fortunately, the advent of inexpensive digital photography eliminated many of the problems such as “I forgot where something goes” or “What did this originally look like?”
Small parts created their own set of problems, but fortune smiled when it came to finding original replacements. In addition to the LeMay collection, just up the road is Hagan’s Barn, an auto supplies store that has been in the area forever. Tom Towers knows the family, and was permitted to go through their upstairs warehouse where he found a set of 1933-34 YANKEE “stop and tail” lights, still in their original boxes. Tom supplied the bracket for the roof-mounted emergency light from his own collection. Hagan’s warehouse again supplied a glass globe from the ’40s era.
Sometimes representative parts of the 1940s era had to be substituted, but when and where possible, the original parts of the paddy wagon were kept, repaired and re-used. A good example of this effort is the benches. Originally cut from southern maple, the benches were in decent shape and worth restoring. Jack Tomasch sealed the cracks with epoxy, the benches were sanded, and grey paint was applied. Another restoration involved the inside dome box light (Photos 9 & 10).


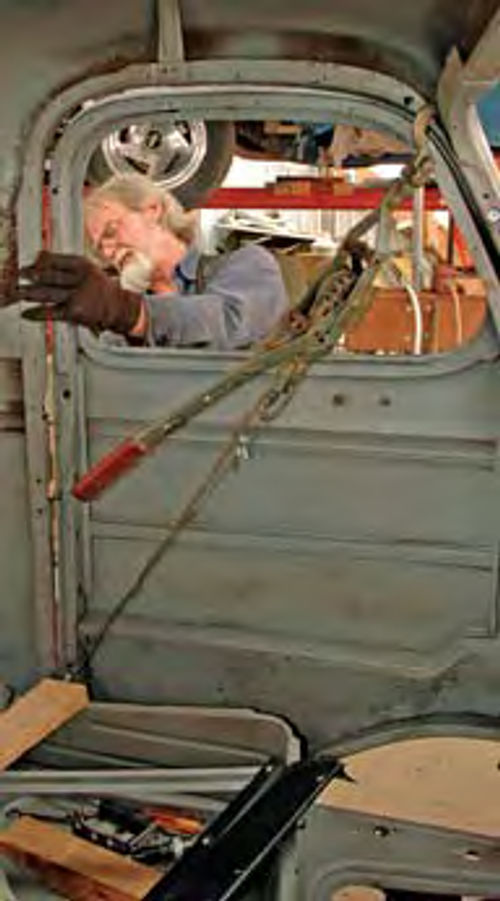
The paddy wagon is a large project physically; nevertheless, small details become incredibly important. Since the cage had probably been switched from the original frame by the movie prop rental company that owned it previously, and the current cab was made from two different cabs, minor imperfections would become major ones if they weren’t corrected in time. What may look good at a distance as a movie prop will not be acceptable under close scrutiny. A prime example of hand fitting a rebuilt part to an original occurred when Tom Schwerdtfeger had to tweak the entire reconstructed cab 3/16” to fit the original door (Photo 11).
Volunteers to the Rescue
A project this size would be impossible within a timeframe of eight months without the help of a group of volunteers. Tom Towers’ core team consists of a half-dozen regular volunteers who work throughout the year. During the month of August this team is joined by another 20 to 30 volunteers who do assembly work, attend to the finer details and prepare everything for the museum’s annual car show. These volunteers come from all walks of life and include engineers, retirees and virtually anyone with an interest in restoring old cars. Included in the group was one volunteer who flew in from Pennsylvania to participate.


