Some Homemade Tools, Pt. 3
Here’s Some Tools for Testing Radiators & Cooling Systems. They Require a Hose, Pipe and a Bicycle Tube.
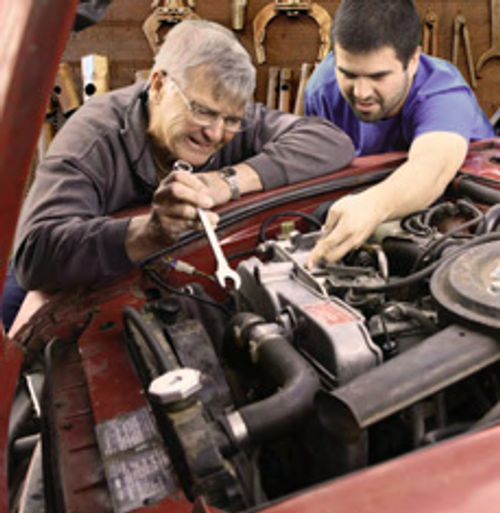
Editor’s note: Self-confessed tool addict and Auto Restorer contributor John Armstrong often crafts tools in his shop because he believes there are times when a homemade tool may be better suited to a specific need, it can be a cost-saving measure or he may produce a tool that’s no longer available on the retail market. So far we’ve featured John’s homemade tools in the December 2011 issue and the April issue. Since there have been eight photos in the first two installments, we’ll start here with Photo 9.
Pressurized Cooling System Hose
This item is pretty much vehicle-specific but it’s an inexpensive option to a radiator pressure tester.
Next time you’re replacing radiator hoses, save your top one. Assuming you are performing preventative maintenance and that the hose didn’t have a leak, you can use it to make a cooling system test hose.
For about $5 you can purchase a couple of steel valve stems (normally used for truck wheels) and by placing one in the hose, you can pressurize the cooling system and check the system for leakage. Photo 9 shows the end result and items used to achieve it.
I chose a location close to the neck of the radiator. This puts it where the hose will be a bit more rigid, and usually at a high point.

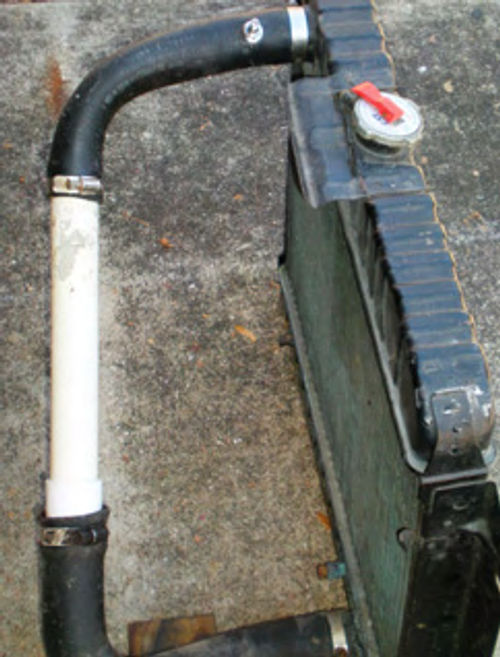
The hole saw seen in the lower left of the picture was used as this will give a cleaner cut. This 3/8” hole cutter is part of a kit manufactured by Blair Equipment Co. of Flint, Michigan (blairequipment. com), and is typically used for cutting out spot welds.
If you use a drill bit, you will need to clean up the hole with a razor tool. Most valve stems are packaged with a rubber seal for both small and large holes. Unless your hole turned out larger than you anticipated, use the smaller of the two and insert the stem up through the inside of the hose. Next place the washer over the top and tighten the nut.
When you need to evaluate the cooling system, drain off some of the coolant using the radiator drain cock, or by loosening the lower hose, then replace your top hose with the test hose, refill, and replace the radiator cap. The cooling system is now ready to pressurize.
Caution!! Don’t take a high pressure air hose and “fill ’er up.” Even though the radiator cap usually will release pressure at 15 psi or less, a sudden burst of pressure might damage the radiator.
Use regulated compressed air, reduced down via a pressure regulator to establish close to your system’s pressure. One of those portable electric or even a 12-volt tire pump also will work. If that’s your choice, cycle it on and off while watching the gauge on it so as not to exceed the system pressure. You will start to feel the upper hose firming up, just as it normally would when running at operating temperature.
Whichever method you use, it’s always best to proceed slowly when pressurizing the system.
If a tire gauge is used to check the system pressure it’s likely there will be some liquid discharge. To avoid damaging your gauge, use a tire gauge designed for water-filled tires. These will expel any liquid they take in.
Now inspect for leaks, and don’t forget to check inside on your vehicle’s floor in the event the heater core is leaking.
If the radiator cap releases pressure immediately, it is most likely defective. Check its pressure rating; it will be marked on the cap. New caps for most applications are very inexpensive so if in doubt, replace it.
When finished, release any remaining pressure by using the release lever on the radiator cap (if equipped); depressing the core of the stem while holding a rag in the other hand to catch any discharge; or simply open the radiator drain cock and release some fluid.
Another caution!! Remember to wear eye protection when pressurizing the system, and only use this test hose when the engine and coolant are cool.
Pressurized Radiator Testers
If you need to test a radiator that’s out of the vehicle, a bicycle tire tube might be the answer. They cost just a few dollars. Once purchased, lay out the tube and opposite the valve stem (180 degrees around the tube) cut it in half. Now using hose clamps connect each open end of the tube to the radiator necks. I purchased a universal inner tube, 16” x 1.75 - 2.125. The neck sizes on my test radiator are 15 ⁄8” & 17 ⁄8”.
While the tube fit, it was quite a stretch over the larger neck so I used some soapy water to help. Next time, I would purchase a size larger.
Now fill the radiator with water, replace the cap, and pressurize it using the stem of the bicycle tube as seen in Photo 10. Keep in mind that this is a low pressure test. Too much air and the tube will burst. Common sense comes into play here.
You might also consider pressurizing the radiator while dry, with only compressed air. You can then use a spray bottle of soapy water and spray the core and tank seams looking for bubbles. This is especially suited for situations like testing a salvage yard purchase before you leave the premises. You can even bring a portable air tank if their air supply isn’t convenient. While limited in pressure, this is a good universal tester that will take up little space.
Now, do you want to be able to test a radiator at normal system pressure?
Take a look at Photo 11. Use the hose with the steel valve stem that we made earlier along with the normal lower radiator hose.
In this photo they are connected together with a section of 1 1 ⁄4”PVC pipe, and glued on union to make it larger to fit the lower hose.
Clamp the hoses to the radiator as normal, and clamp the PVC to both the upper and lower hose.
Some situations likely will require the use of other PVC fittings and elbows, along with a little hose twisting to make the connections. This will be more or less radiator-specific, but it will handle normal system pressure.
Recently there have been discussions with regard to the safety of using PVC pipe to hold compressed air. Keep in mind that this is very low pressure. Only 10-15 psi will be used here. This Is 1/10th the operating pressure of most typical air compressor systems.
However, if you still feel uncomfortable using PVC, substitute a section of iron pipe in its place.
Caution! As previously mentioned, don’t use a sudden burst of high air pressure, it could be the end for your radiator.