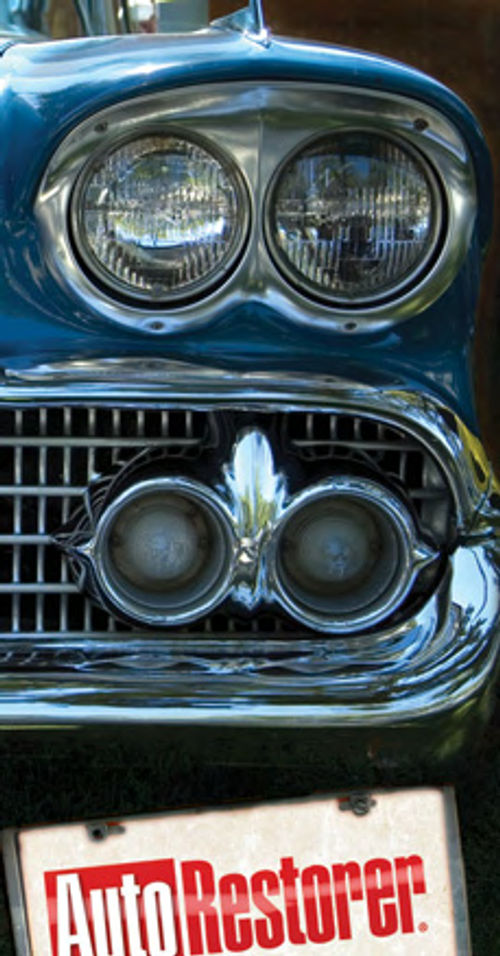
Ruby, the FarmTruck, Pt. 5
Brushing On Rust-Fighting Paint Proved to Be a Difficult Job. Then There Were Those Corroded Step Plates…
Editor’s note: Despite difficulties applying a rust-encapsulating paint, Curt continues to revive an old farm truck by painting the bumpers, grille and wheels. Given one of his project goals—“do it cheaply”—he’ll then go shopping for four used tires. We’ve had 24 photos in the previous four installments and will be starting here with Photo25.
IN THE LAST session I brushed a silver, non-porous POR-15 coating on the right-side floorboards and on the bed floor, and brushed silver (until it ran out) and then gray POR-15 on the bumpers, grille and wheels. All told, I used one quart of POR-15 on the pickup, applying a single heavy coat to the floor of the box and two coats to the four wheels, bumpers and grille.
I found one way to save time and money with the POR-15. Rather than order POR-15 self-etching primer, which is recommended between cured POR-15 and the company’s topcoats, I waited 48 hours for the POR-15 to cure and then scuffed the coating with a scratch pad before applying the white topcoat over the standard POR-15 on the wheels, bumpers and grille. The POR-15 technical consultant I reached at approved this procedure.
To begin, I removed the license plate light from the rear bumper—it was broken and needed replacing, anyway—and the parking light lenses from the grille. I then wiped down the grille and both bumpers with a wax & grease remover and scuffed all parts with a scratch pad. To get the smoothest paint job possible, I hauled the four rims back to my acreage and sandblasted them outside (Photo 25). I sandblasted the rusty wheels and locking rings (left) to remove the old paint, scale and most of the surface rust (right).Because I would use POR-15 rust encapsulating paint, I didn’t need to remove every speck of rust.
Brushing On POR-15
After treating all parts with the two POR-15 metal-prepping products that I described in the last article, Marine Clean and Metal Ready, I did a modest amount of masking around the bumpers and grille to produce a neat appearance. Now I was set to apply POR-15 and did so mostly with a brush. A small fabric roller, identical to one I used with silver POR15 in the truck bed, spread the paint rapidly but left a trail of air bubbles in its wake. For speed, then, I rolled on the paint where I could do so but retouched it with a nylon-bristle paint brush to remove the air bubbles.
I took it in stride when a few tiny fish eyes appeared in the grille, indicating areas where I’d failed to remove oil or antifreeze contamination: I was sprucing up the grille, after all, not professionally restoring it. I hadn’t even attempted to remove several dents and creases in the metal.
POR-15 isn’t a panacea. It was, at times, harder and certainly more time consuming to apply than I would have wished. You also can’t get a professional looking paint job unless you properly prepare a smooth-as-silk surface, which POR-15 doesn’t require.
Asfor application difficulties, every so often my paint brush would begin to pull hard, forcing me to clean it in POR-15 Solvent, dry it with paper towels and resume painting. The brush would behave normally for a short while and then begin to clog again.
Where Did the Time Go?
I was surprised, but shouldn’t have been, at how long I spent applying POR15 by hand.After all, painting the box with a small roller and brush, as I’ve previously related, had been tedious in the extreme.
On the day I painted, I got started shortly after 8 a.m.It was nearly 1 p.m. by the time I’d applied a single coat to the box floor, bumpers, grille, floorboards and four rims. I can’t imagine it would have taken me longer to mask and spray the parts. In retrospect, I would have sprayed the parts if I’d had a dedicated painting area to make that possible.
Furthermore, after applying POR-15, Ruby’s rear bumper, in particular, had a notable texture to it. POR-15 allows painting over chipped paint and rust pits, as long as they are sanded and treated with Marine Clean and Metal Ready. In short, the bumper had a nice shine to it—even in the absence of the white topcoat I’ll apply later—and is now protected from further rusting. But its surface is anything but smooth (Photo 26). POR15’s shiny coating reveals, rather than conceals, the roughness of Ruby’s rear bumper, which I’d made no attempt to smooth over.
I would have achieved a much better paint job, of course, by sandblasting, spraying the standard POR-15 as a base coat and sealer, filling the rust pits,sanding, applying a self-etching primer, sanding again and then spraying the white POR-15 topcoat.
That kind of work would have taken me much longer than my mini-restoration allowed, however. I could have invested two or more hours just in removing the rusty bolts holding the bumper to the truck, for instance. And why would I restore the bumpers when I had no such plan for the truck’s sheet metal? No, there was no point in working that hard.
Another minor downside is that the rust-preventative POR-15 is so thin that droplets formed on the lower edges of the bumpers. Besides being unsightly, these droplets are prone to chipping, given that the paint is built up much thicker than the instructions recommend.
What POR-15 offers is a way to seal and permanently cover rust with “a rock hard, non-porous finish that won’t chip, crack or peel,” its maker claims.Though not necessarily easy to apply, it’s no more difficult than applying automotive paint. And if it’s as durable as claimed, it is ultimately a time-saver because you won’t have to revisit treated areas.
Applying the White Topcoat
Although suitable for coating chassis and suspension parts, the standard rust preventative POR-15 needs to be top coated when it will be exposed to ultraviolet light. For the grille, bumpers and rims, I chose POR-15’s WhiteCote, a resin, which is mixed with a hardener activator before applying.
I had my tires mounted after I’d applied the standard POR-15 to the rims but before I painted the white topcoat. Therefore, back at my shop I cleaned all four rims thoroughly with wax and grease remover. As a precaution, I did the same with the bumpers and grille although I hadn’t handled them with my bare hands. Next, to ensure perfect adhesion, I used scratch pads to scuff and dull the shine on all the parts. I followed with a tack cloth to remove all traces of dust.
Because of the grille’s complex stamping and the hardness of the rust-preventative coating, scuffing the parts took nearly three hours. In that regard, working with POR-15 is similar to working with any other automotive paint: You skip the prep work at your own risk.
I paid $54.50 for a quart can of WhiteCote containing not 32 but 24 fluid ounces of paint. The extra space allows you to mix the hardener-activator in the WhiteCote can. Because I planned to mix the WhiteCote in smaller batches, I had to run to the store solely to buy an empty paint can for mixing.
After stirring it, I mixed the WhiteCote 4:1 with hardener-activator—8 ounces of paint to 2 ounces of hardener-activator— in a glass Pyrex measuring cup. The moment I started brushing mixed paint on one of the rims, I knew I had a problem: The paint began to set up during the several seconds it took me to dip my brush in the mixing can and return it to the task at hand.

The Paint Turns Sticky
In fact, the sticky paint was pulling so hard that it began yanking bristles from the cheap natural-bristle brush I was using. Even after I switched to a nylon bristle brush, the paint still became almost instantly tacky, freezing my brush strokes as if in ice. It was after hours so I couldn’t get a POR-15 tech on the phone. Thinning the paint slightly made it marginally easier to brush on, yet the thinning had no effect upon the rapid rate at which it set up (Photo 27). True, the WhiteCote dressed up Ruby’s bumpers, grille and wheels. But it also was agony to apply.
I’d hauled the rims to my shop in the back of a truck when the outside temperature was 11 degrees F. It’s possible that even after spending four hours in my heated shop, the rims—which I was painting directly on the concrete shop floor—were just too cold to paint.
However, the rear bumper, a couple of feet above the ground, was much warmer, and yet I had the same experience while trying to paint it. The result was a streaky, uneven application.
As noted above, although the WhiteCote instructions recommend applying a primer between the rust-preventative POR-15 and white topcoat, I had phoned POR-15 and learned from a tech that I could skip this step if I scuffed the undercoat before top coating.
Later, the POR-15 technician I reached by phone to ask about my problems theorized that I had received an older batch of WhiteCote and hardener-activator. He sent me a new supply at no charge.
I wish I could report better results during my second attempt to paint with WhiteCote. Again, however, I found it very difficult to brush on. Despite the maker’s claims, some brush strokes remained in the cured WhiteCote, as well. Elsewhere, it streaked, pooled in nooks and crannies on the flats of the rims I was painting, flowed poorly from the beginning and readily sagged on the bumpers’ vertical surfaces.
Confusing Instructions
I also discovered two discrepancies between instructions on the back of the can and the much more detailed instructions in the product information sheet:
1) The can suggests mixing the paint and hardener-activator and then waiting one hour before using it. The info sheet said nothing about a one-hour dwell period. Accordingly, during my first attempt, I’d begun brushing on WhiteCote immediately after mixing it with the hardener-activator. With my second batch, I waited the requisite one hour but, as I’ve mentioned, I nonetheless experienced the same flow-out problems.
2) The info sheet says to thin “only with Xylene, if thinning is needed.” But the WhiteCote can says to “use POR-15 Solvent only for thinning.”POR-15 Solvent contains naptha petroleum; there’s no mention on the container about any xylene in POR-15 Solvent. Therefore, xylene and POR-15 Solvent appear to be different, possibly incompatible, compounds.
Following the one-hour dwell period, I spent a difficult three hours brushing on WhiteCote. Along about the four-hour mark, while I was halfway through painting the front bumper, the WhiteCote began to stiffen and fight me, much as it had from the beginning with my first batch several days earlier. Thus you can figure that in a shop heated to about 65 degrees and with low relative humidity, WhiteCote has a pot life of about four hours.
Some Parts Get Only One Coat
I was having so much trouble finishing the second coat on the front bumper that I didn’t dare try to brush a second coat on the grille for fear of messing it up. Ultimately, I managed to apply two coats to everything but the grille, rear bumper and one of the wheels.
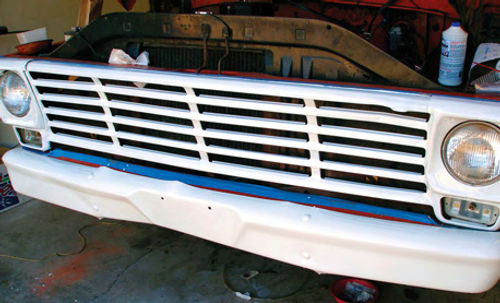
The grille bars look nice with just a single coat covering them, although some darker streaks—the gray POR-15 undercoat—are visible in the headlight surrounds. Four days later, when I mounted and torqued the lug nuts on all four rims, the WhiteCote was still soft enough to dimple when I bounced a socket against it lightly. This is no surprise, given that WhiteCote “is a moisture-cured coating, which means it is strengthened by exposure to moisture”— and I had applied it in dry winter air. It eventually cured and is now rock-hard.
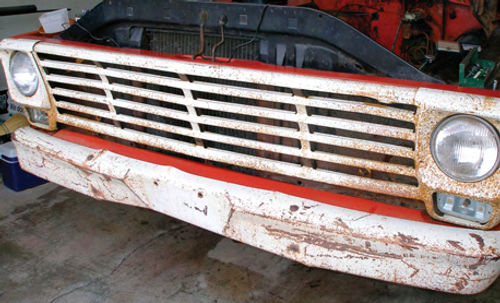
I hope my criticism of WhiteCote doesn’t come across as equally rock-hard. Although I consider it unduly difficult to apply WhiteCote with a brush and won’t attempt to brush it on again, I love the results I got on Ruby. At a distance, the sags and runs disappear, leaving a mostly smooth and white glossy finish—a big improvement from what I started with. See Photos 28 and 29 for a “before” and “after.” Despite the difficulty applying it, POR-15’s WhiteCote transformed Ruby’s rusty grille and front bumper into something more presentable. I haven’t put enough miles on the truck to speak with any authority but I expect the coating will be durable as well.
However, one other problem did develop. While waiting several days for the second batch of WhiteCote to arrive, I’d left my blue painter’s masking tape around the grille for too long. I should have removed it shortly after applying the first coat. When I belatedly did so, the tape stuck and tore into tiny pieces, each of which I had to remove laboriously with a fingernail or an empty plastic ballpoint pen body.
I have since ordered and sprayed WhiteCote on the legs of an antique claw foot bathtub. The thick coating sprayed like a spatter coat but eventually flowed out to produce a fabulously shiny finish that resembles new porcelain. To repeat: Although it’s a good product, I’d advise against attempting to brush on POR-15 WhiteCote. Spray it instead.
A Deal On Used Tires
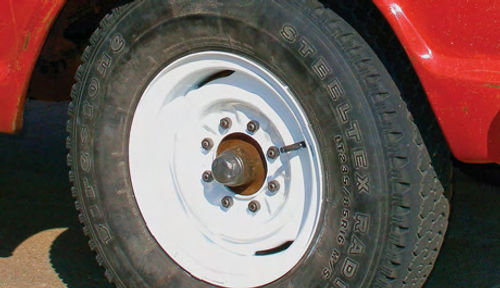
I could easily have spent $700 or more to equip Ruby with five brand-new tires, plus paying for new tubes, a split-rim handling fee, tire-disposal fee and balancing. Instead, for a nice set of four used radial tires, size LT235/85R16, and all the trimmings, I paid $243. For a spare, I’ll use an already-mounted used tire from one of my two other 1967 Ford F-250s.
This is the first time I’ve bought or even considered buying used tires. My advice: inspect them carefully for weather-checking,sidewall damage and tears in the bead caused by careless mounting and dismounting. Also be sure to inspect the four-digit date code so you can avoid buying tires that are more than three or four years old. A sample date code of “3507” signifies the 35th week of 2007. You wouldn’t suspect that Ruby’s new tires are actually used (Photo 30). Of course, it helps that the rims are such an eye-popping white.
Slow Work With the Step Plates
To let the WhiteCote cure fully before attempting to buff the truck’s paint, I set to work on a variety of clean-up projects inside the cab. Foremost among them was cleaning up the aluminum step plates, which proved to be an agonizingly slow task. They were extremely dirty, as befitting step plates that are 45 years old.
I took the step plates outside to clean them with a bucket of water, Dawn dishwashing soap and a scrub brush. They didn’t look much cleaner after scrubbing, however. I could have sworn, if such a thing is even possible, that embedded dirt marred the tops. Moving on to my wire-wheel buffer, I shined up the tops and even cleaned corrosion from the bottoms of the plates. Even so, I used the driver’s-side step plate from a 1968 F-100 parts truck in place of the red truck’s very corroded original plate. In fact, extensive corrosion meant that only two of the original six screws had been holding the left-side step plate to Ruby’s doorsill.
When I climbed beneath the truck to run my scratch awl through the screw holes and up through the new rubber floor mat I’d already installed, I found the shafts of two broken-off screws. One came out with a Vise-Grip; the other one simply broke flush with the floor.
I also had problems of my own making with the step-plate screws. Because of my experience with my two other 1967 Ford pickups, I automatically reached for one-size-larger screws to reattach Ruby’s step plates. The screw holes in Ruby’s floorboard were untouched by rust, however, and therefore still the original size. I learned this after stripping the threads on one new screw and breaking another altogether while trying to attach the truck’s right side step plate. In brief, the screw holes in the floorboard were just fine, and trying to force oversize screws into them was causing more harm than good.
In the next installment, we’ll remove and clean the headliner, polish some chrome and the plastic taillight lenses, clean the dash pad and gauge cluster, install new seat belts and grease the speedometer cable.