
Ruby, The Farm Truck, Pt. 10
A Lot of Time and Effort Has Gone Into This 47-Year-Old Truck. And While It’s Not Ready for the Show Circuit, It Has Returned to Work.
Editor’s note: As a final step toward reviving a long-neglected 1967 Ford F-250 farm truck, it’s time to take Ruby out for a test drive. Well, it seems that this project’s not quite done yet. We’ll start here with Photo 63.
WITH FRESH BRAKES, polished paint and steam-cleaned seats, Ruby undoubtedly looked, smelled and ran better than she had in decades. I swelled with pride as I wheeled her out onto the open road for a test drive that, sorry to say, revealed some heretofore hidden problems.
A brown snowstorm erupted inside the cab when I turned south into a powerful 40 mph wind. Added to the truck’s speed of 50 mph, the effect was the improbable one of driving Ruby at a flat-out 90 mph. As the wind blasted in through Ruby’s open windows, debris began pouring from the open cowl vents and sifting down from between the cowl padding and firewall. Only by squinting did I avoid filling my eyes with dirt as a virtual trash twister spiraled through the cab. This truly was a “shakedown” cruise!
On a quieter stretch of road, a more serious problem arose. It’s never a good sign when puffs of smoke emerge from under the dashboard. When I turned off on a side street to raise the hood, I spotted a cloud of oil blow-by smoke from the oil-filler filter at the front of the valve cover. It had found its way through a couple of holes in the firewall that I’ve since sealed with clear silicone. No mistaking it: Ruby is a Smoky Joe in disguise! That can happen when you buy a truck with a non-running engine.
I’d noted that the oil pressure needle, which early on rode smack-dab in the center of the gauge, fell considerably after the engine warmed up during highway driving. This suggested excessive engine bearing wear, a worn oil pump or — most likely — both.
Why the Engine Clatter?
I had another problem, too. The engine rattled so fiercely that I didn’t dare exceed 50 mph, even when I wasn’t fighting a stiff headwind. The rattling could have been piston slap due to excessive piston-to-cylinder wall clearances, a condition consistent with a worn-out, oil-burning engine. But I guessed — correctly, as it turned out — that it was out-of-whack ignition timing.
To backtrack, it was obvious that someone had replaced Ruby’s original 6-cylinder engine. The 1967 engine used a plain valve cover; Ruby’s new engine sported an embossed “Power by Ford” valve cover. A protruding seam where the firewall and cowl panels met had a strange upward bend in it, consistent with damage caused by someone hooking the seam while winching the engine from its cradle. Furthermore, Ruby’s “new” crankshaft pulley was set up for three V-belts instead of the single belt necessary to run the truck’s alternator and water pump.
That pulley, in fact, was the cause of some of my engine-clattering problem. It contains not one but two timing marks, located about one-third revolution from one another, and neither one wanted to align properly when I’d originally set the ignition timing. I should point out that the engine sounded strong and produced a fantastic vacuum reading of 19 inches at idle. Still, the engine started hard when warm and shuddered and clattered excessively at highway speeds, both classic symptoms of excessively advanced ignition timing.

Resetting the Ignition Timing
I still don’t know what went wrong originally. Perhaps my old timing light had malfunctioned. Perhaps I had. In any case, I decided to get back to basics. Accordingly, I removed all six spark plugs, turned the engine by hand and looked in the No. 1 spark plug hole with a flashlight to find the No. 1 piston’s top dead center (TDC) on the compression stroke.
I then attached a spark plug to the No. 1 cylinder’s spark plug wire and grounded the plug. With the ignition turned on, I loosened the distributor lock-down bolt and turned the distributor slowly until the No. 1 spark plug fired. In other words, I dead-timed the engine.
Although neither of the two timing marks on the crankshaft pulley had originally lined up with the engine’s timing pointer, this time one of the marks did so. In the distributor’s former position, I calculated, the ignition timing was perhaps 20 or 30 degrees (of crankshaft rotation) too far advanced. No wonder the engine clattered at speed.
While the plugs were out, I cleaned their tips and re-gapped them to .034 inch. Strangely, the No. 1 plug’s gap was just .020 inch. I didn’t remember dropping the plug; if I had, I would have re-checked the gap. I’m left with the possibility that a chunk of carbon — or perhaps something else bouncing around in the combustion chamber — struck the ground electrode.
Once I’d fine-tuned the ignition timing with my strobe light, I tackled other problems. First and foremost was the continuing under-hood noise. True, with its timing set correctly the engine was no longer clattering, exactly, and it could easily propel the truck beyond 50 mph. But the engine still had some diesel-like noise to it. Here, I decided to double back to perform a couple of belated engine checks.
Checking Valve Lash
First, aware that excessive clearance in the valve train can produce a hammering noise, I removed the valve cover to adjust the valve lash. Ignoring the Ford shop manual’s convoluted procedure (“Make two chalk marks on the crankshaft damper,” etc.), I used a much simpler technique that a mechanic friend taught me 30 years ago:
1. Remove the valve cover from a warm engine and then start the engine. 2. Loosen each rocker-arm nut in turn until you hear clattering. 3. S-l-o-w-l-y tighten the nut one-half to three-quarters of a turn and proceed to the next nut, working your way from the front to the back of the engine.
With a V-8 stuffed into the engine compartment, this requires much back-straining leaning over the fenders and around the hood hinges. However, it’s possible for me to actually climb into the engine compartment and stand on the shop floor next to the left side of Ruby’s 6-cylinder engine. You can bet I kept a respectful distance from the cooling fan at the front of the engine.
The reason for tightening the nuts slowly is that you are bleeding oil from the hydraulic tappets while the engine is running; move too quickly and you’ll bend a push rod. For this valve-adjustment procedure, buy a set of clips to snap onto the rocker arms, or oil will spray everywhere (Photo 63).
Ruby’s valves, I found, were set close to the mark; the slight readjustment necessary did nothing to quiet the engine.
The same he-man who over-tightened the lug nuts had evidently done the same with the valve-cover bolts, warping the flanges of the sheet metal cover. When this happens, you’ll need to carefully straighten them in a vise or with a hammer and dolly, checking your work against a table top or metal straight edge (Photo 64). Is daylight visible under your valve-cover flanges? If so, someone over-tightened the cover. You’ll need to straighten the flanges to obtain an oil-tight seal again.

After thoroughly cleaning the valve cover with solvent, I used gasket shellac to stick a new composition rubber and-cork gasket directly to the cover. By lightly greasing the contact surface, I guaranteed that I’d be able to remove the valve cover in the future without tearing up the new gasket. I can safely reuse it only because the valve-cover bolt torque, 7 to 9 ft.-lbs., is so low.
A Revealing Compression Test
The second check I performed — partly in an effort to quiet the engine, as uneven cylinder pressures can produce a throbbing or pulsing sound — was a compression test. This involved warming up the engine, removing all spark plugs and blocking the throttle open. I screwed my compression tester into each spark plug hole in turn and then cranked the engine for six or eight revolutions — whatever it took for the gauge’s needle to top out.
Every cylinder except No. 1 registered a healthy 160 psi, which exactly matches the reading from Old Blue, my other 1967 Ford F-250 with an identical 240-cubic-inch 6-cylinder engine. No. 1’s low reading of 95 psi rose slightly to 120 psi when I squirted an ounce or so of motor oil into the cylinder, indicating worn or sticky rings. The valves could have been leaking, too, but that malady shows up more readily in a leakdown test, which is essentially the opposite of a compression test.
Instead of measuring the engine’s self-generated compression, a leakdown test introduces compressed air into a cylinder that has its piston at TDC on the compression stroke, both valves closed. If you hear air leaking into the crankcase, suspect bad rings. If you hear air leaking into either the intake or exhaust manifold, suspect a bad seal at the corresponding valve.
Lacking a leakdown tester, I was left to deduce the problem. In its position immediately behind the water pump, the No. 1 cylinder runs cooler than the rest. Ruby has a long history of sitting for weeks and months at a time and then being driven distances so short that the engine possibly wouldn’t even reach its normal operating temperature — a situation ripe for the formation of sludge and carbon in the cylinders.
I suspect that a build-up of carbon and other crud, especially in Cylinder No. 1, is making it difficult for both the compression and oil-control rings to do their jobs. Thus while it’s possible that engine wear is causing some of Ruby’s oil-burning problems — and there’s room for doubt, given the high cylinder compression readings — carbon is exacerbating it. Furthermore, it’s likely that in the relatively cool No. 1 cylinder a thin layer of carbon has built up under the intake valve, producing a leak that has nearly halved its normal compression reading.
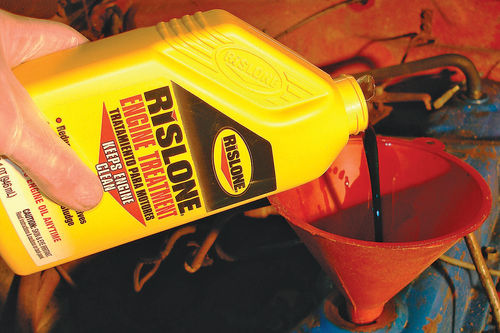
Cleaning It Up
But not to panic. I’d added a quart of Rislone, an engine cleaner, to Ruby’s first fill of fresh oil (Photo 65). I’ve had good luck using Rislone to flush the sludge out of old engines. I suspect the Rislone was working so well that the pistons and, possibly, even the walls of the combustion chambers were shedding carbon, a piece of which apparently struck the No. 1 spark plug with enough force to bend its ground electrode. Driving Ruby longer distances — including one trip of 60 miles — was heating up the engine thoroughly, burning off the carbon and cleaning the engine internally, as well. Instead of doing something immediately about the low compression in Cylinder No. 1, I decided to continue driving the truck and recheck the compression in a few months.
As to the oil-burning problem, I drained the very dirty old Rislone-laced 10W-40 oil after 100 miles, as I’d planned to do, and replaced it with a slightly heavier 15W-40, a Rotella brand. This time, to 4 quarts of Rotella I added 1 quart of Lucas Oil Stabilizer, a thick concoction that assuredly raises the overall viscosity of the crankcase oil. Consequently, my gauge now registers higher oil pressure, the engine seems quieter and I don’t see any oil droplets in the exhaust. To further clean the engine, I added a pint can of Sea Foam to the gas tank.
As I’ve noted, retarding the ignition timing and changing the oil helped reduce the under-hood noise. I’ve come to realize that some noise is quite natural in a neglected old engine, so I was growing less and less concerned about the noise problem. I gave up worrying about it altogether when two Ford friends of mine delivered an identical verdict: noisy timing gears. It seems Ford used a fiber camshaft gear that with age grows ragged and begins to buzz and growl. Good old Ruby!
An Accelerator Linkage Breaks
Another problem cropped up shortly after I put Ruby back on the road. I crashed into a couple of bad potholes while I was running errands during a long trip to town. Moments later, when I depressed the clutch to slow down for a stoplight, Ruby’s engine was racing. Pulling off the road and peering under the hood, I discovered that the accelerator linkage rod, attached to the firewall behind the engine, was loose.
While poking around under the hood, I tapped the linkage with my hand and noted that it shifted a bit from side to side. Immediately the racing engine slowed to its usual idle. I accomplished the same thing behind the wheel by using my foot to tap on the side of the accelerator pedal. By this means — alternately pressing the pedal to accelerate and tapping the side of it to slow down — I guided my finicky truck home.
There, a closer inspection found the cause of the problem: I had a broken linkage mount inside the cab just above the accelerator pedal. I say “cause” but I should say “symptom,” for it’s likely that the broken driver’s-side cab mount — the very one that created havoc with my steering column’s alignment — stressed and broke the accelerator linkage mount. Yes, it is time to repair that broken cab mount!
Replace or Repair the Linkage?
I couldn’t simply replace the linkage mount because the shaft on either side of it was swaged — purposely distorted — to create locking tabs. I could, however, replace the complete linkage with another one containing an intact mount. Aha! My 1968 Ford F-100 parts truck had that very part ready to donate to Ruby. Unfortunately, as I soon discovered, the linkage in the V-8 parts truck was a different length from the one Ruby needed for her 6-cylinder engine.
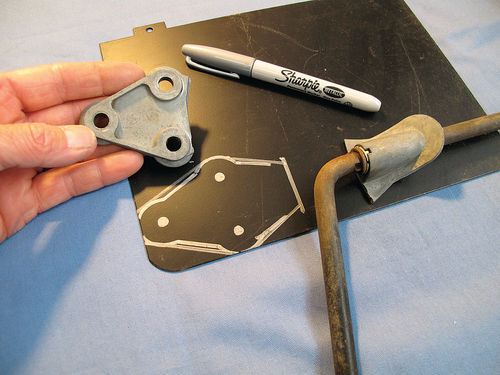
Given the time and delay involved in trying to locate the correct part in a salvage yard, I decided to repair my broken linkage mount. My first thought was to weld the base and be done with it. The mount, however, turned out to be zinc die-cast, better known as pot metal, which would melt if I tried to weld it. I briefly considered but discarded the idea of using J-B Weld or another cold-weld product. I just couldn’t be sure it would form a strong-enough bond.
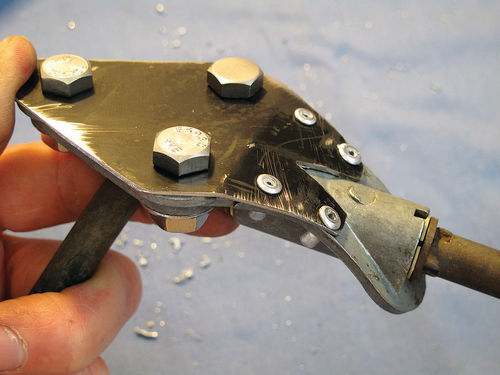
Instead, I used a pneumatic 3-inch cutoff wheel on a piece of heavy sheet metal to reproduce the mount’s footprint. I subsequently bent, drilled and notched this pattern to form a brace that conformed to the contours of the broken mount. The three bolts that hold the left side of the mount to the truck’s firewall also secure the sheet-metal brace. Four pop rivets attach the right half of the mount to the right side of the brace, effectively uniting the broken pieces (Photos 66, 67 and 68).
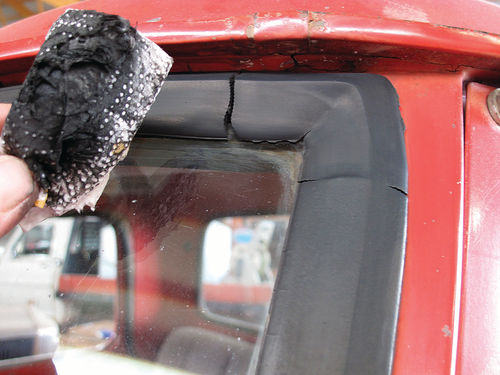
Working With Cracked Weatherstripping
Sealing cracks in the vulcanized corners of the windshield weatherstripping was as easy as it was necessary to waterproof the cab. I prepared the three bad corners by scrubbing the cracked rubber with a 3M scratch pad, wiping the area with wax and grease remover and applying some masking tape to the adjacent glass and metal. Finally, I squirted on some DAP black silicone rubber sealant, which I smoothed with a plastic spatula, supplemented by a wet finger. It dried looking less shiny than it looked wet (Photo 69).
Ready to Enjoy
During Ruby’s mini-restoration, I repaired the exhaust system, made extensive improvements to the engine, flushed the gas tank and fixed the sending unit, patched the floorboards and installed a new floor mat. I also thoroughly cleaned the interior, which culminated in steam-cleaning the seat upholstery; brushed on a do-it-yourself bed liner; and painted the grille, wheels and bumpers. In addition, I’ve re-shod the old workhorse in decent used tires, performed a complete brake job, buffed out the paint, exterminated some electrical bugs and repaired a broken accelerator linkage.
I won’t pretend I’ve achieved everything I meant to accomplish. For instance, the steering wheel repair kit I bought is still collecting dust in my shop, perhaps destined for use on another vehicle. I never got around to using the glass-polishing kit with which I’d hoped to brighten Ruby’s scratched windshield, either. You could say I ran out of time and enthusiasm before I ran out of things to do to Ruby. That’s the way it is with old cars: sometimes you have to set limits and stick to them.
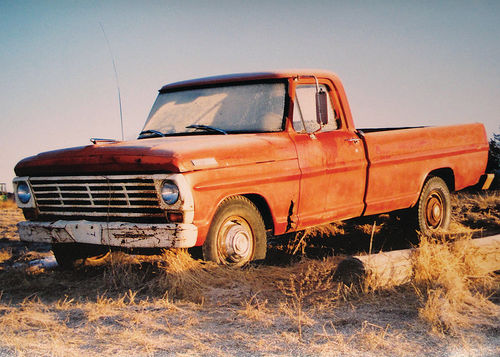
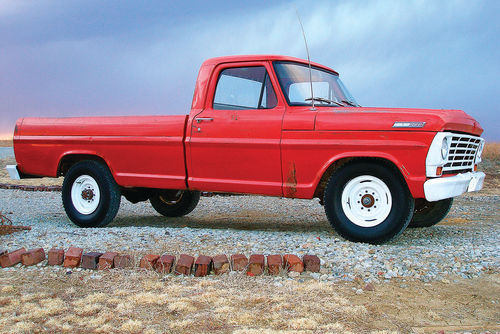
As befitting her age, rough service and many years of neglect, Ruby carries some scars, from minor scratches to a few well earned dents. But she hasn’t outlived her usefulness. These days, she’s a proud, tidy truck — shiny, solid and dependable, good for many more miles of service.
The bad news is that I’ll never borrow parts from my fixed-up red “parts truck” to keep my two other 1967 F-250s running, the original idea behind my purchase of Ruby.
If you’ve been reading these Auto Restorer accounts, you already know the good news…most of the work necessary to bring an old car or truck such as Ruby back from the brink is just that — work. With a little practice and the right tools, anyone with determination can learn to buff paint, cut a floor mat, brush on a bed liner, bolt in a new tailpipe or locate a loose wire.
As for me, all that remains now — once I get that pesky cab mount repaired, of course — is to get behind the wheel and drive the heck out of Ruby (Photos 70 and 71).


