
Let's Revive This VINTAGE DODGE PART 3
It Took a Great Deal of Hard Work. But In End He Accomplished His Goal—Preserving the Original Finish On a Car Built Nearly a Century Ago.
Concluding a three-part series, Curt adopts extreme measures to revive damaged chrome on his 1929 Dodge. Although buffing out the factory paint took far longer than he’d imagined, his perseverance produced an eye-catching finish on this 90-year-old car. Photo numbers start with 44.
The time I’ve spent sanding—51 1 ⁄2 hours—has given me every opportunity to spot problems. Until I cleaned the tires and rims, for instance, I hadn’t noticed that six spokes are missing from one of the spares; it will need repairing before I can ever use it.
I also belatedly noticed that the leading edges of the front fenders sit at different heights: 27 inches off the ground on the left, 25 inches on the right (Photo 44). A close inspection reveals that something struck the side of the left front fender, pushing it inward and upward. The mishap caused other damage: a dent in the radiator side of the left headlamp and a twist in the radiator shell that has produced an ill-fitting hood.
Depending on how often I drive the car, I may want to correct these problems. In any case, I’m glad to be aware of them.
Polishing Chrome Offers Instant Gratification
Compared to the drudgery of wetsanding, polishing chrome is instant gratification: After just minutes, you can see spectacular results.
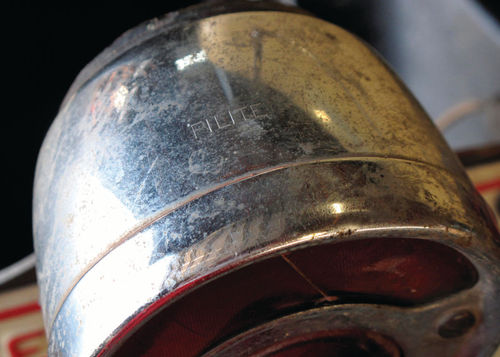
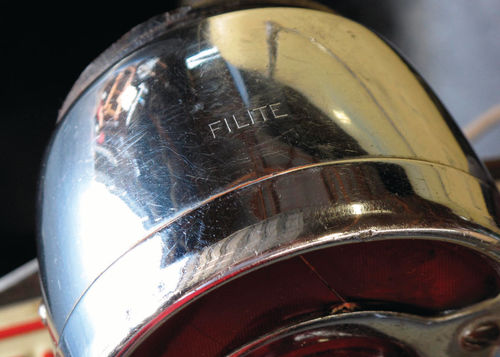
With a damp cloth, I applied Flitz metal polish to the taillamp and other chrome that merely needed brightening, buffing off the residue with a microfiber towel (Photos 45 and 46).
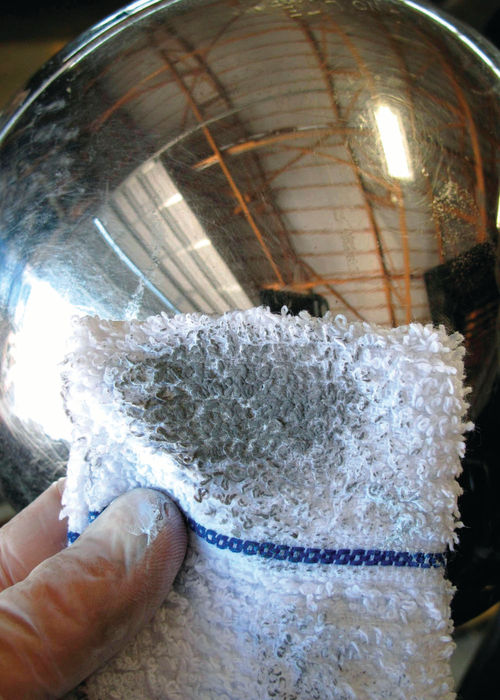
Like the taillamp, the car’s other chromed trim needed only a light buffing in most cases. These items included the gas cap, cowl strip and cowl lamps, headlamps, spotlight and the trim surrounding the rumbleseat opening. To see if the Mr. Clean Magic Eraser has magic properties as a chrome-polishing applicator, I used one to apply Flitz for 50 up-and-down strokes on a headlamp. I did likewise with a damp terry towel washcloth. Sorry, Mr. Clean. The rough-surfaced (textured) washcloth performed better in cutting through dirt and tarnish (Photos 47 and 48).
The car’s chrome-on-brass hubcaps were in various states of disrepair. All sported minor dings and scratches; curb scuffs and scrapes marred some. All but one retained its factory chrome plating, which I polished (Photos 49 and 50).
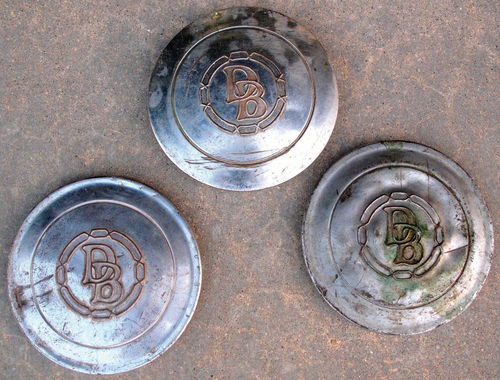
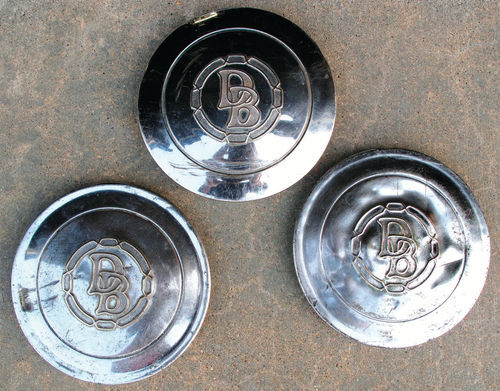
The one exception—a cap with half of its plating worn to burgundytarnished brass and also showing flecks of green—is the only place on the Dodge where I left “patina” in the sense of “encrustation.” I did rub it lightly with Flitz to brighten the remaining chrome, however.
Some Areas Require Extra Work
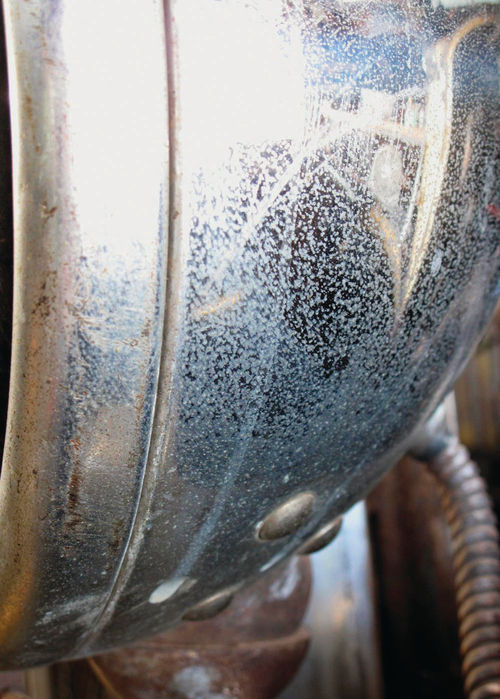
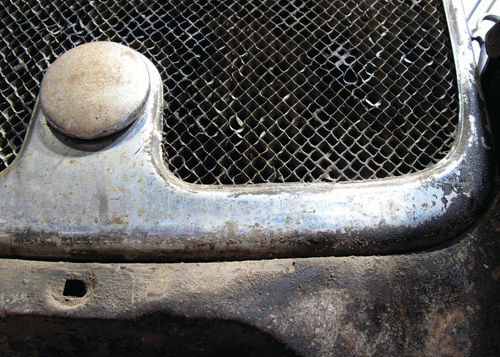
Areas requiring extra work to polish included such chromed-steel items as the radiator shell, headlamp bar, sidemount tire hardware and bumpers.
A rusty pox had attacked all of the chromed steel, evidence that one (or more) previous owners had stored the car in a too-humid building. Do you recall my mentioning the instant gratification that comes from polishing chrome? Instant gratification doesn’t apply to polishing the chrome atop rusty steel.


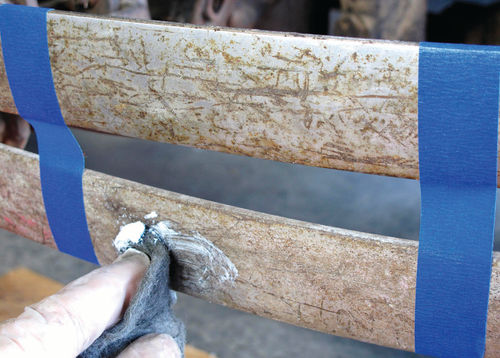
“Extra work” means I applied Flitz metal polish using—brace yourselves, purists!—steel wool, something I’ve always considered out of bounds as a chrome-polishing applicator. For rustpitted or otherwise abused chrome, however, super-fine 0000 steel wool works miracles (Photos 51 and 52).
If I ever decide to re-chrome these parts, I’ll need something more aggressive than steel wool to eliminate the rust pits. In the meantime, however, Flitz and 0000 steel wool dramatically improved the appearance of the chrome (Photo 53).
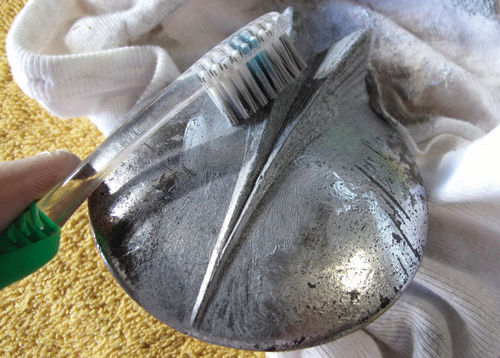
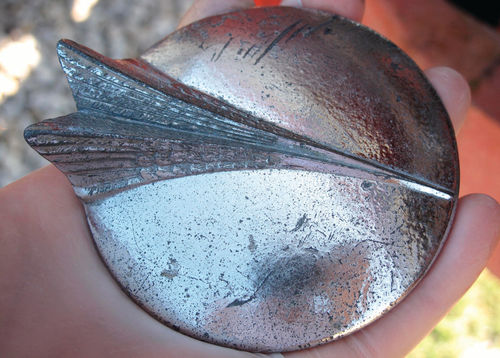
Other chrome requiring extra work—meaning buffing with 0000 steel wool—included the pot metal (zinc die-cast) radiator cap and exterior door handles. None of it regained a mirrorlike finish; at best the flat, weathered chrome now has a healthy glow to it (Photos 54, 55 and 56).
In a few areas on the chromed-brass or stainless-steel trim (the rumble-seat surround and at the lower ends of the cowl strip, for instance), I’d also had to use 0000 steel wool.
The front bumper, sporting more scratches than the push vehicle at a sprint-car track, had become a veritable Petri dish for growing rust. A good rubbing with Flitz and steel wool cut through the rust and conjured up a satin sheen (Photos 57 and 58).
The troublesome chrome got the best of me—or, at least, the best of my time. In all, I spent 23 1 ⁄4 hours—nearly three 8-hour days—polishing chrome.
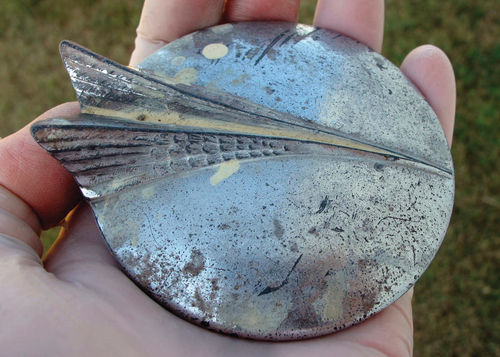
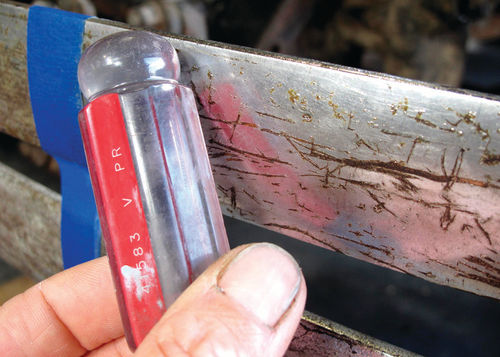
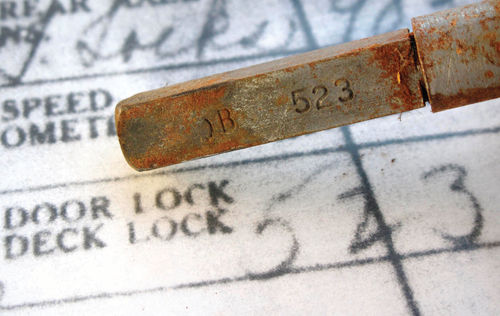
I did make one fun discovery when I removed the rumble-seat lid’s T-handle, the better to polish it. The “DB (for Dodge Brothers) 523” stamped in its shank matches the lock number given on the car’s Chrysler-supplied build record. It doesn’t get more original than that (Photo 59).
How Much to Buff?
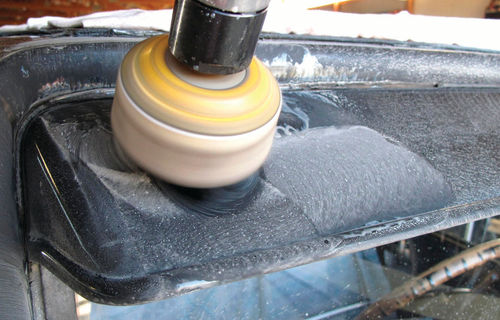
Having sanded as much paint and polished as much chrome as the car and I could stand, just one step remained: buffing the lacquer finish. Except for power-buffing one door and a few other small areas to gauge the results, I’d held off on buffing until I’d sanded the entire car.
When that time came, I equipped my pneumatic buffer with 3-inch-diameter foam pads, which offer advantages over 6- or 8-inch pads: control, for one, and the ability to fit in nooks and crannies, which abound on the old coupe.
Because the 2000-grit sanding scratches were so fine, I wondered about skipping the rubbing compound and buffing with polish alone. This would save time and could avoid removing paint unnecessarily.
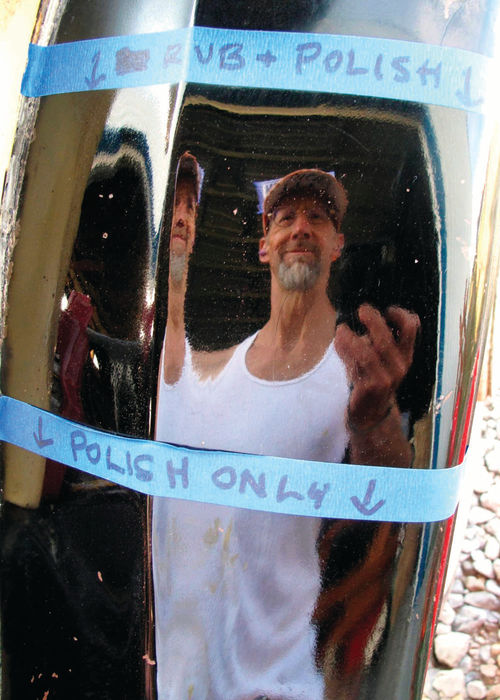
To gauge the results, I taped off two sections of the right rear fender. I buffed with rubbing compound followed by polish on the upper section and polish alone on the lower section. The winner of the shines-like-glass contest: the rubbing compound/polish upper section (Photo 60).
Therefore, I resolved to power-buff the entire car in two steps. First, I’d use 3M’s Perfect-It II rubbing compound No. 05973. Second, after wiping off all traces of rubbing compound, I’d polish with Meguiar’s Deep Crystal polish. (When, eventually, I ran out of his discontinued polish, the Meguiar’s helpline advised me to substitute Mirror Glaze No. 7, advertised as “a pure polish that nourishes the paint.”)
After buffing the paint, I’d seal its shine by hand-applying Meguiar’s NXT Generation Tech Wax.
The Rules for Buffing
I buffed by hand in a few hard-toreach areas, among them door edges and openings. Here the paint was so nice that I used Meguiar’s Deep Crystal paint cleaner, which I consider milder than the 3M rubbing compound.
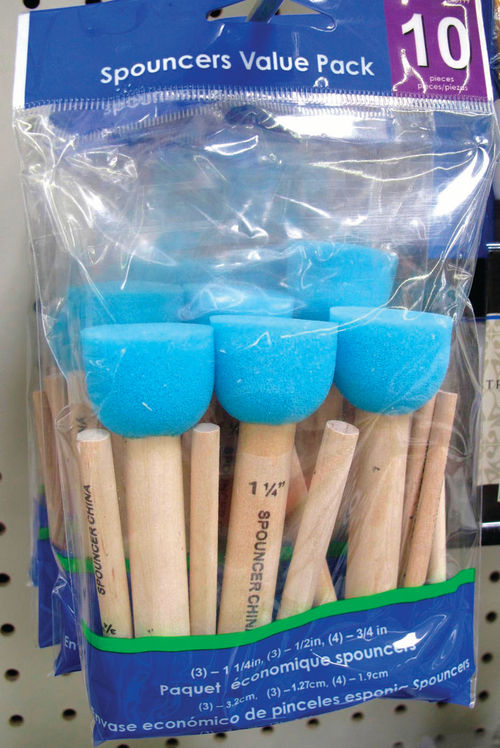
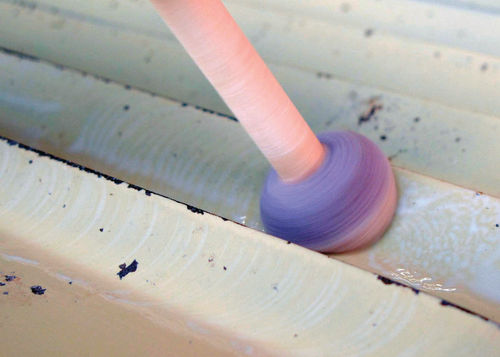
In a Walmart crafts section, I stumbled upon “Spouncers,” foamtipped wooden dowels, which I mounted in a cordless drill to buff the pesky hood louvers (Photos 61 and 62).
My buffing work generally followed this order:
1. Wipe each panel with a clean wet sponge to remove all sanding grit.
2. Attach a clean Velcro-backed pad to the buffer’s backing plate.
3. Wet the pad. I did so by lowering the buffer almost to the water level in my bucket and scooping up water with a cupped hand.
4. While holding the buffer below the rim of the bucket, spin the pad to throw off excess water without soaking yourself or your surroundings.
5. Apply a thin line of buffing compound or polish around the perimeter of the pad. Rub it in with a finger to prevent the pad from slinging it.
6. Wearing goggles (I prefer ear plugs, too), start the pad spinning and then touch it lightly to the paint, tilting the pad slightly to the right as you move left to right (Photos 63 and 64).
A Soft Touch, a Moist Pad
As with the sanding block, resist bearing down on the pad. Rather let it skim lightly over the paint so the compound or polish—not your hand pressure—does the work.
Keep the pad moist. When you see from the swirls in the paint that the compound or polish is drying, moisten the pad with either a few droplets of water (sprinkle it with your fingers or mist it with a spray bottle) or with extra compound or polish.
When the pad turns the color of the paint you are buffing—in my case, yellow or black—clean it. This involves rinsing it thoroughly in your water bucket, spinning it again below the bucket’s rim and reapplying the compound or polish.
Buffing with both rubbing compound and polish consumed 39 hours, most of it in eight longer sessions over three weeks.
Finally, in a 7-hour session, I reapplied Mirror Glaze No. 7 by hand to ensure the shine on all panels was uniformly deep and rich. I sealed this shine by handwaxing with the Meguiar’s synthetic wax.
Overall, then, the buffing and waxing consumed 46 hours, twice the 23 1 ⁄4 hours I’d spent polishing chrome but remarkably close to the 51 1 ⁄2 hours I’d spent sanding.
Charting My Progress
To remember where I’d left off from one session to the next, I created a chart with rows listing the car’s nearly two dozen panels or sections: roof (left); roof (right); door (L); door (R); cowl (L & R); quarter panels (L & R); the fenders listed individually, and so on.)
As I progressed, I placed check marks in columns corresponding to the five tasks I needed to perform on each panel: wash (to remove contaminants) and apply rubbing compound, polish, Mirror Glaze No. 7 and wax.
Honestly, I’d expected the buffing to go faster. I decided against being miserly with my time during this allimportant stage because the more I buffed, the better the paint looked.
Altogether, I spent 120 3 ⁄4 hours— equivalent to three weeks of full-time work—sanding and buffing the paint and restoring the chrome. Adding the time I spent cleaning the tires and wheels, freshening the rumbleseat compartment and washing the fenderwells, my total investment was even higher.
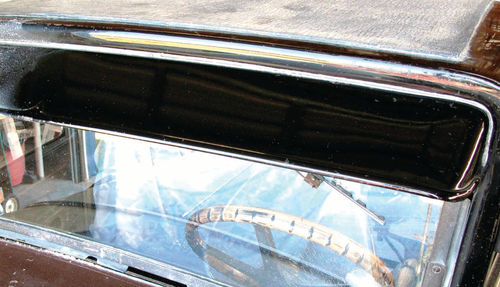
Was it worth it? You be the judge (Photos 65 and 66).
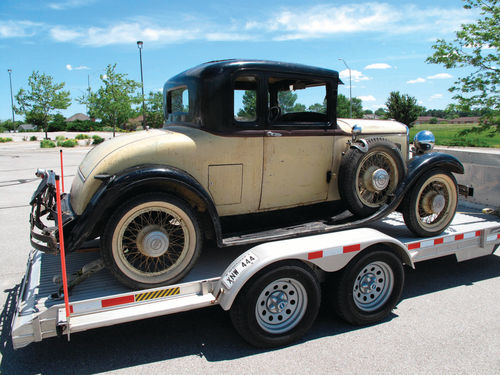
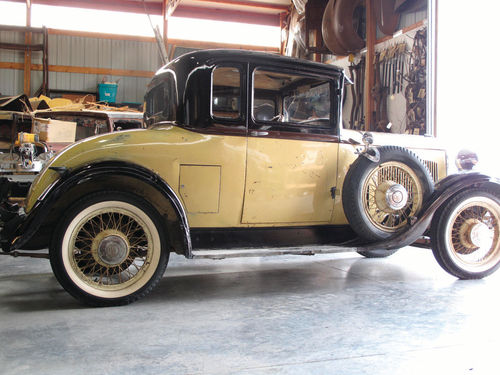
As for me, I’m feeling great about restoring the factory paint and other original details on this car.
Years after I’m gone and someone else owns it, this 1929 Dodge will continue to serve as a beacon to other restorers who are seeking to duplicate genuine factory paint, upholstery material and color, trim panel stitching, floor mat patterns and the like.
The car’s paint initially didn’t appear to be salvageable, which is why this project has taught me two grand lessons that might also benefit other restorers.
One, there’s no paint like factory paint. (It’s only original once, as they say.) Two, if you’re willing to devote the necessary time and energy, you can coax a like-new shine from all but the sorriest-looking paint jobs.


