
Let's Revive This VINTAGE DODGE PART 2
In the second installment of a three-part series, Curt continues restoring the weathered original paint on a 1929 Dodge rumbleseat coupe. This month’s photo numbers start with 20.
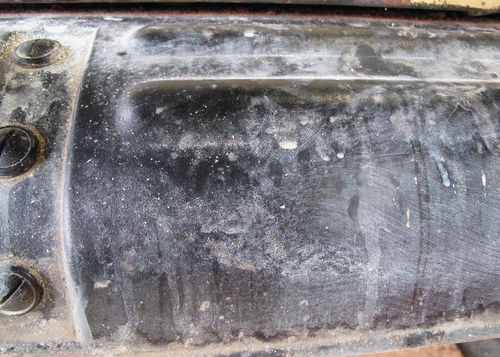
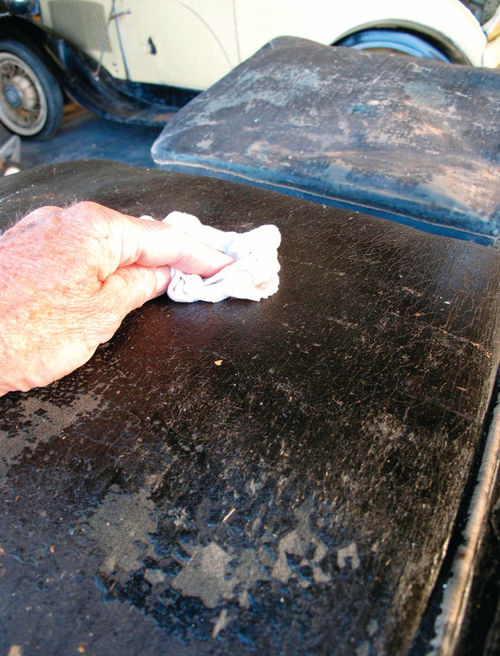
Having sanded every curve and angle on the body’s right half, I repeated my actions by working mostly back to front on the driver’s side: the left half of the beavertail and left quarter panel, door and cowl; back to the rumble-seat lid and the catwalk between the rumble-seat compartment and the base of the roof, and then forward again to tackle the hood. From there I sanded the roof and fenders (Photos 20 and 21).
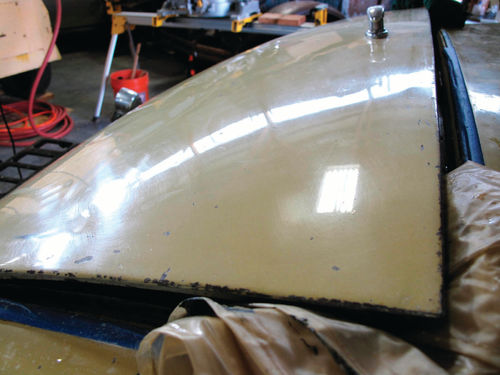
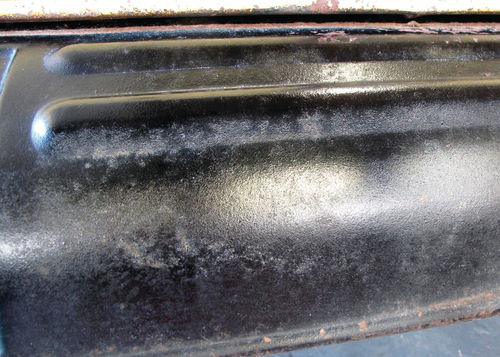
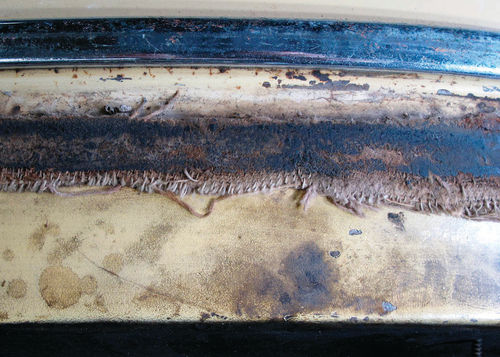
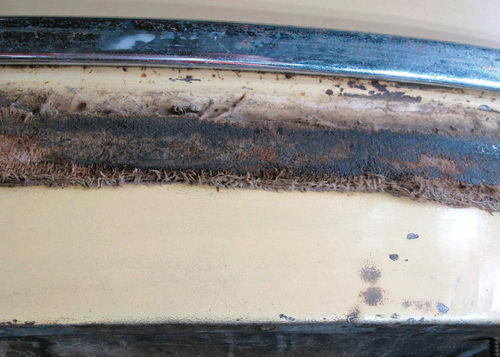
I wet-sanded the brown beltline between the body and roof (and out over the hood) lightly by hand, using a well-worn strip of 2000-grit paper.
Not only was this brown paint especially thin, I wanted to preserve the few bits of factory pinstriping that remained in it. Later, I buffed it lightly with a foam pad, using just polish, not rubbing compound (Photos 22 and 23).

I suspect, but can’t prove, that the coupe’s worn soft top is original. One thing I am sure of: Whoever re-caulked its perimeter seal was not very careful as he dribbled dark-gray caulk all over the roof and even on the cadet visor over the windshield.
Whether scraping with a plastic putty knife or rubbing with various chemicals, nothing could budge these blobs, so I gave up before I damaged the paint.
Down through the years, I’m guessing, the coupe was generally parked inside, because the black roof paint required only light sanding and buffing to shine like glass. (Evidently, the yellow body paint was simply predisposed to oxidizing.)
Because the top halves of the doors, when closed, blend into the roof, they’re painted black; yellow begins below the beltline.
To avoid cutting through paint on the tight curves and sharp edges of the door tops, I hand-sanded them lightly. Using the same technique, I safely sanded the sharp curves of the frames around the rear and quarter windows.
Those Confounded Fenders
The long hours I’d spent sanding the body and roof gave me invaluable experience. I needed every bit of it—along with a limitless supply of patience—in my attempt to revive the fender paint.
Whoever repainted them failed to smooth up the original chipped paint. Furthermore, drips and orange peel indicated where he’d applied too much paint; rough, dull spots signaled where he’d applied too little.
Their accumulation of dents, scratches, chips and stains doomed the fenders to mediocrity. Nevertheless, I did my utmost to clean and polish them, hoping that the coupe’s glowing yellow body would overshadow a few fender imperfections.
Sanding the fenders was monotonous work, especially at the bulbous front fenders. Before I could even start sanding them, I had to use solvent to degrease the catwalk area next to the hood.
I sanded, and then sanded some more, on the rough, flat paint on the inner slopes of the front-fender humps. Likewise, I spent extra time smoothing rough paint where all four fenders met the running boards.
On the bright side, the fender curves were gentle enough that I was generally able to use my sanding block instead of sanding by hand.
Ugly white stains, perhaps from spilled brake fluid, marred the left front fender. I was surprised at how well sanding (and later buffing) eliminated some stains altogether and lightened others (Photos 24 and 25).
A Big Projects Grows Bigger
As big projects tend to do, mine grew larger over time—but only because the results were so impressive.
As my labors rejuvenated the shine on the hood, doors, fenders and other large areas, I became aware that a few smaller, generally hidden, areas appeared shabby by comparison. This compelled me to expend even more time and energy than I’d intended.
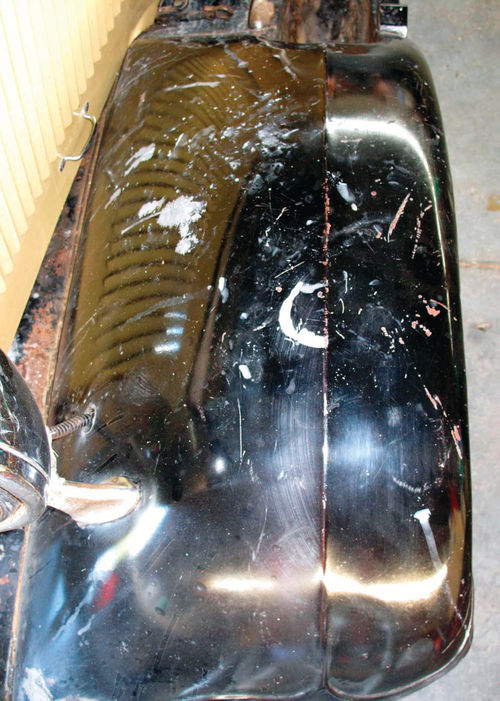
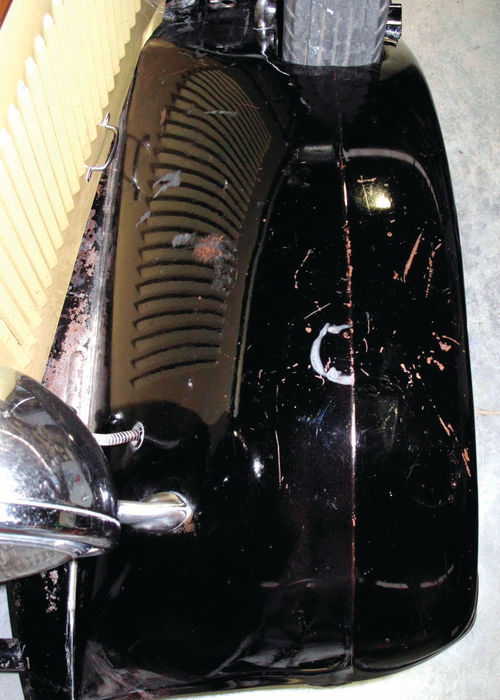
Though largely unobtrusive at the back of the car, the luggage rack and the sheet-metal gas tank cover were especially decrepit. Not only was their black paint rough, the gas-tank cover had been hand-brushed.
My 2000-grit sandpaper proved too fine to level the rough paint; I didn’t want to risk cutting to bare metal by using coarser paper.
Instead, I used my power-buffer to apply 3M’s Perfect-It II rubbing compound followed by Meguiar’s Deep Crystal polish. This treatment brought a brilliant shine to previously dull paint (Photos 26 and 27).
Dodge cleverly and economically dispensed with the usual sheet-metal valance panels between the running boards and body. Instead, it employed the frame side rails, painted black. I buffed these as I’d buffed the luggage rack and gas-tank cover, with similarly pleasing results.
The rumpled sheet metal beneath the radiator shell responded better— and faster—to power-buffing than to sandpaper, with its inherent risk of cutting too far on sharp edges.
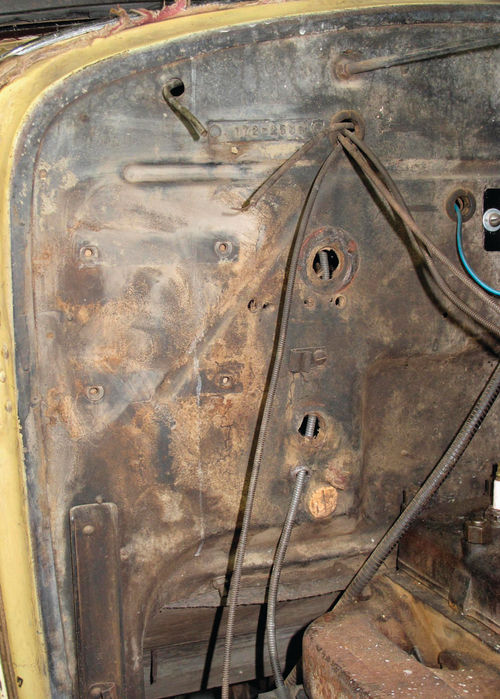
Elsewhere, it was a shock to open a polished door and see dirty, dull paint on the door edges and jamb. My first response was to clean these areas with soapy water and a sponge.
Second, I sanded a few spots of surface rust on the tops of the rocker panels, but I otherwise skipped sanding because the paint had seen no sun damage.
Rather, I applied Meguiar’s two-step Deep Crystal paint cleaner and polish by hand. In a similar manner, I spiffed up the frame and channel of the pushopen windshield.
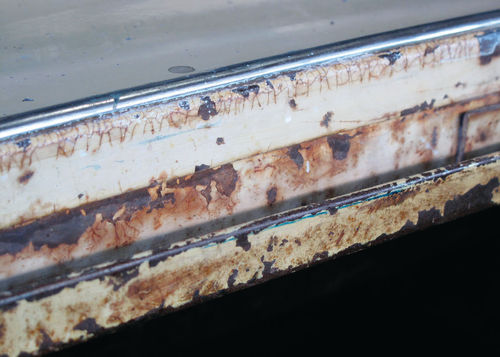
Dingy Rumble Seat Requires Cleaning
Other areas required harsher measures. The problem of “now you see it, now you don’t” was acute in the rumbleseat compartment: opening the shiny deck lid revealed a rusty rain gutter surrounding the opening.
By investing about an hour, using my rubber sanding block where I could and hand-sanding elsewhere, I eliminated this eyesore (Photos 28 and 29). But my handiwork created a bright frame around a rumble-seat compartment that, by comparison, looked dingy.

It helped to sand the thin strip of dull yellow paint on the underside of the deck lid encircling the upper cushion. To make further improvements, I decided to set aside my sandpaper long enough to deep-clean the compartment.
This was contrary to my original plan of simply sanding and buffing the paint and polishing the chrome, I know. But cleaning the neglected rumbleseat compartment was necessary and part and parcel of improving the car’s overall appearance.
Thus I cleaned and disinfected the rubberized canvas of the seat cushions with Formula 409, which I also used to wipe down the compartment’s trim panels, metal surfaces and a fiberboard divider between the rumble-seat and passenger compartments.
By applying Boss Gloss vinyl conditioner (a product that POR-15 has discontinued), I coaxed a modest shine out of the seat cushions, trim panels and divider (Photo 30).
I pulled what I could and vacuumed the remainder of the old mouse nests packed into the cushions’ coil springs. To remove mouse nests from inside the rumble-seat lid, I stuck a piece of heater hose into a pointed-tip vacuum attachment (Photo 31).
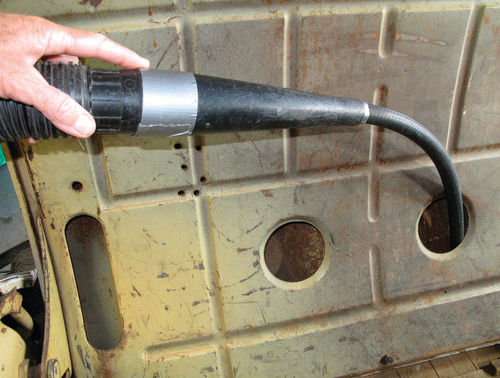
(Yes, alert readers with medical training, in lieu of using a HEPA filter in my vacuum cleaner I wore a respirator to avoid contracting Hantavirus, a mouseborne illness.)
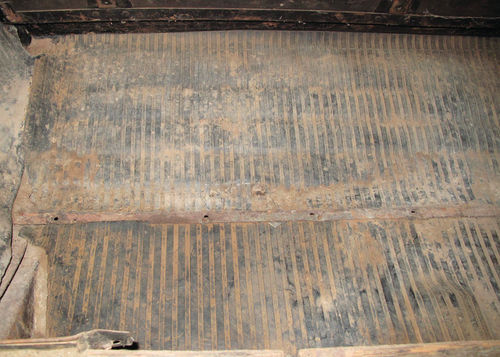
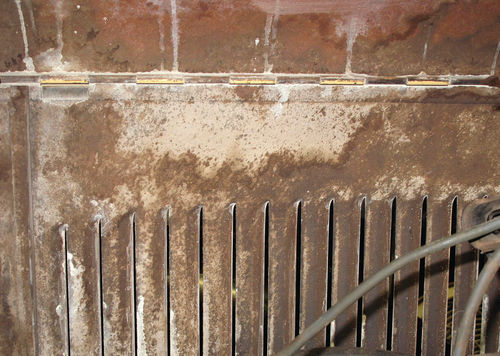
My final and hardest task in the back compartment came while cleaning the ribbed-rubber floor mat, whose patina of ground-in dirt no car-show spectator could admire.
Starting with two pails of hot water that I changed once, I scrubbed with 409 and mopped up the dirty residue with an old sponge. Though this loosened some of the dirt, it was only a start.
More effective was using a stiff-bristled nylon brush to work in Bon Ami, a powdered mixture of limestone, feldspar, soda ash and baking soda. This generally left the rubber uniformly black and smooth-feeling.
Even so, I’d had to scrape off the most stubborn dirt with a flat-bladed screwdriver. The results, however, were well worth the effort (Photos 32 and 33).

Eyesores Under the Hood and Fenders
Another compartment, the one housing the engine, presented three eyesores. The first, a strip of yellow body paint on the cowl under the hood, responded pertly to some gentle sanding with 2000-grit paper (Photos 34 and 35).
Cleaning the dirty firewall required two steps: 1) Degreasing by rubbing with a solvent-soaked rag and 2) polishing the flat-black paint with Flitz metal polish on 0000 super-fine steel wool.
The result is black paint that, while still flat (though this is perhaps the way the factory applied it), is now at least clean (Photos 36 and 37).

The third eyesore in the engine compartment—the oxidized, greasy paint on the undersides of the hood—will have to wait until I remove the hood for engine repairs (Photo 38).
I then turned my attention to a final area where I hadn’t expected my paint-restoration project to take me: the fenderwells.
The yellow paint visible through the rear-fender openings looked especially drab now that the body and fender paint glowed like new. After cleaning by scrubbing the area with Dawn dishwashing detergent in hot water, I power-buffed the paint with 3M Perfect-It II rubbing compound.
Though this brightened the paint slightly, I wish now that I’d wet-sanded the panel as an intermediary step. But the clock was ticking, the project was dragging on and I don’t begrudge myself the time I saved.
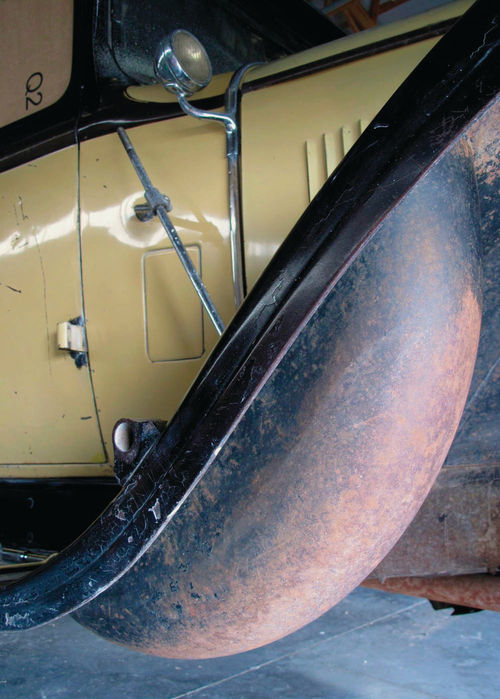
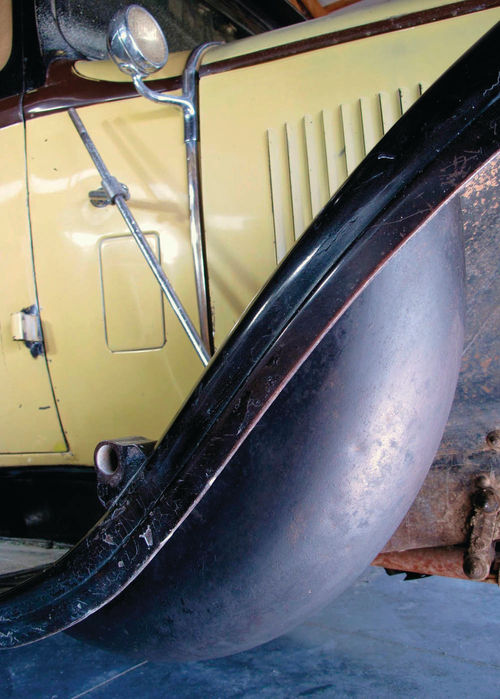
A similar problem of drabness emerged at the front of the car, where the rusty lower tubs of the fenders’ spare-tire wells presented a visual distraction.
Consequently, I washed under the front fenders before using a rag to apply stove polish (also called stove black) to the spare-tire wells. Its flat-black appearance mimics the worn black factory paint still clinging to the undersides of the front fenders (Photos 39 and 40).
Brightening Rims and Tires
Because the four wheels were off for fenderwell detailing anyway, I thoroughly cleaned them, first with solvent. The grease build-up inside one wheel’s hubcap well indicates a bad grease seal at the right rear brake drum, a future fix-it project.
Next, I used Bon Ami to scrub the four road tires and two spares, which now shine like new (Photos 41 and 42). Likewise, some light scrubbing in the solvent tank with a brass-bristled brush revived a sparkle in the old lug nuts (Photo 43).
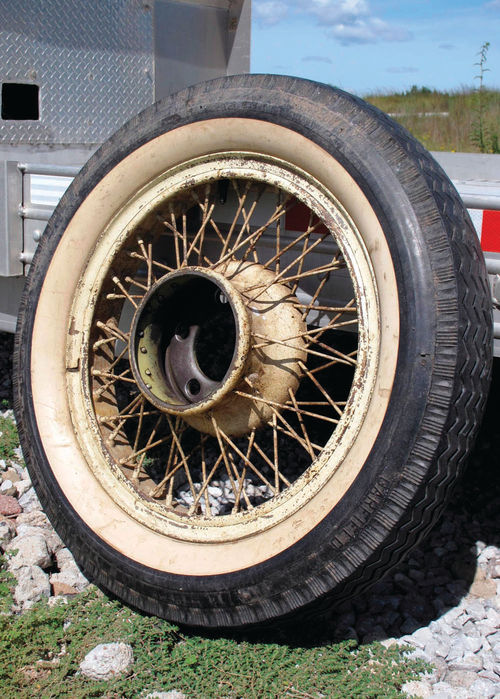
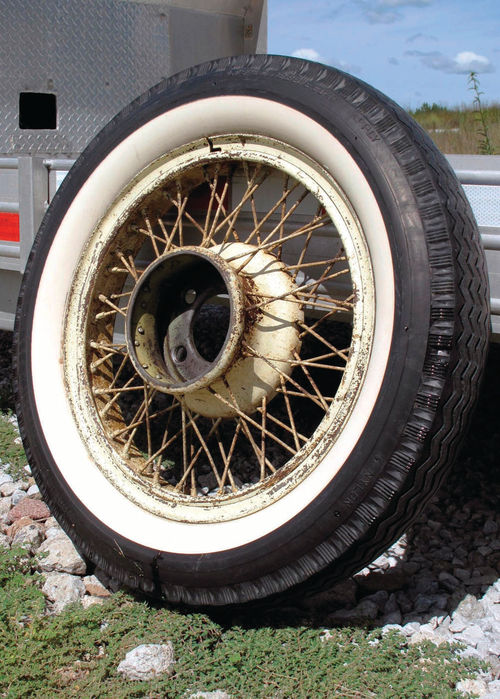

The yellow wheel paint brightened slightly when I removed decades of dirt with soap and a spoke brush. Given the widespread paint crazing and chipping on the wheels—and the rust visible beneath the paint chips—it appears that someone re-sprayed the wheels without sanding first.
With the rest of the coupe looking as shiny as a new penny, the wheels now present the dreariest painted surfaces on the car.
I’m still mulling over what to do about it. I could try sanding and buffing, a task made difficult by all those spokes. Another option is to do nothing: A survivor car’s wheels, like an old-timer’s face, are naturally going to look worn.
Meticulous wet-sanding—hour after hour, day after day—is a prescription for madness. Only in short, sporadic doses could I enjoy it. Consequently, the 51 1 ⁄2 hours I spent sanding to restore my ’29 Dodge’s (mostly) factory paint was spread out over 15 sessions spanning eight weeks.
In the early going, I worked 1 1 ⁄2 to 2 1 ⁄2 hours at a stretch. During my final eight sessions, I managed to devote a full morning or afternoon to the cause, thereby sanding 4 hours at a time.
Next time, Curt uses a tough-love approach to polish the car’s damaged chrome, after which he buffs out all the paint he has sanded.


