LET’S Paint a Car THIS WEEKEND!
Decades Ago, He Took on a Daunting Task—Prepping and Painting a Car During One Weekend. In the Process, He Found That Determination Is a Very Useful Restoration Tool.
OK, boys and girls. Have your mama pack a great big lunch because this weekend, we’re going to paint a car! Watch how we sand, mask, prime, sand some more, spray the color coat and then fall face-first into bed.
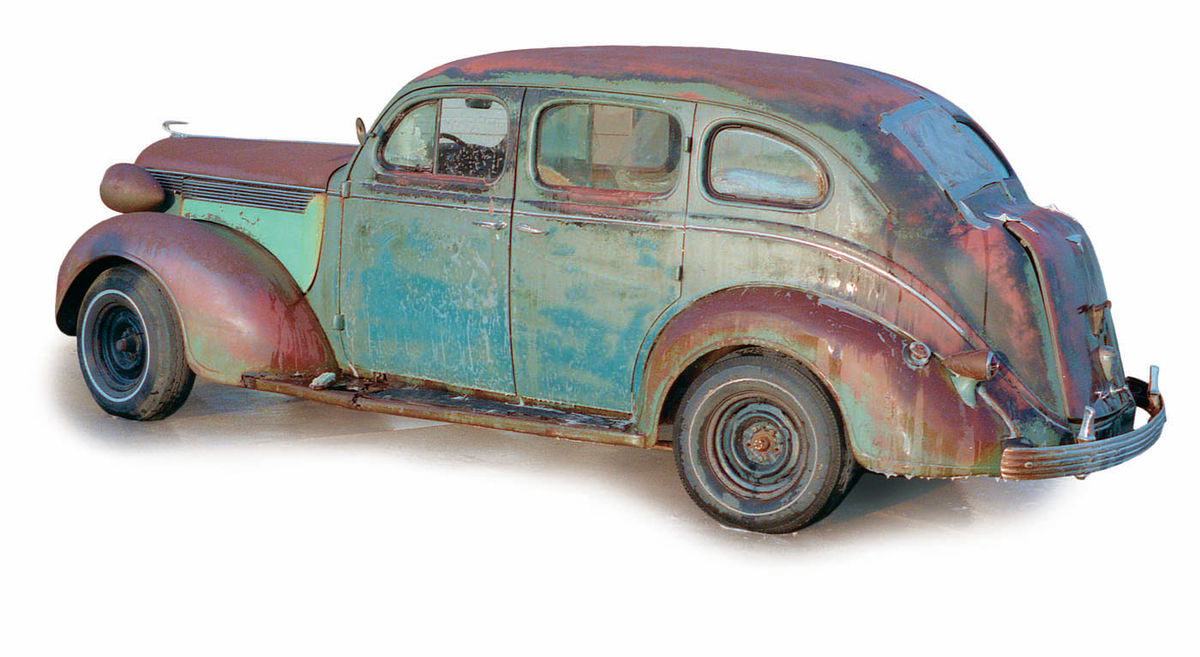
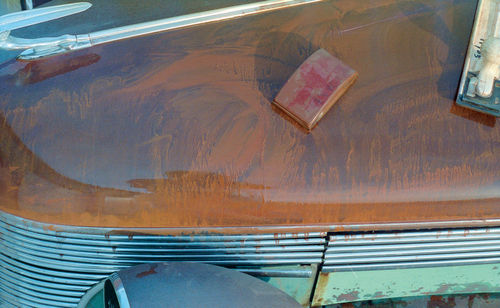
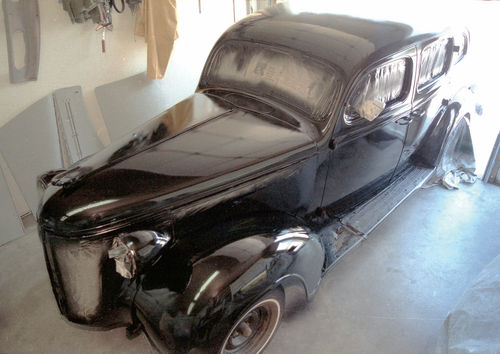
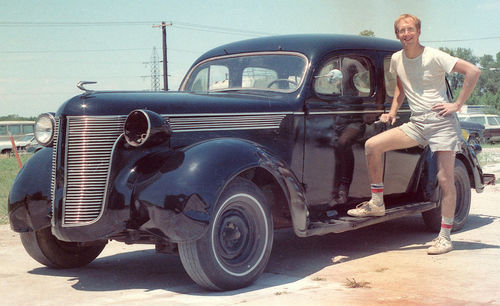
This was my self-assigned homework one weekend in July 1984: to paint my 1937 DeSoto, primarily to stop the surface rust that was blossoming on its hood and roof.
Because I lacked sufficient inside storage and the car was going to have to sit outside for a while, it seemed sensible to paint it.
I wasn’t planning to shoot the door jambs because of all the extra time necessary to sand those areas and mask off the door openings to protect the interior. Likewise, I had no time to patch rust holes or pound out the dented fenders. This was strictly a paint job.
My goal, according to notes I made at the time, was to produce a “decent” painted finish—meaning a durable one—to protect the car’s sheet metal until I could find inside storage.
I wanted the sanding to remove the surface layer of oxidized paint and rust and make the surface smooth enough to create a decent (or better) finish.
Three Painting Problems
I foresaw three great threats to achieving my goal on that July weekend: heat, dust and fatigue.
The forecast high temperature for painting day in Lincoln, Nebraska, was 95 degrees. Accordingly, I had stocked plenty of Ditzler DTL-105 slow-dry thinner to prevent the lacquer from drying too quickly and thereby leaving a rough finish.
I had less control over the dust. My 1935 Plymouth Coupe, disassembled and under restoration, nearly filled my rented mini-shop, measuring just 15 feet wide and 30 feet deep. I didn’t have room to pull the DeSoto fully inside for painting. Besides, I wasn’t eager to deal with paint overspray inside the shop.
At best, I’d hoped to pull the DeSoto partially inside so I wouldn’t have to attempt masking it under a hot sun.
Otherwise, I was planning to spray it outside, right next to a dirt alley and a half-block away from a gravel road. The best I could do was wet the driveway before I sprayed. If it happened to be windy, I knew my paint job would suffer.
As to fatigue, I was 25 years old at the time, confident that I would at least begin the project with vigor. But after working through one hot, endless day and probably well into the night, what kind of shape would I be in by Sunday, Day 2 of the marathon painting session?
An Early Start
If heat, dust and fatigue were variables beyond my control, I knew I could control my time. Thus, following a carefully planned schedule, I arrived at “the scene of the prime”—my rented mini-shop—before 6 a.m. Saturday.
By 6:15 a.m., I’d set up outside to begin washing the car with Ivory dishwashing soap and a scrub brush—not once but three times. Dirt, oil, car wax: it would all have to go so the paint would adhere.
From about 7:30 ’til 8 a.m., I wiped down the car with wax and grease remover (3M General Purpose Adhesive Remover) to avoid grinding any remaining contaminants into the old finish during the sanding stage that followed.
During the next step, lasting from 8 ’til 11 a.m., I used 400-grit paper to wet-sand the entire car. I sanded entirely by hand to avoid damaging the DeSoto’s stainless trim, hood ornament and other delicate parts.
I used a Hutchins Speed File (a plastic handle with a foam-backed surface for a 2-by-12-inch sandpaper strip) on larger, mostly flat surfaces: the doors, roof and top of the hood.
On fenders and other tight curves, I used a small rubber sanding block. I discarded all tools in favor of handsanding alongside brightwork, handles and around the window openings. Nothing screams “poor workmanship” like paint peeling away from such areas. Slow, patient hand-sanding allowed me to get close to these areas without leaving scratches in the trim.
A folded piece of well-worn sandpaper, which conformed to the fleshy heel and side of my hand, worked best.
Metal Prep, Masking & Priming
From 11 a.m. till noon, I wet the car section by section and sponged on metal prep. The acid-etching solution, I knew, would improve paint adhesion to the car’s many sections of bare or lightly rusted sheet metal.
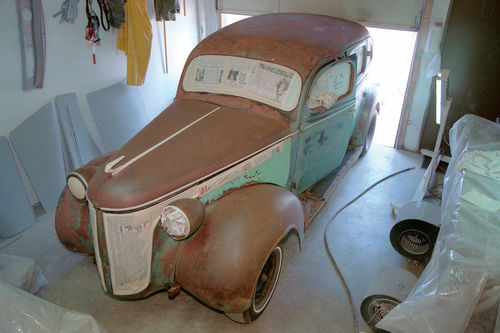
To this point, I’d faithfully followed my schedule almost to the minute. My plan envisioned one final, relatively short, step before priming the car: spending approximately two hours (from noon to 2 p.m. Saturday) masking it.
It was only when I began masking that I fully appreciated the vastness of the tall, long 4-door sedan. Given the care necessary to mask windows, trim strips, the grille, door handles, exposed chromed trunk hinges, the taillamp and headlamps, rear bumper (the front bumper was off the car) and other tricky areas, the “easy” two-hour masking job stretched to five hours.
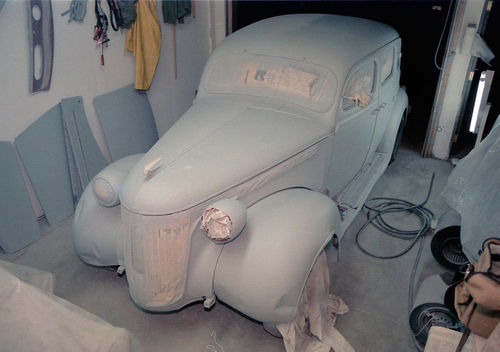
Finally, at 5:15 p.m. Saturday, after nearly 12 straight hours of work, I was ready to prime the DeSoto.
Perhaps all the time I’d invested in simply preparing for the paint job changed my mind about spraying it outdoors. In any case, after rearranging my shop, I found enough space to allow the entire car to fit inside, although I couldn’t quite close the overhead door.
Spray gun in hand, I walked around the car three times. Allowing time to reload the gun, for solvents to flash off between coats and to clean out the spray gun afterward, the priming phase ran ’till 9:30 p.m.
I ended a long, though successful, 15 1/2-hour day by backing the car outside, locking up my shop and heading home for a few hours’ sleep.
Sanding & Sealing
I could have continued work and painted the car that night but I postponed it for three reasons. One, I was tired and therefore likely to do a sloppy job. Two, waiting overnight would let the primer set up so my sanding would be more beneficial in removing scratches. And three, my shop lights would have served as a beacon for bugs, many of which would drop into my fresh paint.
At 6 a.m. Sunday, I returned to begin lightly sanding the primer.
Normally, sanding three coats of lacquer primer will hide sanding scratches and other slight paint imperfections. I wasn’t terribly fussy on that count, however, and so I realized with a start that I’d made unnecessary work for myself.
I could have—in fact, should have—skipped the primer stage and saved myself some spraying and sanding time by settling for a single coat of primer-sealer (which doesn’t require sanding) and following it directly with the top coat.
But it was too late for that now. Accordingly, I lightly dry-sanded the car in about 90 minutes, from 6:30 to 8 a.m. Wet-sanding would have produced better results than sanding without water; I couldn’t risk ruining and repeating my five-hour masking job, however.
Next, I blew off the sanding dust and then used a tack cloth to remove any fine particles left behind.
Before painting the car, I sprayed the sanded primer with a sealer coat, which would prevent the topcoat paint or its solvents from leaching through and reacting with the DeSoto’s original topcoat.
The Main Event: Painting
Unfortunately, I ran short of sealer and the paint store was closed on a Sunday. Thus the driver’s side of the hood got a light coating of sealer but the other side, along with the front fenders and cowl, didn’t get any.
I sprayed two gallons of mixed black lacquer on the car from 8 a.m. until 11:50 a.m. Sunday. Despite using high-temperature (slow-dry) thinner, each coat of paint dried too quickly in the oppressive July heat.
Retarder—an additive to allow the paint more time to flow out to a smooth finish—would have helped. I had none.
Because I lacked the time necessary to sand between each color coat, I had to spray one rough coat after another—three coats in all. But such is the beauty of lacquer: it dries relatively swiftly and is easy to brighten later by wet-sanding and polishing.
Between noon and about 1:30 p.m., I carefully peeled off what seemed like miles of masking tape and paper to reveal a radically transformed car. My preparation and 23 hours of hard work over two days truly had paid off.
Over the next several weeks, I used very fine sandpaper to wet-sand the car, panel by panel, as my limited time allowed. When I then buffed the sanded finish and applied Meguiar’s Mirror Glaze No. 7 afterward, the black paint did shine like a mirror.
The project had far exceeded my goal of producing merely a “decent” paint job.
Painting Reflections
Looking back on my weekend paint job of nearly 35 years ago, I feel some strong emotions.
First, I’m glad I did it, both for the painting experience it gave me and for the memories it evokes.
I’m also grateful for having shot a 36-exposure roll of film showing every step of the process—color film, no less, a rare snub to the black-andwhite darkroom I had at home.
Though stopping to take photos felt like an inconvenience and a timewaster then, now I’m delighted that I recorded the event. My memories of 1984 have certainly faded; the photos I took back then remain sharp.
I’m also struck by how with so little—just two days, newspaper serving as masking paper, a crowded workshop—I accomplished so much.
This underscores two valuable lessons: One, plan and research thoroughly before diving into any big project.
And, two, perhaps the most important talent necessary to complete any auto-restoration project is the drive to succeed despite adversity. In simpler words: believe in yourself and your goals.
The unvarnished truth is that at many of the hardware stores, parts stores, paint stores and machine shops I frequented, an untold number of older, smug men seemed to delight in dispensing discouragement. Time and again as I’d explain what I was after they’d proclaim: “Oh, you can’t do that!”
The result: I gravitated toward the shops where the owners shared my vision that anything is possible if you’re willing to think creatively.
I actually envy the eager, younger and unattached version of myself for having had so many uninterrupted hours available to invest in a weekend paint job and other such cheeky undertakings.
By contrast, some very fortunate circumstances today—a wife, family, house and property, other interests— would make it hard for me to disappear for a weekend.
So thanks. Thanks for the memories.


