Help me to cast plastic knobs and rubber parts
Question:
I am the proud owner of a 1939 DeSoto that belonged to my grandfather. It is in beautiful original condition, but the plastic interior knobs and door handle escutcheon plates are cracked and missing due to years of exposure to the desert sun. There are some small rubber items that are stiff and deteriorated too. Is there a way to make these at home without specialized and expensive tools?
Answer:
As it turns out, that is a pretty easy problem to deal with. You can buy the casting resin and coloring at crafts stores or you can simply order everything you need from Douglas and Sturgess in Richmond, California, (douglasandsturgess.com).
Both rubber items and small plastic parts can be cast quite easily. And rubber parts are even easier than plastic pieces thanks to RTV (Room Temperature Vulcanizing) rubber products.
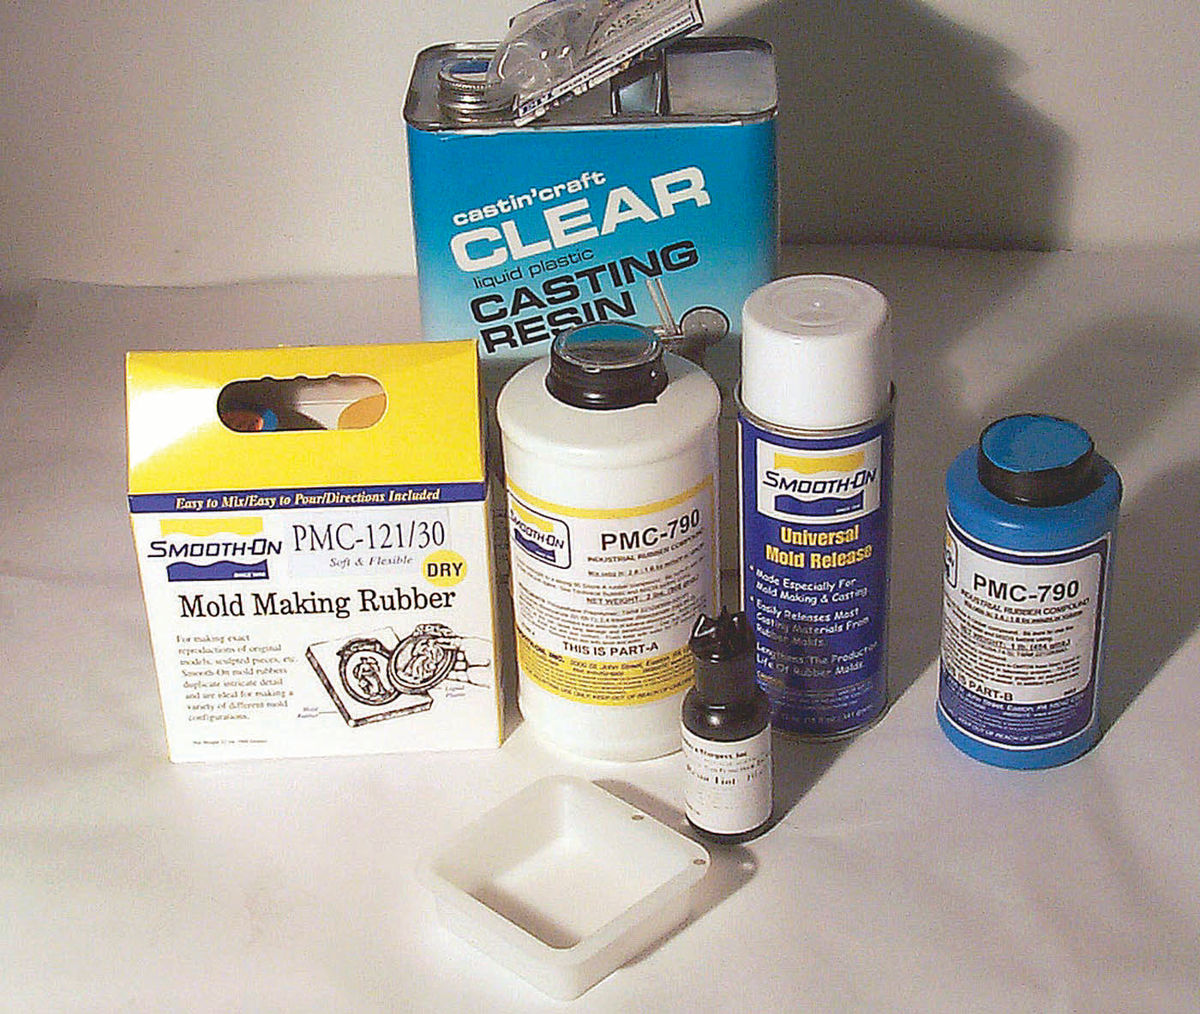
Things You’ll Need:
• Smooth-On PMC-121/30 mold making rubber kit
• Smooth-On PMC-790 (Parts A and B)
• Smooth-on Universal Mold Release
• Black Pigment
• Castin’craft clear casting resin (for plastic parts)
• Enamel in the color of the original plastic item (for plastic parts)
• Measuring cup
• Mold containers
• Rags
• Lacquer thinner for clean up.
Note: There are a number of brands of the above casting items that all work the same way. Stick to one brand though, to insure compatibility.
Also, RTV rubber isn’t really rubber any more than your car’s tires are. Natural rubber was replaced long ago by more durable silicone, butyl and urethane synthetics for most applications. Latex is the exception. It is the only “rubber” product that is still made out of natural rubber from places like Malaysia. But neither natural rubber nor any of the synthetics is actually black.
Have you ever noticed those white tires on horseless carriages? They were made of natural, un-pigmented rubber. Manufacturers started putting black pigment into tires to make them less vulnerable to rot and less prone to showing scuffs and dirt. So when you make your own rubber replacement parts you will want to add pigment to them too, and it’s easy enough to do.
Rubber Parts
Casting rubber items is easy if you have a good original to work with. The item doesn’t have to be perfect. You can use modeling clay to smooth out cracks if necessary, and you can even make whole prototypes out of low-fire modeling clay available from crafts stores if you need to. Prototypes can also be made of wood or metal.
I get my casting materials from Douglas and Sturgess because they have a full range of rubber mold and partmaking products that range in hardness from extremely flexible and gummy to stiff and sturdy stuff. They also have the black pigment solution required to make rubber items look right. Hobby and crafts stores carry similar products, but it is hard to find everything you need in one place.
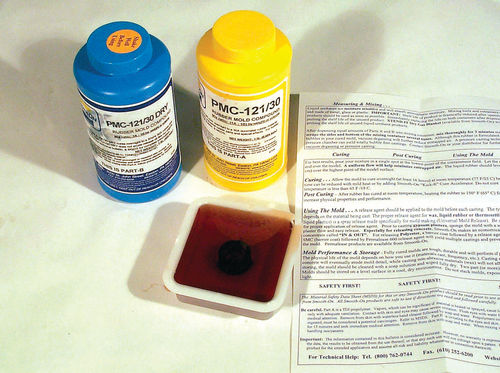
You will need mold dams to contain the liquid urethane molding solution until it cures. Lots of people build boxes out of strips of wood, but I have found that small plastic boxes and bowls such as those you would use for leftovers in your refrigerator or to organize small items in your office work very well if you spray them with a little mold release first.
Temperature is important to the chemical processes involved, so work in an area that can be maintained at around 65 degrees Fahrenheit. You will also need adequate ventilation because the fumes can be dangerous to breathe. And you will want to wear latex gloves to protect your hands.
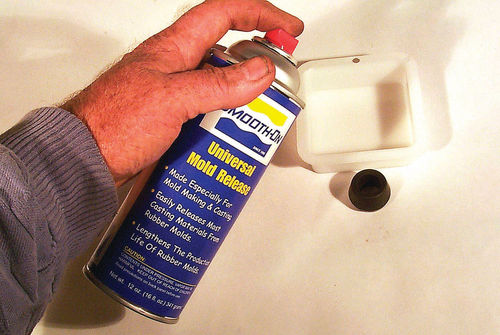
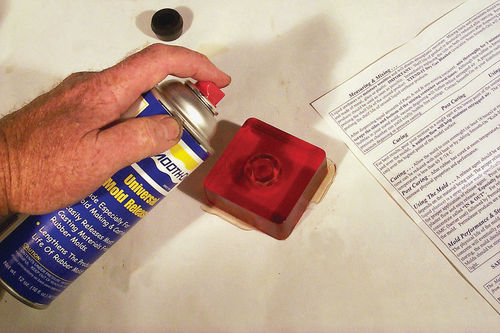
Spray a fine mist of mold release on both the mold dam and the prototype you wish to replicate. It’s a good idea to spread this around with a fine brush, let it set, then shoot on another fine mist. Let the mold release dry for at least 15 minutes before proceeding.
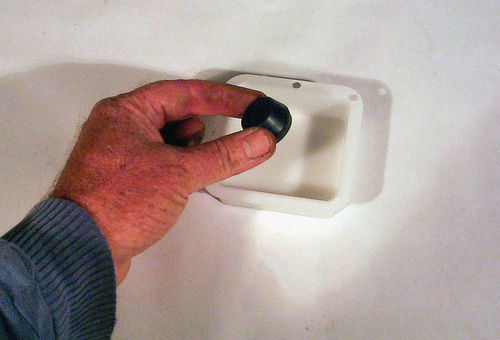
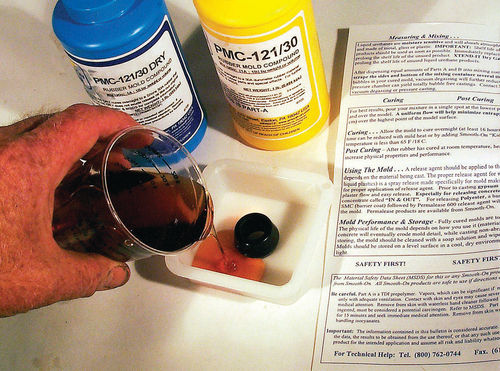
Place the item to be reproduced in the mold dam, making sure that you will have at least ½” of mold above the item after the mold-making mixture is poured into the dam. Be sure to arrange the item so you will have a minimum amount of undercutting. Extensive undercutting will mean that your flexible rubber mold will eventually split and become useless because of twisting and flexing.
If the prototype requires a great deal of undercutting, you may want to arrange it so you can cut the mold into two pieces using a utility knife in order to extricate it. Insert locator pins such as dowels or nails to register the two halves of your mold together before you cut it in half. You may also need to cut a hole from which to pour the casting material, or just insert a plastic soda straw.
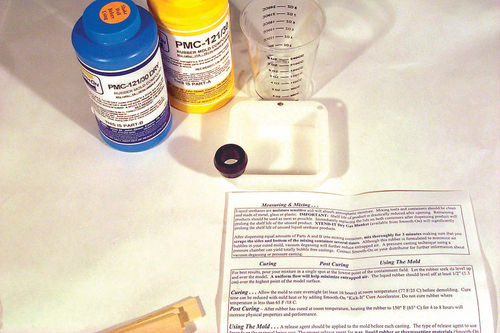
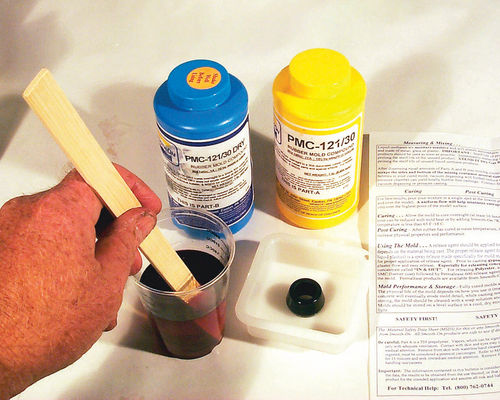
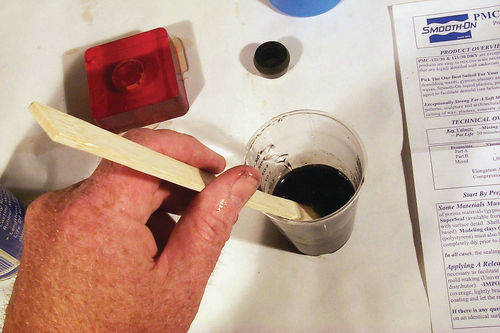
Mix up the rubber mold-making compound. Add Smooth-on PMC-121/30 (a soft, mold-making formula) one part A to one part B in a measuring cup. I use the disposable graduated cups available from crafts stores. Don’t get sloppy about the mixture ratio because if you do, your mold may never cure or could become brittle. Stir the mixture slowly for a full three minutes, scraping the bottom and sides of the cup in order to mix it thoroughly.
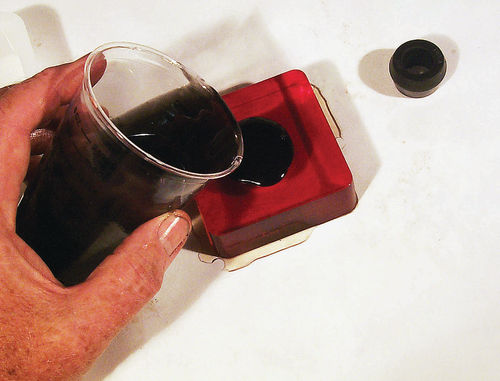
Slowly pour the mixture into your mold, being careful not to trap air bubbles. Let the mold cure for at least 16 hours before disturbing it, and make sure it is kept at a steady 65-70 degrees Fahrenheit during the process. Moderately higher ambient temperatures will hasten curing time a little, but don’t rush it. Turn your disposable measuring cup upside down on a piece of newspaper when you are through pouring. The residue will cure and pop out leaving the cup reusable.
Once the mold has cured for the required time you can then heat it to 150 degrees for four to eight hours to increase durability, but this is not necessary unless you will be making a large quantity of items using it.
When the mold has completely cured, gently remove the prototype by pushing it out. Your new mold should be a perfect impression of your prototype. Check it for air bubble problems, and then proceed with mixing the material for the duplicate item.
I used a Smooth-On PMC-790 Rubber compound to make the rubber spacer I needed because it is a much stiffer, more resilient compound. You need to mix the PMC-790 at a ratio of one part A to two parts B and be sure to stir it carefully for at least three minutes as you did before. Only this time you will also need to add a couple of drops of black pigment for that authentic look.
Again, pour the compound into the mold slowly until it slightly overfills so as to allow for any shrinkage. Let the part cure for 16 to 24 hours. When you pop it out you will have a perfect replica. Virtually any rubber part can be made this way with a little imagination. For long weather-strips make a mold of wood using a router, then shellac it and shoot it with a little mold release. You can make just about anything you might need with Smooth-On polyurethane rubber compound and a good mold.
Plastic Items
If you can get your hands on good pieces from another car, you can easily make molds from them out of casting resin available from crafts stores. Casting resin is especially good for making replacement knobs, escutcheon plates and horn buttons, but it can also be used for more ambitious projects as well.
Prototypes can be made of wood, metal or even low-temperaturefired modeling clay. A machinist can easily make prototypes for round escutcheon plates and horn buttons out of aluminum. Sculpted panels can be shaped out of soft pine and sanded to shape. Even fiberboard will work if it is given several coats of shellac to seal it.

Pouring casting resin requires essentially the same technique as pouring urethane for rubber parts. Just follow the mixing instructions carefully, mix thoroughly, and let the parts cure for the necessary amount of time as called for in the instructions on the can of casting resin.
Casting resin is clear, yellowish or amber in color and is transparent. Dies can be used to tint the plastic, but this seldom gives you the affect you need. To make sure your replicated parts match original items on your dash, take an original to an automotive paint store and have them mix up a pint of matching enamel.
And while you are there pick up a little reducer, some flexing agent and a little clear enamel. Prime the parts, and then shoot on a coat of enamel. Let that flash over, then mix some clear into the color paint and shoot the parts again for a translucent plastic look. Once parts have cured they can be buffed and polished by hand.
If you need to drill holes in your plastic parts, use a drill press if possible, and run the drill at low speed so as not to overheat and melt the plastic. Threads can also be cut into plastic items, but it is a good idea to also use a little super glue inside to help such knobs stay in place.
Plaster of Paris molds can also be made for plastic parts, though they too need to be given a coat of shellac and a squirt or two of mold release. Until rubber mold-making compound came along, plaster of Paris was the mainstay of mold-making for years, but it has since become less popular due to its rigidity and fragility.
As a final note, you may want to make extra parts and place an ad in the club magazine for your marque. Chances are other restorers are having a hard time finding replacements for the same items. With some sales you might even be able to pay for your time and materials, and you may help save other classics in the process.


