
Even "Simple" Projects Have Their Challenges
A Team of Restorers Found Obstacles and Solutions As They Worked With a ’53 Pickup’s Brakes and Rear Axle.
We’ve all heard people say that “it’s easier to take an old vehicle apart than it is to put it back together.” We’ve also all heard the advice that it’s “best to do it right the first time.” While we agree with these words of wisdom, experience tells us that the facts can be a little different when it comes to working on older vehicles.
To illustrate this viewpoint, we’re going to go over some of the trials and tribulations we ran into while servicing the rear axle and front and rear brakes on a 1953 Dodge B-4 ½-ton pickup truck. This truck had been totally disassembled with every part removed from the frame, which was then cleaned up and powder coated. The goal was to turn the chassis parts into a “rolling chassis” so the truck could go to another shop for completion.
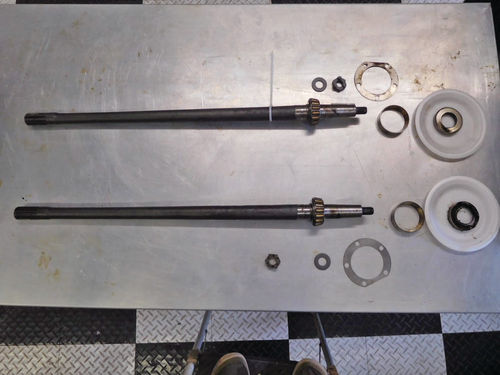
As far as the rear axles went, the aim was to pull both axle shafts out of the housings, then pull out the axle seals, then remove the bearings and races from the axles, then take the “pumpkin” apart and remove the differential, then clean everything up and then reinstall the axles with new seals, bearings, bearing races, shims and gaskets.
The front and rear brake wheel cylinders had all beensent out to the Brake & Equipment Warehouse (www.brakeplace.com) in Minneapolis to have them lined with stainless steel and professionally rebuilt. The master cylinder—not part of this article—was also relined. The original brake springs, pins, backing plates and other hardware had all been blasted or parts-washed clean and painted. New shoes with new linings were purchased from Andy Bernbaum Auto Parts (www.oldmoparts. com) in Newton, Massachusetts.
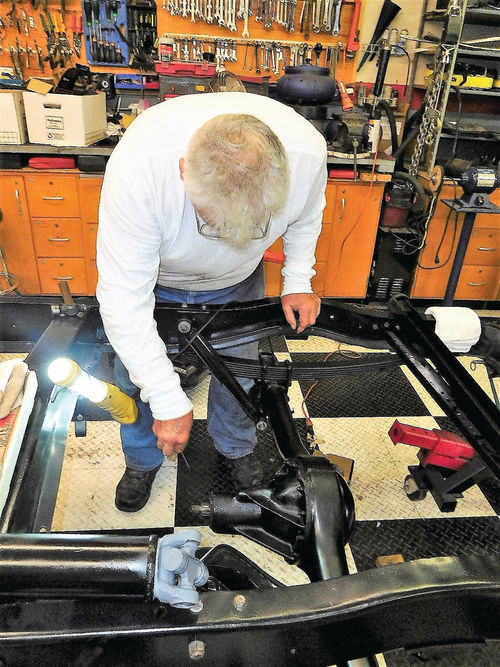
People involved in this project included me and the truck’s owner Larry Obiala, who did the bulk of the handson work. Former Fox Valley Technical College automotive technology instructor Dave Sarna and John Diermierer of John’s Custom Auto helped with advice and tools needed to extract the axle shafts out of the rear axle hosing.
On the other hand, Mother Nature and Old Man Time had teamed up to make every task a little harder to do.
Outdoor Storage Had Taken a Toll
Whoever coined the phrase “it’s easier to take an old vehicle apart than it is to put it back together” most likely never tried pulling axle shafts out of a 65-year-old Dodge Pickup. Larry had purchased the low-mileage truck (with around 20,000 miles on the odometer) in the 1970s and kept it indoors after that. However, prior to his ownership it had been stored outdoors in a fenced- in yard that had no gate the truck could go through.
From being outdoors in the heat and the cold, the 98 percent rust-free pickup still felt the effects of weather and climate. Surface corrosion formed on a few parts, seals dried out, gaskets shrunk; hardened or gelled grease became more like glue and other forms of light deterioration also took place.
After 65 years, the parts on the truck had become very comfortable in their tight “relationships” with one another and seemed to have very little inclination to come apart easily. They were literally stuck on each other.


Trying Various Approaches
Larry—who had experience with owning and working on a 1949 DeSoto (as well as other early postwar Mopars)— remembered using the brake drums to pull out the axles years ago. To do this, you put the brake drum over the wheel studs and then put the lug nuts on the end of the studs. The loose fit allows the brake drums to slide in and out on the wheel studs and hopefully function as a tool to pull out the axle bearings and bearing races. The bearings are pressed onto the axle shafts near each outer end.
Using the brake drums as a puller tool worked well when these Mopar models were new, but it did not pull the axles out of a Dodge truck that had been sitting for 35-40 years.
Dave had borrowed a slide hammertype tool that had a hook on the end. The hook could not be attached to the end of the Dodge axle. Eventually, we removed the hook and worked out a way to attach the slide hammer to the axle, but it did not generate enough force to pull out the bearing and race and remove the axle.
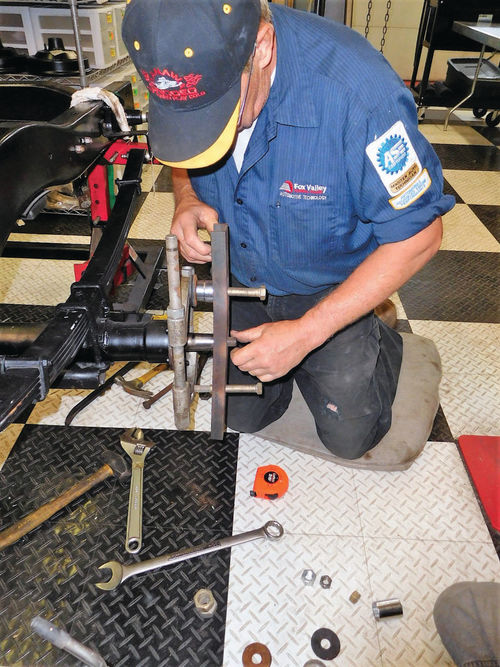
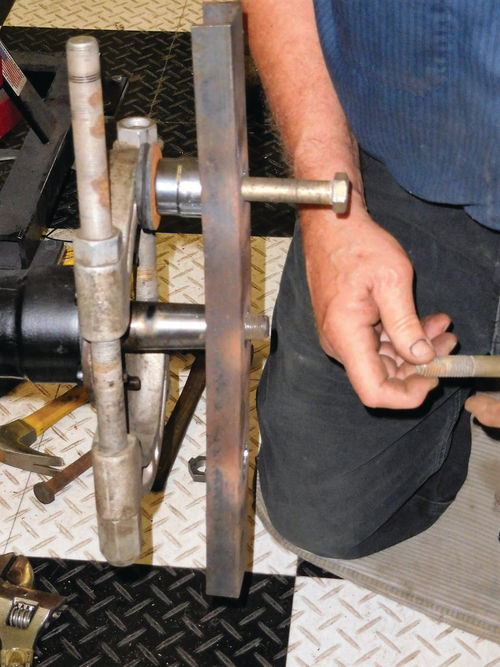
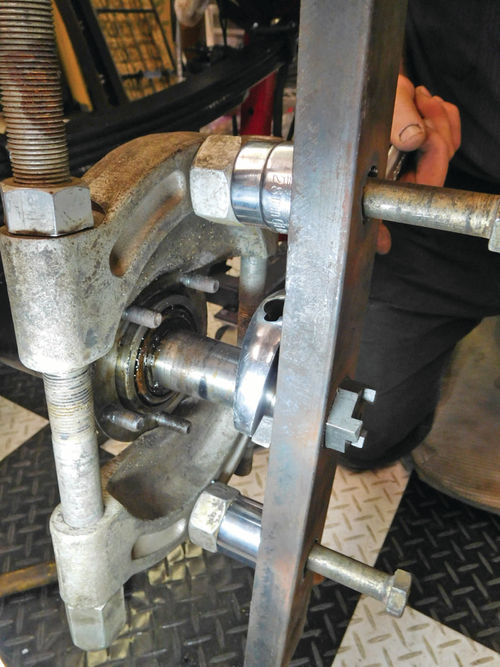
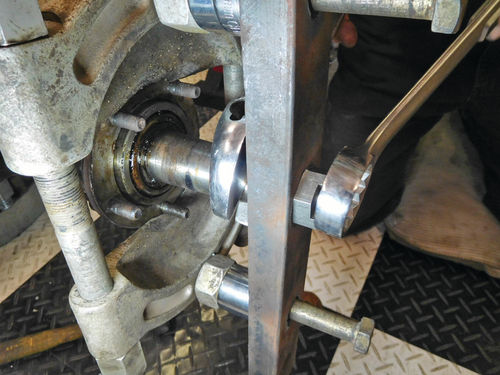
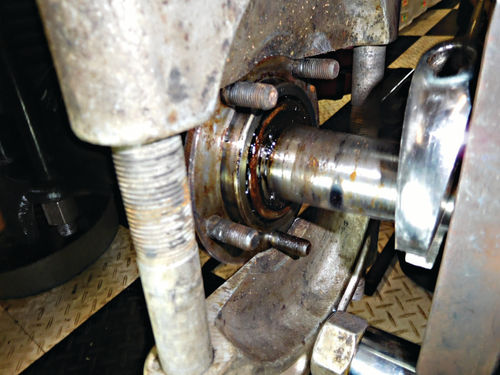
Dave went back to the drawing board and designed his own puller using a bearing splitter, a bar that he drilled several holes in and several large nuts and bolts. The bearing splitter had holes in each end for a bolt to thread into. The splitter was positioned against the end of the axle housing. The center hole in the bar was placed over the end of the axle and the castle nut was replaced on the end of the axle to hold the bar on. Then the large bolts were placed so they passed through the other (outer) holes in the bar.
Several large spacers were placed between the bar and bearing splitter, with the bolts passing through the spacers and into the holes in the bearing splitter. As the large bolts were tightened, the bar moved outward and eventually exerted enough force to pull the bearing pressed on the axle out of the housing and bring the axle along with it. With one axle removed, the puller was carried to the other side and used to pull the other axle.
A Little Patience Helped


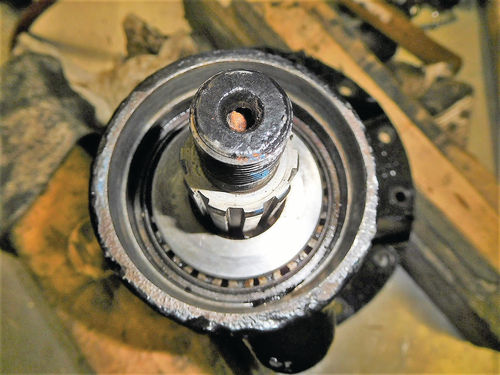
After both axles were removed, the next task was to remove the axle seals on either side. We went back to the slide hammer with the hook, with the hook being placed behind the edge of the seal. This did not work right away and it was decided to start chiseling away at the oil seal. Did we mention that the 1953 factory oil seals were a lot more robust than the seals you get today? It probably took well over an hour to pry, lever, hammer, chisel, cut and rip the old seal apart.
Larry thought the first seal removal was a rush job. Using the slide hammer with the hook and a bit more patience, he focused on pulling the seal out rather than chopping it up. He positioned the hook, gave the tool a few slams and the seal flew out. It’s hard to say whether the same approach would have worked with (and saved time on) the removal of the first seal, but we know that patience is an important thing for restorers to develop.
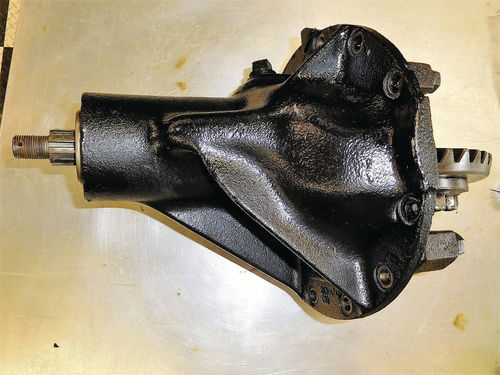
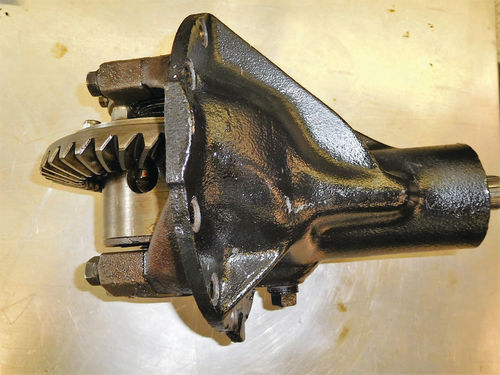
After removing the axles and cleaning them, Larry turned his attention to the differential and removing it from the “banjo.” First he drained the old lubricant. Then the nuts were removed from 11 bolts holding the differential in place. The differential and the axle housing had also been “going steady” for a long time, so it took some tapping and prying with a heavy bladed screwdriver to separate the parts. Then there was more clean-up to do, including cleaning of the differential and the inside of the pumpkin. The old cover gasket material was removed using a green rubber drill fixture with little “fingers” that’s designed for this job. We then cleaned the hard-to-get-into area with a gasket scraper.
Working With Numerous Parts Sources
Getting replacement parts was the next trial and tribulation experience. We prefer to try to get parts locally for two reasons. First, this can speed progress along. Second, prices for a “seal or bearing or gasket” are usually lower than prices for an “antique truck seal or bearing or gasket.”
You have to understand that Chrysler engineers did not design these parts for the Dodge B-4 truck. Instead, they designed the truck, then used its size and weight to select the proper existing seals, bearings and gaskets for their application.
So, chances are pretty good that seals, bearings and gaskets of similar sizes that interchange with the originals are still being made today. The trick is finding the parts numbers for the interchanges available today. The Internet can be a big help…sometimes. For instance, we were able to replace the seals that fit in the rear brake backing plates with a modern crossover by using the Rock Auto Website to get the modern part numbers that replaced the Mopar part numbers. Then we ordered those seals from the local Bumper to Bumper auto parts store where we get a trade discount.
This technique worked fine for the brake backing plate seals, but the part number we got for rear axle seals crossed over to a modern seal that was too small in diameter. In a similar situation, a helpful young man at an O’Reilly parts store found no listing in his computer for a ’53 Dodge pinion seal. He was smart enough to use Google to locate a part number that seemed to fit this application, but it turned out the part was about 3-4 times the size of the old pinion seal. We’re guessing the seal he came up with may have fit a Power Wagon or a larger size 1953 Dodge truck. O’Reilly’s did take the seal back.
Not far from our central Wisconsin shop, we’re lucky enough to have a business called Gene’s Bearings of Antigo, Wisconsin, ( ) that sells nothing but bearings and related parts.
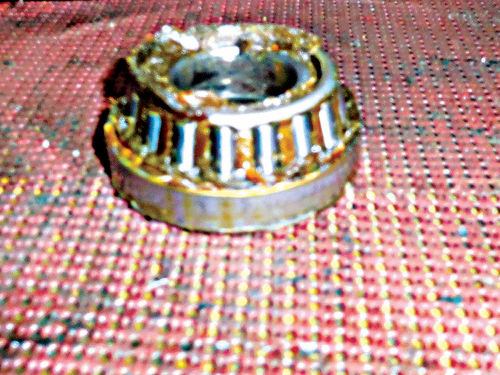


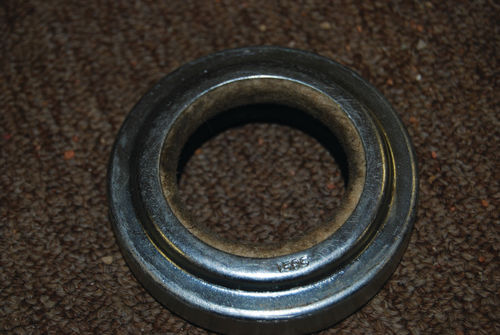
Gene’s carries bearings for everything from tractors to washing machines, so the inventory is not entirely automotive. Still, we were able to get new axle bearings and races with one phone call to Gene’s and new seals with a second call. We ordered these off the numbers on the original parts, rather than from a catalog or computer listing. We ordered the proper pinion seal from Andy Bernbaum Auto Parts.
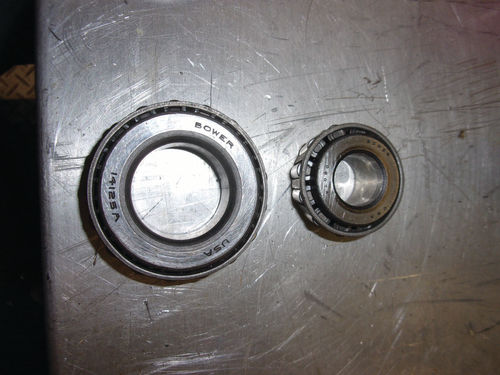
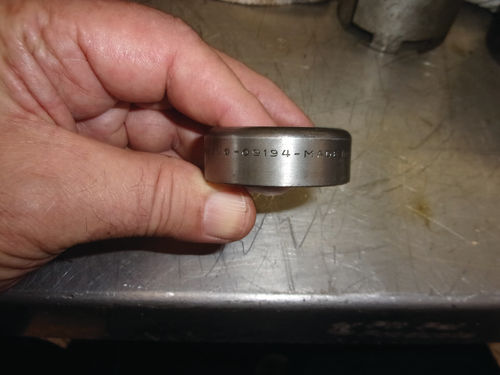
It’s interesting to note that the bearings and races obtained from Gene’s Bearings still used the part numbers we found stamped on the old bearings, which we assume were the originals from 1953. However, all of these parts were now being sourced from manufacturers in other countries. The following table tells the story:
1953 Dodge Pickup Left Front Inner and Outer Bearings and Races
Description Part No. Manufacturer Country of Origin
Original 1953 Parts
Front outer bearing No. 09074 Bower USA
Front inner bearing No. 14125A Bower USA
Front outer race No. 09194 Timken USA
Front inner race No. 14276 Timken USA
Modern Aftermarket Parts
Front outer bearing No. 09074 Amcan China
Front inner bearing No. 14125A Amcan China
Front outer race No. 09194 SKF Sweden
Front inner race No. 14276 Amcan China
Sometimes differences in the design and construction of the seals will be noticed. For instance, many of the original parts use rawhide as the oil seal, whereas the newer parts will use rubber or neoprene to seal out oil.
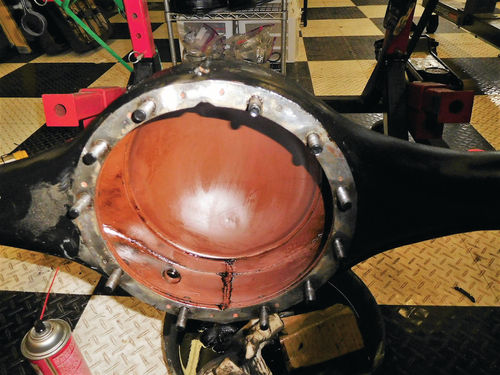
Locating the gasket that goes between the flange on the differential and the rear axle “pumpkin” was another trial and tribulation. We looked up the part number on Rock Auto’s Website and ordered the differential gasket from a NAPA store. When the new Fel-Pro gasket came, the sticker on it said it was for 1957-up Dodge trucks with 10 bolt holes. As we already mentioned, our pumpkin had 11 bolts. It was not the gasket we needed.
We contacted John Geidl of Minnesota ( ), who sells new and used parts for 1936-71 Dodge trucks. He confirmed that the size of Dodge truck differentials changed in 1957 and said to try Midwest Military (www.midwestmilitary.com) of Prior Lake, Minnesota, a source of Mopar parts that also have military applications. Midwest Military recommended Vintage Power Wagons (www.vintagepowerwagons.com) of Fairfield, Iowa. When all was said and done,we ordered a differential gasket from Andy Bernbaum Auto Parts. They counted 11 holes. It arrived two days later and fit perfectly.
At this point the only thing we hadn’t found were new front axle seals. To be honest, we had planned to reuse the old ones, but since all of the other front and rear seals were new, we figured it was best to replace these with new as well. An Internet search by type of partneeded turned up a supplier called DCM Classics (www.dcmclassics.com) of Zeeland, Michigan. “DCM” stands for “Dodge Central Michigan” which had this part at a very reasonable price. DCM also stocks a lot of other New Old Stock Dodge truck parts.
Insight For the Next Step
With his experience with Mopar repairs, Larry knew a few interesting steps when it came to putting together Mopar brakes. The Mopar anchor pins have little arrows on them to show which way they should be oriented. The front brakes for the ’53 Dodge truck had already been built, but the arrows weren’t pointing the right way and the eccentrics were positioned incorrectly. In addition, there were extra parts—washers—that had not been installed on each side. These go between the brake shoe and the backing plate and hold the shoes out slightly so that they line up properly.
With some minor disassembly and adjusting, Larry got the washers installed and corrected the orientation of the anchor pins and eccentrics. The eccentrics are used to do final adjustment of the brakes on the vehicle. We should point out that Mopar front and rear brakes of this era differ in the number of wheel cylinders used and the sizes of the cylinders.
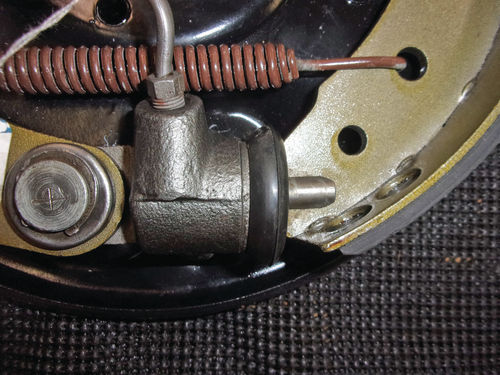
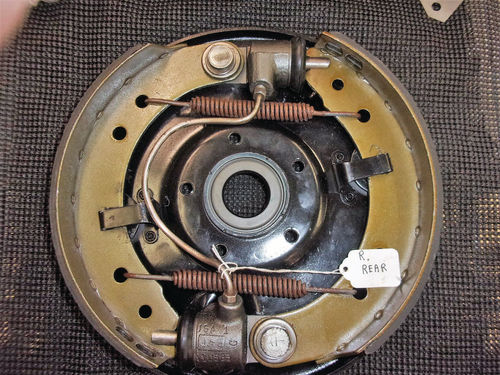
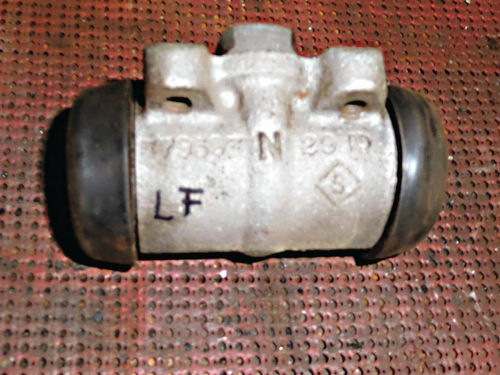
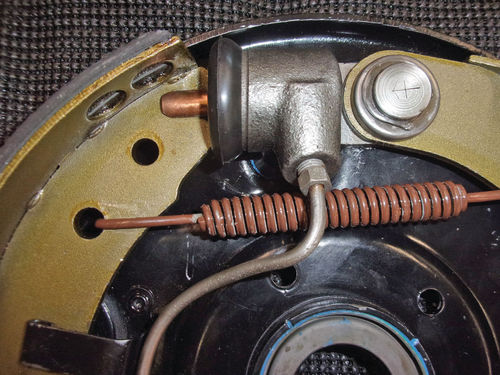
The front brakes have one larger wheel cylinder at the top of the backing plate. The rear brakes have two smaller wheel cylinders on opposite ends of the backing plate. A tube running between the two wheel cylinders carries brake fluid to the lower one.
Larry did an excellent job building both of the rear brake assemblies with the anchor pin arrows pointing in the right direction and the eccentrics properly set. As we noted, the wheel cylinders had been sent out to be relined with stainless steel. The links that sit between the ends of the cylinders and the brake shoes were not sent out. We also photographed all of the pieces we sent away so that we had a photographic inventory of parts. We thought we had taken every precaution; so what could go wrong…
Wait, What Happened Here?
Then those old trials and tribulations raised their ugly heads again. Larry had both rear brake assemblies built and we realized that the shoes on one assembly were too far out against the edge of the backing plate. This meant that the brake drum would not fit over the shoes because they were so far out. At first, this was a real head scratcher. We knew everything was done “by the book,” but something was wrong. Where did we mess up?
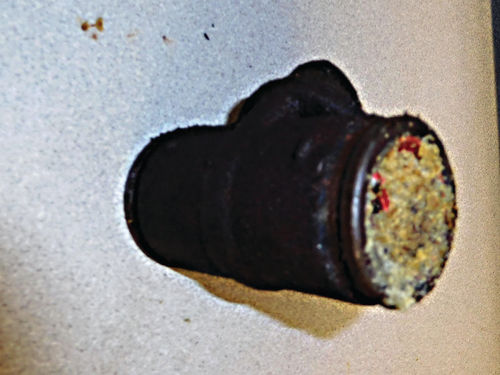
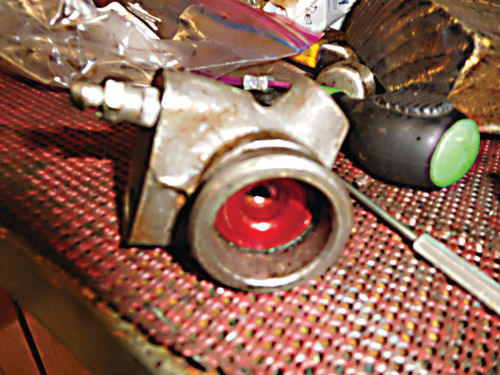
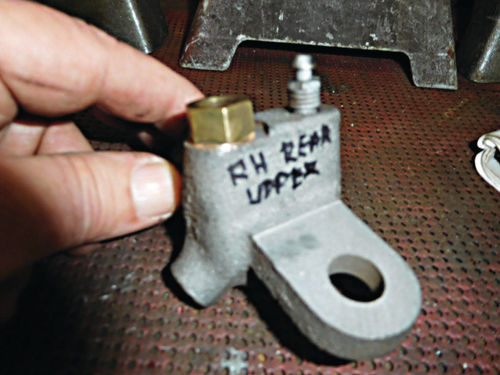
We looked and looked at the assembled parts. Then we noticed that one of the links was brass and the other three were steel. We pulled the rubber end seals off the cylinders and noticed that the pistons on three of them were a metallic red color, but the fourth one was steel colored.
The metallic red pistons sat deeper in the bores, while the wheel cylinder with the steel-colored piston had a shallower bore. That shallower bore was designed to take the brass link, which was shorter than the three steel links.
Apparently, one of the wheel cylinders was a replacement part and probably an aftermarket part from years ago. Since we had not picked up on the design difference, we reassembled the rear brakes with the shorter brass link going into one of the deeper bores. This resulted in a longer steel link going into the cylinder with the shallower bore (the one with the steel-colored piston). As a result, the longer link in the shallower bore was holding the brake shoe too far out from the wheel cylinder to allow the brake drum to fit over the assembly. Both brake assemblies had to be taken apart so that we could switch parts around and put the brass link in the cylinder with the shallower bore.
From now on we will look more closely at our disassembly photos and check for any differences in the parts. If we see a difference, even if it seems inconsequential, we’ll put more thought into why the difference exists and how it’s going to affect the reassembly process. Remember, everything was working before we took the brakes apart and we were careful to put all the cylinders back in their proper positions. To a large degree, they all looked similar, too. We simply overlooked the fact that one link was shorter.
Plan For Parts and Tools Before Starting
These are some of the trials and tribulations you can run into while doing restoration jobs that are typically “simple” tasks. We’re sure that you’ve encountered your own bumps in the road.
To make your jobs go smoother, you can spend more time identifying correct parts, ordering them early and comparing them to the parts you are taking off the vehicle to see if there are critical differences that will affect the way they function. Spend time going over the disassembly photos you take and looking for anything that stands out as being different. If you spot a difference, give some thought to why it exists and how to deal with it.
Also, think about what tools you’re going to need and have them ready when you start the job. Many tools that you may not own—say a hub puller for example—can be borrowed for free from auto parts stores such as O’Reilly’s.
The more things you deal with in advance of the project, the fewer trials and tribulations you’ll encounter as the work gets done.


