How -to Replacing a Headliner, Pt. 1
The Thought of Installing a New One Can Be a Daunting Idea. So Consider These Tips Before You Start.
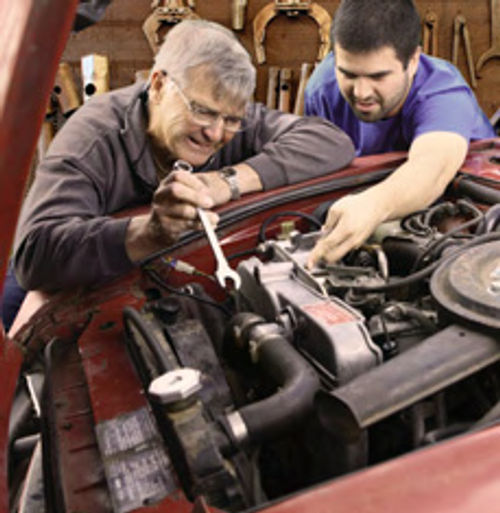
FEW THINGS ARE more annoying when you’re out cruising than a sagging headliner flapping around above your head or a snowstorm of deteriorated foam coming down on you. And there are few automotive jobs more intimidating than hanging your own new headliner. The Material cost of this job is often under $100, but the labor cost of having your local interior shop install it for you can easily eclipse four or five times that amount.
However, a few handy tools, a day of your time, and some serious attention to detail can save you some money and get you over your fear of headliners.
They Come In Two Styles
There basically have been two generic styles of headliner in use for the past 60 years or so.
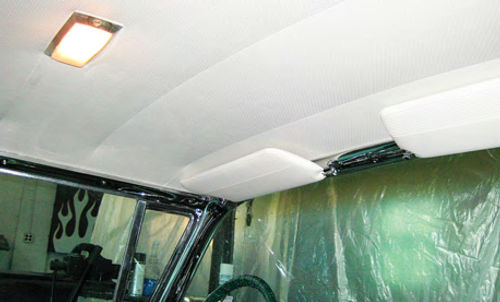
Up until the mid- to late-’60s, most vehicles used a bow-style headliner and that’s probably what most of us encounter during our restoration projects. After that, the manufacturers went to a solid board-style headliner which consisted of material glued directly to a rigid piece of cardboard or plastic that was designed to fit the contours of your vehicle’s roof and be retained with some clips and trim. The former usually is the dreaded project we do not want to take on ourselves. But follow along here and learn the steps associated with replacing your own bow-style headliner.
Apply Some Outdoor or Indoor Heat
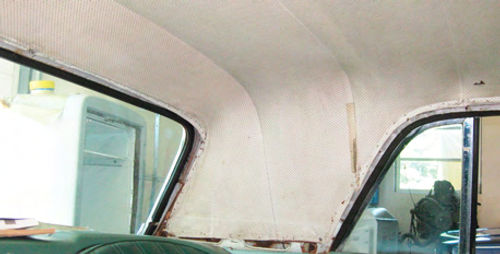
After many years of service, your vehicle’s headliner material may be stained, torn or just brittle and flaking apart. The good news is that most of the aftermarket suppliers for your favorite make should offer a pre-packaged replacement that is already cut to fit into your project. Simply pick your color of choice and order it up.
Once it arrives, the first thing you’ll want to do is open it up and, if possible, hang it outside in the sun on a warm day. This will help work out a lot of the wrinkles that were pressed into the material while it was packaged as well as allow it to stretch a little, something that will aidin the installation later.
You also can use a hair dryer or hand- held steamer to work out some of the stubborn wrinkles. Either one is avail- able at many local retail outlets for around $25.
Pull the Trim and Accessories
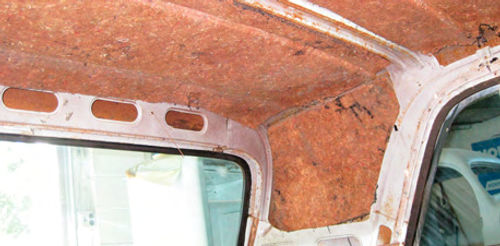
While your new headliner is baking in the sun, you can begin your removal of the old one. If there is a lot of old foam falling from the ceiling you may want to cover your interior and carpet with some blankets or sheets to protect them.
Now you can begin by taking off all the trim and accessories around the perimeter of your headliner as well as anything in the middle. This includes things like dome lights, coat hooks, rearview mirrors, sun visor mounts, and, of course, the framing around the roof and your windows. If any of your trim is in need of plating or polishing, this is a great excuse to finally do it before you put it back up.
Removing the Old Liner
Your headliner can be fastened around the perimeter in three basic ways: staples/tacks, barbed strips, or glue. Begin undoing the perimeter of the old material while being careful to not break any barbed strips by bending them too much. If your headliner is glued in place, a little bit of lacquer thinner on a rag can help loosen the bond. Try to clean off any residue left behind after the material has been removed as well.
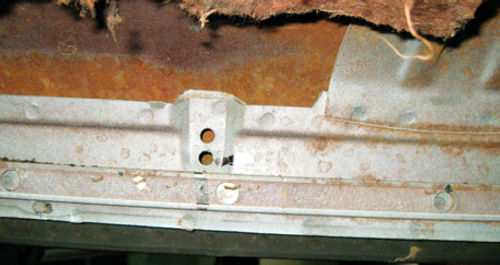
Also, if your particular vehicle uses tacks or staples, pay attention to the condition of the tacking strips they go into. These are very dense strips that are attached to the sheet metal with screws or brackets and over time they can become brittle as well. Replace them if necessary.
Working With the Bows
Now comes one of the most important parts of the entire job, removing the headliner bows from the roof. Keep in mind that each bow is unique and must go back in the same position.
The bows are all different shapes and lengths and your headliner will absolutely not fit right if they are mixed up. You can tag them with numbers starting from the front and moving your way to the back or you can remove all of the ends from their retainers and pull the whole bow and material assembly out as a whole and transfer each one to the new material one at a time.
I like to use a marker to mark the holes that each bow was in as there often is more than one in each location and usually you want to go back into the same one. Sometimes, however, you may need to move them up or down a hole to keep the headliner tight against the roof.

Finally, when removing the last bow look for two short wires coming from above the back window and looping around that last bow. You need to release these wires before you can pull that bow out.
If your particular project has wind lac- ing around the windows this would be the time to replace it as you usually can only access its fasteners while the head- liner is out.
Insert Your Bows In the Listings
Turn your attention back to the new material that has been baking out in the sun and hopefully is close to wrinkle- free at this point. You will want to begin installing your bows into this new head- liner. There are pockets sewn to the back of the seams running horizontally across the car that the bows slide through. These little muslin pockets are called “listings.” Slide each bow into its correct listing.
Sometimes you may need to trim a little bit of material off the ends of the listings to allow the bow to protrude properly. With the material still hanging, use a tape measure or yardstick and determine the centerline of the headliner from front to back. Use a marker to put a small mark in the center at the front and back. Be sure the mark is in an area that will either be trimmed off or hidden after installation.
Put the Bows Back In Place
Now move your new bow-and-material assembly into the car and begin reinstalling the bows in their proper locating holes. Start with the center bow and work your way forward and back, completing them all. Once the material is hanging inside the car, adjust it side-to- side on the bows to make sure your centerline marks line up with the actual center of your front and rear windows. Failure to do this can lead to big problems at the end of the job as the manufacturers do not give you much along the lines of excess material and you can end up short in your sail panels. After you are happy with the centering and all the bows are in place, reattach the two wire hooks at the rear window area to the last bow. The rest of the job will now build off of this anchoring point.
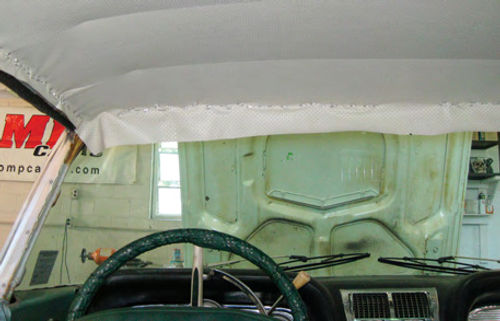
Time to Attach the Material
To start reattaching the perimeter, you should gently pull the headliner from back to front, removing all of the slack and attach it at the front.
In this case, my vehicle used staples so I put just a handful of staples across the front to hold it tight. This leaves me the option to remove them if any final adjustments are necessary.
At this point you will likely have some wrinkles going from front to back in the material. Carefully work them out from the center to the edges at the bows. Be mindful of the overall alignment of the headliner front to back while you do this. Now, starting just in front of the last bow, begin attaching the material along the sides pulling it tight to remove any creases and wrinkles.
I prefer to work on one section between bows at a time doing both the left- and right-hand sides of the perimeter between each one instead of going up one entire side first and then the other. If you do it one whole side at a time it’s more difficult to remove any wrinkles that are left toward the center of the headliner without going back and undoing the other side.
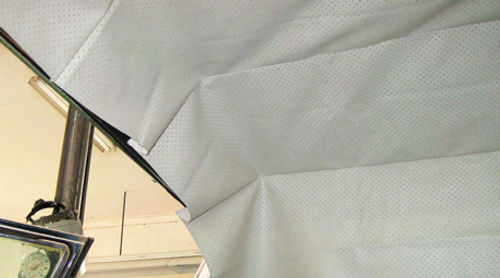
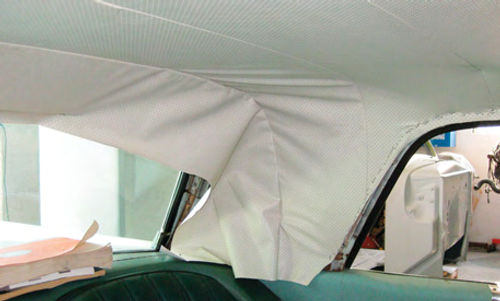
Working With the Back Window and Sail Panels
Once you have worked your way up both sides and you are happy with the way the ceiling looks front-to-back, you can read just the front if necessary or just secure it better if that’s all it takes.
Then it’s time to move to the back window area and the sail panels if your vehicle has them.
These two areas must be done last and they are often the most difficult.
Begin by pulling the top section back and attaching it across the top of the back window working all the way out until you begin to curve down and around the window. Finally, you can work the sail panels into place pulling them diagonally to remove any creases and wrinkles and fastening them at the edges.
If you are unhappy with how a section looks you can always undo it and work it some more. Time and patience will pay off big here.

Trim the Excess…and Go for a Drive
Now that the headliner is completely fastened around, there are a few things you can do to make it look even better. Since the material was out in the sun before installation and hopefully stretched some, I like to let the car sit for a day or two.
After a few nights of cooler weather the material will shrink down a bit and tighten up some of the wrinkles you may still have. You can go back yet again and rework any sections you’re still not satisfied with at that point. Also, any creases from shipping or other wrinkles can be worked out with your hair dryer or hand-held steamer as was done back in the beginning of the process. Just be careful not to stay on one spot too long or you may damage the headliner material.
Finally, after you are satisfied with the fit of your new headliner you need to go around with a pair of scissors or a razor blade and trim off the excess material. Generally speaking, leaving about 1/2-3/4” of material hanging past your fasteners should be adequate.
Then all that’s left is to reinstall all of your trim and get back out on the road with the wind—and not your headliner— in your hair. n
Next month, we’ll replace a board headliner.