How -to Refinishing Fiberglass Vehicles, Pt. 1
A New Fiberglass Body Will Likely Have Pinholes and Bumps. Here’s How You Can Handle Those Surface Problems.
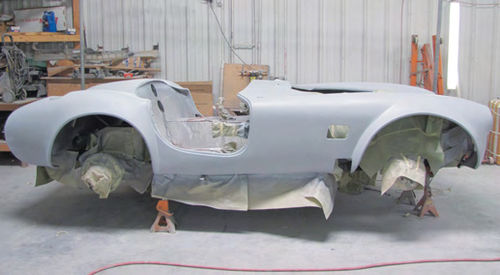
ALL FIBERGLASS REPLICA cars have one thing in common: The body, when it arrives in your shop, is anything but ready to paint. Parts such as the doors, hood, and deck lid often don’t line up and the body itself is usually bumpy, wavy, covered with teeny tiny pinholes, and occasionally pocked with small air bubbles.
Certainly you can sand and trim on the edges of doors, hood and deck lid until you achieve a good fit.But what you can’t do is sand and trim on the body to get rid of the bumps, waves, pinholes and bubbles. To do that, you have to apply a little fiberglass and a little plastic body filler, then coverthat with a lot of primer.
If you break down fiberglass and plastic body filler into their basic components, you will find they both have one principal component in common, polyester resin. What that means is that these two products are distant cousins and should you need to go this route it is perfectly safe to apply plastic body filler directly over a properly sanded fiberglass gel coat. Sanded with what? My preference is 80-grit sandpaper. It won’t remove the gel coat, but it will leave it rough enough to accept anything you might want to apply over it.
There’s a Time and Place for Epoxy
In the old days that is exactly how we did things, we sanded new fiberglass bodies with 80-grit on a DA sander to roughen up the gel coat then used plastic body filler to level the bumps and waves. After that we applied at least three coats of primer/surfacer before blocking the body smooth.
That’s still basically the same process that is used today with one exception. After the initial sanding with 80-grit and before applying any plastic body filler, the fiberglass body gets a coat of epoxy.
Why add epoxy when there is no need for rust prevention? I have three reasons. First, both fiberglass and plastic body filler are porous. That means moisture could wick through the fiberglass and into the plastic body filler causing any paint products I apply over the filler to delaminate. Epoxy will stop moisture from reaching the filler. Second, fiberglass gel coats are notoriously full of pinholes, you’ll see what I’m talking about a little later, and epoxy will fill a lot of those holes. Third, epoxy promotes adhesion to anything applied over it.
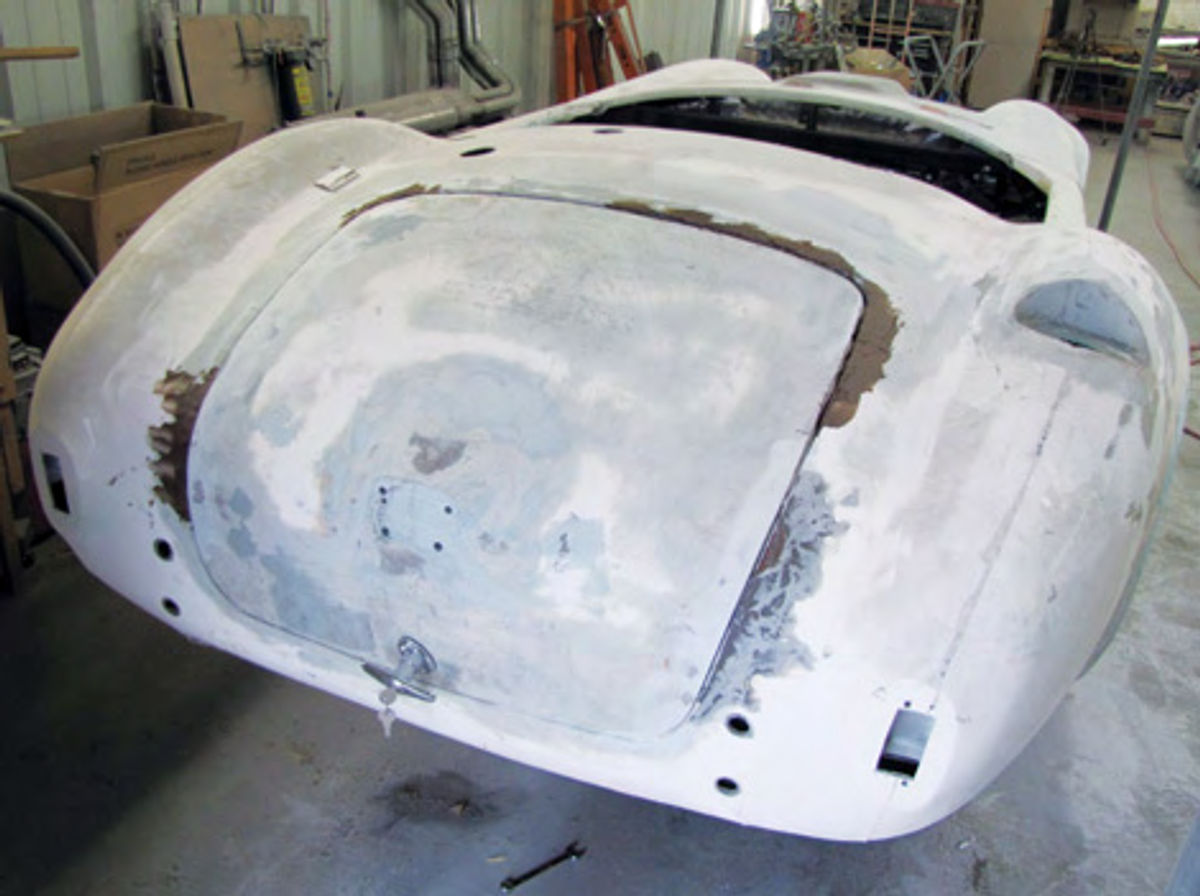
Of course, there are exceptions to everything I think ought to be a firm and fast rule (Photo 1). Notice here that I’ve done some extensive fiberglass repair work around the deck lid opening. Also notice that at this point in the build the body has not been covered with a coat of epoxy. The deck lid does have a coat of epoxy and that allowed me to take care of some needed plastic body filler repair work to help bring this panel into alignment with the body.
The repairs visible around the deck lid opening were all made to the fiberglass and that meant removing the gel coat to get down to the fiberglass. When you have to go this deep with a fiberglass repair, it doesn’t make sense to first coat the area with epoxy.
A last thing to note here is the installation of the deck lid latch handle.
Everything from the headlights, park lights, tail lights, rear license plate holder, push bars, and even the deck lid latch have been mounted to check the fit of each component. Should a mounting issue for any of these pieces arise it is best that issue be addressed before the car gets painted.
Moving ahead to the point where all of the bolt-on components such as the doors, deck and hood have been checked for fit and any adjustments or repairs made, the fiberglass body can be covered with two coats of epoxy.
Note: To thoroughly clean the fiberglass body before applying the epoxy I cleaned the surface using Eastwood PRE Painting Prep #10041Z. This is an aerosol degreaser that is sprayed on and immediately wiped off using a clean, dry cloth. Because degreaser products tend to penetrate the porous surface of most fiberglass panels it is extremely important to allow the solvents in the degreaser to escape for a minimum of one hour before applying the initial coat of epoxy.
Sanding Those Contoured Surfaces
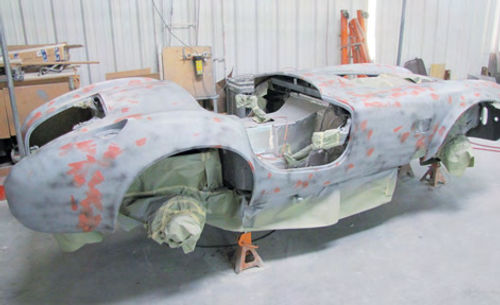
Those coats were allowed to cure overnight before being lightly sanded with 180-grit to provide a rougher gripping surface for the plastic body filler that’s applied next. A rougher surface equals better adhesion (Photo 2).
What did I use to sand and smooth the plastic body filler? This body has two panels with flat surfaces, the right and left side panels forward of the door openings. Everything else about this ride is curved and contoured. My choice of sanding blocks is the Eastwood Flexible Sander Kit #20327.This kit contains three sanders, 15-, 21-, and 27-inches long. They are exceedingly flexible and work great for sanding all of the curved surfaces this ride presents.
For sandpaper I opted for Eastwood #31373P40-gritroll,#31375P80-gritroll, #19627 P180-grit roll, and #31376 P320- grit roll.What does the “P” stand for? The letter “P” indicates these sandpapers are European grits, which are slightly coarser than American sandpapers.
To complete the plastic body filler repair work I Started with the 40-grit, followed that with 80-grit, and finished with 180-grit. The 320-grit will be used to block sand the primer coats.
From here the plan calls for applying a final coat of epoxy, followed immediately with three coats of urethane primer/surfacer, followed later by three more coats of urethane primer/surfacer, followed even later by a seal coat, followed immediately after that by at least three coats of single-stage urethane paint, followed by three more coats of an accent color which will also be a single-stage urethane paint.
What brand of refinishing products will I be using?
In this case I elected to go with Eastwood’s line of painting products starting with Eastwood Epoxy Primer #50244ZP and #50245ZP Catalyst, Eastwood 2K Urethane Primer #50240ZP and Activator #50241ZP, Eastwood Electric Yellow #50215ZP and Activator #21856ZP, and Eastwood Chop Top Silver Metallic #50211ZP and Activator #21856ZP.
Note: The seal coat will be a single coat of Eastwood Epoxy Primer with the 10% addition of#50111ZP Universal Urethane Reducer to allow the coat to lay smoother.
The Difficult Part
The problem with working with new fiberglass bodies covered with a gel coat is that even though these bodies appear to be nice and slick that is rarely the case. Gel coats are sprayed into molds then immediately covered with fiberglass mat and resin (generically speaking). The heat generated from this process can cause pinholes and air bubbles in the gel coat and it is those issues, aside from the bumps and waves, which must be dealt with before painting.

That’s where the problem deepens. Pinholes in any substrate can be very difficult to find and fill. Pinholes in white fiberglass gel coats, the substrate I’m dealing with here, can be almost impossible to find and fill.
To find and fill the pinholes, I started by applying that initial coat of epoxy I talked about earlier. Epoxy is capable of filling some of the pinholes, but nowhere near all of them.
Of course, the application of plastic body filler where needed over the layer of epoxy helped fill some of the remaining pinholes, but even this process didn’t get them all.
In fact, by the time the plastic body filler repair work was completed that process may have created as many pinholes as it eliminated. What caused the pinholes in the filler? High ambient temperatures, 90° F plus, and high humidity, 70% plus.
The second coat of epoxy, which I applied after completing the plastic body repair work and sanding the entire body one last time using 180-grit sandpaper, will help remove some more of those pinholes; as will the three coats of urethane primer/surfacer applied next. It just won’t get them all. That brings me to the next step.
Making Those Stubborn Pinholes Go Away
This is what I’m talking about when I say fiberglass gel coats have a tendency to pinhole (Photo 3). What you are seeing here is my first attempt to find and fill the mass of pinholes that only became obvious once the car was primed with the urethane primer/surfacer. What’s the red-colored stuff I’m using to fill the pinholes? This is 3M #5972 Super Red Putty. This product is similar to the acrylic based red putty we used back in the ’70s when we used lacquer-based primer/surfacers. The main difference between this putty and the old stuff(3M #5966) is that it doesn’t shrink as much as the old stuff when it dries.
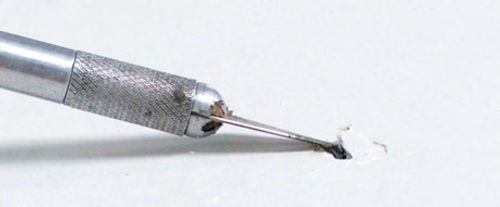
This is not a product you will see me use very often. It isn’t a catalyzed product and even though it is formulated for minimal shrinkage it will still tend to shrink a little. Something that might not be obvious in the photo is that I’ve applied this product as thinly as possible. The thinner it is applied the quicker it dries and the less it shrinks.
The reason I opted to use the 3M Super Red Putty is it can be applied directly over fresh primer; that is, primer that has cured for less than two hours, without having to sand the primer to gain better adhesion.
How does it sand? At this point in the process I’m sanding with 180-grit sandpaper. The Super Red Putty sands easily, powders quickly, and doesn’t clog my sandpaper.
This method is a departure from the way you’ve seen me do things in the past so it is very important to understand what I’m Doing and why I’m Doing it this way. I’ve applied the Super Red Putty over the fresh primer because this will be my best opportunity to find and fill the pinholes. The gray primer helps the darker pinholes to stand out.
I could use a guide coat to help locate the pinholes as I sand, but should I elect to go that route and not apply the putty, the primer dust from sanding will fill many of the pinholes and hide them from view. This hiding effect will happen whether I dry sand or wet sand the primer/surfacer.
Won’t I be able to come back and find any remaining pinholes after the body has been block sanded and cleaned? Not necessarily. Pinholes have a way of filling with primer dust and staying hidden until the solvents in the top coats concentrate within the trapped primer dust and finally erupt as the solvents work their way toward the surface. When that happens the pinholes are once again exposed. That may seem a little strange, but consider the number of times you may have found open pinholes in a completed finish and wondered where they came from and how you missed them. Now you know.
Dealing With Air Bubbles
Air bubbles in fiberglass nearly always form between the gel coat and the layers of fiberglass mat. They are easy to recognize because they form as a soft bump on the surface. The problem with air bubbles is that, like pinholes, they often don’t show themselves until after the vehicle has been primed. I think what happens is that the solvents in the primer penetrate the gel coat and accumulate inside an air bubble causing it to swell slightly. That swelling is what you see when you find an air bubble.
Air bubbles come in all sizes(Photo 4). This one happens to be less than a half inch in diameter. As you can see, the gel coat has delaminated from the fiberglass mat underneath and it doesn’t take much to break this bubble open.
So what do you do to fix a problem like this? First off, you do exactly as I did, pick the cap off of the bubble to see what lies beneath. Am I looking for anything in particular? Yes, I am. I want to know that the fiberglass underneath the gel coat cap is hard and cured. If so, all I need to do is grind back the gel coat from around the bubble and fill the area with Evercoat Fiber Resin Jelly #473. This product is exactly as the name implies. It is a heavy body fiberglass product made specifically for repairing flaws in fiberglass or bonding fiberglass panels together.
To grind the area my preference is to use a 36-grit 3M Roloc #1407 disc on a die grinder and grind away enough gel coat to triple the size of the original bubble. This ensures that I’ve removed all of the affected area and gives me a slightly larger repair area to fill with fiber jelly. A larger repair area ensures that the repair can be feathered into the surrounding gel coat for a completely invisible repair. Sand the cured jelly with 80-grit sandpaper before priming.
What if the fiberglass underneath the gel coat isn’t cured? In that case you will need to grind the repair area back until you find hard fiberglass then patch the repair with fiberglass cloth and resin. What might cause the fiberglass to not harden? A flaw during manufacture is a good possibility.
The Second Coat of Primer
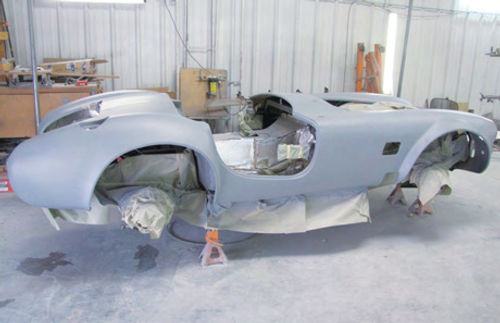
With a little luck all of the imperfections have been found and fixed using the Super Red Putty and I can make a second application of primer. I’m still applying three coats because I need the buildup for block sanding (Photo 5). I’ll add a guide coat of aerosol flat black to help highlight anything that I might have missed on the first go-around. What could I have missed? Believe it or not I still fear the pinhole issue. They’re small, difficult to see, and have a way of hanging around until the bitter end.
I’m also switching over to 320-grit sandpaper, Eastwood #31376, because I want to achieve a surface smooth enough to be seal coated. That isn’t the plan, adding the seal coat, but I need the surface of this ride as near to perfection as I can get it, as I’ll explain in a moment. The smoother the surface the more the imperfections such as missed bumps or waves will show up. I don’t plan on finding any.
What happens if I do find a bump or a wave? Sadly, it is back to plastic body filler and more primer. Just think of it as what you have to do to get it right and the extra work doesn’t seem so tiring.
As you can see, I’m still having issues with pinholes, just not as bad this time (Photo 6). Recall I said it sometimes takes an application of primer to get pinholes to expose themselves? That is what has happened here. Somewhere, somehow during the first go-around I missed these pinholes. The remedy, of course, is to apply more red putty and fill them.
What are the blotchy spots all about? These are areas where I sanded through my second application of primer/surfacer and exposed the epoxy coat underneath. That doesn’t upset me at all. In fact I’m tickled to see the epoxy. That tells me that even after six total coats my primer/ surfacer layer is extremely thin and that’s the way I like it. How come? Primer/surfacer coats are soft. The less buildup, the stronger my final finish.
Time for Some Wet Sanding
At last I can see the light at the end of the tunnel (Photo 7). I’ve made all of the necessary repairs to the body and filled every pinhole and flaw I could find. Here you can see I’ve made yet another application of primer. Only this time I put down a single coat.
Why only one coat? I’m done with the block sanding and I’m done with finding and filling pinholes. This final coat of primer accomplishes only one task, it gives me an almost perfect surface.

To get the surface almost perfect I’m going to lightly sand this coat of primer using Eastwood #31377 P400-grit sandpaper on a short block and I’m going to sand it wet. Why wet? A400-grits and paper used dry to sand primer will clog faster than corn husk down the kitchen sink. A little water will keep the sandpaper clean and cut my sanding time in half.
Before I pick up this project again next month I’ll accomplish that wet sanding then remove all of the masking paper visible in the various photographs of the car before giving it a good cleaning with a pressure washer.
After that I’ll mask off the car once again as I prep it for color. Why not leave the masking paper in place? It is covered with over spray and is hiding who knows what kinds of trash. No way do I want this stuff anywhere near the car when I’m ready to spray color. Got a question? Send it along.
Resources
LPL Body Works, LLC
5815 Contented Lane
Amarillo, TX 79109
Body and paint repair DVD series
The Eastwood Company
26 Shoemaker Rd.
Pottstown, PA 19464
Automotive restoration tools and supplies


