
Battery & Starter Troubleshooting, Pt. 2
Continuing On, We’ll Check the Starter’s Current Draw, Then We’ll Take a Look at the Charging System.
EDITOR’S NOTE: LAST month we started a series of checks and tests to troubleshoot instances where a vehicle’s battery appears to be dead or the starter turns the engine over slowly or you hear a clicking sound when trying to start your vehicle. Possible problems we considered were 1. Poor or corroded connections at the battery and/or starter solenoid (and the condition of the cables themselves). 2. A defective (or simply worn out) battery. 3. An electrical drain, which could be an accessory staying on or an unwanted electrical ground somewhere.
This month, we’ll check for a starter with excessive current draw and a charging system problem, most typically a loose drive belt, bad voltage regulator or a malfunction in the alternator. We’ve also included some shortcut charts covering the steps taken in both parts of this series. There were six photos in last month’s installment so we’ll start here with number 7. Also, we covered five approaches to the potential problems last month, so we’re starting here with approach number 6.
6. If the battery has tested out good so far, it’s time to test the starter.
Again, the carbon pile can be used to determine the starter current draw or an induction type DC amp meter can be used.
To utilize the carbon pile for this test, disable the ignition and spin the engine over while watching a voltmeter connected to the battery. Note the voltage reading during cranking. Now with the key off, apply a load to the battery (as we did when testing the battery) until the same voltage is reached on the meter as during cranking; observe the amperage reading on the carbon pile. This equals your starter current draw. Most applications will be 175 amps or less, and a starter drawing too much current usually draws far more than what is specified in your shop manual, making it obvious.
The other method is to use an induction meter as seen in Photo #7. Clamp it over the positive battery terminal and spin the engine as described above while watching the scale on the meter. This Craftsman meter has a data hold button which will make it easier to note the reading (as well as take this photo).
Note: When performing these tests, to avoid overheating, never spin the starter for more than 20 seconds. Half of that is more than enough to evaluate the starter. If you do reach 20 seconds, give it time to cool down if further testing is needed.
If the reading is too high and the starter spins slowly but uniformly during testing, the starter will require replacing or rebuilding, and you have found your problem.
Ignition and valve timing can also create starting problems.
If the starter spins erratically and you noticed the current draw jumps up and down from normal to high, this may be ignition timing that is too far advanced or a more serious problem such as incorrect valve timing.
Unless the engine has just been rebuilt, improper valve timing would be caused by a jump of the timing chain or belt. This usually is due to missing teeth on the rubber belt or, where a chain is used, failure of the nylon teeth on the camshaft timing gear. A mechanical check of the valve timing will be required. (We’ll cover that in a later issue.)
To determine if ignition timing is the problem, disable the ignition system by removing the coil wire, or temporarily ground the distributor side (usually the negative terminal) of the ignition coil. On HEI distributors, unplug the battery positive wire from the distributor cap. Now try and spin the engine over again. If it spins fine, you’ve found the problem.
I’ve been told that drag racers who ran extremely advanced ignition timing would use a “kill” switch to aid in startup. This switch would prevent any spark to the cylinders when the engine started spinning by grounding the ignition system. Once it was spinning pretty well, the “kill” switch would then be flipped off, allowing spark and the engine would fire up.
Taking Stock and Recharging
If you have performed steps one, two and three from last month’s article, that is, eliminated any questions with regard to battery connections being clean and secure, evaluated safety switches and the ignition switch for possible problems, and used the battery’s state of charge to help tell you about the vehicle’s electrical system, and the battery indicated less than a full charge (those equipped with an eye would be dark) we now need to determine if it has been run down from trying to start the vehicle, if there is a charging system failure, a drain on the system, or a battery failure.
So, the next step is to fully recharge the battery. If it has removable caps, make sure the liquid level is adequate by adding de-mineralized water as we mentioned earlier.
7. Recharge the battery. Your hydrometer will tell you when the battery has reached a full charge. If you are not in a rush, a slow charge is the best, but if you don’t have that kind of time, charging at a higher rate is OK, just make sure not to overheat the battery. You want to make sure the temperature stays below 125 degrees F while charging. If the case starts to feel warm to your hand, it’s best to reduce the rate of charge. If you are unable to raise the specific gravity to 1270, the battery requires replacement.
8. Inspect the charging system. We need to determine why the battery was not fully charged, so again let’s start with the simple things.
Check the alternator belt tightness and condition. You should not be able to turn the alternator pulley and see it slipping under the belt. If the pulley has a fan behind it, use it for a better grasp and see if it will turn. If so, it’s too loose and this likely is your problem.
You may have noticed that the alternator can easily be spun by hand with the belt off. This is not the case, however, when it’s energized and carrying a load.
Look at the drive belt. If it is worn or oil contaminated, it must be replaced.
Note: should you install a new belt, expect it to stretch. Depending on how much you drive, it will require re-tightening in two or three weeks.
Now that the battery has been recharged, we expect that it will start the vehicle, so let’s give it a try, but first hook up a voltmeter to the battery and make note of its reading (once it has been sitting for a while with the charger disconnected). Once started, note the reading again. Is it the same reading or did it increase? Next, let the engine run for a couple of minutes and turn on all loads—headlights with high beams, heater fan on high, wipers (unless they are vacuum), depress the brake pedal, etc. Bring the engine to a fast idle (1500- 2000 rpm) and note your voltage. With a 12-volt system you would expect to see a minimum of 13.2 volts (this will vary depending on your battery’s condition). If so, we can move on to the next step. But if both your readings are the same as before starting the vehicle, or possibly lower, there is a problem with the alternator, voltage regulator or related wiring. In some cases this may include a blown fusible link. Consult your shop manual for proper procedure to determine what has failed.
9. Testing for a drain on the battery. This is an easy task to perform, but it’s not always easy to find the source of the drain.
All loads must be off, so if there is a bulb under your hood that normally comes on, remove it. Make sure doors are closed so as not to activate your interior lights; the ignition key must be off, etc.
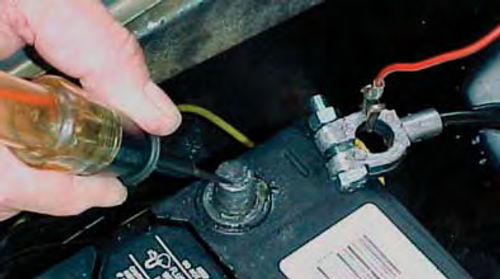
Disconnect the negative cable from the battery. Now use your test light to bridge the connection between the cable and the battery as in Photo #8. It should not light; if it does, there’s a drain. (A voltmeter can be used in place of a test light, and a reading of battery voltage indicates a drain.)
Double check everything such as the glove box or the trunk if they have lights. If everything is off, but the test light still comes on, you definitely have a drain. If the test light comes on for a moment and then goes off, you likely have a factory clock that is “pulse wound.” That is, every so many minutes a short pulse of electric current is required to wind the clock, so this would be normal and acceptable.
Now you know what the problem is, but you still have to find it. Remove one fuse at a time and each time re-check with the test light. When you have found the fuse that makes the light go out, you have at least identified the circuit with the drain. At this point a factory shop manual with a wiring diagram will tell you what the circuit supplies. Now you can trace the wiring and inspect it for an unwanted ground, or something that is on and drawing current.
If no drain on the battery was indicated, test the battery with a carbon pile load as outlined earlier in step #4. Should the battery pass the test, continue on to testing the starter current draw as discussed in step #6.
While it’s unlikely, it is possible to have more than one problem causing the hard starting condition. This usually is something you will run into more often with a neglected vehicle.
As we’ve demonstrated in this article, some special tools are needed (or are very helpful) in conducting these tests and evaluations: A battery hydrometer, your vehicle’s shop manual; battery terminal cleaners and re-shapers; voltmeter; test light; an induction ammeter and, finally, a remote start button. In addition, you will need some basic hand tools which you probably have on hand.
Basic safety items like disposable rubber gloves, eye protection or a face shield are a must, and can be found at home improvement centers or other stores that sell a range of tools (like Sears). The carbon pile is a great tool to have, but you will have to decide if the expense is justified.


