When You Need a BIG FAN For a Large Shop
This Restorer Found the Fan Parts He Needed In His Personal Salvage Pile. But That Was Just the Start of Solving Problems With This Project.

Most of us have our own unique pile of junk lying around our shops and garages. In fact, some of you may remember the former reality show that gave contestants a project to make from the parts found in a salvage yard. For me, being a citrus grower, my stash includes old farm equipment that has been retired for a variety of reasons.
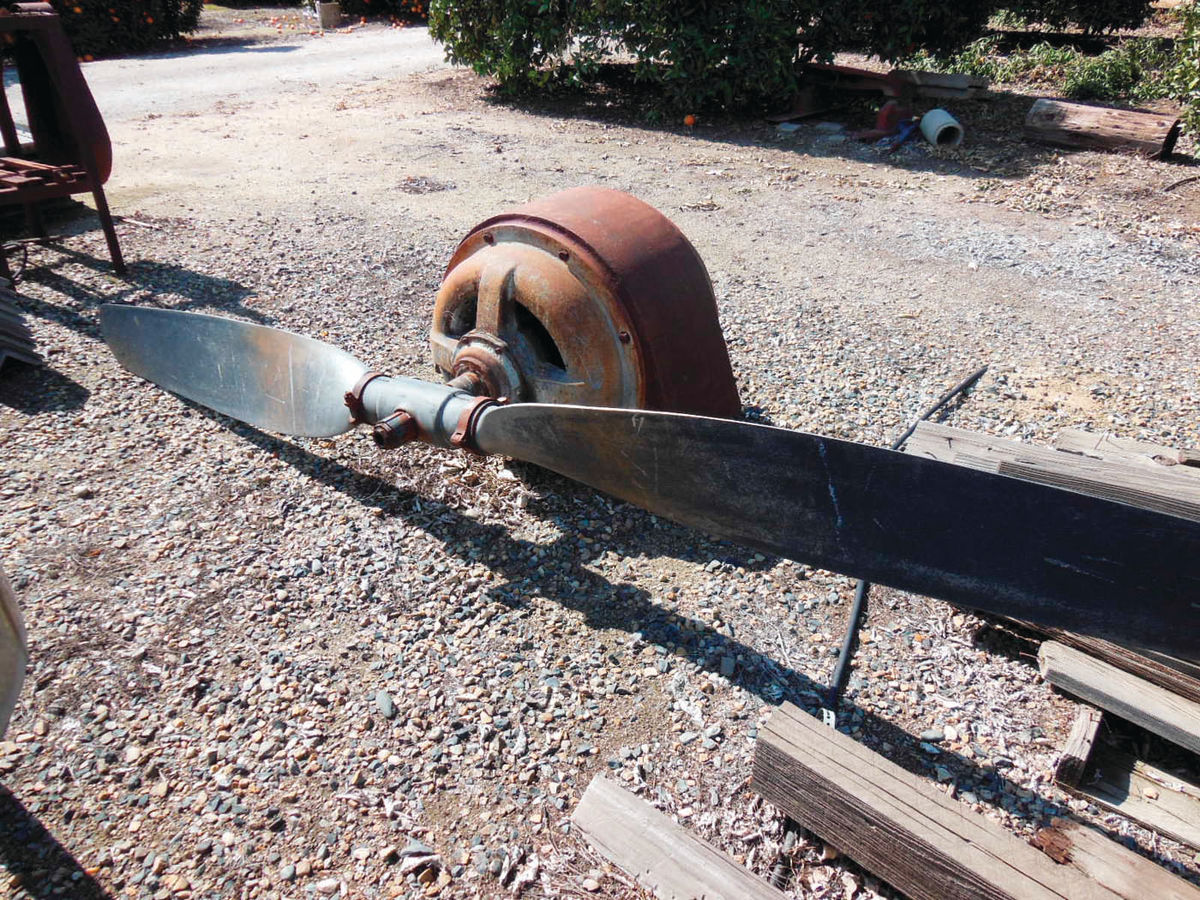
One day while walking around my yard, I looked at a WWII-vintage 75 hp electric wind machine used for frost protection. With its 11.5 ft. antique aluminum propeller, I would be hardpressed to find a better blade for a ceiling fan for my shop.
ceiling fan for my shop. I was familiar with a company called Big Ass Fans in Lexington, Kentucky, that makes industrial-size fans for large work areas. (Their company logo, by the way, features a drawing of a donkey…visit bigasssolutions.com.)
I called them up and asked if they would sell me a motor for my blade. Of course they wouldn’t as they want to sell their complete units starting around $3000.
More Parts From the Pile
Back to square one, I continued to look at my junk pile and found a 1 hp gear reduction motor that used to power some self-cleaning moss screens.
The wheels started turning in my head. That might work. I hooked some 3-phase power to that old motor and determined that it still worked and that the gearing was 32 rpm. A little slow but nothing that could not be sped up with the right size pulley.
The next problem to solve was how to connect the 1 hp motor to the prop. The bearings on the main shaft of the 75 hp motor still turned smoothly. But this old motor was made out of thick cast iron and with the prop probably weighed in at over 1200 pounds. Way too much weight to hang from my ceiling.
The wheels kept turning and I wondered if I could take the guts out of the motor, keep the end plates with the bearings for the shaft and mount my 1 hp motor on one end to drive the prop. This would still be a heavy unit; probably around 500 pounds considering the prop alone weighed 150 pounds.
I checked with my contractor friend and he said he could triangulate the middle truss in my shop and it should easily hold the weight. The project was now a go.
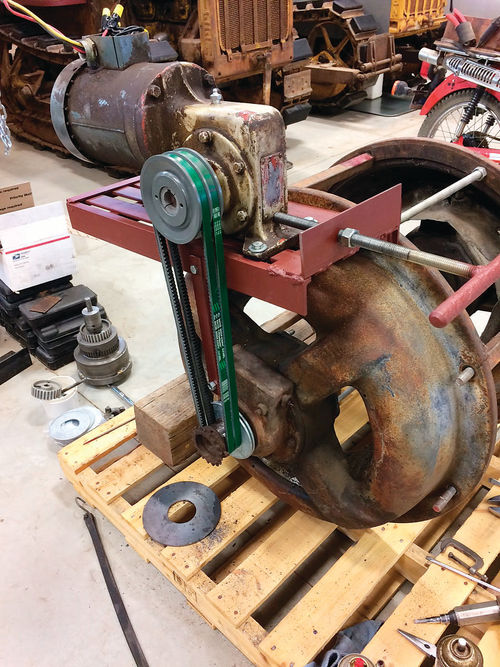
Handling That Initial Torque
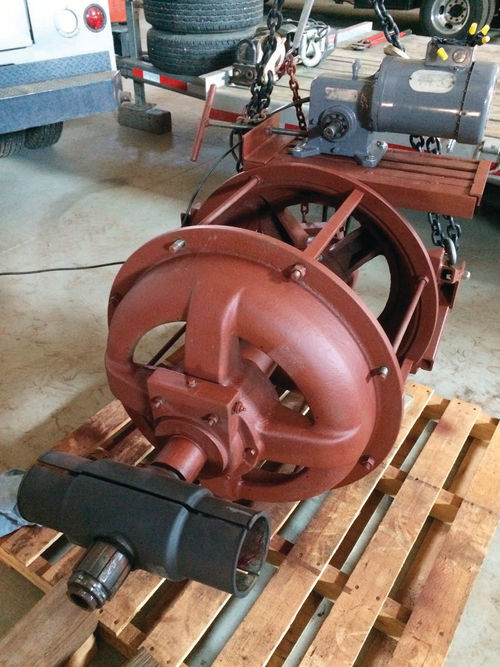
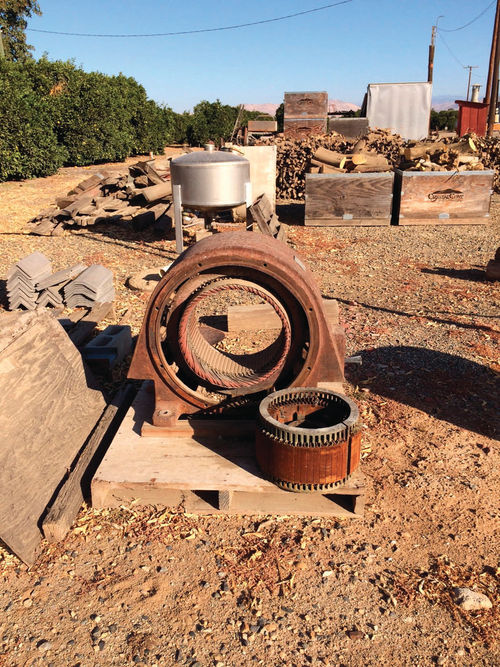
The motor came apart fairly easily but the rotor had to be cut off the main shaft. The two outer halves with the shaft bearings were separated by using some 5/8-inch all thread and 1-inch square tubing to replace the cast iron middle section of the motor housing.
I made a bracket on the end opposite of the prop to hold the new drive motor. I had some concerns about having the prop and drive motor rigidly connected. I could sense that having 100% of the torque available on start-up trying to twist a 150-pound prop would not be a good thing for my I-beam.
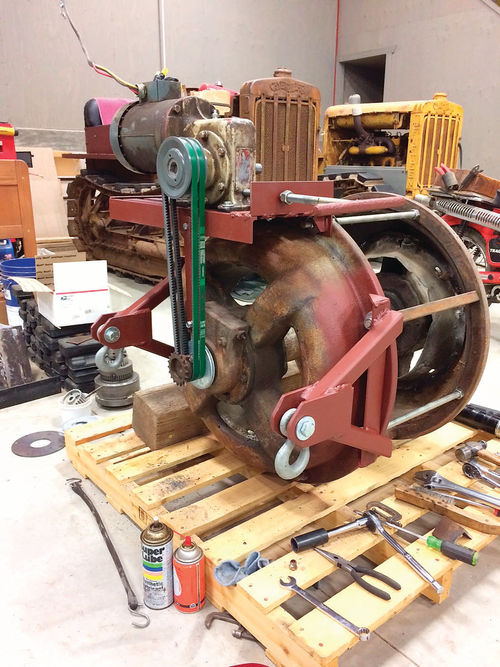
I came up with a two-belt system that started with adding a 4-inch pulley on the motor end. The belts then just wrapped around the 2-inch prop shaft without using a pulley. This allowed the belts to slip on start-up and shut-down. The drive motor mounting bracket was made with adjustment slots so I could adjust belt tension. This process was aided by a t-handle 5/8-inch all thread rod that went through a welded nut and pushed the motor to tighten the belts. With the 4-inch pulley, I doubled my rpm to 64 which was a guess on how fast to spin the prop.
Addressing the Lubrication Situation
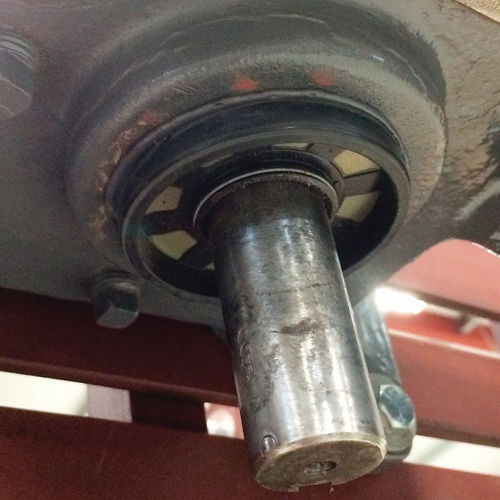
Another minor problem to solve with this project was the orientation of the drive motor. The reduction gearbox was designed to have several inches of gear oil bathing the ring gear for lubrication. This was not possible with me turning the gearbox 90 degrees. If I filled the box to cover the ring gear, I would have problems with the shaft seal keeping the oil in the box in an orientation that it was not designed to handle.
My solution was to drain the oil out of the box and fill it with grease.
This should work with annual additions of grease to keep the gears covered.

This did create another problem as the driveshaft now pointing toward the floor began to seep grease. I decided to add an external double lip grease seal by siliconing it to the flat area at the base of the shaft. I thought that the shaft probably has some wear and if I put a new seal in the original position, it might still leak. With a limited amount of run time on the fan, so far it is holding.
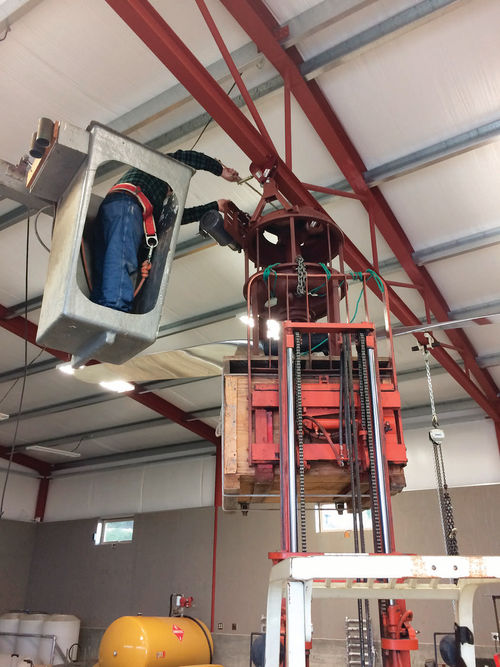
Time to Lift This Big Unit
The next problem to solve was hanging this beast. I made two heavyduty mounting brackets that attached to the 5/8-inch all thread used to keep both halves of the old motor together. These brackets ended with a 5/8-inch bolt that connected two hooks. From there it attached to two I-beam clamps mounted to my 6-inch I-beam.
Upon mounting, my drive motor gave the fan a slight tilt as the added weight was on one side only. To counter this, I used a small chain connecting the offsetting drive motor with the I-beam. I placed a turnbuckle in this chain setup for tilt adjustment.
I made legs attached to the bottom of the unit so that it would sit upright on its own and have the prop and shaft not touch the floor. My forklift was not capable of lifting it high enough so I used a fruit bin with a heavy duty pallet on top to act as a 2.5-foot extension. I put the 500-pound fan on top and roped it down a bit and it went into place fairly easy. Many thanks to my brother Chris, who gave up a Sunday for the installation.
Also, many thanks to my friend Dave Thurber who spent way more hours than I will ever be able to repay him while polishing the prop.
Now that it’s in place I’ll admit that the actual performance is no hurricane… But you have to feel cool just looking at it.


