
Producing a Mirror Finish
You’ve No Doubt Encountered Vehicles With That “Perfect” Look. Here’s How You Can Achieve It In Five Steps.
A FEW MONTHS ago I had the opportunity to check out a new A/C Cobra kit car my local 3M representative had built. The car was very nice, but what really caught my eye was the paint finish. He has painted the car black and as I stared into the finish I could find no trace of sand scratches or swirl marks, just a deep dark mirror. OK, sand scratches can be removed from black finishes, but swirl marks? Now that’s a tough one.
When I questioned him about the lack of swirl marks and the mirror finish, he informed me that 3M had come out with some new polishing products and I was seeing the results of the company’s research and development.
So, naturally, I had to check out these new products and pass along just what I found out.
Modern Paints Require a Fresh Approach
Getting that perfect shine isn’t as easy as it once was. Today’s low VOC (volatile organic compound) clear coat finishes are harder than ever. These harder finishes equate to deeper, longer-lasting shines, rock chip protection and the need for fewer wax jobs, but they also equate to more difficulty achieving that longer lasting shine. At least that was the case up until now. Don’t worry if your ride has a solid-color, single-stage finish on it, these products and this technique will work great on that finish as well.
3M has put together a complete polishing system called the 3M Perfect-It Paint Finishing System. This truly is a polishing “system” as each component has been designed to move you from fresh paint to mirror finish in five steps.
Some New Sanding Products
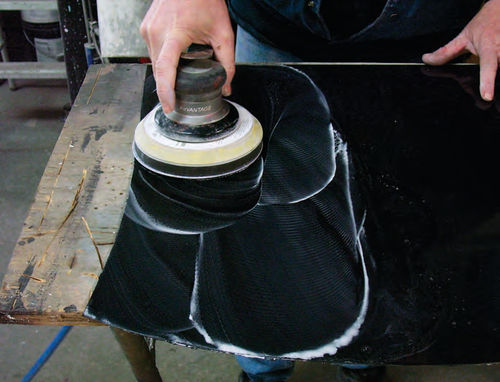
Steps One and Two in this “system” take care of the necessary sanding (Photo 1).
To achieve a true mirror-like shine, clear coats must be sanded to remove any traces of orange peel.
To facilitate Step One in the sanding process, 3M has developed a new Trizact Hookit Clear Coat Sanding Disc—P1500 (#2088). I need to point out here that this is not the same 1500-grit sanding disk I’ve used in the past to sand clear coats. This is a very soft, very flexible disk designed specifically for wet sanding clear coats. The disk I’ve used in the past, #0750, is a very stiff sanding disk that was designed for both dry sanding and wet sanding.
Another advancement with the use of this new sanding disk is that you no longer need to use a small orbit, random orbital sander. The reason we went to the smaller orbit sanders in the first place was to eliminate “pig tails.” These were very minor circular sand scratches caused by the wide orbit of the older model random orbit sanders.
Of course, going to the smaller orbit sanders meant more time was spent sanding, but the upside was a finer surface after the sanding. The new Trizact sanding disk gives you that finer surface even when using the more aggressive wider orbit sanders. Why go back to the wider orbit sander? In production shops time is money. The wider orbit sanders cut down on sanding time.
While I’m on the subject of sanding, 3M recommends using their soft interface pad, #5777, to assist when sanding contoured areas. This interface pad is a soft foam pad about a half-inch thick that is designed to provide a buffer between the hard sanding pad and the sanding disk. The result when using the interface pad is a more even sanding when working on contoured or curved panels.
Some Sanding Tips for Clear Coats
But before you get started, there are some things you should know about sanding clear coats.
*Most random orbit sanders have a speed adjustment built into the machine. Set the speed about mid-range. Not too fast; not too slow. The result will be better control over the machine, less chance of sanding through the clear coat, especially when working near an edge, and a longer life for the sanding disk.
*Dampen the sanding disk before sanding and keep the surface slightly wet as you sand. Plastic spray bottles are available just about everywhere these days, including your local paint supplier. Fill one with clean water and set it to spray a mist and not a stream.
*Too much water on the surface will cause the sanding disc to hydroplane and reduce its ability to sand. Not enough water and the disk will tend to stick to the panel. You will know the panel is perfectly wet when the sander moves easily over the surface and you see a thin, white slurry being produced as you sand (Photo 2). That slurry is the clear coat being removed.
*Finally, use a 50% overlap as you sand. It’s the same as when painting. To achieve good coverage you must use an overlap technique. 3M’s assessment is that a 50% overlap is just right.
*After sanding, clean the panel with a dry, lint-free, detail cloth and inspect the surface for any missed areas. Basically you want the surface to have a dull, even and smooth look to it.
Time for Some Refined Sanding
I’m still in the sanding phase, but now I’m ready for Step Two where we refine the finish that has already been sanded using the P1500 sanding disc.
To move on to the next sanding step, I’ll switch to the 3M Trizact Hookit Foam Disc-P3000, #2085. This also is a very soft foam-backed sanding disc that, like the P1500 disc, is to be used wet. 3M also recommends buffering this disc with the soft interface pad and to maintain the 50% overlap technique when sanding.
I’m still looking for that white slurry to form as I sand. That lets me know the sanding disk is working. I’m also not trying to be aggressive with this sanding. All I want to do here is refine the surface and start moving the finish toward that polished look.
Needless to say, P3000 isn’t going to remove much of the clear coat. What it will do is start the polishing process and thereby reduce my buffing time by as much as 50%. If you’ve spent a week or so with a buffer in your hand, you can appreciate a little more time spent with the sander to reduce that buffing time.
Once the panel has been sanded, it’s time once again to bring out the detail cloth for a cleaning and inspection. A bright light will help here as what you are looking for are any traces of sand scratches left from the P1500 sandpaper.
You say you found a few sand scratches? Revert back to the P1500 sanding disc to remove them. No need to sand the entire panel, just wet sand any problem areas you find. Trust me, the P3000 will refine the existing surface, but it won’t remove sand scratches. Once you have removed the sand scratches with the P1500, return to the P3000 to again refine the surface.
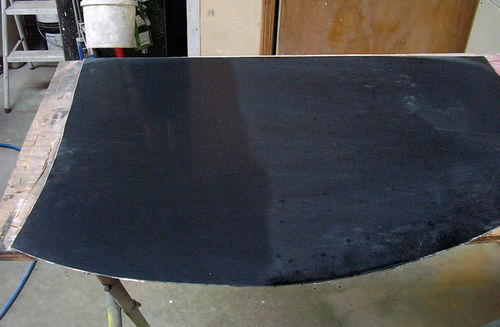
Can you really see any difference in the surface after sanding with the P3000? Yes, you can.
Check out Photo 3. I sanded the left side with P3000. The right side was sanded using the P1500 sandpaper.
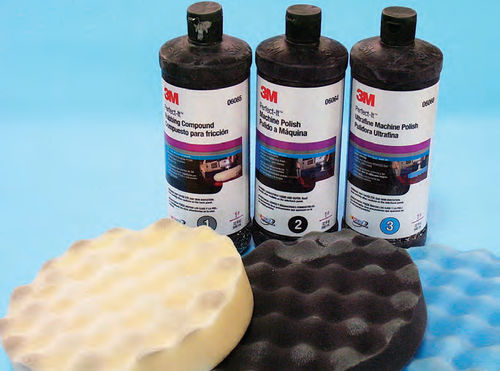
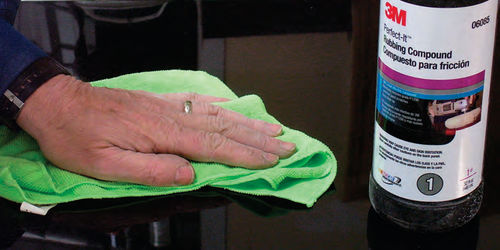
As shown in Photo 3, sanding leaves behind a dull, flat surface. To get rid of that dull look and bring out a great shine, I need to compound and polish the panel. To accomplish that, I’ll use three different 3M products: Perfect-It Rubbing Compound #6085, Perfect-It Machine Polish #6064, and Perfect-It Ultrafine Machine Polish #6068, as well as three different 3M buffing pads, white #5737, black #5738 and blue #5733 (Photo 4).
Compounding the Situation
Step Three in our five-part system begins with 3M Perfect-It Rubbing Compound #6085. This is a very creamy compound, so don’t bother doing the “between the fingers” test with this product. It isn’t filled with heavy cutting grit, so it doesn’t need to be tested. Remember, this is a polishing system. Completing the P3000 sanding step made it possible for this compound to bring out a shine without the grit.
Just what is the “between the fingers” test, you may be asking at this point. In the old days, we would place a drop of compound on the tip of the index finger and rub it between that finger and the thumb to get an idea of how much cutting grit the compound contained. More grit indicated an aggressive compound, while less grit indicated a less aggressive mixture. Production shops like to feel grit in the compounds they use. That means a quicker cut…and that equates to less time spent behind the buffer bringing out the shine.
But if you think about it, cutting grit is what makes sandpaper cut into the clear coat to achieve that flat, dull look. Isn’t that why I just spent a lot of valuable time sanding the surface with the random orbital sander, to achieve that dull, flat look? This almost seems like one of those “duh” moments. Grit in the compound is like using a liquid sandpaper product on the finish…and hoping to get a great shine.
A Choice of Wool or Foam
This brings me all the way back to checking out that A/C Cobra without the swirl marks. Swirl marks are a direct result of having cutting grit in the compound. That’s what a swirl mark is, a track left in the finish after having rubbed something rough over it. Eliminate the cutting grit and you eliminate most of the swirl marks.
So, how well does this compound work without the cutting grit? Surprisingly, I found that it brought out the shine very quickly and didn’t create a lot of heat as I worked. I like the “less heat” feature, as creating warmth when working with a fresh clear coat can cause the finish to soften slightly and that can lead to what we once referred to as “buffer burns.” A buffer burn looks like a scuff mark on the finish.
To start the polishing process, 3M recommends using either the 3M Superbuff III Wool Pad #5719 or the 3M Perfect-It Foam Compounding Pad #5737.
I opted for the foam pad because of the lint a wool pad will produce, but since I haven’t mentioned using the wool pad before, let’s talk about it. Attach this pad to the buffer and operate the machine at 1800 rpm. The wool pad has to be considered the more aggressive of the two compounding pads when it comes to removing sand scratches, but even so, when used in combination with #6085 compound it will not create a lot of heat on the surface.
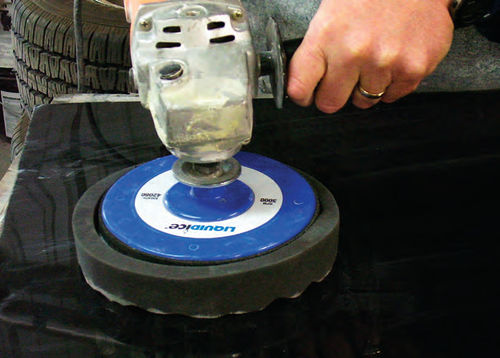
3M recommends keeping this pad flat on the surface as you work and using 50% overlap with each pass. I’ll add to that a need to consider the direction of the pad’s rotation so that when you approach the edge of a panel the pad turns from a position of on the panel to off the panel and not the other way around. This is the best way I know to prevent burning through the paint along the edges.
And this brings me to an off-topic point. I’ve heard warnings that burning through the paint along an edge is due to the paint being very thin at that point. If that is true it is due to poor painting techniques, which is basically not taking care to spray past, around, and over an edge when making a spray pass.
In reality, burning through the paint along an edge is due simply to the concentration of effort placed on a very narrow paint surface.
3M also suggested working in a 2 X 2 square foot area at a time. This allows you to concentrate on a smaller section of painted surface to ensure you have removed all of the sand scratches and dulled areas before moving on. That doesn’t mean you should compound and clean and inspect and re-clean and reinspect each and every tiny section that you work. You will kill yourself repeating and repeating, and never get the job done. Instead, what this means is that once an entire panel has been thoroughly compounded, you should stop, clean the panel using clean water, wipe it down with a new 3M Perfect-It Detail Cloth #6016, and inspect it for any remaining problems. In most cases, you will be left with taking care of only a few minor flaws across the panel.
If you are like me and don’t like the lint the wool pad produces, try the 3M Perfect-It Foam Compounding Pad #5735 (Photo 5). This is a white pad that is fairly stiff and it should be slightly dampened before use. Maintain the same 50% over lap used when buffing with the wool pad and operate the buffer at 1600-1800 rpm.
Which pad is better? I think that depends upon the job at hand. If I’m working on a huge cruiser with more flat surfaces than a stack of pancakes, I’m going to use the wool pad, despite the lint. However, if the job has more curves and body lines than a vintage VW bug, I’m going to use the foam pad. The foam pad will allow me better access and more control when getting up close and personal to adjacent panels and body lines.
I’ll finish this step by cleaning the test panel using a clean detail cloth (Photo 6). The shine is really apparent now.
Machine Polishing the Surface
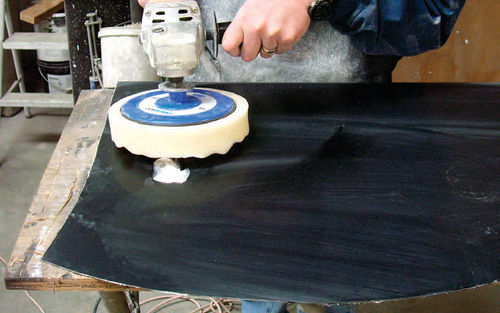
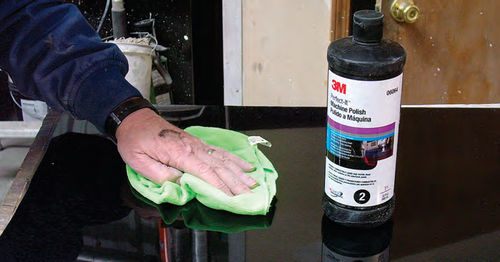
On to Step Four in our program, machine polishing with 3M Perfect-It Machine Polish #6064.
This is the step that really tells the tale about the finish as it removes those pesky little swirl marks left from the compounding process and brings out the depth in the finish (Photo 7).
3M recommends using the Perfect-It Plus Foam Polish Pad #5738 with the Machine Polish. This is the black pad, and it should be dampened slightly before use.
Apply a small amount of Machine Polish to the surface being polished and operate the buffer between 1200-2000 rpm. Stay with the 50% overlap method as you polish. Use medium pressure with the first few passes; then, when the shine begins to come up, lighten the pressure until the pad is just touching the surface. At that point stop polishing and clean the surface with a new 3M Detail Cloth #6016 (Photo 8).
A new detail cloth? Yes, detail cloths are like buffing disk pads. You should never cross-contaminate a buffing disk by mixing polishes. This can cause the surface of the disk to become clogged with polish. A clogged disk is a ruined disk. The same thing goes for detail cloths. Switch cloths every time you switch polishing products.
If you’re working with a lighter color, by this point the surface being polished should be reaching perfection, with no sand scratches and no swirl marks. However, I found that upon very close inspection, a darker color can still hold a few very minor swirl marks. Why didn’t I find swirl marks on the lighter colors? I actually sprayed a white test panel just to look for the swirl marks. I think the marks may have been there, I just couldn’t see them for the glare. And that brings us to the need for Step Five.
Getting Those Hard-To-See Marks
Step Five in our process is swirl elimination using 3M Perfect-It Ultrafine Machine Polish #6068.
Let me warn you up front: Don’t skip Step Four thinking the Ultrafine Machine Polish will take care of your swirl mark problems. It will, but you will spend a lot of time, effort and polish getting there. Including Step Four in the process will save you a lot of time and frustration.
Ultrafine Machine Polish is designed to remove those “I can see it in certain lights” swirl marks that we never see until 50 people are standing around the car giving it the once over. This is the stuff that makes black finishes worth the effort.
To use Ultrafine Machine Polish, switch the buffer to the 3M Ultrafine Polishing Pad #5733 (Photo 9). This is the blue pad and it works best when slightly damp and operated at 1200-2000 rpm. To take out any remaining swirl marks, operate the pad flat on the surface and use medium pressure.
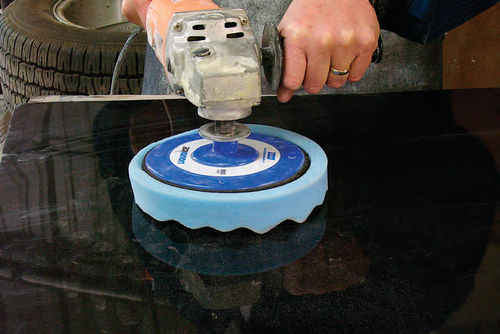
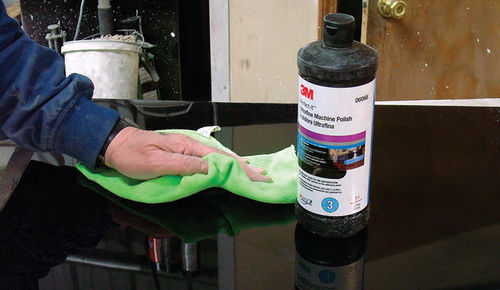
Once the swirl marks are gone, use light pressure to finish polishing the surface. Don’t let the surface dry out as you work; be sure to leave a wet film behind. That film will dry on its own and, as it dries, you can wipe the surface with yet another clean, dry detailing cloth. The result should be a surface that you will be proud to show off to anyone (Photo 10).
Tips To Keep You Going Straight
•As you may have already noticed, 3M came up with the idea of numbering their new polishing products 1 to 3 and color coding the foam buffing pads. White is aggressive, black less aggressive and blue for fine work.
•Always wear a buffing apron, such as the 3M #5709, when polishing. This washable apron keeps compound and polish splatter off of you as you work.
•Pay attention to the electrical cord on your buffer. With all of the turning and twisting you will do, the cords tend to twist along with you. Twisted cords tend to break.
•Pay attention to where you are working. Compounds and polishes go everywhere and get onto everything.
Clean up the work area when you are done for the day. That goes especially for the ride you are working on.
Compound left on a fresh paint surface overnight can etch that surface, causing you more work the next day trying to remove the etching. How do you remove the etching? A little more compounding usually does the trick. If not, resort back to the P3000 to remove the etch mark.
•Finally, forget the wax. Fresh clear coats need to breathe so the solvents within the finish can dissipate.
Wax products can trap those solvents and cause the clear coat to separate from the color coat. That’s the last thing you need after putting the best shine possible on your ride. How long before you can apply wax? Give the finish at least three months to cure.
Got a question? Send it along.
Resource
LPL Body Works, LLC
5815 Contented Lane
Amarillo, TX 79109
Paint and body repair DVDs


