How -to A Closer Look at Color Sanding
Some Finishes Can Be Sanded, Others Shouldn’t Be Touched. This Will Help You to Get the Glossy Look You Want.
I DID A quick search through a number of my past articles looking for references to color sanding…and, needless to say, I found a lot of them. I mentioned color sanding this, color sanding that, and even how to prep a panel for color sanding. But what I failed to mention even once in all of those articles is exactly what color sanding is and, more importantly, I’ve never gone over the list of which finishes should or should not be color sanded.
The definition of color sanding is really pretty simple. It is the process of lightly wet sanding a completed finish using clean water, a soft block, and extremely fine grit sandpapers. How fine are these sandpapers? How about grits ranging from 800 to 3000?
Why would you want to color sand a finish? In the world of commercial body shops, the predominant reason would be to remove tiny imperfections from the clear coat. Usually those imperfections are specks of trash that find their way into the paint job as it is being sprayed.
Over in my world, the world of automotive restoration, color sanding is done without regard to the tiny bits of trash that might find their way into a paint job and done more so for the sake of removing the orange peel effect.
A desirable side effect of color sanding to remove the orange peel is that doing so also removes the tiny bits of trash. Why don’t commercial body shops worry about orange peel? Factory paint jobs have orange peel. To remove it would change the appearance of the overall finish.
So color sanding is confined to clear coats? No, besides color sanding clear coats you can color and solid color single-stage finishes. You also can colors and some of the in-between refinishing steps as long as you adhere to some rules I’ll give you in a moment. What you cannot do is color sand a metallic color single stage finish that has not been clear coated.
The Way It Used to Be
What I’ve said so far should raise enough confusion to get you scratching your head, so now it’s time for some explanations, starting with a little refinishing history.
Back in the olden days of lacquer and acrylic enamel we didn’t colorsand anything. In fact, if you asked for fine sandpaper back then you would be given 600-grit.
And the only reason you would want 600-grit would be to very lightly wetsand the first five or six coats of lacquer in preparation for applying even more lacquer. Remember those 10- to 12-coat lacquer paint jobs we once were proud to show off? They looked good, but unfortunately the life span of those paint jobs was shorter than the time it took to compound them and bring out the shine.
After that we discovered acrylic enamel. We didn’t compound those finishes and we sure didn’t get near them with a sheet of sandpaper. Compounding enamel was difficult because it had a tendency to soften and burn due to the heat produced by the process and, like lacquer, 600-grit sand scratches could only be removed by adding more paint. But with enamel, you couldn’t add more paint because the cure time was several months and if you applied additional enamel coats on top of fresh enamel, the entire finish would lift and wrinkle. Fresh enamel would be any acrylic enamel more than 12 hours and less than six months old.
Note: Hardeners are now available for enamel paints and should be used every time you mix and spray any acrylic enamel product to prevent lifting and wrinkling should you need to repaint part of your project.
The Age of Color Sanding Arrives
But that was then and this is now. Enter the age of urethane clear coats, urethane single-stage finishes, ultra fine sandpapers…and color sanding.
Once all of us old school painters were pulled kicking and screaming into the urethane paint age, the first thing we discovered was that we could take an average paint job and improve on it dramatically by wet sanding (color sanding) out the imperfections, specifically orange peel and trash, using extremely fine grit sandpapers and then compounding that finish until it looked as wet as water.
Then we discovered that we could not only color sand a completed finish, we could also color sand some of the in between steps, such as the seal coat and the base color coat. Both of these products occasionally need to be color sanded to remove specks of trash from the finish before applying additional coats.
That sounds simple enough, but then there are those rules I mentioned above. You can only color sand a catalyzed sealer. If you are using a non-catalyzed sealer you cannot color sand it because you are breaking through the surface of the seal coat and that can allow the solvents from the subsequent coats of base color to penetrate the sealer and cause it to lift. That doesn’t happen with a catalyzed sealer because it has been “hardened” throughout the layer of the coat and solvents can’t penetrate it.
If you color sand a base color coat you must, I repeat, you must apply at least one more coat of color over the entire repair area before applying the clear coat. How come?
Let’s back up to where we found that speck of trash and start there. Let’s say you just found a tiny little black something in your fresh coat of silver metallic base. Whatever you do, do not attempt to spray over the speck with more color. That method never works and it often results in creating a run. Think of it as placing a single piece of gravel on your concrete driveway and trying to cover it with enough driveway paint to make it disappear. Instead of adding more paint the best course of action is to allow the color coat to dry for at least 30 minutes at 70° F then very lightly wet sand the imperfection using 800-grit sandpaper on a small foam block to remove it.
Do not fold the sandpaper into a tight square and attempt to sand with your fingers. All this method of sanding will accomplish is to cut furrows in your otherwise flat surface. Those furrows may not become apparent until you apply the clear coat. My preference is to sand out specks of trash using 800-grit on a soft foam block. What do finger furrows look like? Photo 1 is a good example.
As for the wet sanding process, I like to fill a spray bottle with clean water and use that to keep the surface and the sandpaper wet as I sand. Some painters like to add a few drops of dishwashing detergent to the water to make the surface a little slippery. That is known as “soap sanding” and it comes from the lacquer paint era when we tried to negate some of the harsh effects of using 600-grit on a fresh coat of lacquer.
The goal here is to sand lightly and to only sand enough to remove the imperfection. Once you have removed the imperfection, rinse the repair area with clean water and blow the panel dry. The slightest drop of water hidden behind a fold in the masking paper or tucked into a crease in the masking tape will automatically splash out onto your work once you make a pass with the spray gun, which would come next.
Why not use a bucket of water instead of the spray bottle? The spray bottle ensures the cleanliness of the water and allows you to concentrate it onto a small space. The less water applied the less water that has to be removed before you can resume painting. This brings us to my earlier point that any time you sand a base coat color that repair must be covered with additional paint. Most of the time you can gently fog a little color over the repair and hide it completely. Other times you will find upon close inspection of your work that a ring of color has formed around the repair. Should that happen, the best course of action is to give the entire panel where the repair is located one more coat of color. You’ll find that blacks and yellows are notorious for leaving color rings around spot repair areas.
Color Sanding Single-Stage Finishes
Have you ever thought about why the P Sheets for most single-stage urethane finishes provide instructions for the application of a clear coat? It’s for one simple reason: To allow you to color sand the finish.
Single-stage finishes will tend to orange peel just like a clear coat. However, you cannot color sand a metallic single-stage finish to remove the orange peel effect unless you have applied clear over it. Why not? The metallics in a single-stage finish act just like the metallics in a metallic base color coat. They float freely throughout the depth of the coat, which means some metallic particles end up deep within the coat while others end up exposed near the top of the coat.
All of those tiny specks of silver you see in a metallic paint job are those exposed particles.
As for how you can remove the orange peel effect from a single-stage finish by applying clear over it, the trick is in the application. If you apply the clear within 15 minutes of applying the final single stage color coat the first coat of clear will soak into the single-stage finish and help it to level out nice and smooth. Any orange peel that appears as you continue to apply the clear coats, and it usually does, will be confined to the clear and easy to sand out.
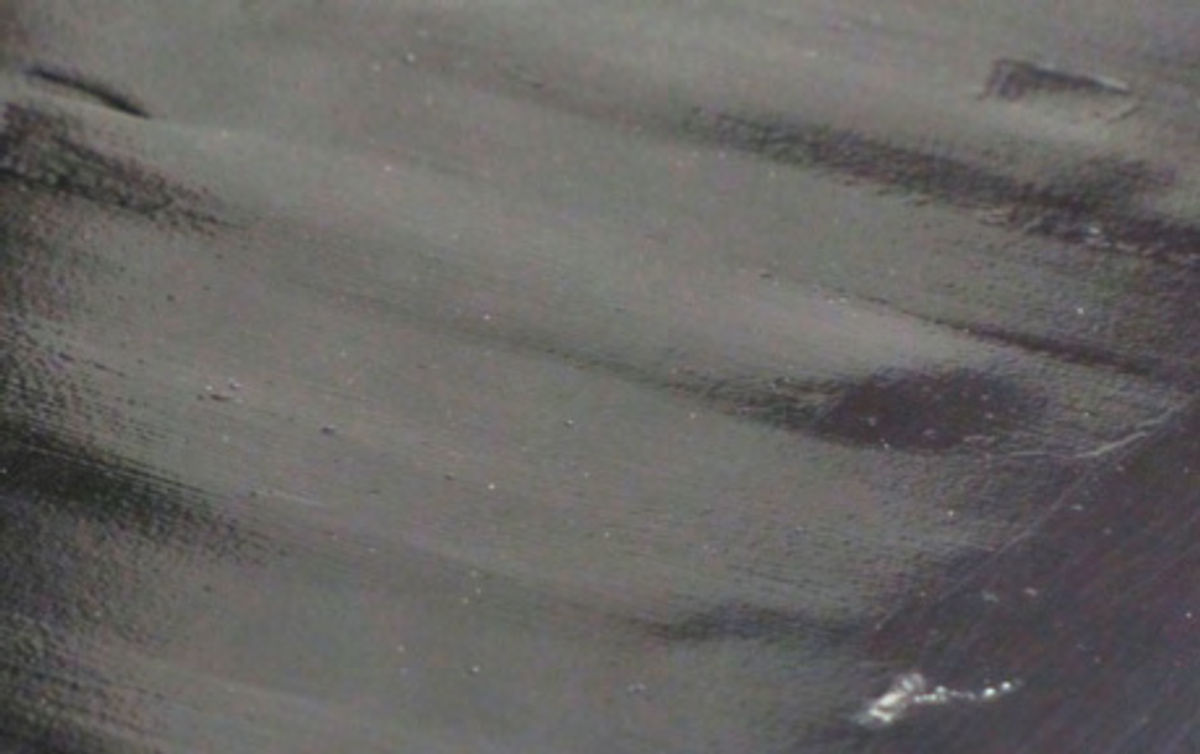
If you color sand one of these finishes without adding the clear coat you will inadvertently sand those exposed particles and leave them with a dull appearance. The result is a mottled and blotchy finish (Photo 2).
To prevent the mottled and blotchy appearance, you have two choices. Either you accept the finish for what it is and be proud of your work, or you can apply two to three coats of clear over the metallic single-stage finish in order to give you something to color sand and polish smooth.
Do you have to apply a clear coat over a single-stage finish? No, butifyou don’t once you finish spraying the metallic single-stage you are done. All you can safely do from that point on is apply wax.
Then there is the issue of color sanding single-stage finishes that do not contain metallics.Those colors are commonly referred to as solids. Pure white and pure black are good examples. The great thing about spraying single-stage solid colors is that you can apply the desired number of coats—I’ve been known to lay down as many as five— then color sand this finish to your heart’s desire and never worry about mottling or getting that blotchy look.
To color sand a single-stage solid color I start with 1000-grit, follow that with 1500-grit and finish with 3000-grit. Each sanding step is accomplished by wet sanding and using a soft foam block.
Color Sanding Clear Coat Finishes
Since base coat/clear coat finishes have become predominant in the automobile restoration world, this is where the rubber meets the road when it comes to color sanding. We all want the finish on our rides to be something close to perfect and the only way to achieve that goal is to color sand the clear coat.
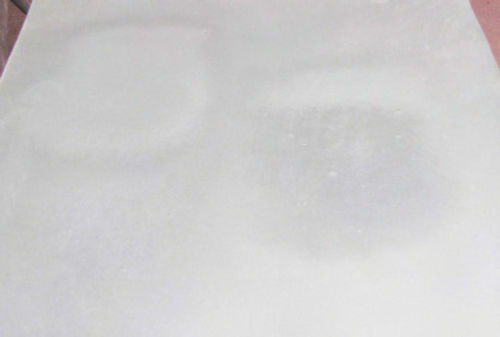
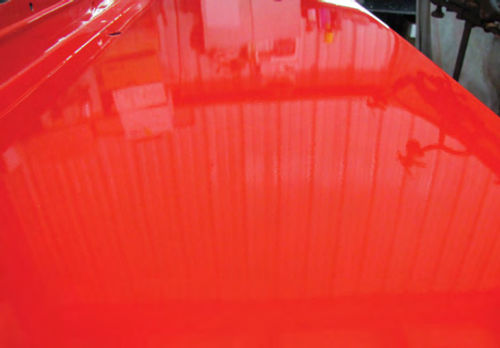
Here is a good example of the difference between a color sanded portion of a panel and the raw finish (Photo 3). There are several things to note here and the first one is the obvious orange peel effect still visible on the right side of the panel that has not been color sanded. What caused this much orange peel? The more coats of clear you apply the more the orange peel effect becomes apparent. In this case I applied four coats of clear.
Why so many coats of clear?
I knew from the word “go” that I would be color sanding every panel on this ride. The extra coats are there to give me plenty of material to color sand and ensure that this panel is nearing perfection when I’m done.
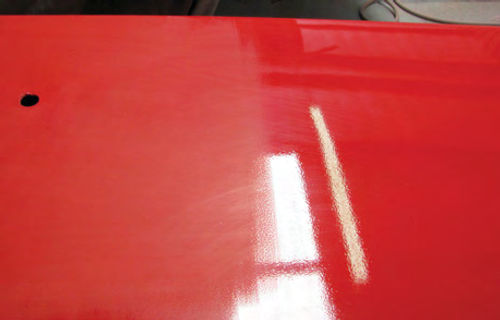
Another thing to notice is that since the left side of the panel has been color sanded it is not only dull in appearance it is also flat and smooth. That is what color sanding accomplishes, it kills the gloss and leaves an extremely flat and smooth surface. Where’s the shine?Right there, in Photo 4, after a little compounding and polishing.
Guide Coating Before Color Sanding
Applying a guide coat to a finished paint job is meant to do one thing, highlight imperfections on the surface so that they can be color sanded out. I have to admit that I rarely use a guide coat on a finished surface mainly because once I start the color sanding process the surface transforms from a high gloss to an extremely dull luster. Imperfections Such as fish eye contamination or deep ripples of orange peel tend to remain glossy until such time as they are removed through colorsanding.It is that transformation from gloss to dull that I substitute for a guide coat.
But then there are colors such as white and silver that tend to hide imperfections and it is on those colors that I will sometimes apply a guide coat prior to color sanding. The trick is to only use base colors for guide coating, to use a contrasting color such as black on a white surface, and to very lightly fog the color onto the surface being sanded.
Base colors are used because they are thin and don’t add any build-up to the finish. In addition, base colors tend to sand away easily. Note: Before applying the guide coat I prefer to lightly sand the surface using 1000-grit.
Why sand before guide coating? It has been my experience that a guide coat applied to a glossy surface tends to slip off of that surface and catch on the sandpaper where it balls up. That is the last thing you want or need when color sanding. You might as well pour gravel on your finish. The results will be the same, deep scratches in the surface that might not sand out.
Hand Sanding
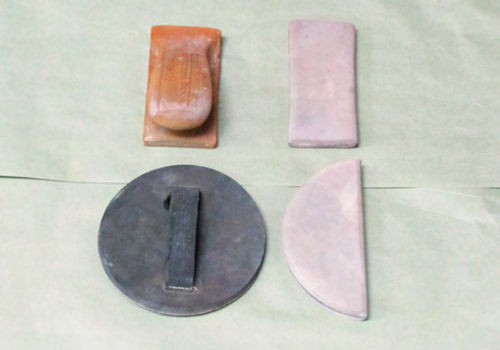
I think I’ve mentioned this before, but you should never sand anything on your project with your bare hands. Hand sanding leaves furrows in the finish that look strangely like your fingers. Always sand with a block. A few examples of 3M blocks are shown in Photo 5. From left to right, top to bottom they are: 3M #5442 Soft Hand Block, 3M #5586 Stikit Hand Pad, 3M #5291Hook it II Soft Hand Pad, and a 3M #5792 Hookit II Half Round Soft Hand Pad.
Take Time to Prep
Then there is the matter of preparation. How do you prep a panel for color sanding?
First off, you get it clean. You should never attempt to color sand anything that isn’t clean. That’s because even the tiniest bit of trash caught between your sandpaper and the surface being color sanded can leave deep scratches in the finish. Those scratches will rarely compound out.
Most of the time, scratch removal requires additional sanding. Additional sanding can lead to sanding through the finish and exposing the under layers of finish. Should that happen, it is time to reload the spray gun and start over.
Once you are ready to color sand, the last step is to tape all of the edges.
Edges and peaks in the metal are prime candidates for sanding through. It doesn’t take much effort to sand right through a sharp edge.
A little masking tape in the right places might just be all the difference there is between completing a paint job…and starting all over.
Got a question? Send it along.
Products supplied by:
LPL Body Works, LLC
5815 Contented Lane, Amarillo, TX 79109
lplbodyworks.com A body repair and paint DVD series is available