
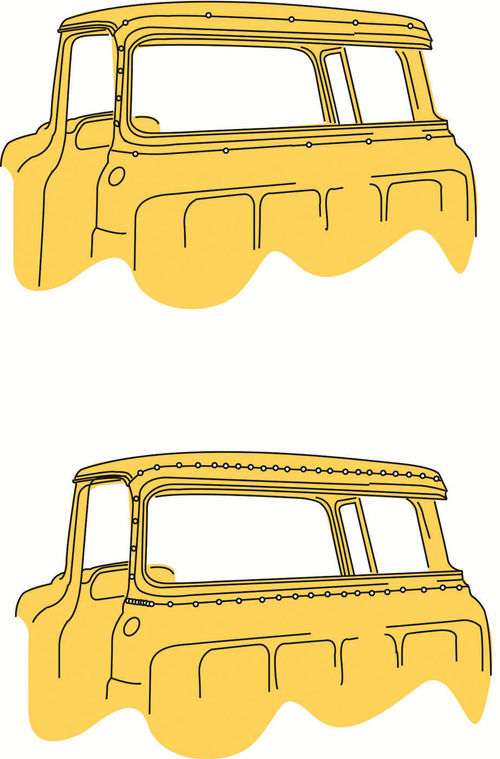
Installing a Big Back Window
If you want to improve the rear view vision in your vintage pickup, here’s how to do it.
We knew it could be done, but we also knew that our patient would have to be under the knife for hours, and if we didn’t do everything carefully, our ’57 Ford F-100 would look a lot worse than when we started. Installing a big back window in a classic truck that came with a small one is not a job for the faint of heart or the impatient. The task requires a bit of skill, but is doable for an experienced hobbyist restorer. Lucky for us, the perfect person to demonstrate the process happened to be visiting awhile back and was eager to demonstrate his prowess—in return for suitable remuneration of course.
We did our window transplant at the former Memory Lane salvage yard in Sun Valley, California, because they had everything we needed, and they too wanted to see if my vacationing friend Bruce Haye from New Zealand could do the job and make it look right in the mere five hours we had available to us before closing time. We’ll tell you whether he finished it within the time limit later in the article. Meanwhile, here’s how he did it, and how you too can treat your small-windowed ’50s hauler to a big back window:
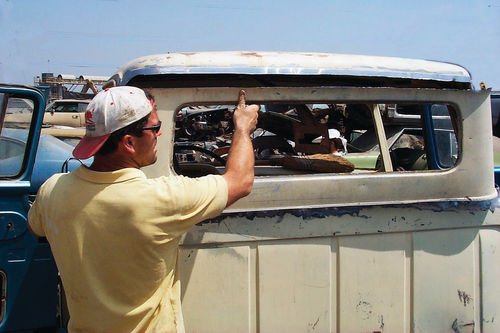
Find a Window Donor
To begin with, you will need to find a donor cab with the requisite big back window. (Trucks from the ‘50s came either way.) That’s where Memory Lane came in. They had acres of old cars and trucks at that time. But, unfortunately, Memory Lane is now just a memory, though several salvage yards advertising on the Internet in Arizona have huge selections of salvage parts, and you also can try Bob’s F-100 parts at:
Bob’s F-100 Parts
9372 Mission Boulevard, Riverside, CA 92509
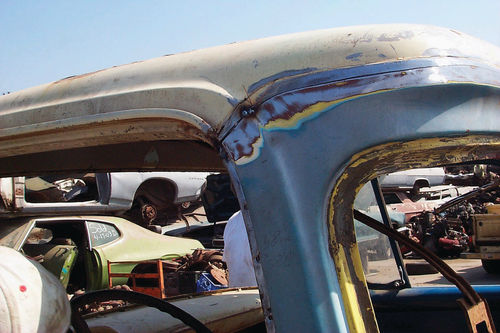
If you can find a complete, straight, rust-free big-back-window cab in a salvage yard somewhere, the best way to go would be to change out the entire cab. However, we were only able to find a rough, rusty cab at Memory Lane that wasn’t worth the trouble to repair, so we were able to liberate its big back window and surrounding sheet metal before it was sent to the crusher because those parts were still fine.
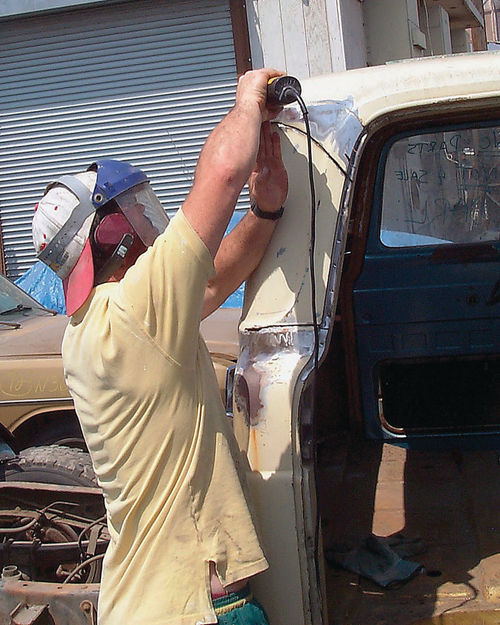
Take Steps to Be Safe
To do all the cuts, you will want to use a cut-off blade on a high-speed grinder or Kett double-cut sheet metal shears. A cutting torch or saber saw will deform and mutilate the sheet metal, so don’t even consider using either of them. Also, always wear heavy leather welding gloves when handling sharp sheet metal. Earmuffs and safety glasses also are a must while cutting if you value your eyesight and hearing. And your sheet metal cuts should be clean and straight, not jagged and wobbly.
You will use up several cutting wheels during your project, so have a half-dozen on hand.
As I said before, our donor cab was ready for the scrap heap anyway, so we just cut out the entire big back window section, including the B pillars, allowing plenty of sheet metal to spare. (Always leave plenty of extra overlap on patch panels so you can fit them carefully, with minimum risk.)

Protect the Glass
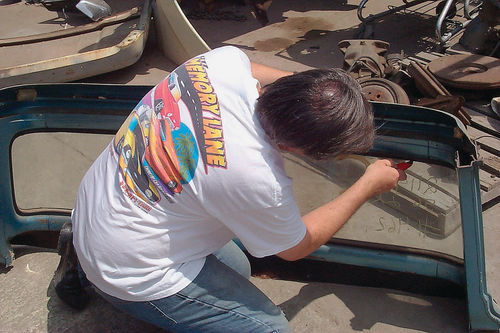
Remove the back window glass from your donor cab, and remove your original small back window as well just to be safe. Replacement glass is expensive and hard to find.
Cut around the insides of the rubber gaskets using a sharp utility knife, and then gently press the window in toward the interior of the cab. Use leather gloves, and don’t get too aggressive with the pressure because you could easily crack the glass. Also, make sure you have thick blankets nearby on which to place the windows. Store the glass flat on the blanket in a place where it won’t get stepped on or bumped. It’s a good idea to keep that original small back window glass because someone most likely will want it at the next truck meet you attend.
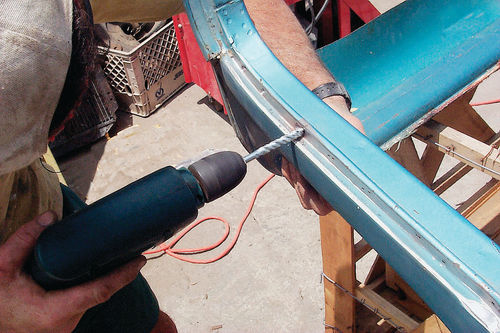
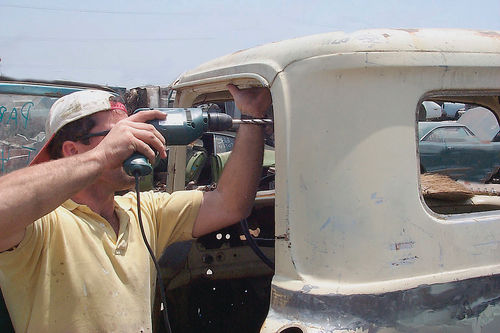
Drill Out the Welds
If you cut your donor window panel out of an old cab, pillars and all as we did, you will need to drill out the spot welds that hold the sheet metal to the B pillars. Use a 1/16” bit to drill small holes completely through the welds, and then switch to a 1/4” bit to drill through the outer sheet metal. I like masonry bits for this job because they are sturdy and they cut slowly, thus avoiding problems. Don’t drill all the way through with the larger bit. Just use it to grind out the spot weld enough to separate the window sheet metal from the pillar.
Welding…and Gluing Options to Consider
If you are a very skilled welder you can fusion-weld (metal to metal with no welding rod) or if you are not quite so skilled, you can butt-weld the panels together to produce a near-perfect seam using an acetylene torch. But if, like a lot of us, you are not skilled at fusion or butt welding and only have a MIG welder, you will want to have the panels overlap about 1/2” so you can lap-weld in your window panel.
With lap joints you run a risk of rust forming between the lapped panels if you don’t prepare them well and seal them properly, but then your truck’s cab will be marginally stronger with lap welds. Butt-welding is also possible using a MIG welder, but controlling distortion, and finishing the final seam can be a bit tricky.
Another way to attach your patch is to glue it into place with the new two-part super glues that are being used by the auto industry to assemble cars. There is no chance of rust, and the glue is actually stronger than the metal it bonds— unless you heat it up over 400 degrees Fahrenheit. The only catch is, you need to be able to clamp the seam for 12 hours, and that isn’t always easy to do.
The instructions from here on tell you what to do to lap-weld in the panel, but if you are skilled enough to butt-weld or fusion-weld, you will most likely know how to trim panels and what to do to avoid warping and blow-through problems. For the uninitiated, “blowing through” amounts to making holes in the parts instead of welding them together. For the backyard welder, lap welding is the best way to avoid such problems.
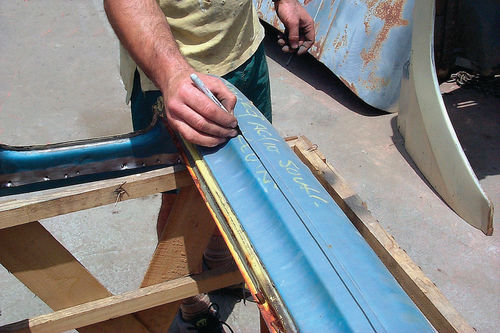
Measure, Mark and Trim Very Carefully
The old adage “Measure once, do it twice—measure twice, do it once” applies here. Big back window sheet metal can be hard to find. You won’t want to mess yours up by measuring incorrectly. Measure up from the upper bend or crease in the metal one inch on your replacement panel, and measure down one inch from the lower crease at the bottom of the panel and draw a line with a felt tip marker. Now trim your big back window sheet metal carefully, maintaining a nice straight even line as you go.
Next, carefully measure up one halfinch from the body crease line on your truck and draw a line with the felt pen. Also measure one half-inch down from the lower body line and draw a line. Just to be safe, before you make a cut to your cab, hold the big back window patch panel up to the truck and make sure your lines correspond with a half-inch overlap all the way around.
Incidentally, you never want to cut directly along a body crease because you will find it impossible to get the line straight when you go to weld in and finish the panel.
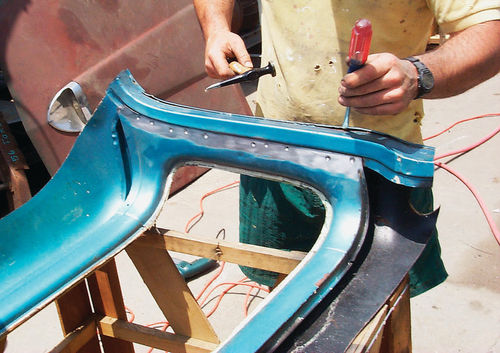
Remove the Current Panel
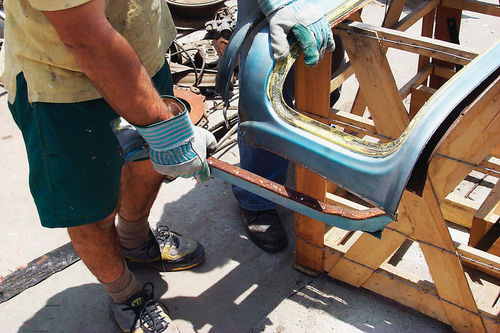
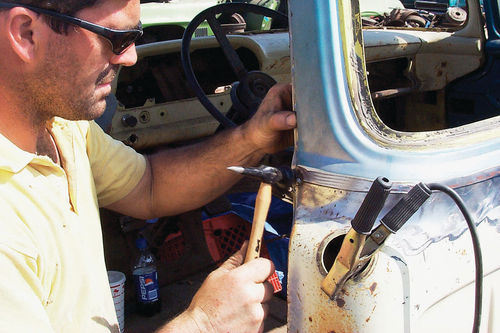
Drill out the spot welds inside and out on the B pillar on your truck using the same method as you did for the patch panel. Make your cuts top and bottom being careful not to damage the B pillars. Cutting wheels are best for cutting near the pillars, and double cut sheers work best for cutting across the big expanses of the cab. Again, maintain an even, straight line.
Pop the spot welds loose along the B pillar using a big screwdriver or pry bar. Have a friend who is also wearing leather gloves standing by to help you lift the cut-out section, because it is fairly heavy and very sharp. At this point you will notice that the remaining cab panels are a bit floppy. That’s because the stampedin tension in the panel has been released. Go along the cut edges of your cab and your big back window panel using a hammer and dolly to get them straight and pucker free, but don’t try to deal with the floppiness.
Time for Some Spot Welds
Carefully slip your big window panel in place and check the fit all the way around. A little cutting and filing at this point can save you a lot of bodywork later. Clean both surfaces to be welded using a high-speed grinder and 80-grit discs. The metal to be welded must be absolutely free of rust, paint, oil or galvanizing if the welds are to be sound. When everything looks completely clean and straight, weld up a spot weld hole on each side of the cab and check everything again. If the alignment looks good, finish recreating the original spot-welds. Finally, tack a little weld in the center of the panel over the bed, top and bottom.
Now Let’s Do Some Tack Welds

Next, do small tack welds about every two feet, and work from the center of the cab out, back and forth, left and right, to the ends. If you start at the corners of the cab and work in, you may well end up with a lot of excess sheet metal, causing a big pucker in the middle. And the reason for not welding in a continuous line is that you will overheat and warp the panels by doing it that way.
If you are gas-welding in your panel, you will have the advantage of a softer weld, and you can actually hammer it against a dolly while it is hot to keep metal-finishing to a minimum. If you are MIG welding your panel in, hammer welding will not be effective because the weld is generally too hard. Also, the safest way to MIG weld in a panel is to not weld in a continuous line at all for even an inch. The trick is to just keep doing little random tack welds until you have the whole thing welded up. This process takes awhile, but for a novice or inexperienced welder, it is the safest way to do the job.
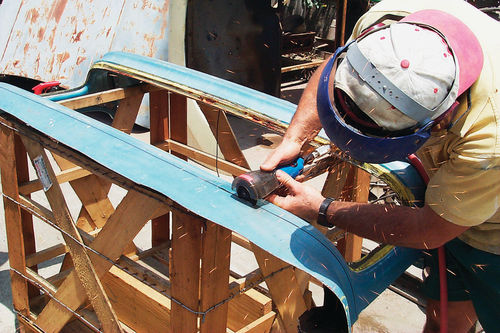
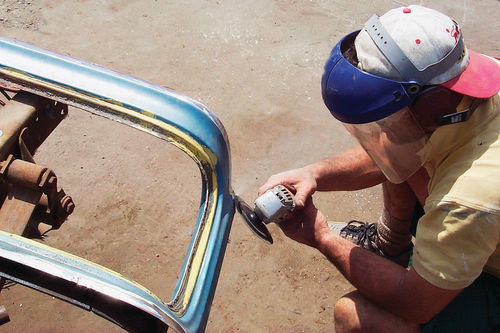
Finishing the Surface
Use a high-speed grinder to smooth down the welds, but again, don’t work in one spot for so long that you heat up and warp the panels. If you see any discoloration of the metal or the weld during grinding, stop immediately. It means you are dangerously thinning and heating the sheet metal. It is better to leave a little roughness along the weld than to try to grind it perfectly flat in most cases.
Smear a skim coat of plastic filler about eight inches wide and no more than 1/4 of an inch thick along the whole weld seam, and when it cures to a hard-cheese consistency, sand it with 36-grit paper mounted in a long-board sanding block. You want the filler to be no more than 1/8” thick at the seam when completely finished, and preferably less than that. Do the rest of your rough shaping after that using 80-grit paper, and finish with 150-grit.
When you are ready to prime the panel, go over the filler with 400-grit to get a smooth surface. Finally, fill any small pinholes with glazing putty.
Prime the cab with moisture-proof epoxy primer, or paint it as soon as possible to avoid rust. Bare metal rusts in a matter of hours, and most plastic fillers absorb moisture. Once the cab is painted and the paint has been allowed to cure for at least five days, it’s time to install that big back window glass. You will need a new rubber gasket from a source such as Bob’s F-100s. And you will need urethane glass-caulking compound and a squeeze gun to apply it.
Installing the Glass
Never try to seal windows or windshields using hardware store silicone caulk. It doesn’t work. Use only professional-grade urethane. Mark the center of the back window glass at the bottom so you will know where to cut the rubber gasket that goes around the glass. Shoot a small bead of the caulk into the inner seam on the window gasket. Wrap the gasket around the glass so its ends meet at the bottom center of the window.


Make sure the gasket is pressed firmly in place all around the window, and then cut the rubber so it will butt together. It is a good idea to cut the rubber about 1/32” fat so the butted seam will be pushed together when the window is installed. Now push a piece of strong twine, or telephone cord into the outer seam of the gasket so that its ends cross at the bottom center of the window.
Have a friend help, and as he gently pushes the window in at the bottom from the outside, slowly pull the cord out of the lip of the gasket as it flops over the pinch weld at the window’s opening. Keep working slowly around the window until it is popped into place all around. Caulk under the gasket on the outside using the urethane caulk. Finally, press into the rubber any stainless trim that goes with the window.
My friend Bruce didn’t quite get the window completely welded in at Memory Lane’s 4 p.m. closing time, but the rest of the work went as described above.
Allow yourself at least a couple of days to do this task regardless of your level of restoration experience. Take your time, measure carefully, and you too can go around making the small back window guys feel envious.


