Applying the Final Clear Coats
When I left the shop last night I had just completed the graphics work on the sides of the car and locked down those colors with a single coat of clear. To refresh your memory from last month’s installment, I only had a 12-hour window within which to apply the clear coat over my graphics colors or I would have had to go back and sand those coats.
Since the graphics colors are metallic, sanding means cutting into the metallics and that can leave a mottled and blotchy surface. That’s not acceptable, so the only solution was to lock the colors down with a clear coat. I still have to lightly sand the clear coat applied over the graphics using 1000-grit sandpaper before I can apply the final clear coats, but that’s better than sanding and reapplying color coats.
So with that taken care of I can move forward with applying the final clear coats to the body. Normally I would apply two additional coats of clear to the body, for a total of three coats, then bring out the 1000-grit sandpaper and start the sanding and polishing process. The cookie crumbs in this lemonade are those two additional graphics colors I applied to the car after applying the initial purple base coat. Those additional colors have created paint lines on the surface and I don’t want to be able to feel those lines once the car is finished.
Covering Those Lines
In paint shop circles we refer to the upcoming process as “burying the colors” to get rid of the paint lines. The way this is accomplished is to literally pile on the clear coats to form a buildup of clear over the paint lines. Once the clear has cured, normally within 48 hours, it is aggressively sanded with 1000-grit sandpaper until the paint lines can no longer be felt. That is how you “bury” paint lines.
Prepping For the Final Clear Coats
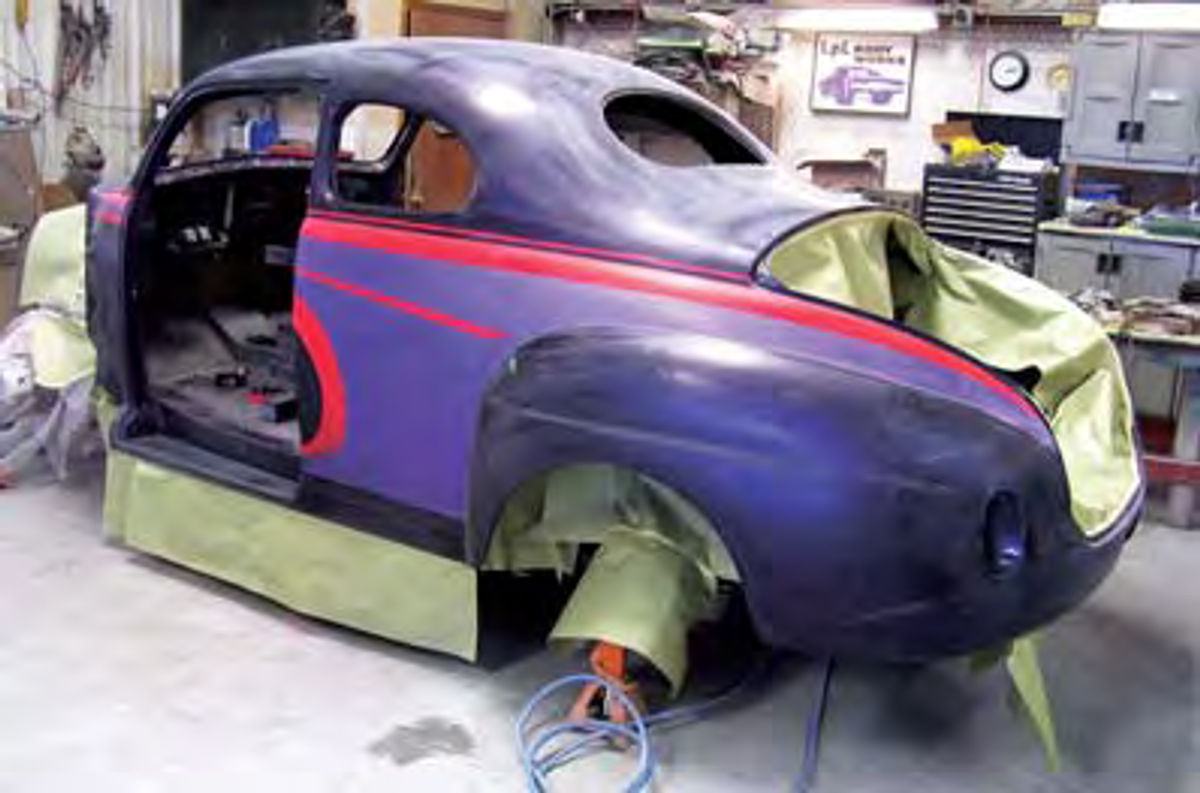
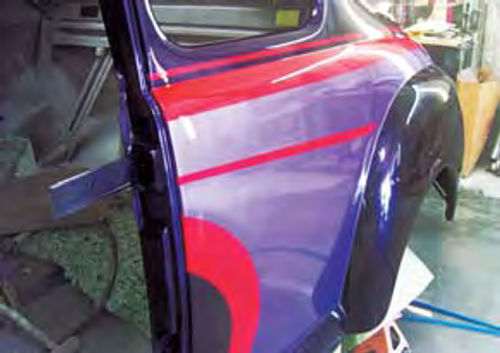
Notice that I have once again removed the doors and the deck lid (Photo 1). This allows me to apply the clear coats evenly everywhere, including inside the door jambs and around the deck lid opening. I haven’t mentioned the need for masking the car previously because that part of the spraying process really hasn’t been an issue. But now that the body is back on the frame, masking does become an issue. I can’t take the chance of having the clear coats over sprayed onto the frame or the engine.
Clear coats are the worst when it comes to creating over spray. Spraying clear is like spraying enamel was in the old days. Anything that isn’t masked off will receive over spray. To prevent over spray problems I even go so far as to remove vehicles from the driveway in front of the shop for fear they will be coated.
As you can see in Photo 1, I masked off the underside of the car to prevent over spraying the frame and masked off the
firewall and engine as well. If you will recall, I previously gave the firewall three coats of clear to avoid having to deal with the task of spraying around the engine.
The Clear Coating Process
Clear coating the body starts with a thorough sanding. I very lightly wet sand every inch of the body using 1000-grit sandpaper on a soft foam block.
Never, ever sand with your bare hands. Doing so can result in furrows on the surface that exactly match the size and shape of your fingers. Not a good thing to have on your ride.
What block am I using to sand the body? For this work I prefer the 3M #5442, a five-inch-long foam block. I’m not looking to remove much of the clear that is already on the body. I just want to rough up the surface enough to accept the additional coats. I do need to warn you that if the single coat of clear is sanded through and the color coat beneath is exposed, all bets are off and the exposed area must be dealt with correctly.
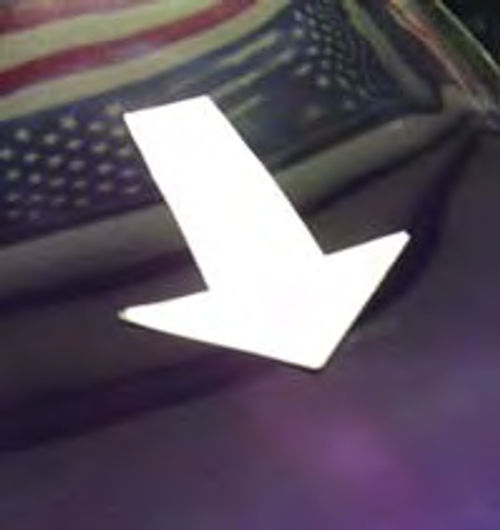
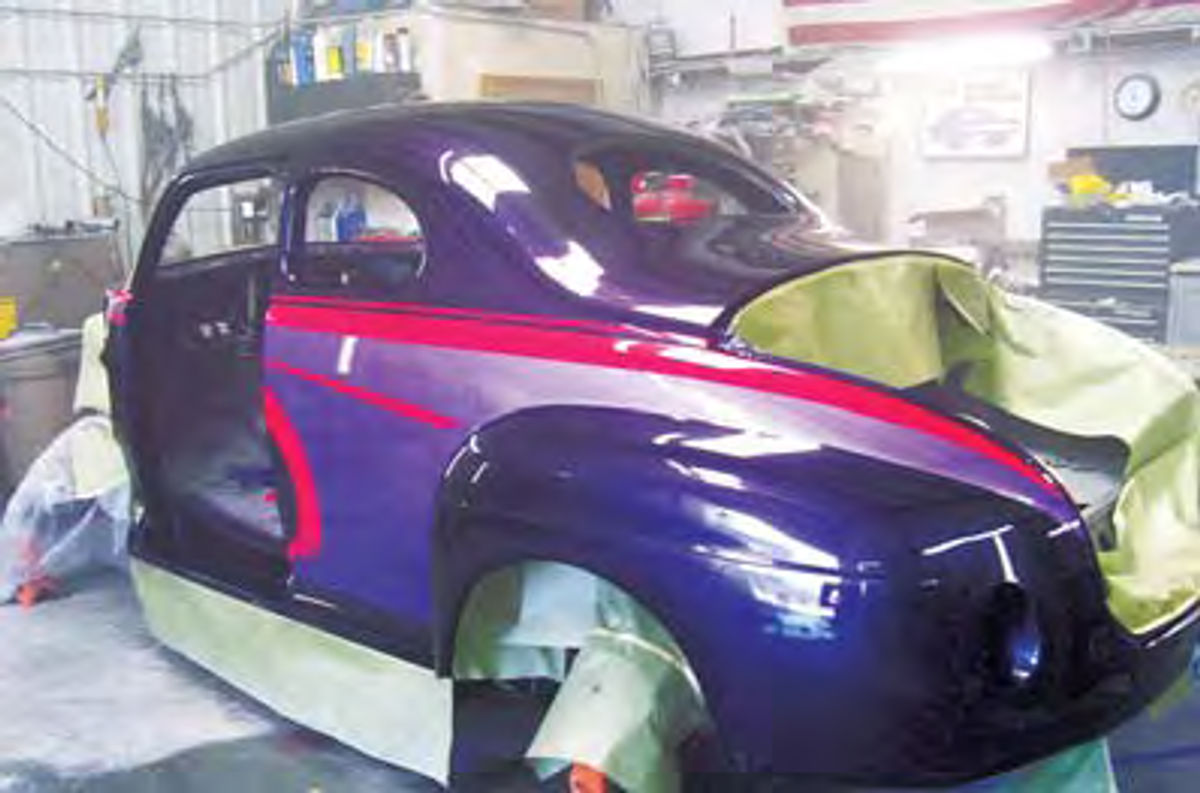
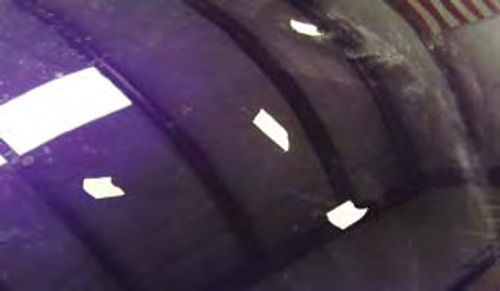
What does a sanded-through area look like? Unfortunately, I have a prime example. Notice the change in color in Photo 2. It’s that change in color that says the clear coat has been breached and the color coat beneath has been exposed.
How do you correctly deal with this type of problem? You can’t simply add more clear to the spot. The color change will still be there. What must be done is to blend more color over the spot. But there’s a catch. You cannot simply cover the sanded-through area with more color. The edges around the sand-through will wrinkle because the solvents in the fresh color coat will penetrate under the edges of the clear coat and lift it away from the surface. The area that has been sanded through exposing the color coat must be sealed, in this case using House of Kolor (HOK) KS 10 Sealer, then covered with additional color before adding the clear coat. Which spray gun works best for this type of repair? I prefer the DeVilbiss SriW-630G. This is a small gun and that makes it ideal for making spot repairs.
Keep It Clean
Now, getting back to the additional clear coats, the next step in the process is a thorough cleaning. The painting area must be as clean as possible. That means sweeping and cleaning everywhere, then wetting everything down to help settle any dust that may still be hanging around in the shop.
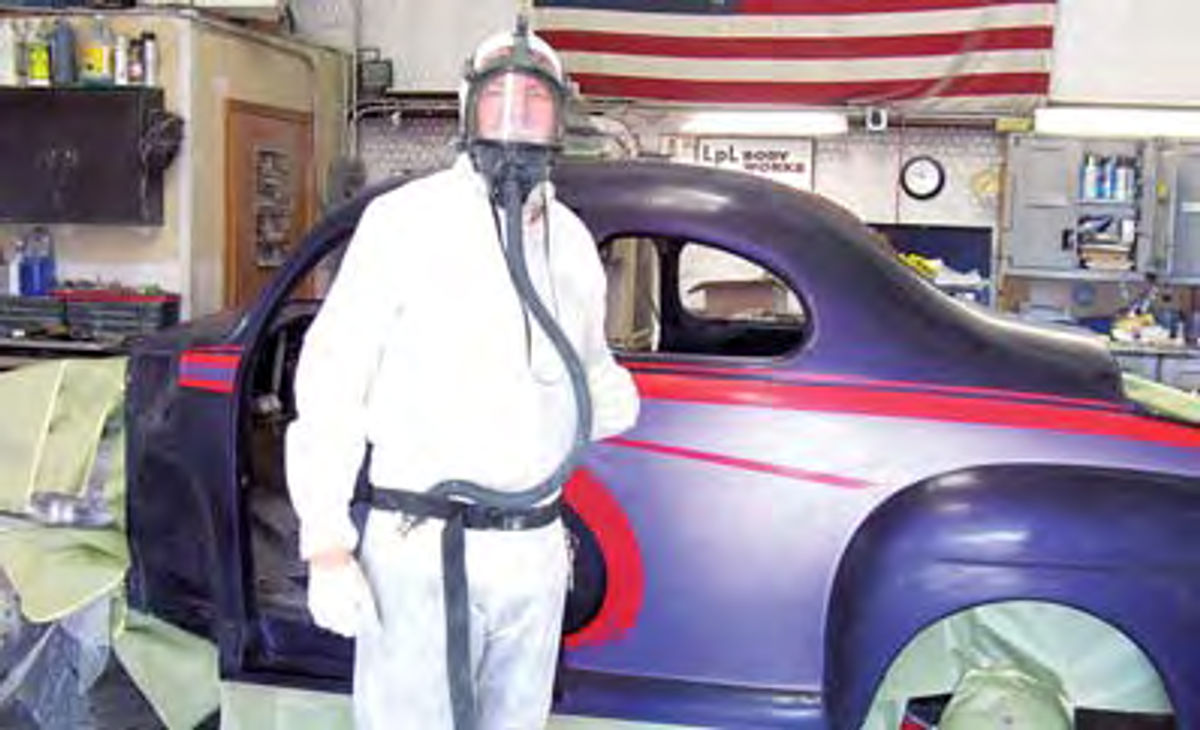
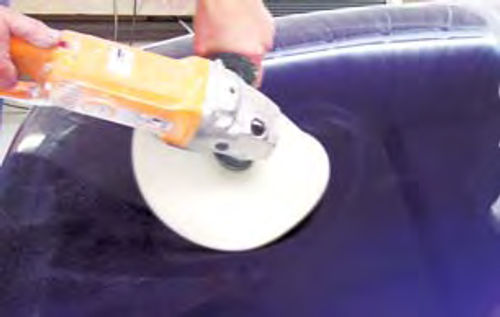
After that, it’s time for me to get clean. That means a new painting suit, latex gloves and head sock (Photo 3). What’s not obvious in the photo is that I am wearing an Eastwood SAS Pure Air breathing system #20397. This system uses a full face mask and when attached to the filtering unit provides the user with fresh air.
I talked about the mixing ratios for the HOK products in the January installment so I won’t cover that information again here. What I will talk about is the spray gun I’ll be using. The gun of choice for spraying clear coats is the DeVilbiss PLUS GFG 670 gravity feed gun. This is not an HVLP spray gun in that it requires higher air pressure than does a true HVLP, around 28 psi at the inlet. Even so, it still produces great results. I’ll be using a 1.3mm spray tip.
Clear Coat Application
Back when I refinished Project Charger some five years ago, each coat of clear was applied medium wet. The results were excellent, but the medium wet coats left a surface that had a slight orange peel effect to it. To remove the orange peel I sanded every panel on that car until each one was as smooth as glass. Needless to say I spent several days on the process.
Today things are a little different. Since doing Project Charger the paint manufacturers have made great strides toward improving their products. Colors are easier to spray and clear coats no longer produce the amount of orange peel they once did.
Spray gun manufacturers also stepped up to the plate and refined their products to the point that now a mere change in tip sizes can take a quality spray gun from laying down primer to laying down slick and smooth clear coats.
Of course, all of this improvement and refinement had to be dealt with in the paint shop. As products and tools change, so must the guy using those products and tools. So today, instead of applying three medium wet coats, the way we did in the old days (a few years ago), I start the clear coat application with a first coat that is best described as being somewhere between medium dry and medium wet.
There’s no real trick to achieving this type of application. I just speed up the stroke of the gun during application. For example, in the old days I would have taken about five seconds to move the length of this quarter panel when spraying a medium wet coat. Today I take about half that time to make this same spray pass. The result is an initial coat that at first glance appears far too thin and rough (Photo 4).
Apply Some Patience Here
This coat of clear may look sparse, but take heart. As the coat begins to cure, it also begins to flow out, one of those improvements I talked about. It just needs a little drying time, about 15 minutes at 70 degrees, to flow out and lay flat.
But then 15 minutes of drying time can seem like an eternity when you are staring at a clear coat you know is much too thin and far too rough.
But getting antsy is a bad thing. The clock must tick down the 15 minutes before the next coat can go on. If it doesn’t, you risk getting runs and orange peel...and that’s not good.
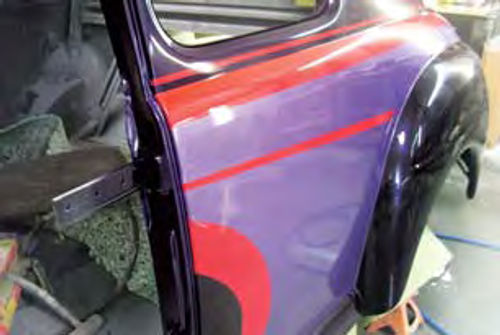
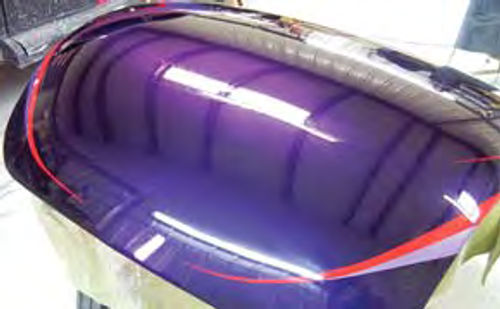
The second coat is applied slightly slower than the first. This is still not a medium wet coat. I make this pass in three to four seconds. That’s slower, but not much slower. Once this coat is on the panel, the difference in the surface will be obvious. The clear will have laid out smooth, (Photo 5), with no traces of orange peel anywhere.
Another 15 minutes of cure time and I’m ready for the third coat. But hold the phone. This next coat is not going over the entire body. This coat is for the graphics work on the sides of the car only. It is applied at the same speed the second coat was applied.
The idea here is to gain some depth to the clear coat in the areas that need depth, which is along the paint lines of the graphics work. This buildup of clear will help when it comes time to sand the paint lines smooth.
In the old days I would have had concerns about leaving a dry edge along the length of the stripes when using this technique. Today, with the improved flow out characteristics of the clear coats, leaving a dry edge is pretty much a thing of the past.
Thirty minutes later and I’m ready to apply a fourth coat. What happened to the 15 minutes drying time between coats that I used previously? At this point I have a pretty good buildup of clear on the car. That buildup has trapped a lot of solvents within the layers of clear. Pausing to give the clear an extra 15 minutes to cure will help dissipate those trapped solvents. What can happen if I don’t give the clear coat that extra 15 minutes of cure time? Solvent pops.
What’s a solvent pop? Solvent pops look like tiny pin pricks all over the surface of the clear coat. Think about a sauce pan of pudding boiling on the stove. Yep, my wife lets me lick the spoon. That’s how I know about boiling pudding. Anyway, as the pudding boils steam bubbles form on the bottom of the pan and move to the surface of the pudding where they pop. Solvent pops happen the same way. They form at the bottom of the clear coat and move to the surface where they dissipate.
The problem is that it can take some time for the solvents to work their way through multiple layers of clear and reach the surface. If the coats are applied too quickly, the solvents in the first coats may still be moving to the surface while the exposed surface of the fourth coat is drying and forming a skim. When those solvents from the first coats finally do move to the surface, they burst through the dried skim and leave behind holes in the clear coat.
Normally if you get one solvent pop, you get a few hundred. The only cure is to allow the clear to cure, sand the surface smooth, and apply more clear. That’s dollars spent and time wasted just because you were in a hurry to apply the next coat of clear.
Getting back to applying that fourth coat of clear, I spray the coat at the same speed used to apply the second and third coats. I’ve still not slowed to the medium wet application rate. But that’s all right. The surface is looking nice.
How does the car look? See Photo 6. The haze of clear over spray is still hanging in the air, but the car looks great.
Polishing the Clear Coats
A characteristic of clear coats is that the longer the finish cures, the harder it becomes. That’s great when you think about the longevity this gives to the overall finish, but not so great when you think about the need to sand and compound a finish that is getting harder by the minute. I normally give a clear coat finish at least two days to cure before doing any sanding or compounding. That ensures the finish has had time to completely cure, yet still be soft enough to be easily sanded and compounded.
I’m going to use the deck lid for demonstration purposes as I go through the sanding and polishing procedures.
To start with, whatever you are sanding must be clean. This may seem like a no-brainer, but trust me it is very important and quite often overlooked. Fresh clear coats are easily scratched and the easiest way to scratch a fresh clear coat is to trap a piece of dirt or debris between the sandpaper and the clear coat. With
that thought in mind, I always begin by washing whatever is to be sanded. I use a quarter cup of Dawn dishwashing liquid per one gallon of clean water and gently clean things using a new, and I stress new, cotton washing mitten.
Next, I need to think about sandpaper grits. Clear coats can tolerate sandpapers as coarse as 1000-grit, so that’s where I begin. What if you use a more coarse sandpaper? Don’t. The next grade down would be 800-grit and using this sandpaper would result in a surface that was so rough that a heavy sanding with 1000-grit might not remove all of the scratch marks. The result might be the need to recoat the panel or the entire vehicle with more clear just to remove the sand scratches.
Once the panel has been thoroughly sanded using 1000-grit, I move up to 1500-grit and repeat the process. After that it’s on to 2000-grit for a final sanding in preparation for compounding.
Sounds easy, right? If only it was. Let’s start by getting the terminology correct. In paint shop lingo the sanding and polishing process is referred to as “color sanding and buffing.” So when I use those terms from here on out you will know what I’m talking about.
I always color sand by hand using a soft, round sanding pad, 3M #5291. This pad is specifically designed for use with 3M Hookit II sanding disks. The disks themselves are: 3M #0869, 1000-grit, and 3M #0850, 1500-grit. The 2000-grit comes in 51⁄2 x 9 inch sheets, 3M #02624, and is best used with the 3M #5442 Soft Hand Block.
The Hookit II disk can also be used on an orbital pneumatic palm sander, but unless you are proficient with one of these machines I would not recommend its use, especially on a vehicle as rounded as the ’46. What’s rounded got to do with it? Pneumatic palm sanders have a flat sanding pad and they work great on a flat surface. It is much more
difficult to get a flat pad to sand a curved surface without cutting deep into the clear coat. That deep cutting could actually go through the clear coat and expose the color coat beneath. That would call for more color and more clear. In other words, it would mean starting over.
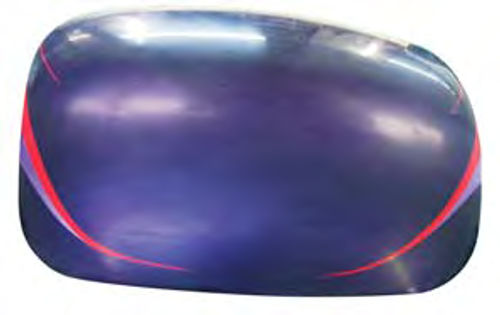
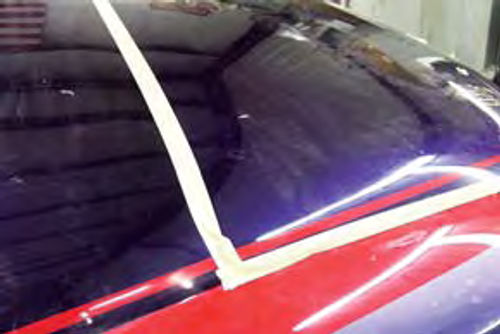
Here is the deck lid after sanding it smooth using 1000-grit sandpaper (Photo 7). Notice that the shine is gone and the surface now has a very smooth, very dull sheen to it. That’s the goal. This dull sheen contrasts with any imperfections that might be left on the surface as they will remain shiny.
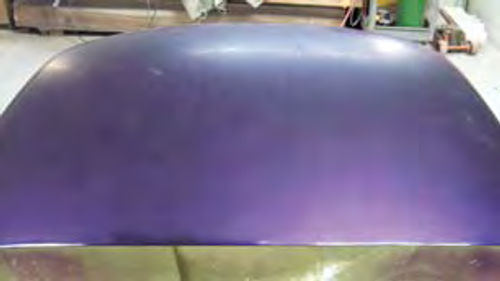
Now look at the same surface after being sanded with 2000-grit (Photo 8). I skipped the 1500-grit surface because it looks very much like the 1000-grit surface. The difference in the surface is obvious. The 2000-grit has taken the finish from very flat to almost beginning to shine. Since bringing back the shine is the ultimate goal, completing the sanding process using 2000-grit is definitely worth the effort.
I could easily spend an hour compounding this panel to bring back the shine if I stopped sanding after using the 1000-grit. But by continuing the sanding process and finishing with 2000-grit, I can easily cut my buffing time in half. More time spent sanding, but less time spent buffing. It’s a tradeoff time-wise, but involves less physical labor.
Polishing Equipment
To bring back the shine, the machine of choice is a variable speed electrical buffer. Many professional shops prefer to use pneumatic buffers and they work quite well. The difference is that professional shops have giant compressors that can handle the CFM requirements of a pneumatic buffer. Most garage restorers do not.
Select a buffer with a top speed of around 3200 rpm. Anything faster is considered a grinder and shouldn’t be used here. High speed equals heat and heat equals burned paint. Not a good combination.
Select a wool or wool blend buffing pad to start the polishing process. For this ride I’m using the Norton Liquid Ice system. This package includes one quart of Liquid Ice Extra Cut Compound, a heavy duty Hook and Loop backing pad that will attach to most buffers, a wool buffing pad to remove the sanding scratches left from the 2000-grit, a blue foam pad for removing swirl marks left from the wool pad buffing, and a white foam pad to produce a high-gloss finish.
I begin the buffing process using the wool pad. I apply a small amount of Liquid Ice Compound to the surface and work in a roughly two-foot by two-foot area. I move the machine over the entire two-foot by two-foot area and never allow the machine to sit in one spot for very long. Doing so could create a buildup of heat that can burn the fresh clear coat.
A tip: If the Liquid Ice Compound begins to dry, dampen the surface with a mist of clean water. Water will reactivate the compound and extend the buffing time. I continue this process of working in small sections until the entire panel has been compounded and is free of all sanding scratches.
How do you know when the sanding scratches are gone? Sanding with the 2000-grit should have removed them, but if any are left they will become visible as the shine begins to come out. Generally, a little extra compounding in the area of a found scratch will remove it. If not, it’s back to the 2000-grit sandpaper.
Here’s the trick. If I see a sand scratch or even a small imperfection in the surface after the area has been buffed, I first try applying more compound to the area and doing more buffing. If that doesn’t remove the problem, I leave it and continue buffing the rest of the panel.
Once the panel is completely buffed, I wash the panel with a solution of distilled water and 10% vinegar mixed in a spray bottle and wipe the panel dry using a lint-free detail cloth. The water and vinegar solution acts to remove any compound that might be trapped in a scratch and helps expose the problem. Once the scratches or imperfections are exposed, I mark each one using a small piece of masking tape (Photo 9).
That saves me the trouble of having to search the panel a second time looking for problem areas when I’m ready to remove them. Removal is accomplished via a spray bottle filled with water and a piece of 2000-grit on a block. I wet sand every imperfection and repeat the buffing and polishing process.
Next comes the blue foam pad. At this point the panel should be looking nice. No more dull areas and no more sand scratches. This pad works best if dampened before use.
Once damp, I apply several small drops of Liquid Ice directly to the pad, not to the surface being polished, then polish the surface until all traces of swirl marks have been removed.
Next comes the white foam pad. This pad also works best when damp. I apply several small drops of Liquid Ice to the pad and lightly polish the surface to bring out the shine. You should be able to shave with this shine (Photo 10).
Can’t get the buffer into the tight corners? Try the Eastwood #12815 Dual-action sander/polisher kit. The three-inch pads in this kit make reaching those hard to get at areas much easier.
More tips: Never operate the buffer with the pad laying flat on the panel. Always tip the machine up slightly (Photo 11). This method provides better control over the machine and concentrates the polishing into a smaller, easier to monitor area. Use masking tape to protect all edges of the panel being polished (Photo 12).
Always drape the electrical cord over your shoulder when operating a buffer. This ensures that the cord will never become tangled in the machine. Wear eye protection and a NIOSH approved dust mask when operating any type of buffer.
Finally, wash the car again before leaving for the day. Compound tends to sling everywhere when buffing. Compound left on a fresh clear coat can etch the surface, creating more work removing the etching marks.
Here’s a final tip: Ask your paint supplier for a painter’s smock. He should stock them and they work great for keeping compound off of your clothing.


