How - to Cooling System Maintenance, Pt .2
This Time We’ll Drain and Flush the Radiator and Engine block. Then We’ll Back-Flush the Heater & Replace Hoses.
LAST MONTH WE performed a thorough inspection of our cooling system, gathered the necessary tools for the project and came up with a “shopping list” of parts and products we’ll need. There were nine images with the first installment, so we’ll be starting here with Photo 10.
Drain, Prep & Flush the Cooling System
There is professional equipment available that will back-flush the cooling system, but this do-it-yourself method will also yield very good results. Prestone makes a flushing kit, and while it is better than just draining and flushing the radiator, the steps described here will do a more thorough job and also address back-flushing the heater core. You can do this using only clean (preferably filtered) water, but a better choice is with the addition of a chemical flush.
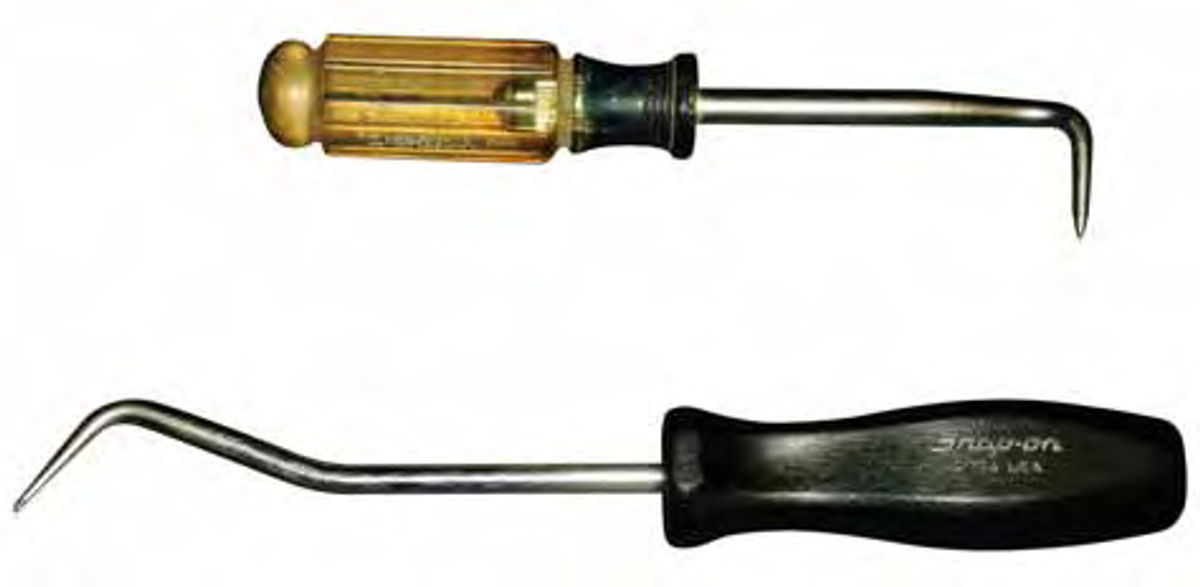
1. Start with the engine cool and drain the radiator. To do a good job of draining, begin by removing the radiator cap. If your radiator has a drain cock, use it. If it’s not so equipped, carefully remove the lower radiator hose and have a large target ready to catch the fluid. Photo #10 shows two tools that are very helpful in breaking the bond between the hose and radiator. The Snap-On tool (lower) is actually marketed for hose removal while the Craftsman is technically for cotter pin removal. Use either of these tools to work in between the hose and radiator outlet. When the hose can be rotated easily in either direction, the bond has been broken. Now you can safely twist and remove the hose. Once the radiator has finished draining, replace the hose and snug the clamp (or tighten the drain cock).
Note: Remember that when you’re dealing with antifreeze /coolant (ethylene glycol) don’t leave it lying around in an open container. Animals are attracted to its sweet taste; they will drink it, and it can kill them. Catch it in an open container and then transfer it into old milk jugs. You will need a means of carrying it to the recycling center anyway, so why wait? If you intend to reuse the coolant for some reason, consider using one of those black plastic containers that are sold for drain oil. I have one of these dedicated just for this purpose. Be sure to label it to avoid any confusion.
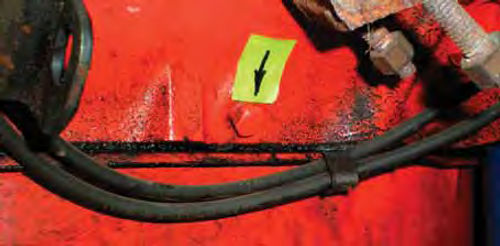
2. If your engine block has a drain plug(s) in it, remove that and drain out as much fluid as possible. Typically, but not always, “V”-type engines will have a drain plug on both sides of the block. Photo #11 shows one of the two drain plugs on the sides of a 350 Chevrolet engine located just above the oil pan. If the plug is removed and nothing comes out, there is a “skin” or rusty build-up on the inside of the block. A small screwdriver or something similar is all that is needed to poke through and open up the drain hole. Once drained, replace the plug. We will repeat this draining procedure a couple of times when rinsing the block, and after the final rinse, we will apply Teflon tape around the threads before replacing the plug(s).
3. Want to go a step further?
To remove as much old coolant as possible, disconnect the heater hoses and flush the heater core with your garden hose. Use an old milk jug on the end of one hose and introduce fresh water through the other hose until the discharge is fairly clear. If your system includes a heater control valve, as discussed last month, connect up to the heater hose on the “heater core” side of the valve.
This is the suction hose and the arrows indicate the direction of flow to the core. It’s not essential to include this step in the flushing procedure, but it removes a bit more of the old stuff.
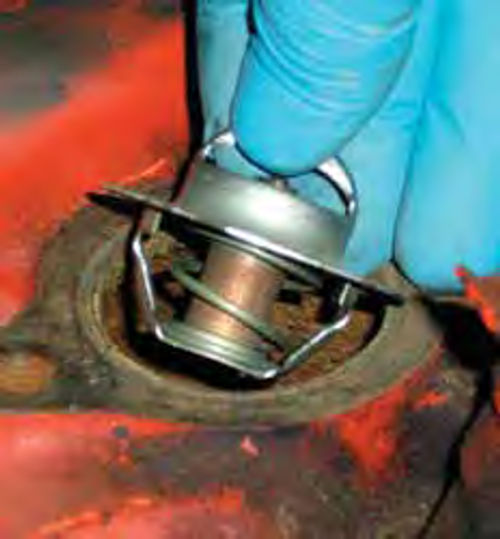
4. Remove the thermostat to allow for maximum circulation during the cooling system flush. Photo #12 shows the proper orientation of the thermostat as it is being removed. This thermostat fits into a slight recess, but that’s not always the case. Some thermostats twist and lock into the housing, so check your manual if you are not certain. Reassemble without the thermostat but with a new gasket (the old one can be reused if it remained intact). This is why you needed to purchase two housing gaskets.


5. Add the flush solution. Today’s radiator flush solutions are pre-mixed liquids that pose little threat to radiators or other parts in the cooling system. The same can’t be said for some of the granulated powders used decades ago. Many radiator shops claimed they did more harm than good, due to undissolved particles remaining in the radiator. Follow the directions that come with the flush.
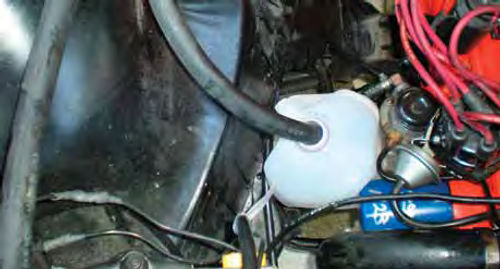
Using a filter on the garden hose like the one shown in Photo #13 is an option during the filling and rinsing procedures. This is typically used for filtering the water supply to an RV when camping. They are available at general merchandise stores, but it may not be practical to buy one for just this purpose. Do you know anyone with an RV? They probably have one and might not mind loaning it to you considering the minimal use you would give it.
6. With the radiator filled, start the engine and turn the heater on to its maximum setting. You should immediately notice strong water movement within the radiator due to the fact that there is no thermostat in place. If the level drops, bring it back up to the proper“cool” level then replace the radiator cap to the completely closed position. Since we’ve removed the thermostat the engine won’t generate the normal amount of heat, and some chemical flushes depend on that heat. To help compensate you can block part of the radiator with a section of cardboard or old blanket, and increase the flush time. Feel the upper radiator hose and you can judge if the temperature has increased. Also, if the heater has been working efficiently it can be used as a gauge by feeling the temperature of the discharged air. Run the engine for about 30 minutes and then shut it off.
7. Draining. Once the engine has cooled down sufficiently, repeat the same draining process we did in steps #1 and #2. Don’t rush it. Never remove the radiator cap while it’s hot, as the system will likely be under pressure and you could easily be injured.
8. Rinsing the system. Fill the system again, this time with water only and replace the radiator cap. Run the engine with the heater on for about 15 minutes, then let the engine cool and repeat the same draining procedure. Perform this even if you didn’t use a chemical flush. It will help ensure there is no old coolant remaining in the system.
Back-Flushing the Heater Core
Disconnect the heater hose from the engine block and the other from the water pump. The heater hose that connects to the water pump is the “return hose.” If it’s not connected directly to the pump, it will always be the hose closest to the pump. Connect your garden hose to the return hose for back flushing. The set-up shown in Photo #14 allows the water to be turned on and off easily without disturbing the nozzle. The brass shutoff valve is visible, but already inside the heater hose is a simple non-adjustable brass nozzle. I cut the end off of it to enlarge the opening; if you look again at Photo #13 you can see it. Take the other heater hose and place it securely into a milk jug (or something similar). The sudden blast of water will knock the jug over if it’s not wedged in between something as in Photo #15. If there is a heater control valve used in the hose, temporarily disconnect it, or just perform the service on the heater core side of the valve. You don’t want there to be any possibility of building up pressure within the heater core and chancing damage. This method will help kick out any rust build-up and increase your heater’s performance.
If you have access to compressed air you can now perform the same procedure with air only. Next go back to the water flush. Do this as many times as needed until there is no longer any measurable amount of rust being discharged from the hose into the milk jug. If there isn’t a good blast of water from the hose into the jug, the heater core is severely restricted and will need to be replaced. As previously mentioned, you can also verify this by feeling the heater hoses during normal operation. With the engine at operating temperature and the heater on full heat, feel both heater hoses. If it’s hot entering the core but noticeably cooler when exiting, that indicates a poor flow of coolant through it.
Heater Hose Replacement
In most applications this is a simple procedure. While some later models may require vehicle-specific molded hoses, older vehicles generally use 1/2”, 5/8” and 3/4” ID hose. This is sold by the foot at many auto parts stores.
Removing the hose connections from the water pump and block are easy, at least from the standpoint of worrying about damage. You can use the hose removal tool shown in Photo #10 or cut and twist the hose without fear of damage to the engine’s connections. The heater core is an entirely different story. The two brass tubes that extend out of the firewall and connect to the hoses are soldered to the core and can easily be damaged if you are not careful. This is true whether the core is old or new. You can use the hose tool to aid in removal, and if the hoses are to be reused, you will be relying on it entirely. Support the hose with one hand and carefully work the tool in between it and the heater core tube. Without putting pressure on the tube, gently work the tool back and forth by twisting its handle. This will stretch the rubber, breaking its bond to the brass. Progress along in this manner until the hose is free, and can be twisted without fear of damage to your heater core.
If you’re replacing the old hoses, things are simplified by cutting them. Photo #16 shows the best way, by slicing through the reinforcement cord of the hose. Once you do this, the hose will be much weaker and can easily be removed.


Note: Had you been replacing a high pressure hose in the air conditioning system, this method is essential.
Using a straight-through cut against the inlet of an A/C Condenser to remove a high-pressure, clamp-on style hose would likely end up costing you a new condenser. The cooling system, however, is by comparison very low in pressure, and if you must make a straight cut against the brass due to limited access, do so gently. In some instances I have found it helpful to cut the hoses off square, close to the end of the tubes as shown in Photo #17. Now you can see the tube while working to remove the remaining section of hose. In addition, the hose tool can be inserted from either side, if needed. If a hose was very difficult to remove it’s likely it may have left some rubber bonded to the brass. Do a final cleaning by scraping off any rubber and then finish by carefully cleaning the brass with a small amount of lacquer thinner on a rag.
To make it easier to install new heater hoses (or any cooling system hose) use soapy water to coat both the hose and its mating surface. When connecting hoses to the heater core, push straight on with only a slight twist.
But before you connect the new heater hoses, we will use the one connecting to the engine block to do a final rinse.
Next, we’ll rinse the block, discuss the signs that call for hose replacement, and wrap up the project.


