How -to Primers Revisited
Primers Continue to Be a Topic of Interest for AR Readers. So, Let’s Take an Updated Look at What’s Available.
SOME TIME AGO, the May 2004 issue to be exact, I talked about the different types of automotive primers on the market. And over the last half dozen years readers have not lost any of their interest in the subject because I continue to receive numerous questions about which primer to use in a given situation. So, this seems like a good time for us to revisit the various types of primers available and their uses.
Self-Etching and Wash Primers
These have to be the most misunderstood primers out there. Why? Because in my experience, I’ve found that few people seem to fully understand when and why a self-etching or a wash primer should be used. I’m going to step out on a limb here and say that this lack of understanding where vintage rides are concerned may be partially my fault. I’ve rarely mentioned these primers in the past and never discussed their use over the course of the three different project cars— Project Charger, Project Mustang and Project 46—thatIdidforAutoRestorer.
So, just what are self-etching and wash primers?
Self-etching and wash primers are two different products that basically accomplish the same task. They prepare clean and sanded bare steel, clean and sanded galvanized steel, and clean and sanded aluminum for refinishing by etching the surface of these panels to promote better adhesion for the next coating to be applied, generally a urethane-based primer/surfacer or a sealer.
If you darken the door to a commercial body shop where panels are being replaced on late-model vehicles, you will find self-etching and wash primers being used. That’s because many of the vehicles being repaired by these shops are constructed of galvanized steel and/or aluminum. If you hope to get sealer or urethane primer/surfacer to stick to galvanized steel or aluminum, you must first sand the metal with 180 to 320-grit sandpaper then treat the metal with a self-etching primer or a wash primer. Basically what you are doing is coating the metal with phosphoric acid to “open the pores” of the metal to provide better adhesion for whatever you plan to apply over the metal, which again is normally a urethane-based primer/surfacer or a sealer.
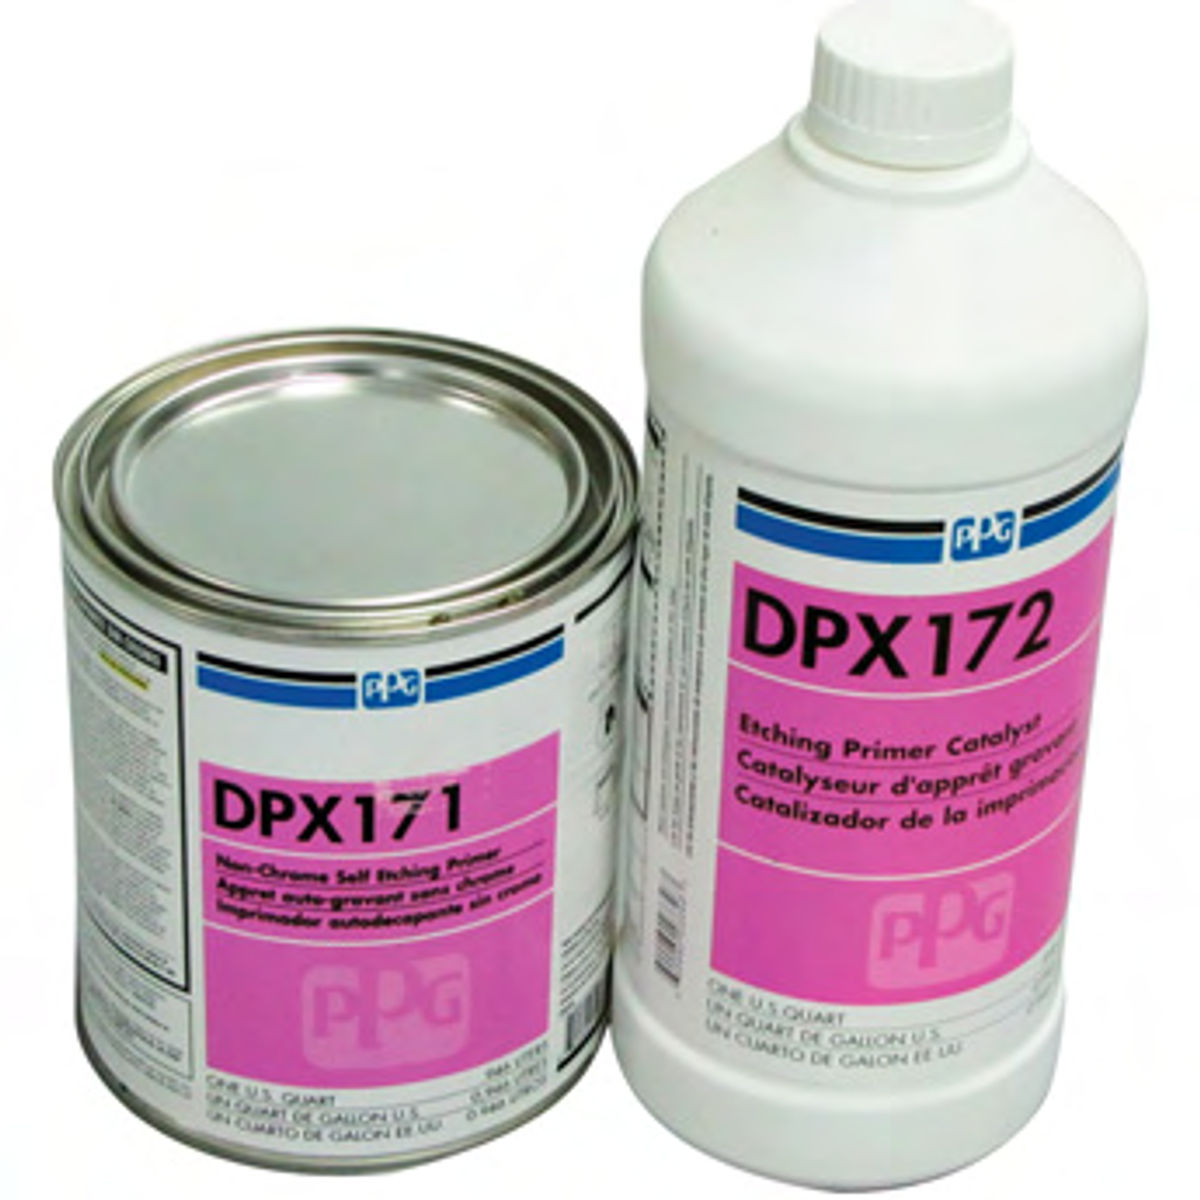
So, what’s the difference between a self-etching primer and a wash primer? Consider these two productsfrom PPG. The first is DPX171 (Photo 1.) This is a self-etching primer that contains zinc or chromium to make the solution thicker and provide a heavier buildup of material on the panel being sprayed. Normally, automotive paint shops use a self-etching primer when working with newly galvanized steel panels. They may also use this primer when refinishing galvanized panels that have some areas of exposed metal along with some paint on them.
When working with an older finish, the etching primer is sprayed over the bare metal in need of refinishing then feathered out onto the sanded original finish to ensure good coverage. When working with a new panel the entire panel is coated. This is a catalyzed product, using DPX172 Catalyst mixed 1:1. PPG recommends that this product be sprayed in one wet coat.
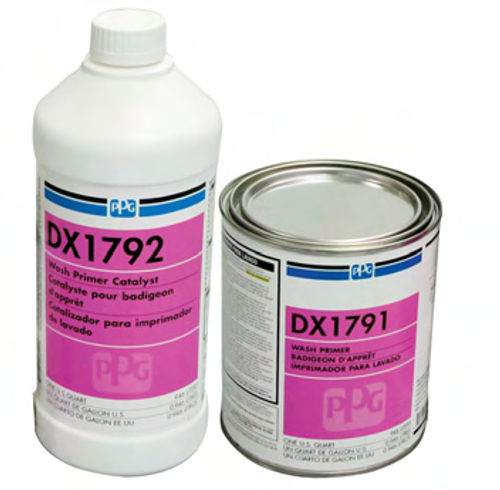
On the other hand, DX1791 (Photo 2) is a wash primer and it does not contain zinc, which makes this product almost as thin as water.
I can’t say for certain where the name “wash” comes from, but in the old days we actually used clean shop towels to apply the early, non-catalyzed, versions of wash primers and followed the application by wiping away the residue with more clean shop towels.
That method doesn’t work these days as wash primers must now be catalyzed and applied using a spray gun. Use DX 1792 Catalyst mixed 1:1. PPG prefers that their wash primers be applied in one wet coat as well.
Wash primers are primarily used on new bare aluminum panels that will not require any repairs other than refinishing.
Compatible Surfaces and Top Coats
As noted, self-etching and wash primers can be applied over clean and sanded steel, clean and sanded galvanized steel, or clean and sanded aluminum. Do not apply either of these products over fiberglass because phosphoric acid will soften it.
You may apply any sealer and any urethane primer/surfacer over these products. Do not apply epoxy over these products as it will not stick. Do not apply any color coats, whether enamel, base coat or single stage, directly over these products. They will not stick either.
Safety
You must wear an approved refinishing respirator when spraying self-etching and wash primers. Do not inhale sanding dust from either of these etching products. Sanding dust? Yes, etching primers can be lightly sanded with 320- grit sandpaper to improve upon the surface being top coated.
Corrosion-Resistant Primer
This type of primer is probably unfamiliar to most restoration shops. It is primarily used in commercial body shops as a non-sanding primer and occasionally as a primer/surfacer. (PPG’s version is PPG NCP271).
Where would you use a non-sanding primer? Don’t quote me on this, but generally speaking non-sanding primers are applied to used cars to quickly fill and hide minor blemishes in the old surface before the vehicle gets a fresh coat of paint. The non-sanding aspect of this primer cuts down on the time spent preparing the vehicle for paint, while the filling and hiding aspect of this primer offers a better overall finish without all that sanding. After all, time is money.
Corrosion-resistant primers do not contain chromium, lead or isocyanates, which makes them somewhat safer to work around than would be primers in the chromate family.
Ironically, the drawback to using a corrosion-resistant primer is that it does not contain chromium, lead or isocynantes. That means more coats are often needed to achieve a good build of material if the plan calls for block sanding to improve on the overall finish.
This also is a catalyzed product using NCX275 Catalyst mixed at a 3:1 ratio. PPG recommends applying one wet coat if this primer is used as a non-sanding primer or apply four to six wet coats if it is used as a primer/surfacer.
It can be top coated with most sealers, base color coats or single-stage finishes.
Safety
Wear an appropriate refinishing respirator when spraying a corrosion-resistant primer and a dust mask when sanding. Sand with 320-grit sandpaper.
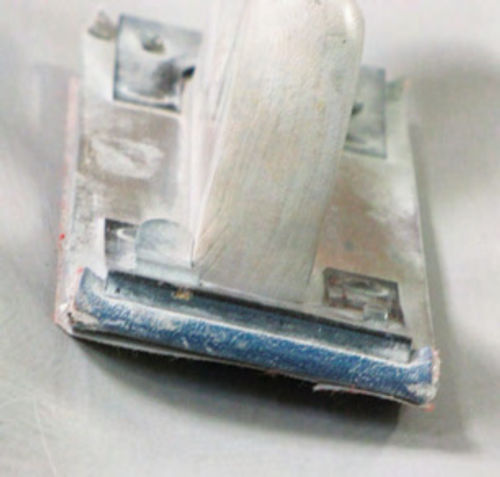
Epoxy Primer
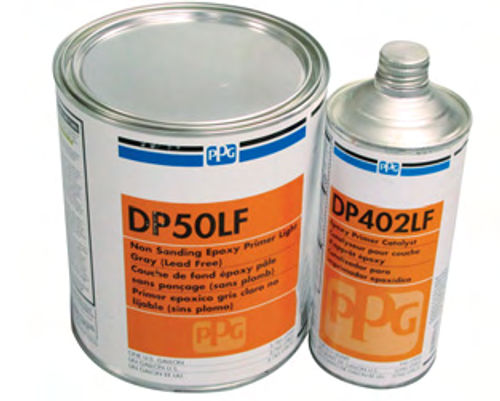
For restoration purposes this is the first primer that should be applied to your project. The epoxy shown in Photo 3 is PPG DP50LF, a gray primer. Other colors are available in the PPG DPLF epoxy primer line and they are designated as follows: DP40LF—green, DP48LF— white, DP60LF—blue, DP74LF—red, and DP90LF—black.
Any of these can be applied to bare steel, media blasted steel, galvanized steel, aluminum or fiberglass. To qualify that statement, any surface not media blasted must be sanded with 180 to 320- grit sandpaper and you must have a film build of at least 1.2 mils if applying over galvanized steel or aluminum. In paint shop terms that would be two medium wet coats.
Two products that any DPLF Epoxy Primer must never be applied over are DPX171 or DX1791. These products are not compatible with epoxy. What happens if you do? The DPLF will not stick. It may even lift and wrinkle before you even get the second coat applied.
The next thing to know about DPLF epoxy primer is that your paint supplier will ask you which PPG catalyst you prefer, DP401LF or DP402LF. The difference is that DP401LF requires a 30-minute induction period before you can spray the mixture. Why would you want to use DP401LF and have to wait 30 minutes before using the mix? The pot life is extended out to 72 hours instead of the eight hours you get when using DP402LF. That can be very helpful around commercial body shops.
As noted, this also is a catalyzed product using either DP401LF or DP402LF, and each must be mixed at a 2:1 ratio. PPG prefers that their epoxy be sprayed in medium wet coats; in most cases two coats is sufficient.
Safety requires that a refinishing grade respirator be worn when spraying and a dust mask be worn when sanding.
Chromatic Primer
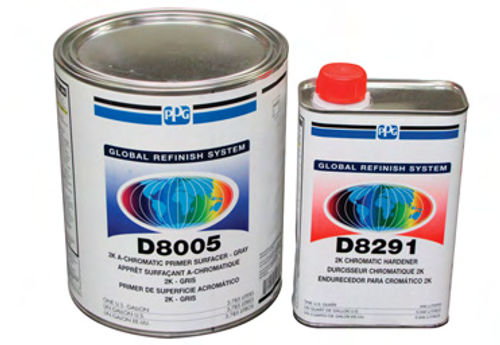
While this is a urethane-based primer product, it is more commonly known as a “surfacer.” (PPG’s version is D8005 2K Chromatic primer/surfacer.) This also is the type of primer you will find being used in many commercial body shops when it comes to priming over plastic body filler repairs to achieve a smooth surface.
As the name indicates, this product contains chromium which means this is a very thick product. Why so thick? This type of primer does one very important thing: it fills imperfections and sand scratches (Photo 4).
Chromatic primers can be applied over original finishes that have been sanded with 180 to 320- grit sandpaper, aluminum that has been sanded with 180 to 320 and coated with a wash primer or etching primer, bare steel that has been sanded with 180 to 320, and galvanized steel that has been sanded with 180 to 320-grit and coated with a wash primer or etching primer.
This primer also can be applied over any dry and sanded polyester body filler product, fiberglass panels or SMC panels. I stress the dry part because all polyester fillers, bare fiberglass and sanded SMC products can soak up moisture if wet sanded. What do you do if any of these surfaces get wet? Give them at least 24 hours to dry at 70° F before applying any primer product.
Apply two to three wet coats for a total build of about 4 mils.
Safety requires that you wear a respirator when spraying this primer as this is a catalyzed product, and wear a dust mask when sanding.
Primer Summary & Some Use Tips
That’s the overview of the main types of primers you’ll find being used in today’s body shops. Now let’s get down to the specifics of using these primers when it comes to repairing vintage rides, starting with etching and wash primers.
The rule for using either of these primers is pretty simple: If your vehicle was manufactured before 1980 and it is constructed of mild steel or fiberglass you do not need an etching primer or a wash primer for any reason.
I’ll repeat that in case some slick paint salesman wants to sell you an etching primer or a wash primer. If your ride was manufactured before 1980, you do not need either one as there is no galvanized steel anywhere on these vehicles that would require etching.
On the other hand, if your project happens to be an original Shelby Cobra with a bare aluminum body that only needs a paint job, you can opt to apply a good etching primer or wash primer in order to prepare the surface for a few coats of chromatic primer. Me, I’ll use an epoxy primer instead.
On the other, other hand, if your project happens to be a later model vehicle, produced after 1980, the chances are you will find at least some galvanized steel under the factory finish.
How will you recognize a galvanized coating when you find it? It can actually be difficult to know for certain if the panel has been galvanized. A good clue is to grind the old paint down to the bare metal and look for a shiny metallic-like coating on the steel. You’ll recognize the shiny area the moment you grind through it and expose the dull-colored steel beneath.
You think your panel is galvanized? The next step is to apply a single coat of DPX171 Etching Primer To the clean and sanded panel. Yes, you can spray DPX 171 out onto clean and sanded original finishes when necessary. PPG says you can apply a very thin coat of plastic body filler over lightly sanded DPX171.
If you think your galvanized panel will require more than a very thin coat of filler to repair it, you will be better off forgetting the etching primer and instead going with a premium grade fillers such as Rage Extreme that can be applied directly to sanded, galvanized steel or aluminum. Once the repairs have been completed, cover the filler with epoxy primer and apply a urethane chromatic primer over the epoxy.
Can you still do the sandwiching thing and apply epoxy first,followed by filler, followed by more epoxy, followed by urethane chromatic primer? Definitely, that’s the way I do it.
Something else you should know about etching primers and wash primers is that both of these products are porous. That means they will soak up any moisture present in the air. You won’t find either of these products being used in high humidity conditions. How do you get around using these primers? Apply epoxy instead. It will stick to just about any sanded surface.
Corrosion Resistant Primers
My opinion is that you probably don’t need to apply this type of primer anywhere on your vintage ride. The only area I can think of where you might use this type of primer is when slicking out a frame. This primer could be used as a non-sanding primer to fill nicks in the frame before giving it a finish coating. Thatsaid, I would still lean toward applying a couple of coats of epoxy instead.
A Vote for Epoxy
As you might have guessed, this is my choice of primer for use when it comes to initially coating all steel panels, even galvanized steel panels, and aluminum panels. Read the P-Sheets on whatever brand of epoxy you will be using to determine how many initial coats you need to apply for whatever type of surface you are working on.
If you followed Project Mustang and Project ’46 (both available in book form at autorestorermagazine.com or by calling ) you saw me apply two coats of epoxy to the bare steel of both bodies before doing the plastic body filler repair work to these cars. After the filler work I applied two more coats of epoxy and followed that with several coats of urethane primer.
The idea was to lay down a rust-resistant coating on the metal then sandwich the plastic body filler between more coats of rust-resistant primer. The whole idea was rust prevention. That’s the basic idea behind using epoxy.
Chromatic Primer Is a Filler
Recall that I said this urethane primer is more commonly known as a “surfacer?”Always remember that this primer is used to fill minor imperfections and sand scratches left behind from applying plastic body filler. It is not there for rust prevention or adhesion promotion. It is a filler; plain and simple.
The thing to understand about purchasing a “surfacer” is that money talks when you consider the time spent applying and block sanding these products. The more solids the “surfacer” contains, the higher the cost. Expand that out to higher cost equals more solids and the result is fewer coats that need to be applied and less time spent block sanding to achieve good results. Spend the bucks to get the good stuff and you won’t regret it.
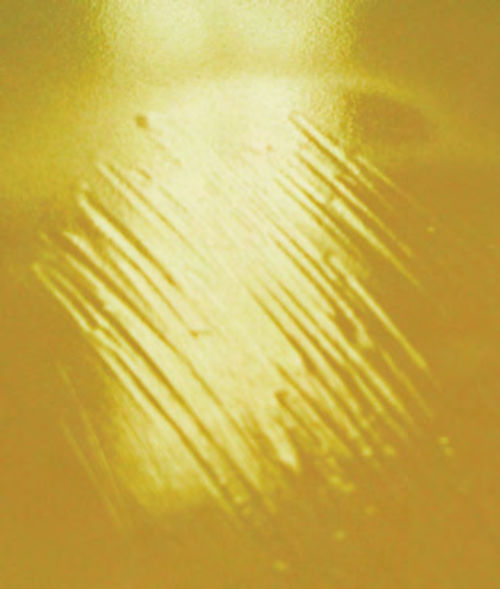
The next thing to consider when it comes to “surfacers” is a phenomenon called “die back.” Years ago when the only “surfacer” out there was a lacquer based primer, die back was a huge problem. People would pile on four to six coats of lacquer primer, which amounted to roughly 8 mils of primer, give it 24 hours to dry and start sanding. The problem was that it actually took several weeks for the lacquer to dry and as it did it had a tendency to shrink. The shrinkage that occurred after sanding slowly telegraphed up through the paint layers and left behind visible sand scratches. (See Photo 5.) Those visible sand scratches are what is known as “die back.”
The good news is that die back isn’t the huge problem it once was now that we have gone to catalyzed products. However, it still persists if the “surfacer” isn’t applied correctly. My method of application calls for applying three coats of “surfacer,” allowing those to cure for a minimum of 24 hours then block sanding those coats with 180-grit sandpaper. Keep in mind that I’m talking hot summer days with the temperature reaching 90° F or higher and little humidity. In the dead of winter when the shop struggles to reach 65° F I wait at least 48 hours before sanding.
Let me pause here and talk about the cure time. The P-sheets on PPG 2K D8005 Chromatic Primer Surfacer Gray gives a cure time for three wet coats at one and a half hours at 68° F. Personally I’d be scared to death to start block sanding that quickly. I might do it in an emergency case or in a very small area, but not when doing an overall restoration where I have the time to just let the primer sit and cure for a while.
Lately I’ve taken a cue from a restoration pro friend of mine and give each “surfacer” application two weeks to cure before doing any block sanding. How do I remember if it’s been two weeks? I write the date I applied the primer right on the car using a water-based marker pen I purchase from my local paint supplier. Being water-based, the marks sand right off. Do I have any die back problems? Not yet, knock on wood.
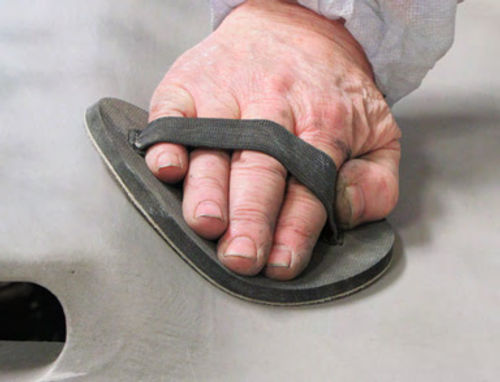
How about another tip? Consider that block sanding a “surfacer” isn’t something that occurs every day. The techniques for blocking might be a little on the rusty side. Yet block sanding is just block sanding as long as we are talking about flat or slightly contoured surfaces. It is those deeply curved and concaved surfaces that need to be sanded with a flat block that can cause problems.
How so? We always block sand with a stiff block. That’s how all those surfaces come out so nice and flat. Now think about moving that stiff block up and over a concave surface. The only part of the block that will be touching the surface is the edges (Photo 6). That can leave ridges on the surface. The problem is that those ridges are impossible to see until you have the panel painted and clear coated. That’s when those ridges show up as lines on the surface and those lines can even look like “die back” issues. The thing is; they aren’t. They are simply due to improper blocking techniques.
What’s the cure? My preference is to start block sanding everything needing sanding using the stiff block.
Once that task is completed I return to the curved surfaces and apply a thin guide coat of flat black from an aerosol can. Next I use a soft 3M 5791 Hookit 6- Inch Hand Pad with a disc of 400-grit attached to go back over the curved surfaces (Photo 7).
Mind you that using the soft hand pad is not like using a hard block. Any imperfections such as high spots and low spots left on the surface will not go away. The soft hand pad only removes the ridges and lines caused by the hard block. Got a question? Send it along.
Products and supplies provided by:
LPL Body Works,LLC
5815 Contented Lane
Amarillo, TX 79109
DIY body and paint DVD series
English Color and Supply
419 S. Fannin St.
Amarillo, TX 79102
Automotive paint and supplies


