
How -to Learn Solvent Welding
Damaged Plastic Parts Can Be Repaired With This Process. In This Case, Your“Welder” Is a Syringe Bottle.
A FEW YEARS back, I scored my dream car while vacationing on the Gold Coast of Florida. During a quick run to the local convenience store, I spied a local auto want ad magazine and figured I’d take a peak to see what was for sale in the area. Low and behold, right there in front of me was a numbers matching ’71 Cuda…just sitting in some guy’s backyard and waiting for me to save its rusty hide from a sure topsoil burial.
I immediately rang the guy up, raced down to his house which was about an hour south of my location, and struck up a deal on the spot. The next day I had a tow truck at the ready, and pulled the ’Cuda out of its grassy casket and got it out on the road to Tampa…its first stop on the road to recovery. I found a local restoration shop that was going to get her going, and in the meantime Istripped what I could off the car, and prepared to ship some parts back to Jersey to start my end of the restoration.
In that group of parts was the most identifiable piece of this ’71 Plymouth “fish” car…the beautiful “cheese grater” grille that adorns the front of this pavement pounder. It’s a work of art in the eyes of Mopar lovers, and in my eyes it was a pure DaVinci from Detroit. And since I was dealing with such a fragile piece of motorhead art, I decided it was best to ship it back home in a reinforced box, as the 30-year-old ABS was starting to show signs of UV damage…and a few run-ins with immovable objects.
The item was packed up, and brought over to some shipping guys who will remain nameless. I paid a hefty sum and relinquished the artfully packed, wood framed box to the guys who make shipping their living.
I headed back home on the plane the next day, excited to soon see the six-foot box arrive at my door within a few business days. I readied myself for the start of the restoration…paint, sandpaper, buffing supplies…all in the name of getting this baby back to its original luster.
The box arrived a few days later while I was at work. Finally…I can get this restoration moving in a positive direction. I went to lift the box to bring it to my shop…and all I heard was a shuffle…and some rumbling. It felt like the box was bottom heavy as well, as it moved around like a giant round-bottomed toy.
I opened the box to find my grille was now an eclectic collection of 13 separate sections…and a few residual chunks. My heart sank…I figured this was a catastrophe on the highest level. These grilles didn’t grow on trees, and they weren’t available in the aftermarket. Of course, the shipping guys said it was my fault…go figure.
The next day I had a talk with a coworker who was also a master prop builder for Broadway. I told him of my dilemma, and how it was going to set me back quite a sum. He offered up a suggestion…solvent weld the unit back together.
“Solvent weld?” I said with a bit of sarcasm.
“Yes, using the plastic solvent to weld the pieces back together,” he said. At this point I was willing to try anything even slightly feasible, so that night I went off to the local plastics shop and picked up a can of ABS solvent in an effort to bring my grille back together, piece by piece.
How It Works
In solvent welding, a thermoplastic’s corresponding solvent is added to the joint between two separate plastic pieces, softening each at the contact point, letting each piece’s polymer chains be free to mix and mingle with each other. As the solvent dissipates through the material, these entangled chains solidify into one mass, thus forming a solid bond between the two pieces. Products like ABS, PVC and Acrylic all are thermoplastics that can easily be joined to each other with this basic process.
And luckily for us car restorers, the technique is easily learned, and has minimal start-up costs. IPS Corp. in Compton, California, makes solvents for all types of plastics, and they are easy on the wallet. Besides The target plastic, the necessary tools are usually found in the garage, kitchen or your bathroom.
This Technique worked so well for me on the ’Cuda that I bought a few broken grilles off eBay and restored them just for practice. The system works better than any aftermarket epoxy or resin glue, as you actually use the grille’s own substrate to weld the unit back together. So not only does the bond offer up to 95% of the original strength of the plastic, it also blends in unnoticeably in the repair area because you are not bringing a foreign material into the bond; you’re using its own “skin.”


So not only is solvent welding great on grilles, it can be used on an array of different car parts, even if they are made of other types of plastics. In many vintage cars, though, ABS reigns supreme as the most commonly used plastic.
In the segment ahead, I use basic methods of solvent welding to correct three common results from poorly handled plastic parts…a single break of a mounting tab, a double break of a dash section, and plastic degradation due to extreme heat or corrosive liquid. Watch asI fix these common plastic problems…
Photo 1. This is all you’ll need to get started. For ABS products,use IPS WeldOn 2354 as your solvent. A syringe or syringe bottle is an important piece of equipment, as you can deliver the solvent directly to where it is needed. A small jar with a lid, some ABS scraps, nail file boards, a straw, some wet/dry sandpaper and some buffing compound round out the items needed to get the job done.
Photo 2. To get ready for the plastic repairs we are about to do, take some ABS scraps and break them down into small fragments and place them in a small jar (baby food size is perfect). Add enough solvent so it just covers the scraps, put the lid on and let them soak for a few hours. I use a straw to pipette transfer the solvent into the jar to avoid spills.
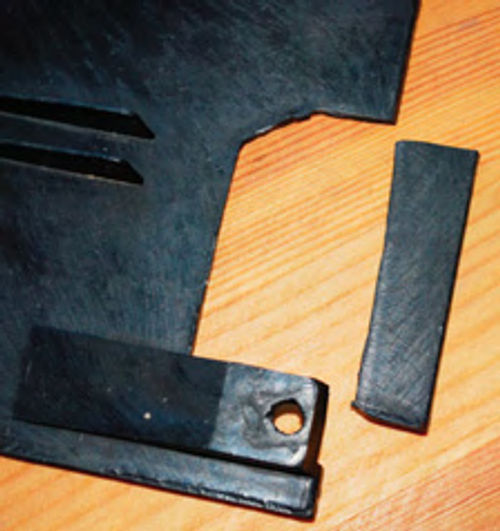
Photo 3. On to the repairs. Here we have a section that broke off completely in two spots. It was a clean break, with no missing parts, which is a big plus. It Should go back on without too much drama.
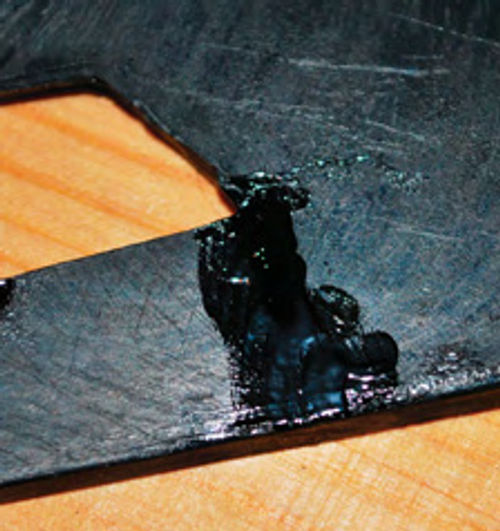
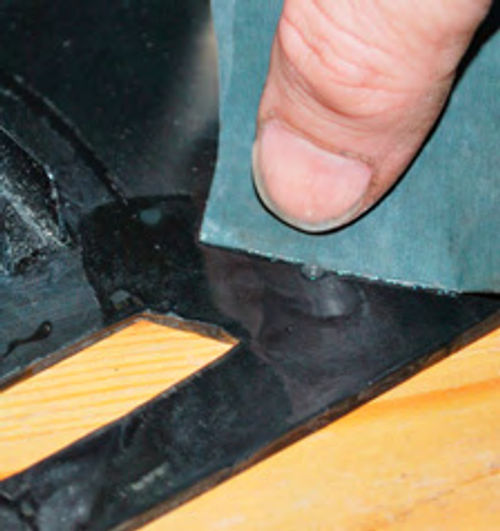
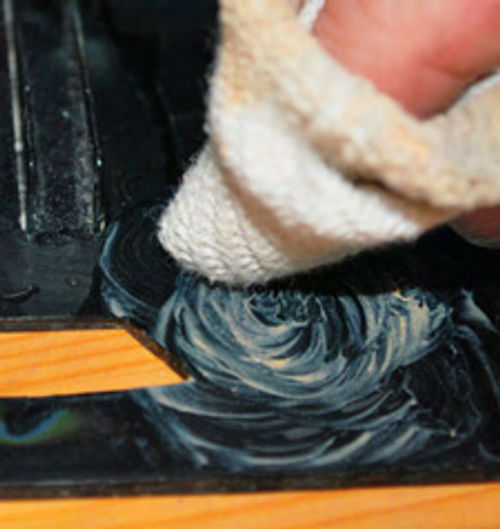
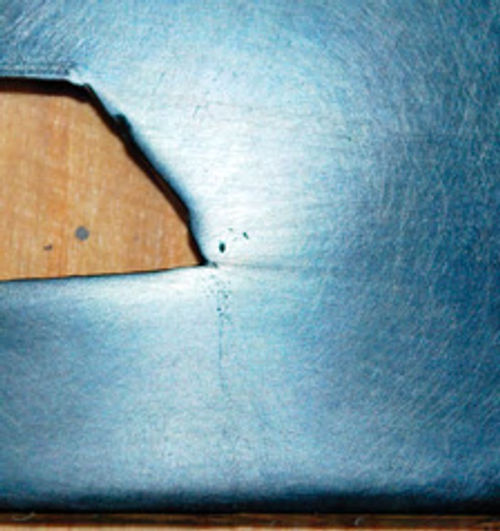
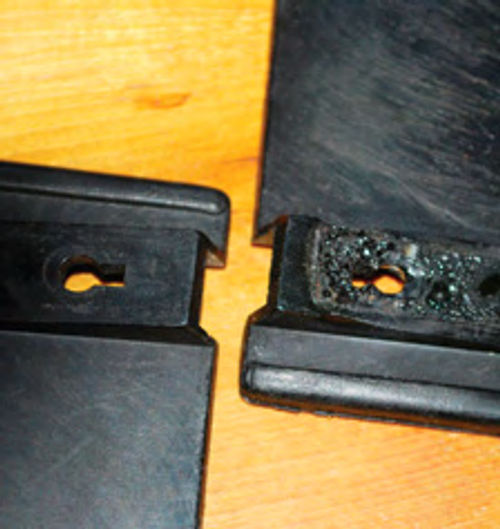
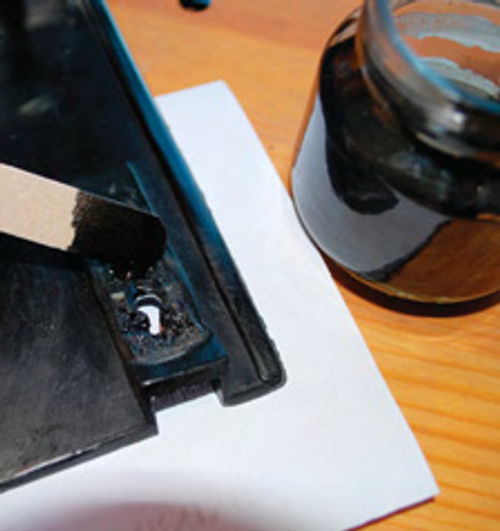
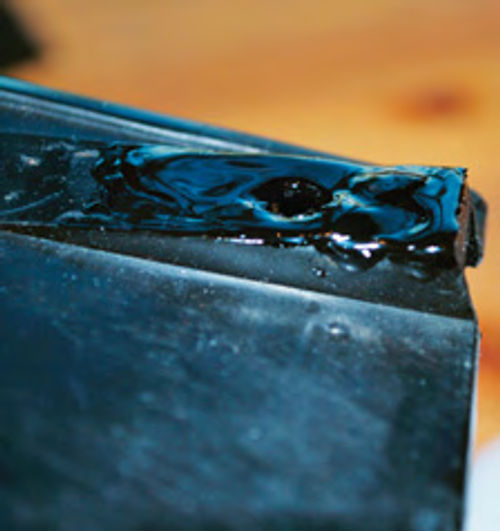
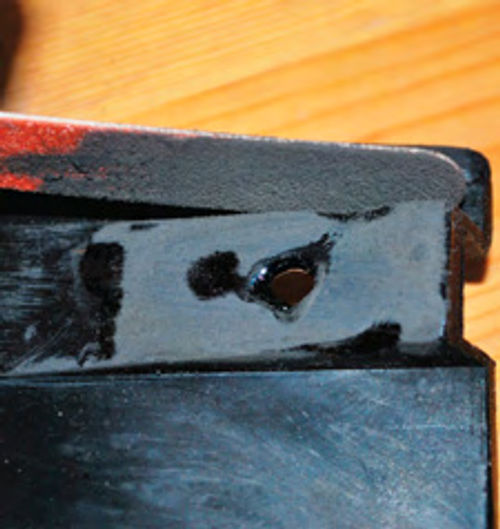
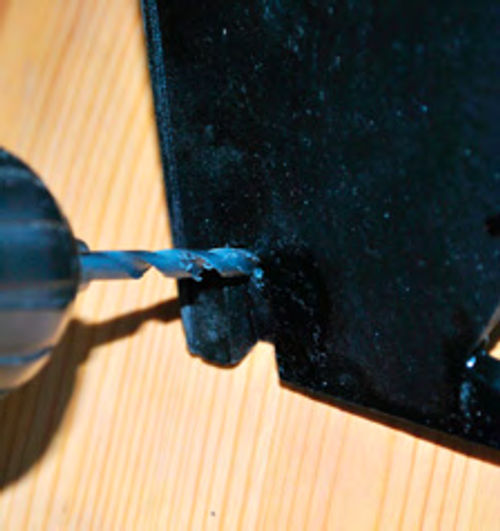
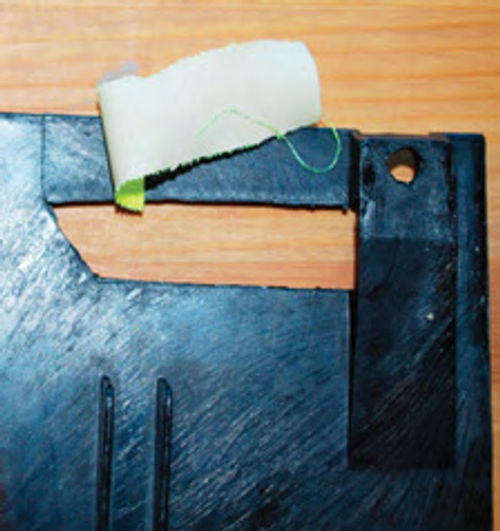
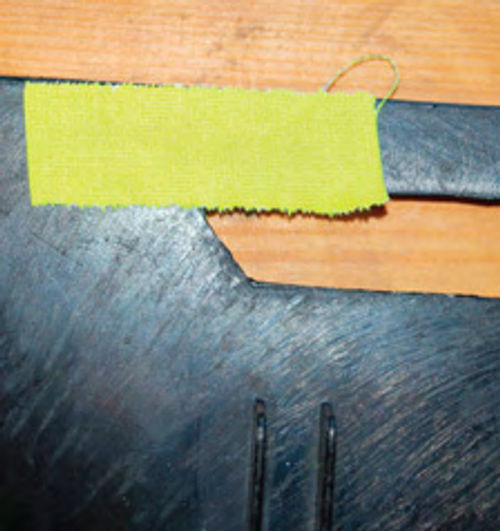
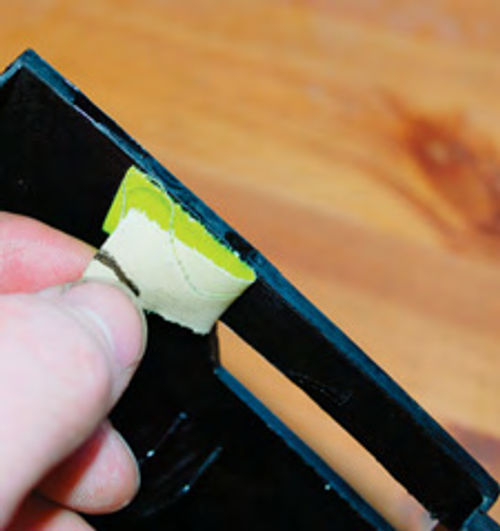
Photo 4. Line the broken piece back up in its original spot, making sure it fits in properly, locking along its break line. You’ll know when it’s in there correctly. Next, take a piece of strong cloth tape and mask the piece in position, taking care to make sure it is firmly in place.
Photo 5. With the tape holding the parts in position, you can now turn it over and get ready to weld. Fill your syringe with a few cubic centimeters of solvent. You don’t need much, so there is no reason to dispense much more than that.
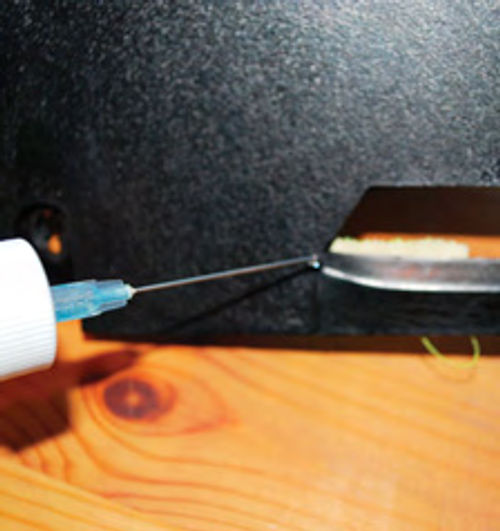
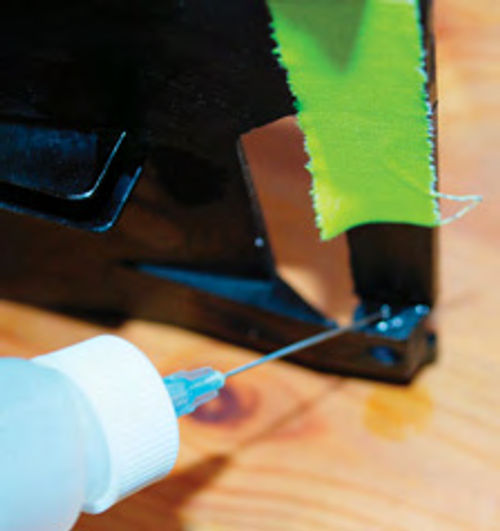
Photo 6. Lightly drop solvent into the break. No need to open the crack, osmosis will draw the liquid deep into the crevice and start the welding process.
Photo 7. Once that has dried and the joint has hardened over a few minutes, flip the part over and repeat the process on the other break, lightly injecting the solvent into the break line. Add light pressure for a minute to keep the joint together correctly.
Photo 8. Once both sides have set up, you can remove the tape. Next, since both breaks were completely through the piece, now you can inject solvent into the back side of each break line to further solidify the bond.
Photo 9. After the welding is done, you can still see a hairline crack in this bond. You can take further steps to completely remove this by adding ABS putty to the seam.
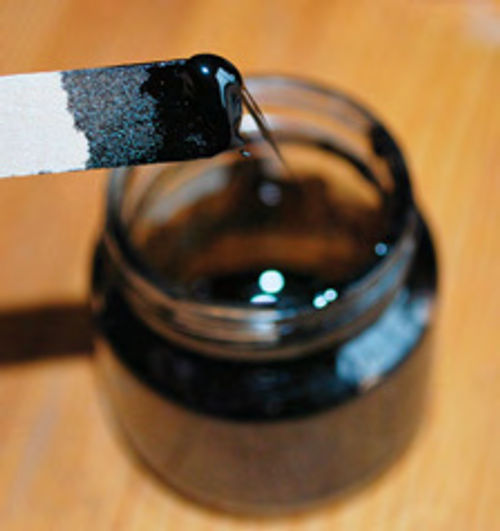
Photo 10.Mix your ABS mixture until it has the consistency of molasses. Use a file board and scoop out a small amount and spread it over the crack, making sure you fill the crevice. Always put the cap back on your putty mixture right away as it air dries pretty quickly.
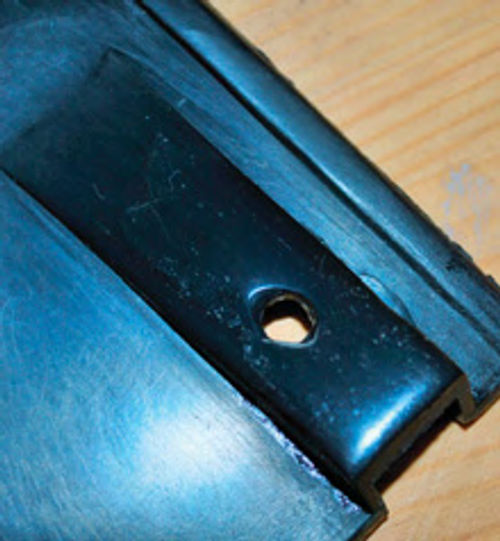
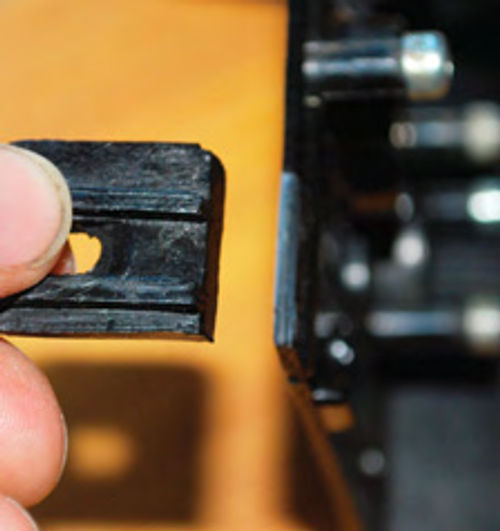
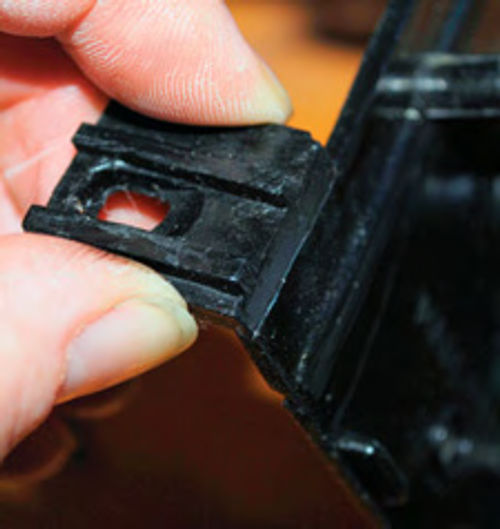

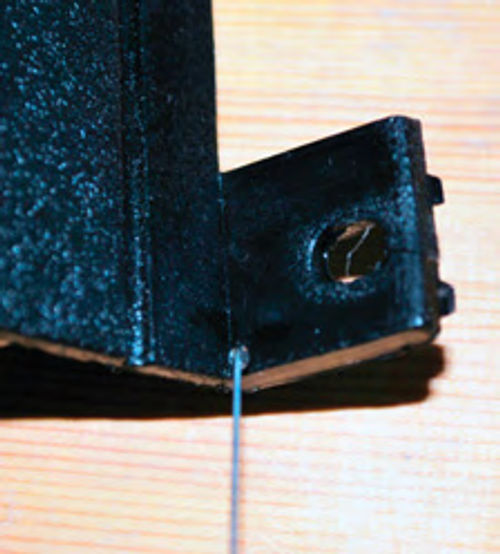
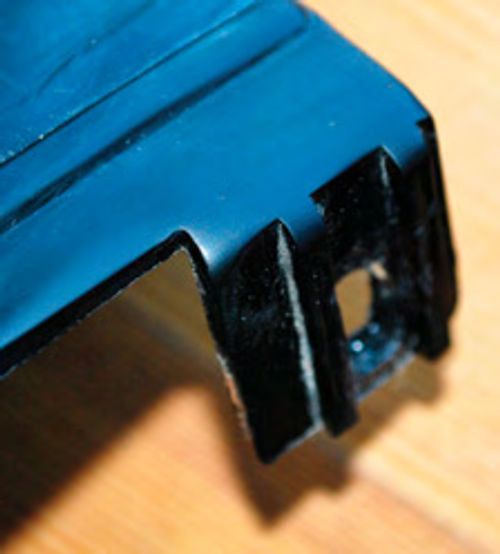
Photo 11.Let the mixture sit for an hour or so to harden up before you sand it flat.
Photo 12. Next, break down the putty with some 400 or 600 paper, then go down in steps, finishing up with 1200 paper.
Photo 13.Just like bringing up the luster in paint, you can bring back the shine of the plastic and remove any light scratches by using some polishing compound.
Photo 14. The finished repair on the dash piece. When done properly, the break is barely noticeable. If you’re not satisfied with the results, you can always add more putty and repeat the process.
Photo 15. Next off, we move over to one of the mounting areas on the piece. As you can see,somehow part of the tab on the right melted away, leaving a weak and unsightly joint. The left piece shows how it should look. We will build up the eroded area with some ABS putty, and then level it off.
Photo 16. Taking the nail board, scoop up some of the ABS putty and place it in the eroded area. Fill the area until it starts to run over and let it dry out for about 20 minutes. Once it gets some consistency, repeat the process until the depression is completely full.
Photo 17. Though it looks bumpy, the area is completely filled. Let it harden up for a few hours before you start to shape the piece.
Photo 18. Here I use a nail file to get the sharp edges on the tab section. I also like to wrap a Popsicle stick with 120-220 sandpaper to help shape the piece.
Photo 19. Because I’ve added so much plastic to the tab, the original hole has been blocked by putty that has hardened in it. I measured the stock hole size on my original piece and bored out the hole to size. Next, I’ll use a Dremel tool to recut the notch adjacent to the hole.
Photo 20. Smoothed out, the tab looks near stock and is as strong as the original.
Photo 21. This mounting tab has completely broken off. Luckily there are no missing parts. When test-fitted, the piece attaches snugly into its fractured groove, so it should be a simple process of “welding” it back on.
Photo 22. While holding the broken tab firmly in place, take the syringe and drip solvent directly into the fissure.You do not need to “break open” the split in any way. The solvent will be drawn into the break deep enough to make a solid repair. Do not exert too much pressure on the break, as you could distort the weakened plastic.
Photo 23. After the piece has set for a minute, check the tab to see that it has a firm joint between it and the larger piece. Sometimes, I will give it another shot of the solvent to make sure I have a complete weld between the parts.
Photo 24. After a few minutes of drying, turn the piece over and use the syringe to give a shot of solvent into the break from the rear. This will give it a complete weld from front to back. Once this is done, let it set up for a few minutes before the next step.
Photo 25. Finish it off like you did previously on the other breaks, first by adding putty to the visible seam, next by taking it down with wet/dry sandpaper and then finally adding luster by buffing it out. Can you see the break-line now?
Resource
IPS Corp.
455 W. Victoria St. Compton, CA 90220


