
Browsing Through John’s tool chest
Various Types of Tubing Must Be Shaped During a Restoration Project. Let’s See What This Auto Restorer Contributor Has In His Toolbox to Help With These Tasks.
Tubing Benders
At some point in time you will likely need to bend tubing without the risk of kinking it. After all, there is a quite a selection of tubing on most vehicles: brake lines, fuel lines, distributor vacuum advance, transmission cooler lines, transmission modulator vacuum line, and even more with emission A.I.R. plumbing.
Where a large radius is called for you might use an old pulley to bend tubing. Old water pump or crankshaft pulleys can be used to form tubing, but unless you have a large collection of varioussize pulleys you will be limited in what you can accomplish. Besides, sometimes you need to form a tight radius, and even if you have something small to form around, it can be extremely difficult to hold and work with everything involved.
There are several means of safely bending tubing, and naturally there isn’t one right tool for all tasks.
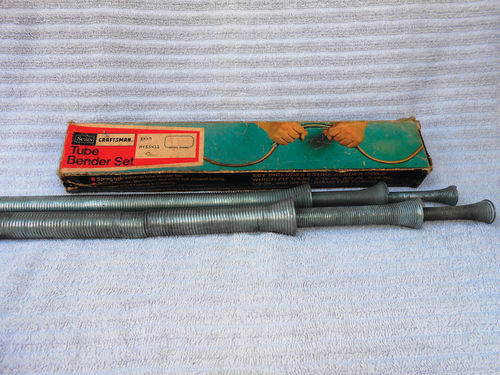
Photo S shows a six-piece set of spring/coil benders that were sold by Sears. These fit 1 ⁄4 " , 5 ⁄16" , 3 ⁄8 " , 7 ⁄16" , 1 ⁄2 " and 5 ⁄8 " . While this is probably the most basic means of tube bending, and the larger sizes have no usefulness in automotive applications, they are still worth having around. Bending with your hands (as pictured on the box) gives you total control, but tight bends are not possible. While they are inexpensive, you are also limited by the fact that the end of the tube cannot have a nut or be flared until after you form it. This Sears Craftsman set #9 55411 is no longer listed, but a search on the Sears website shows a six-piece set by General Tool for $16.40, as well as others. The Home Depot has a four-piece set for $9.48 and www.zoro.com has a four-piece set including 1 ⁄16" - 3 ⁄16" for $3.
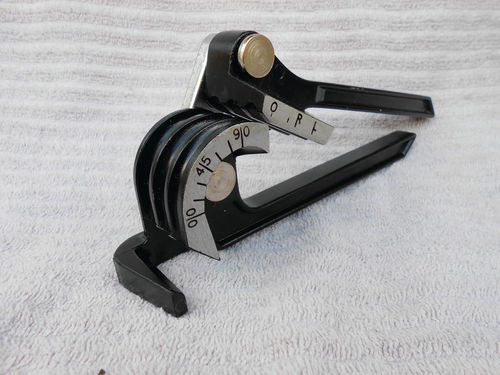
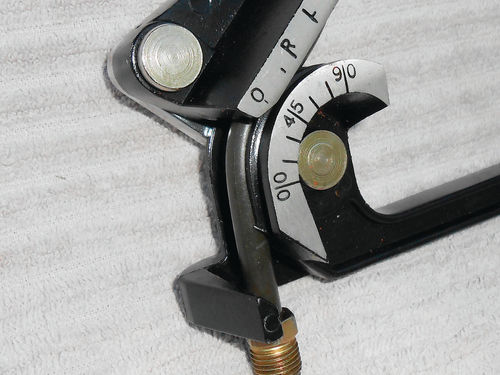
A very useful tool is the lever-style tubing bender. Photo T shows a no-name import bender that’s in my toolbox. It can handle 1 ⁄4 " , 5 ⁄16" and 3 ⁄8 " tubing. Find the correct width channel for the tube size you’re working with and you are ready to go. Photo U shows the flare nut can remain on while bending this 5 ⁄16" tubing, as long as the bend doesn’t need to start too close to the nut. This is something you can’t do with the springs. The lever is drawn back to make the desired bend angle. It’s a smooth operation and easy to do, but if you have several close bends, it is a good idea to practice on some old tubing first. Knowing the proper position for the tubing before getting started on compound bends takes some practice, at least it did for me. Zoro offers a similar lever bender with the RIDGID name on it for $35.95; Sears shows one by Superior tool for $28.79, as well as others; Northern tools #9094243 is listed for $17.99, and Harbor Freight has a Pittsburgh #3755 for $7.99.
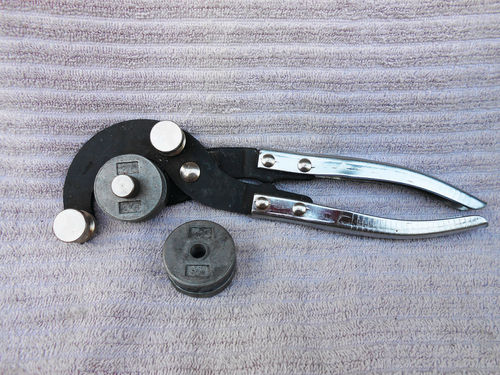

Photo V shows a bender that does the bending between three stationary wheels. The large center wheel is interchangeable, and is determined by tubing size. One fits both 5 ⁄16" & 3 ⁄8 " , while the other fits 1 ⁄4 " , but rotate 180° and it then handles 3 ⁄16" . Photo W shows it positioned for bending. I can’t say there is any advantage with this one over the lever style; it’s just another way to do the job. The tool shown is marked Taiwan and most are probably made in China. Ask the particular supplier to be certain.
Northern Tool has a similar one, #9094246 for $11.99, and the Sears webpage shows one by KD tools for $37 and another by Gear wrench for $27.92.

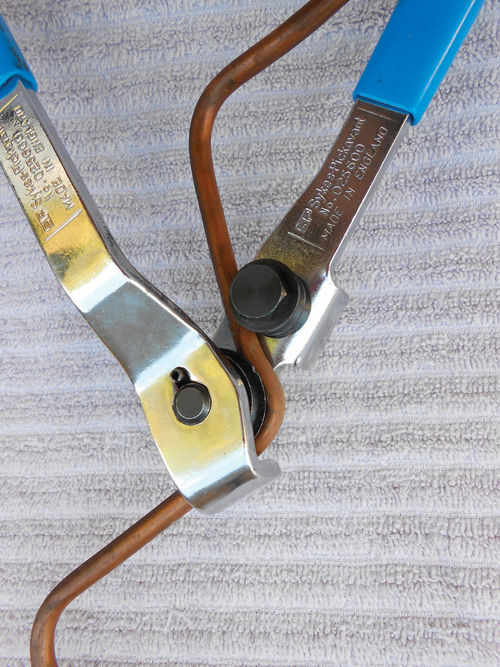
If you need to make bends with a small radius in 3 ⁄16" or 1 ⁄4 " tubing, this English-made Sykes Pickavant #025600 tool shown in Photo X will get the job done. Both wheels are live and move with the tubing as it’s being formed. The metal tab located below the roller on the lower handle allows the tool to be held in a vise. Lift off the top handle and position the tubing between the propersize rollers. Now replace the handle engaging it with the tubing and bend to the desired angle as shown in Photo Y. A piece of copper tubing was used only because it was handy; the tool has no problem bending steel. One benefit of this tool is that the bending operation is very open, allowing excellent visibility of the work piece as it’s starting to take shape. Once the bend is completed or if you just want to stop and compare the tube for its fit, just lift off the handle and remove the tubing. Should it be necessary, the drive roller will easily slide off as well. It’s only retained by the friction fit of a rubber O-ring. If you look closely you may notice there is a nick on the edge of the drive roller. This happened while it was stored in my toolbox. The wheels appear to be made of aluminum, so they are soft. This can be filed smooth, but in the future the tool will be wrapped in a rag to protect it from happening again. The tool is made in England, and their website http://sykes-pickavant.com/products/brakingtools/pipe-and-brake-service shows the tool, but all references I found were to suppliers in the UK. This tool was originally purchased from Eastwood years ago, but today they only offer a similar product #49041 for $29.99; most likely a China or Taiwan clone. If it’s as well-made as the Sykes, it’s a great addition and perfect for brake work.
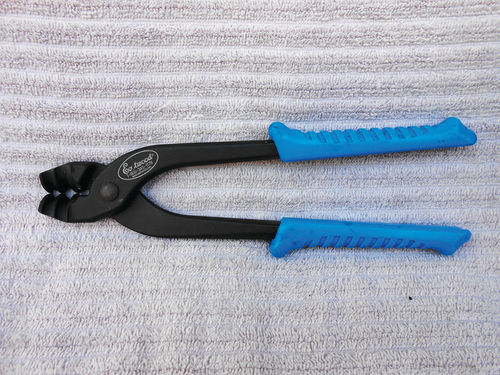
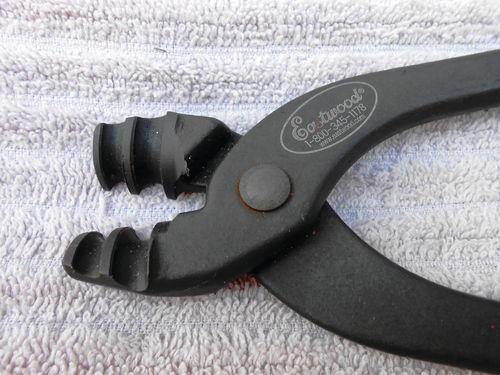
Photo Z shows the Eastwood brake line forming tool (#49074). It’s used for bending, but only small bends. Thinking you will make 180° bends with this tool is not practical. It’s best suited for where small jogs are needed. A good example is on a solid rear axle housing where the brake line needs to have a couple of bends to line up with the wheel cylinder. Photo Z1 shows the curved jaws the tubing is formed against. These special forming pliers will fit 3 ⁄16" and 1⁄4 " tubing. The tool is available for $24.99 from www.eastwood.com.


