What to Do When the Wheels Are Stuck
They Tried To Turn Them… They Tried to Move the Car… Then…
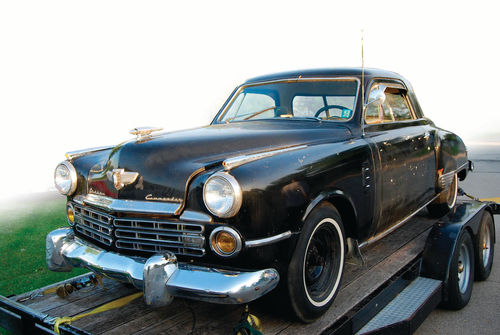
When we bought the 1949 Studebaker Starlight Coupe in June 2014, we used a pickup truck with a long chain to pull it up onto our trailer. After the four-hour ride from Illinois to Wisconsin, we rolled the car off the trailer onto a four-post lift in our home shop.

Filled with energy and enthusiasm for a new project, we quickly yanked the engine from the car to rebuild it. We also took out the transmission and the overdrive unit, the clutch, the driveline and the combination master cylinder for the brakes and the optional Hill Holder mechanism.
Then, after the engine was completely rebuilt, we lost momentum and let the Studebaker sit.
You know the story: Too many projects; too little time. Specifically we had three other big projects going, several customer cars calling for our attention, an illness and recovery period, lots of travel to car shows and a bit of personal stuff.
Bottom line: Nothing got done on the Studebaker between December 2014 and November 2016 other than a little bit of clean-up work on the front suspension pieces.
Let’s Get It Running… and Go From There
So we came to the reality that we had a Studebaker that was not going to get touched for years unless we started farming out some of the repairs it needed. We signed up to attend a meeting of the Wisconsin Chapter of the Studebaker Drivers Club to see if there was a member in our state who worked on other members’ cars. We were pointed toward a man who said that he could do all the mechanical work involved, which was what we needed.
We just wanted to get the car back together and running. We wanted it to go down the road, stop and basically function. The cosmetics could wait until later. With so many projects going on at home and work, we knew that we couldn’t afford a full restoration. It was a case of just wanting the car to be a car, rather than a pile of parts. We wanted to do a “rolling restoration,” starting off with a car that could actually be driven, even if it was “cosmetically challenged.”
Wait a Minute, It Won’t Move
It was there that we ran into a problem. The plan was to push, pull or roll the car onto a trailer to take it to the Studebaker Club member to let him do repairs over the winter. It seemed like a fool-proof idea, except for one drawback—the car’s front wheels wouldn’t turn. That meant the car was not going to get on the trailer.
Our first thought was that something was rusty and the corrosion wouldn’t let the wheels turn. We thought we could break the wheels loose by re-mounting the tires and spinning them. This would have given us enough centrifugal force to break the hubs and brake drums loose from the rust. Unfortunately, the problem was not rusty parts and the wheels still didn’t start spinning.
Someone suggested that rolling the car might make the front wheels turn again. That seemed like a possibility, except for the fact that our car building is on a fairly steep grade. That would have posed a problem if the front wheels didn’t break completely loose. The car would then be stuck halfway down the hill and we’d have had the problem of getting it back up the hill again.
Let’s Pull the Drums Off
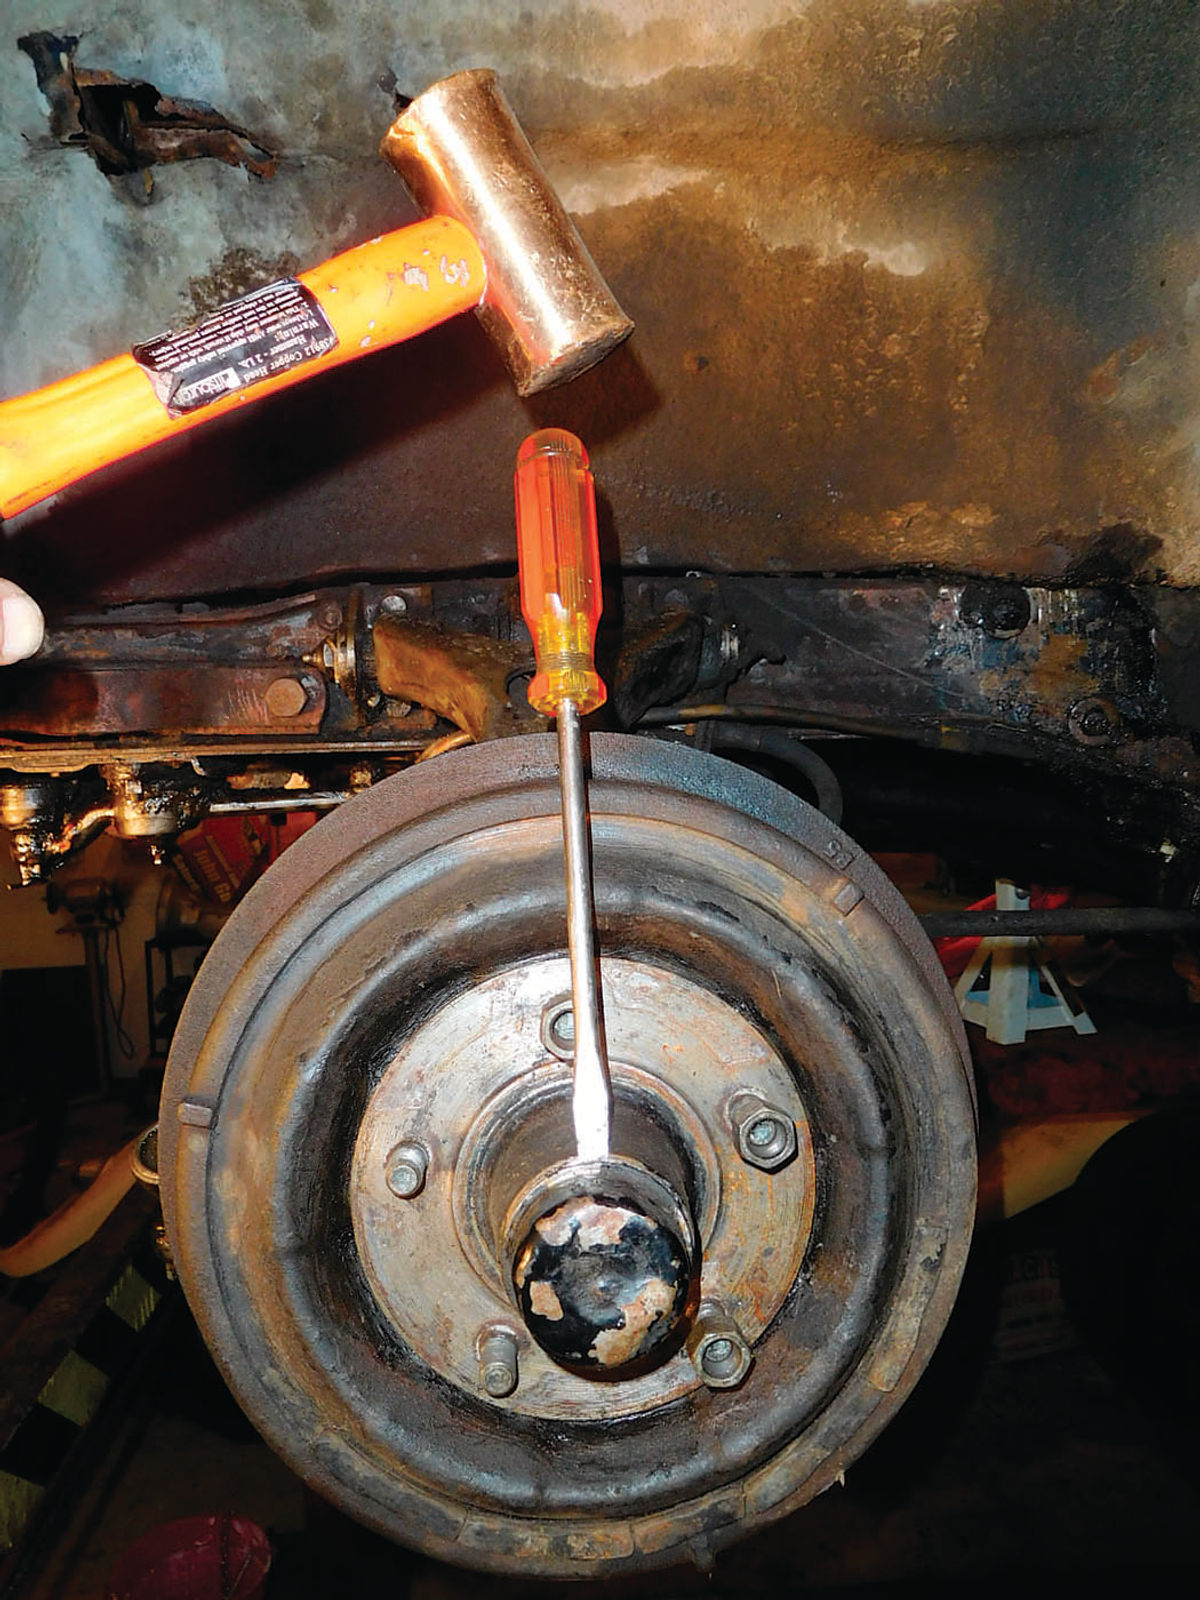
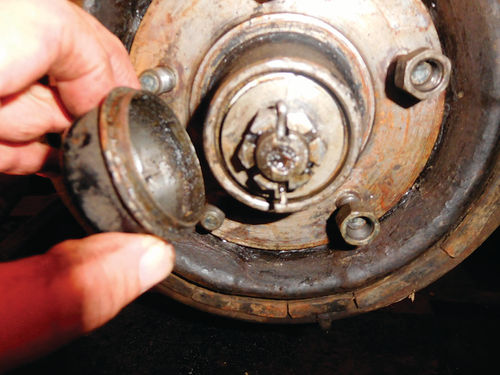
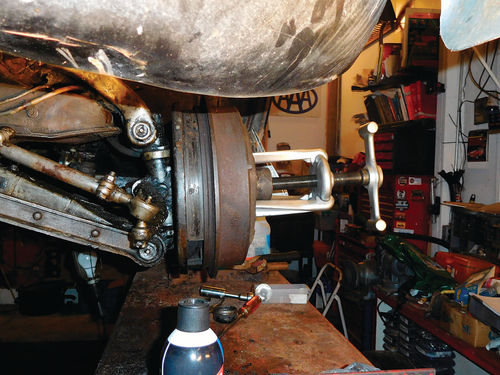
We decided that it made a lot more sense to try using a puller tool to remove the front hubs and drums and see what was going on. At first we tried to use the largest of the three-jaw pullers we sourced from Harbor Freight. In order to use this, we had to remove the dust cover that keeps road grime out of the hub. Then we removed the cotter pin and used channel lock-type pliers to remove the castle nut holding the wheel on. Then we removed the large washer behind the castle nut and the smaller outer wheel bearing. The brake drum and hub would normally pull off the spindle at this point, but they were stuck on tight.
That’s when we turned to the large, three-jaw puller sourced from Harbor Freight to grip the hub and attempt to pull it off. The puller’s center bolt went against the spindle. The claw end of the puller couldn’t grip the lip of the brake drum at three places at once. As we tightened the center bolt against the spindle, one “jaw” of the puller would straighten up and lose its grip on the lip of the brake drum.
We switched to a universal puller with legs that slide onto a disc. The legs have holes in their “feet” and the holes can fit over three of the wheel studs on the brake drum. We used the regular lug nuts to hold the puller on. They tighten clockwise on the right side of the car and counter-clockwise on the left side.
After you attach the legs of the tool to three of the wheel studs and secure them in place with the lug nuts, you have to move the center bolt into position against the center of the spindle. Then put the hex-shaped hole in the spinner handle over the hexshaped outer end of the center bolt and use the spinner to tighten the center bolt against the spindle, which should then pull the brake drum off. In our case, it worked.

Solving the Mystery
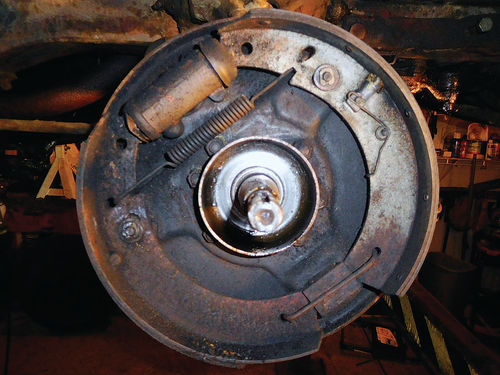
With the brake drum removed, we could see that there was no excessive rust on any of the parts and certainly not enough corrosion to lock the pieces together. It appeared that the brakes had been applied (possibly when we had rolled the car off the trailer two years earlier) and stuck in the “on” position. There was also a lot of black grime and residue on all the brake and wheel parts, but it didn’t seem like it could have caused the brake drums to get stuck so badly.
We believe what happened is related to the fact that the car had sat for over 30 years. It had first sat in Mississippi. It was then purchased by the police chief of Libertyville, Illinois, who bought it for a father-and-son project. We were told his son was not interested and they let the car sit for a long time. When we got the car, there was still a little braking action. We used the brakes while loading it on the trailer. After getting it home, we removed the master cylinder.
Obviously there was no pedal pressure holding the brakes on, but we are guessing that one or both wheel cylinders froze in the “on” position. After sitting for two more years in our garage, the wheel cylinder was frozen solid in the “on” position and that explains why we couldn’t move the wheels at all.

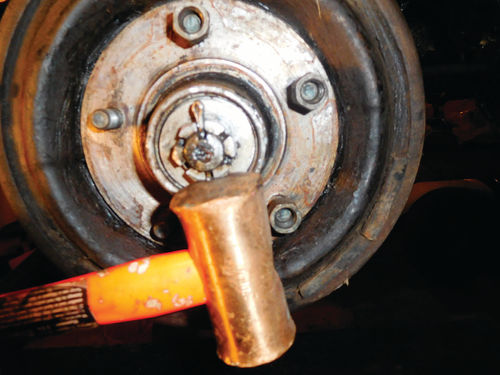
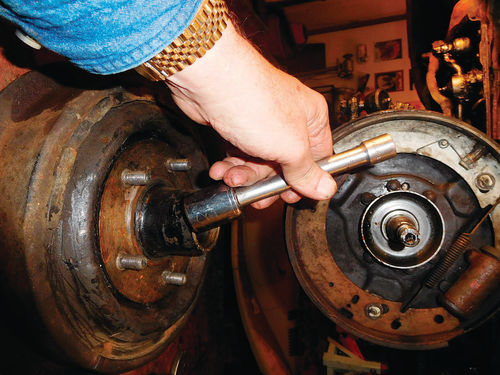
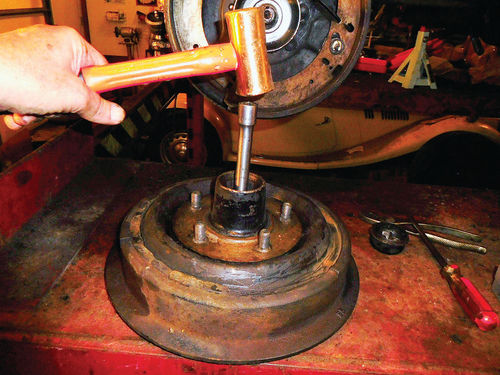
Once we had the brake drums off, we attempted to use a bearing remover/installer tool to knock out the larger inner wheel bearing and the seal that held it in place. We did not have the proper-size tool, so we substituted a socket and bar of the proper size and hammered the bearing out of the hub. This was done only to clean up and re-grease the bearing for reuse later on.
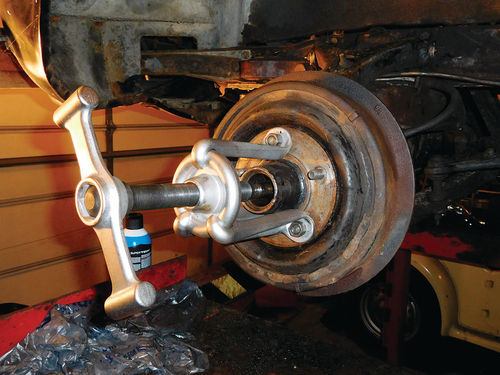
With the brake drum and hub removed, our next goal was to remove all the brake hardware and the shoes. After that, we could re-install the bearings and seals and re-mount the brake drum on the spindle (without brakes) so the car could be carefully rolled onto the trailer. Then, while our Studebaker club friend worked on other things, we could be cleaning up the brake hardware and sending the wheel cylinder out to be relined with stainless steel and rebuilt.

Learning About This Brake Setup
This was the first time we had dealt with Studebaker brakes. The setup is pretty conventional with a few things different that we documented with good notes. Instead of being held on with pins and slotted discs like a GM car, Studebaker brake shoes fit over studs on the backing plate and are held on with C-clips.
On the leading shoe on both sides of the car, the studs have two thin washers under the shoe and one thicker washer and a C-clip on the outside of the shoe. On the trailing shoe on both sides, there is a kind of cup washer with slits under the shoe and a thicker washer and C-clip on the outside of the shoe.
Once the small C-clips are removed with a nudge from a flat screwdriver blade (hint: watch where they go), you can pry the upper ends of the brake shoes off the wheel cylinder. Then, with a twisty motion to get the other ends of the shoes out from behind the anchor, you can usually remove all the parts as a unit if you hold tension on them. As you can see from the photos, a lot of cleaning of parts will probably be in order, unless you go with all new hardware. And you are not going to find all new Studebaker parts at NAPA or Auto Zone.
As usual, we will send the various cylinders to Brake & Equipment Warehouse in Minneapolis (brakeplace.com) to have them lined with stainless steel. They can probably provide new hoses as well.
We assume that rebuilding the combined brake master/Hill Holder cylinder is going to be a bit costly. Stainless lining costs a bit, but it lasts for a long, long time, especially if you use silicone brake fluid. We will also make up new brake lines with cunifer (copper-nickel) tubing, which NAPA does sell. Cunifer can be bent by hand, it is easier to flare, it looks great on the car and it is very rust resistant.


