
Removing crust & rust
Question:
I’ve almost finished the restoration of my 1960 Metropolitan and started restoring my ’51 Studebaker 1-ton truck.
I have a blast cabinet I’ve used for hundreds of parts on the Met, and now for pieces of the Studebaker that will fit in it. I’ve found this a great way to thoroughly remove rust and old paint. How can I get larger, complex truck components—frame, axles, springs, huge split-rim wheels, etc.—to similar condition? How do other hobbyists and professional restorers handle this? Having somebody else blast or use another method to clean these parts is fine with me, but I need to know what method and who can do it for me.
Answer:
Taking a truck completely apart and cleaning and sandblasting components is a big job, and I don’t know of anyone, short of a restoration

shop—that will charge you upward of $90 an hour—who will take on such a task. Sandblasting doesn’t do much to caked-on grunge, and neither does steam cleaning. And if you go to sand blasting you run the risk of grit getting into little vents on the transmission and differential, as well as other places, and ruining bearings.
There is no quick clean solution to your problem that I know of, but here’s my time-tested recipe for transferring years of road grime from your restoration project to your clothes and shop floor. First, assemble the following tools:
Putty knives Small squirt can
Lacquer thinner
Electric drill
Propane torch
Assortment of wire wheels
Sanding disk and sandpaper
Strong twine
Tri-sodium Phosphate (TSP)
Scrub brushes
Neoprene gloves
Rust-Oleum Rusty Metal Primer
Satin finish black Rust-Oleum
Safety glasses and particle masks
Your first instinct might be to
take your truck to a steam cleaning facility but I don’t recommend it. Steam cleaning doesn’t appreciably affect caked-on muck anyway and it will damage distributors, generators, voltage regulators and other electronics, even if such items are covered with plastic bags sometimes. And blowing dirty water into the induction system or into your cab air vents isn’t such a great idea either.
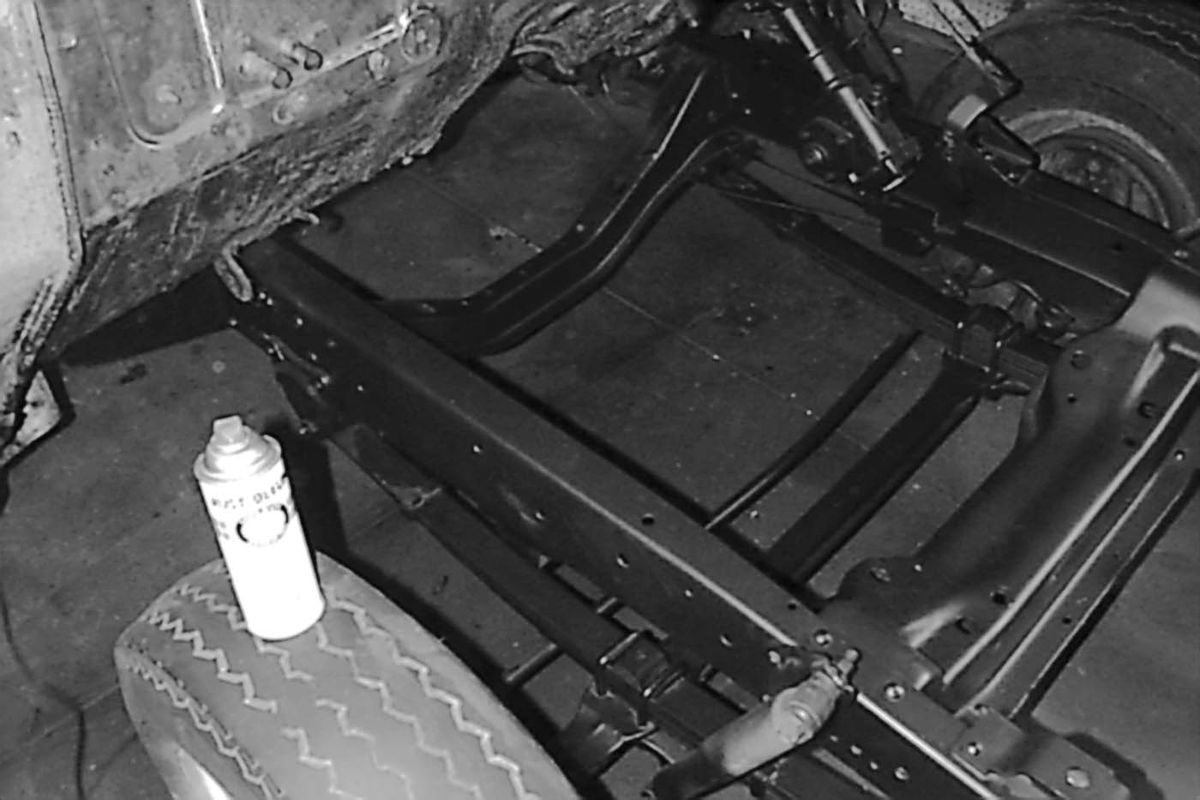
Before you begin, spread a tarp to catch the dirt, and then drive the truck onto the tarp. Put the vehicle up on jack stands so you can get under it easily and remove the wheels so you can get to the brake backing plates. Now put on some long-sleeved coveralls, a hat and safety glasses and roll underneath.
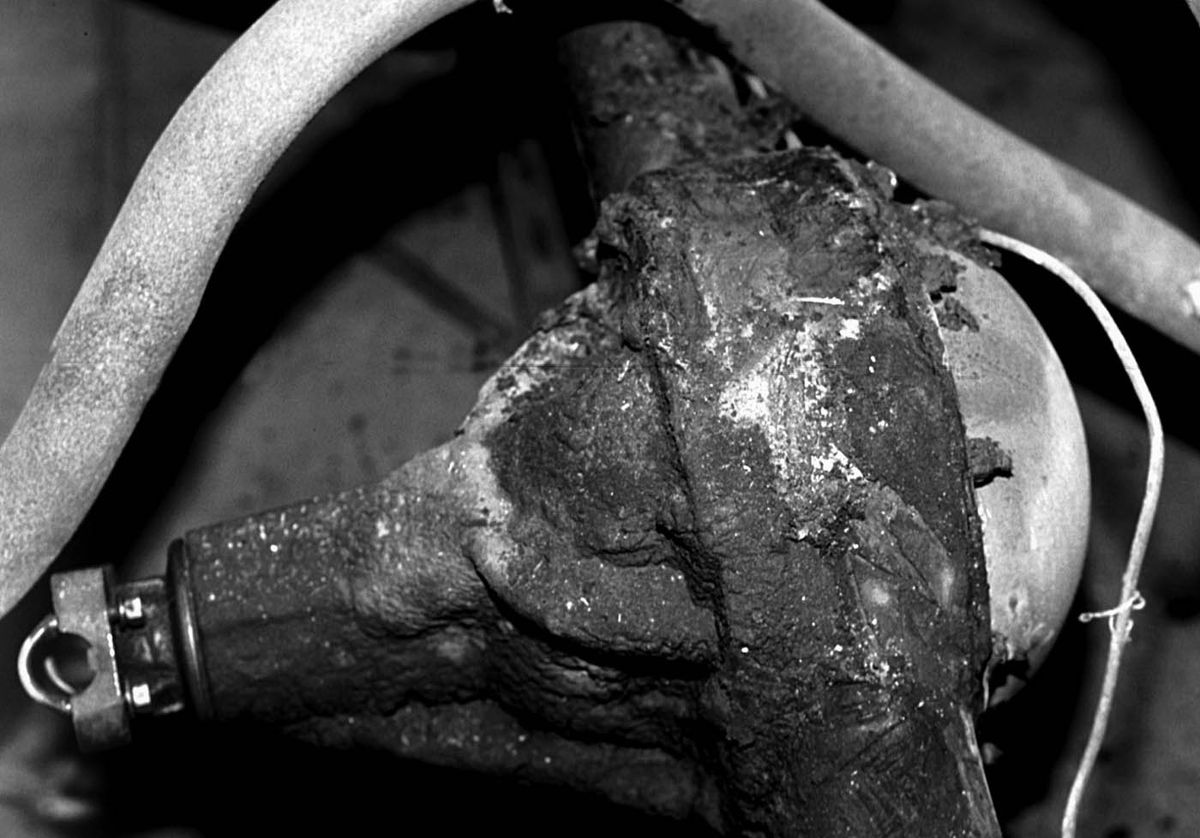
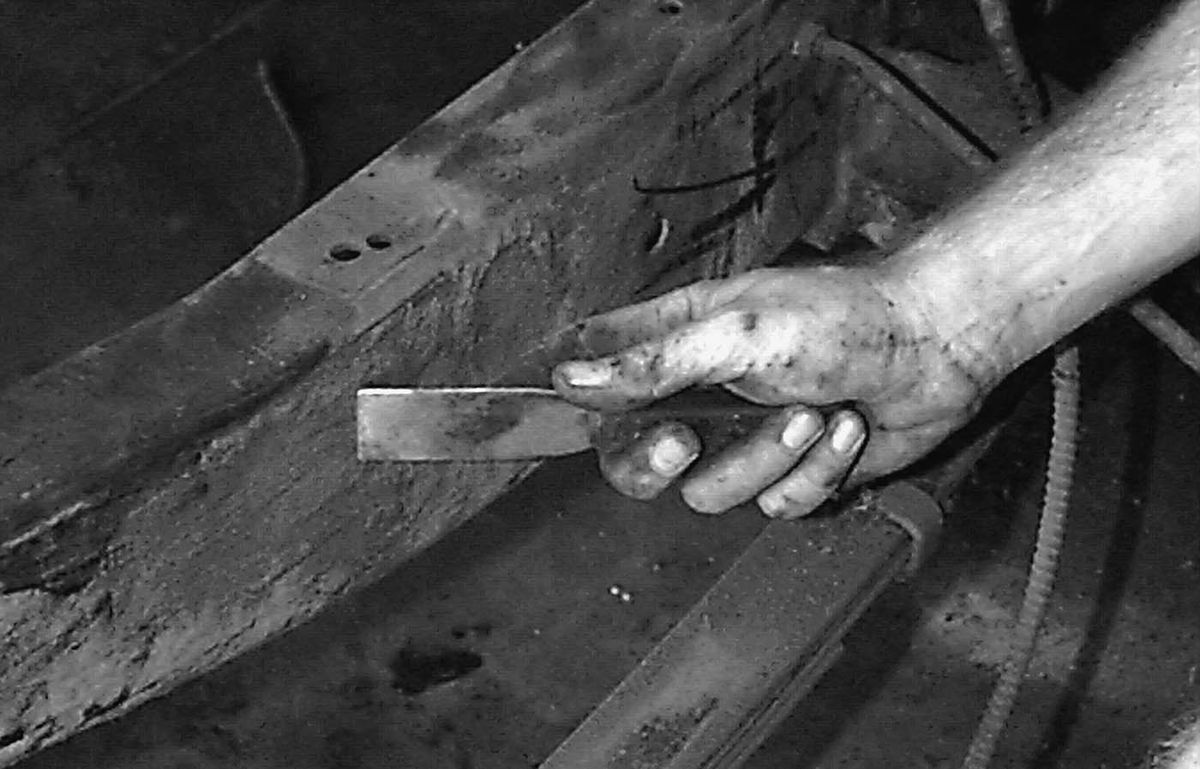
The worst stuff you’ll have to deal with is the dirt-and-oil combination that forms a kind of tough, asphalt coating (I call it grunge) wherever it sticks. Dissolving it all with solvent is really messy, and as we said before, steam cleaning doesn’t seem to affect it appreciably. In fact, it has been my experience that heating it with a propane torch and scraping it off with a stiff putty knife is the most effective approach to its removal. Scraping will remove most of it, and you can use sturdy twine to saw dirt from around bolts and other protrusions. Wire brushes are helpful too.
Put a little cheap lacquer thinner such as you would use to wash a spray gun in your squirt can and squirt it onto stubborn or hard-to reach places to dissolve the grease. Work outdoors in a well-ventilated area, and have a fire extinguisher handy. Lacquer thinner is volatile. Use old absorbent rags to clean up your mess, and dispose of them properly so as not to risk fire or pollute the environment.
Now put a stiff wire wheel in your electric drill and clean as much of the remaining dirt and rust off of everything as you can. There are several shapes of wire wheels that range from the fine to the heavy-duty twisted steel brushes. You’ll want an assortment for chassis cleaning.
Next, install a sanding disk with #200-grit open coat sandpaper in your drill and sand as much stubborn rust and discoloration off of everything as you can. Areas that cannot be reached by your sanding disk will have to be done by hand. This is a lot of work, but the cleaner the metal on your classic’s chassis, the longer its new paint will last.
When you have everything clean and bright you are ready to wash the chassis. Mix up a strong solution of TSP and hot water and put on neoprene gloves and goggles. Now wash everything down from front to back to remove any remaining grease or oil. Finally, rinse your work thoroughly using a garden hose.
When the chassis has dried thoroughly, if you have a compressor and spray gun, mix up a pot of Rust Oleum’s Rusty Metal Primer and shoot it on. Use big pieces of corrugated cardboard to shield fenders, bumpers and running gear from over-spray. Give the primer about 45 minutes to dry, and then mix up some Rust Oleum satin finish black paint or Eastwood’s Chassis Black. Use a touch-up gun or an aerosol spray can of the same paint to get into tight places. (You can do the entire chassis with rattle cans and I have done this myself, but it takes time.)
Let your truck sit for at least 24 hours before driving anywhere. Rust-Oleum takes a while to dry, but when it finally does it is very tough and will last for years. The satin finish black is correct for production trucks made in the last 70 years, and the results will surprise you.


